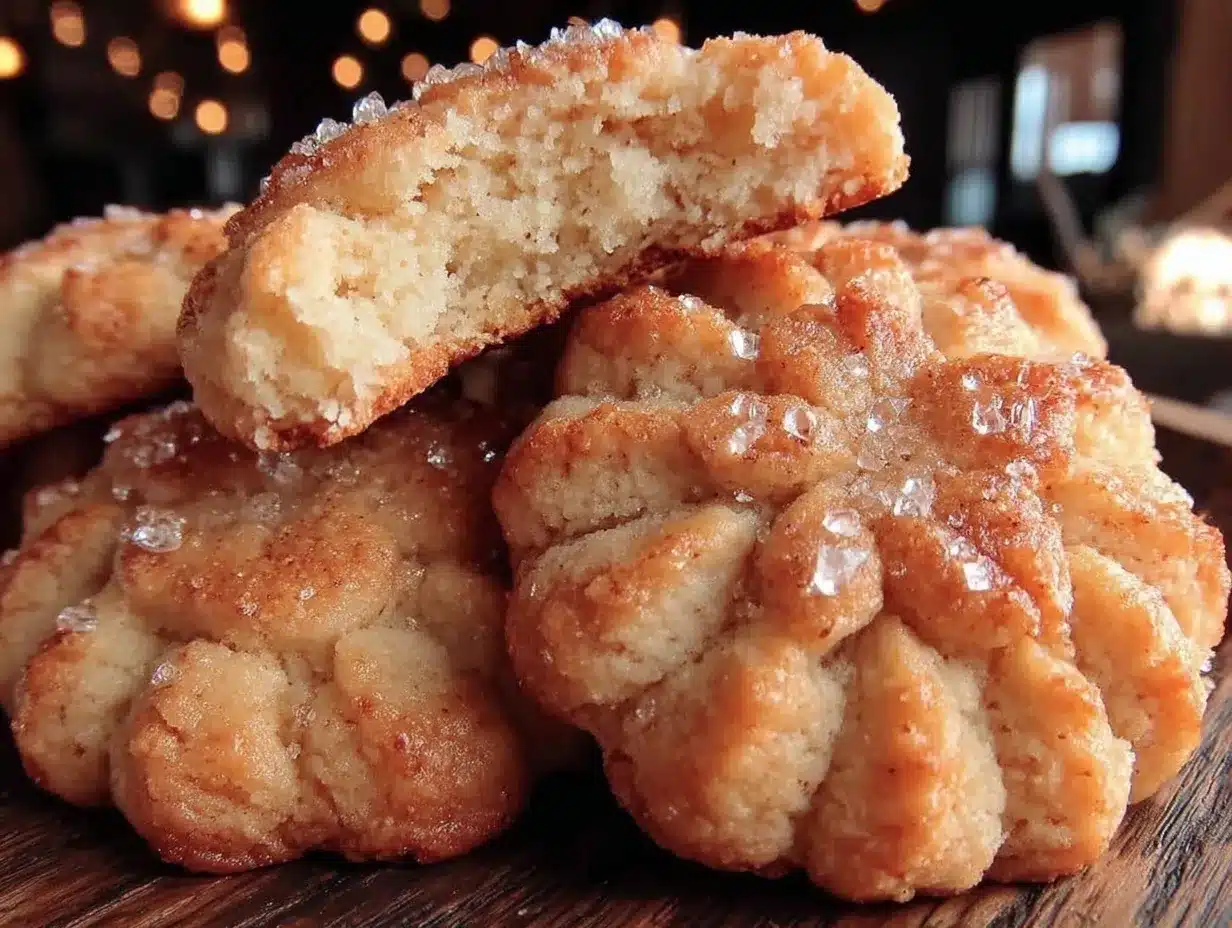
“Wait, you didn’t chill the dough?” That’s exactly what my friend blurted out the first time I pulled these flower-shaped butter cookies out of the oven. Honestly, I was half-expecting her skepticism—because, like many, I grew up thinking cookie dough needed hours in the fridge for a reason. But these cookies proved otherwise. One rushed afternoon, with no time to spare and a last-minute craving for something buttery and crisp, I tossed the dough together and skipped the chilling step. To my surprise, the cookies baked up beautifully, with those charming, delicate flower shapes holding firm and edges crisping just right.
Sometimes, it’s those little kitchen shortcuts that turn into favorites, you know? The smell of butter and vanilla swirling in the air, the gentle crisp breaking under your bite, and the simple joy of a cookie that feels both homemade and fuss-free. It stuck with me—not just because these cookies are pretty to look at but because they’re foolproof enough to make even on a hectic weekday evening. No chilling means no waiting, and those crispy edges? They’re the kind of detail that turns a basic butter cookie into something just a bit more special. I’m pretty sure you’ll understand that quiet satisfaction after your first batch.
Why You’ll Love This Recipe
This easy no-chill flower-shaped butter cookies recipe has become a go-to for me and many who’ve tried it. I tested it multiple times to get the texture just right—crispy on the edges and tender in the center—and it never disappoints. What makes it stand out?
- Quick & Easy: The dough comes together in about 10 minutes and skips the usual chilling phase, perfect for those moments when you want baking results without the wait.
- Simple Ingredients: You likely have everything on hand—just butter, sugar, flour, and a few basics—making it a no-brainer for spontaneous baking sessions.
- Perfect for Beginners: The no-chill approach removes a common stumbling block, especially for new bakers who get intimidated by waiting times or complicated steps.
- Crowd-Pleaser: These flower-shaped cookies aren’t just pretty—they’re addictively delicious, getting rave reviews from kids and adults alike.
- Unbelievably Delicious: The crispy edges add a satisfying crunch, while the buttery centers keep it soft enough to melt in your mouth.
This isn’t just another butter cookie recipe. The secret is in balancing the dough’s moisture and butter content so it holds its shape without chilling. Plus, the flower cutter adds a playful twist that makes these cookies ideal for everything from casual teatime to festive gatherings. It’s like the buttery cookie you always wanted but never thought you could make without the hassle. And if you love quick sweet treats, you might also really enjoy the Pink Velvet Cookie Crumble Board I shared earlier—it’s another simple but stunning way to impress without stress.
What Ingredients You Will Need
This recipe uses simple, wholesome ingredients to deliver bold flavor and satisfying texture without the fuss. The ingredients are mostly pantry staples, so you won’t need a special grocery run.
- Unsalted butter, softened (1 cup / 227g): The heart of the recipe. Using unsalted butter lets you control the saltiness perfectly. I prefer brands like Land O’Lakes or Plugrá for their creamy texture.
- Granulated sugar (3/4 cup / 150g): Adds sweetness and helps the edges crisp nicely.
- Pure vanilla extract (1 teaspoon): Brings warmth and depth to the flavor. I always keep Nielsen-Massey on hand for consistent quality.
- All-purpose flour (2 cups / 250g): The structure of the cookies. Spoon it lightly into your measuring cup for accuracy.
- Salt (1/4 teaspoon): Enhances flavor and balances sweetness.
If you want to swap things up or accommodate dietary needs:
- Use almond flour (2 cups / 192g) for a gluten-free option, though the texture will be a bit softer.
- Replace butter with a dairy-free margarine for a vegan twist—though the cookies won’t crisp quite as much.
- Try adding a pinch of cinnamon or lemon zest to the dough for a subtle flavor lift.
For the flower shapes, a simple flower cookie cutter (about 2.5 inches / 6 cm diameter) works best to get those crisp petal edges that everyone notices. But if you don’t have one, a glass rim or small biscuit cutter will do the trick!
Equipment Needed
- Mixing bowl: A medium to large bowl for creaming butter and sugar. I prefer glass or stainless steel for easy cleanup.
- Hand mixer or stand mixer: Helpful for creaming butter thoroughly, but you can also do it by hand with a wooden spoon if you’re determined.
- Measuring cups and spoons: For accuracy, especially with flour and sugar.
- Flower-shaped cookie cutter: Around 2.5 inches (6 cm) diameter. If you don’t have this exact shape, any small cookie cutter or even a small glass will work.
- Baking sheet: A rimmed sheet pan lined with parchment paper or a silicone mat to prevent sticking and promote even baking.
- Cooling rack: For letting your cookies crisp up as they cool.
Budget-friendly tip: If you’re just starting out, skip the stand mixer and use a sturdy wooden spoon or spatula. It might take a bit longer, but the results still impress. Also, silicone mats last forever and save you from constantly greasing pans. I’ve had mine for years, and it’s been worth every penny.
Preparation Method
- Preheat your oven to 350°F (175°C). This ensures even baking. Line your baking sheet with parchment paper or a silicone mat to keep cookies from sticking.
- Cream the butter and sugar: In your mixing bowl, beat 1 cup (227g) softened unsalted butter with 3/4 cup (150g) granulated sugar until the mixture is light and fluffy—about 3 to 4 minutes. This step is key to getting those buttery cookies tender but crisp at the edges.
- Add vanilla and salt: Mix in 1 teaspoon pure vanilla extract and 1/4 teaspoon salt until combined. It smells amazing here already.
- Incorporate the flour: Gradually add 2 cups (250g) all-purpose flour, mixing on low speed or folding gently with a spatula. The dough will come together but remain soft, not sticky. Don’t overmix—stop as soon as the flour disappears.
- Roll out the dough: Lightly flour your work surface and roll the dough to about 1/4 inch (0.6 cm) thickness. This thickness helps achieve those crisp edges without drying out the centers.
- Cut flower shapes: Press your flower-shaped cookie cutter into the dough, gently lifting each shape and transferring it to your prepared baking sheet. Space cookies about 1 inch (2.5 cm) apart to allow for slight spreading.
- Skip chilling: This dough works perfectly without chilling, so pop the tray straight into the oven.
- Bake cookies: Bake for 12-14 minutes, or until the edges turn a light golden brown and the centers look set but not overbaked. If you notice the edges browning too fast, rotate the pan halfway through baking.
- Cool on the baking sheet for 5 minutes: This lets the cookies firm up a bit before transferring to a cooling rack where they crisp up nicely.
Pro tip: If your dough feels too soft and hard to cut clean shapes, briefly pop it in the freezer for 10 minutes. But usually, you’ll find it perfectly workable as is. After baking, the crispy edges and tender centers create a delightful texture contrast that’s hard to beat.
Cooking Tips & Techniques
Getting these butter cookies just right is mostly about balance and timing. Here’s what I learned after several batches:
- Don’t skip creaming: Beating butter and sugar until fluffy traps air, which helps the cookies rise slightly and stay tender inside.
- Handle dough gently: Overworking flour can make cookies tough. Mix just until combined.
- Use room temperature butter: This helps it blend smoothly with sugar and creates a better dough texture.
- Oven temperature matters: A too-hot oven will burn edges before centers bake. If your oven runs hot, reduce temperature by 10-15°F (5-8°C).
- Space cookies properly: Crowding the pan causes them to stick and lose shape. Give them room to crisp up evenly.
- Watch baking time closely: They can go from perfect to overdone in just a minute or two. Pull them out once edges are golden but centers still look set.
One time, I baked a batch on a dark metal pan, and the cookies browned way too fast on the bottom. Lesson learned: light-colored pans or using parchment paper make a noticeable difference to avoid burnt edges. If you want a fun spin, try pairing these with the creamy Valentine’s Pink Strawberry Cream Puff Bars for a pretty and tasty pairing at your next gathering.
Variations & Adaptations
These butter cookies are a blank canvas for all sorts of tweaks, depending on your mood or dietary needs.
- Flavor twists: Add 1 teaspoon lemon zest or a pinch of cinnamon to the dough for a fresh, seasonal vibe.
- Chocolate dip: Once cooled, dip half of each cookie in melted dark or white chocolate and let set for an elegant finish.
- Gluten-free option: Swap all-purpose flour with a gluten-free blend (like Bob’s Red Mill 1-to-1) and add 1/4 teaspoon xanthan gum for structure.
- Nutty crunch: Mix in 1/4 cup finely chopped toasted almonds or pecans for texture.
- Dairy-free version: Use dairy-free margarine or coconut oil in place of butter, though the crisp edges might be slightly less pronounced.
I once tried a batch with a sprinkle of coarse sea salt on top just before baking—surprisingly addictive! The sweet and salty hit really made those crispy edges pop. For a different shape and fun project, you might also enjoy the colorful Dr. Seuss Rainbow Breakfast Biscuit Pops that bring a bit of whimsy to your baking table.
Serving & Storage Suggestions
These cookies are best served at room temperature once fully cooled. The crispy edges soften a bit if stored in airtight containers, so if you love that crunch, enjoy them within 1-2 days.
- Presentation: Arrange on a pretty plate or tiered stand for teatime or casual dessert. The flower shapes look especially charming with a dusting of powdered sugar or a light drizzle of glaze.
- Pairings: Serve alongside a cup of tea, coffee, or a glass of cold milk. They’re also a delightful contrast to creamy desserts like panna cotta or mousse.
- Storage: Store cookies in an airtight container at room temperature for up to 4 days. For longer storage, freeze baked cookies in a sealed container or zip bag for up to 2 months.
- Reheating: Warm cookies in a 300°F (150°C) oven for 5 minutes to refresh that crispy edge.
Flavors develop nicely over a day or two, which means these cookies are great to bake ahead of time when you want to bring a little homemade charm to brunch or a party. For a full sweet spread, you might want to add some creamy treats like the Pink Velvet Strawberry Cheesecake Cups, which complement the buttery simplicity of these cookies beautifully.
Nutritional Information & Benefits
Each butter cookie contains approximately:
| Calories | Fat | Carbohydrates | Protein |
|---|---|---|---|
| 120 kcal | 7g | 14g | 1g |
These cookies offer a modest energy boost with simple ingredients. The butter provides fat-soluble vitamins like A and E, and the flour supplies carbohydrates for quick energy. They’re not loaded with additives or preservatives, making them a cleaner choice compared to many store-bought options.
Note: This recipe contains gluten and dairy. Those sensitive to these should consider the suggested substitutions. From a wellness perspective, I see these as an occasional treat that pairs well with balanced meals and active days—sometimes you just need a little buttery comfort, right?
Conclusion
This easy no-chill flower-shaped butter cookies recipe has earned a permanent spot in my kitchen because it’s quick, simple, and reliably delicious. Whether you’re a busy parent needing a last-minute sweet or a beginner baker looking to build confidence, these cookies fit the bill without fuss or fancy steps.
Feel free to tweak the shapes, add your favorite flavor notes, or pair them with creamy desserts to make the experience your own. Personally, I love how these cookies bring that cozy, homemade feeling with minimal effort—and really, what’s not to love about a cookie with crispy edges and a tender heart?
If you try this recipe, I’d love to hear how it turns out or any fun variations you come up with!
FAQs About Easy No-Chill Flower-Shaped Butter Cookies
Can I make these cookies gluten-free?
Yes! Substitute the all-purpose flour with a gluten-free 1-to-1 baking flour blend and add 1/4 teaspoon xanthan gum to help with texture.
Why don’t these cookies need chilling?
The dough has a balanced moisture and fat content that holds its shape well without chilling, saving you time without sacrificing texture.
How do I keep the flower shapes from spreading too much?
Make sure your butter is softened but not melted, and avoid overmixing the flour. Also, space cookies well on the baking sheet.
Can I store these cookies for later?
Yes, store them in an airtight container at room temperature for up to 4 days or freeze for up to 2 months.
What’s the best way to get crispy edges?
Bake at 350°F (175°C) until the edges turn a light golden brown—usually 12-14 minutes—and let cookies cool on the baking sheet for a few minutes before moving them.
Pin This Recipe!
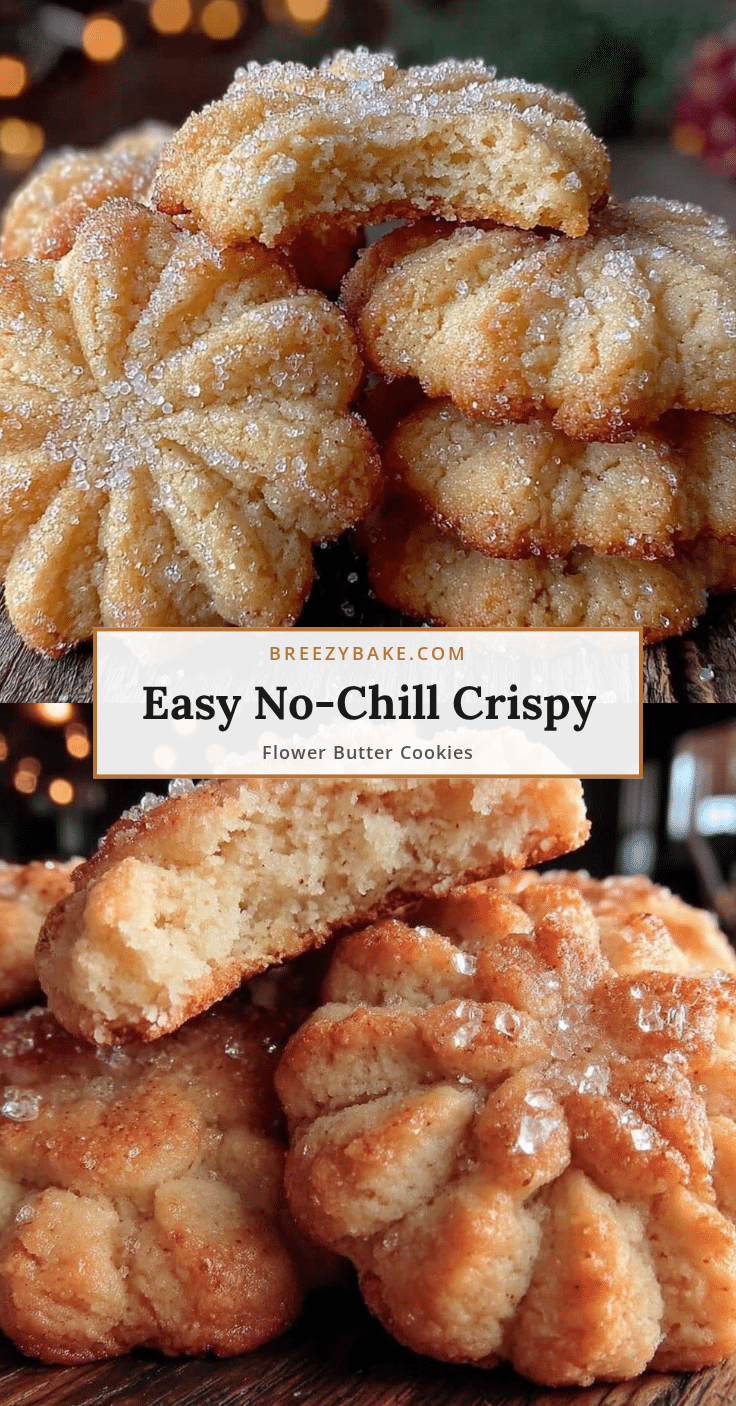
Easy No-Chill Flower-Shaped Butter Cookies
A quick and simple butter cookie recipe that skips the chilling step, producing flower-shaped cookies with crispy edges and tender centers, perfect for beginners and busy bakers.
- Prep Time: 10 minutes
- Cook Time: 12-14 minutes
- Total Time: 22-24 minutes
- Yield: 24 cookies 1x
- Category: Dessert
- Cuisine: American
Ingredients
- 1 cup (227g) unsalted butter, softened
- 3/4 cup (150g) granulated sugar
- 1 teaspoon pure vanilla extract
- 2 cups (250g) all-purpose flour
- 1/4 teaspoon salt
Instructions
- Preheat your oven to 350°F (175°C). Line a baking sheet with parchment paper or a silicone mat.
- In a mixing bowl, beat 1 cup (227g) softened unsalted butter with 3/4 cup (150g) granulated sugar until light and fluffy, about 3 to 4 minutes.
- Mix in 1 teaspoon pure vanilla extract and 1/4 teaspoon salt until combined.
- Gradually add 2 cups (250g) all-purpose flour, mixing on low speed or folding gently with a spatula until the flour disappears. Do not overmix.
- Lightly flour your work surface and roll the dough to about 1/4 inch (0.6 cm) thickness.
- Press a flower-shaped cookie cutter (about 2.5 inches / 6 cm diameter) into the dough, lift each shape, and transfer to the prepared baking sheet, spacing cookies about 1 inch (2.5 cm) apart.
- Skip chilling and place the baking sheet directly into the oven.
- Bake for 12-14 minutes, or until edges are light golden brown and centers look set. Rotate the pan halfway through baking if needed.
- Cool cookies on the baking sheet for 5 minutes before transferring to a cooling rack to crisp up.
Notes
If dough is too soft to cut clean shapes, chill in the freezer for 10 minutes briefly. Use room temperature butter for best texture. Avoid overmixing flour to keep cookies tender. Use light-colored pans or parchment paper to prevent burnt bottoms. Store in airtight container up to 4 days or freeze up to 2 months. Reheat at 300°F (150°C) for 5 minutes to refresh crispiness.
Nutrition
- Serving Size: 1 cookie
- Calories: 120
- Fat: 7
- Carbohydrates: 14
- Protein: 1
Keywords: butter cookies, no-chill cookies, flower-shaped cookies, easy cookies, beginner baking, crispy edges, quick cookies


