“You really think this will work?” my friend asked, eyeing the pile of berries and whipped cream I was juggling in our cramped kitchen. It was July 3rd, and we were scrambling to get a festive dessert ready for the barbecue the next day. Honestly, I was skeptical too. But sometimes, the simplest ideas bloom into the best surprises.
The Easy Red White and Blue Berry Trifle Jars came about almost by accident that evening. I had a stash of leftover angel food cake, some fresh strawberries and blueberries from the farmer’s market, and a tub of whipped topping. Tossing them all into mason jars felt like a quick fix—not exactly gourmet. But by the time I layered the last berry and dollop of cream, the jars looked like little flag-themed treasures.
The next day, those jars vanished faster than I expected. Between the vibrant colors and the light, creamy sweetness, they were a hit not just with the kids but the adults too (who kept sneaking little spoons back for seconds). I realized then that this recipe isn’t just a quick dessert; it’s a kind of magic in a jar—easy, no-fuss, and perfect for those moments when you want something special without the stress.
It stuck with me because it’s honest and approachable, yet it feels festive enough for the Fourth of July or any summer celebration. Plus, it’s the kind of treat you can whip up while the grill is firing or the kids are playing—no need to miss out on the party or the fun. And if you ever need an easy yet charming dessert for a picnic or potluck, these trifle jars will quietly steal the show.
So here’s to simple layers of red, white, and blue that taste like summer, sunshine, and a little unexpected joy.
Why You’ll Love This Easy Red White and Blue Berry Trifle Jars Recipe
Honestly, this recipe has been a go-to for more than just the Fourth of July in my kitchen. After testing it over several weeks, I can say it’s a dependable crowd-pleaser that nails the balance of sweet, fresh, and creamy every time. Here’s why it might just become your next favorite dessert:
- Quick & Easy: You can assemble these trifle jars in under 20 minutes. Perfect for those last-minute dessert needs or when you’re juggling a million things at once.
- Simple Ingredients: No need for fancy or hard-to-find items—just good ol’ berries, cake, and cream. Most of these are pantry or fridge staples, so you can pull this together on a whim.
- Perfect for Summer Gatherings: Whether it’s a backyard barbecue, a picnic, or a casual brunch, these jars bring a festive, patriotic touch without any hassle.
- Crowd-Pleaser: Kids love the fun layers, and adults appreciate the fresh fruit and light texture. It’s a dessert that bridges generations.
- Unbelievably Delicious: The combination of fluffy angel food cake, luscious whipped cream, and juicy berries hits that sweet spot of comfort and freshness.
What makes this recipe stand apart is the layering technique I fine-tuned—using small pieces of cake to soak up the berry juices just enough without turning soggy, and folding in a touch of vanilla extract to the whipped cream to deepen the flavor. It’s subtle but makes the difference between “just dessert” and “dessert you dream about.”
This isn’t your run-of-the-mill berry trifle; it’s a recipe that feels festive and fun, yet doesn’t require a pastry chef’s skills. Honestly, after making these a few times, I started bringing them to every summer gathering—right alongside my strawberry cream puff bars and chocolate-covered strawberry mousse cups—and they never fail to impress without the stress.
What Ingredients You Will Need
This recipe uses simple, wholesome ingredients to deliver bold flavor and satisfying texture without the fuss. You’ll find most of these are pantry staples or easy-to-source fresh items, making it a breeze to prepare anytime.
- Angel Food Cake – about 8 ounces (225 grams), cut into bite-sized cubes. You can substitute with pound cake or sponge cake if you prefer a richer texture.
- Fresh Strawberries – 1 cup (150 grams), hulled and sliced. Fresh is best here, but frozen thawed berries work in a pinch.
- Fresh Blueberries – 1 cup (150 grams). Look for firm, plump berries for the best texture.
- Heavy Whipping Cream – 1 cup (240 ml), chilled. This is what you’ll whip into fluffy cream. You can swap with coconut cream for a dairy-free version.
- Powdered Sugar – 2 tablespoons (15 grams), to sweeten the whipped cream just right.
- Vanilla Extract – 1 teaspoon (5 ml), adds a lovely depth to the cream.
- Fresh Mint Leaves – a few for garnish (optional but pretty and fresh).
I usually go for a trusted brand of heavy cream to get that perfect whip—something like Organic Valley or local cream if you can find it. For the cake, I’ve tried store-bought angel food cake, but homemade is always a treat if you have the time. When it comes to berries, seasonal freshness really makes a difference. In peak summer, those local berries bring the flavor to life.
Substitution tip: If you want to make this gluten-free, swap the cake for a gluten-free pound cake or even gluten-free cookies broken into chunks. For a lighter version, you could try mixing in some Greek yogurt with the whipped cream to add tang and reduce the richness.
Equipment Needed
- Mixing Bowl: A large bowl for whipping the cream. I prefer glass or metal bowls because they stay cold better, which helps the cream whip faster.
- Electric Mixer or Whisk: An electric hand mixer speeds things up, but a sturdy balloon whisk works if you’re up for a workout.
- Mason Jars or Clear Glass Jars: About 4 to 6 jars (8-ounce or 240 ml size). These are perfect for layering and make serving a breeze.
- Measuring Cups and Spoons: For accuracy—especially with sugar and vanilla.
- Knife and Cutting Board: For slicing the strawberries and cubing the cake.
If you don’t have mason jars, small dessert glasses or even wine glasses work well to showcase those pretty red, white, and blue layers. I also recommend chilling your mixing bowl and beaters for 10 minutes beforehand if you can—that little trick helps your whipped cream get fluffy faster.
Preparation Method
- Prepare the Whipped Cream (10 minutes): Pour 1 cup (240 ml) of chilled heavy whipping cream into your cold mixing bowl. Add 2 tablespoons (15 grams) powdered sugar and 1 teaspoon (5 ml) vanilla extract. Using an electric mixer or balloon whisk, beat on medium-high speed until soft peaks form. The cream should be fluffy but not grainy or over-beaten. (Tip: Stop as soon as the peaks hold but before it gets stiff to keep it light and smooth.)
- Cube the Angel Food Cake (5 minutes): Cut about 8 ounces (225 grams) of angel food cake into 1-inch (2.5 cm) cubes. Try to keep pieces uniform so they layer nicely and soak up the berry juices evenly.
- Slice the Strawberries (5 minutes): Hull and slice 1 cup (150 grams) of fresh strawberries. If your strawberries are large, slice them thinner so they layer well in the jars.
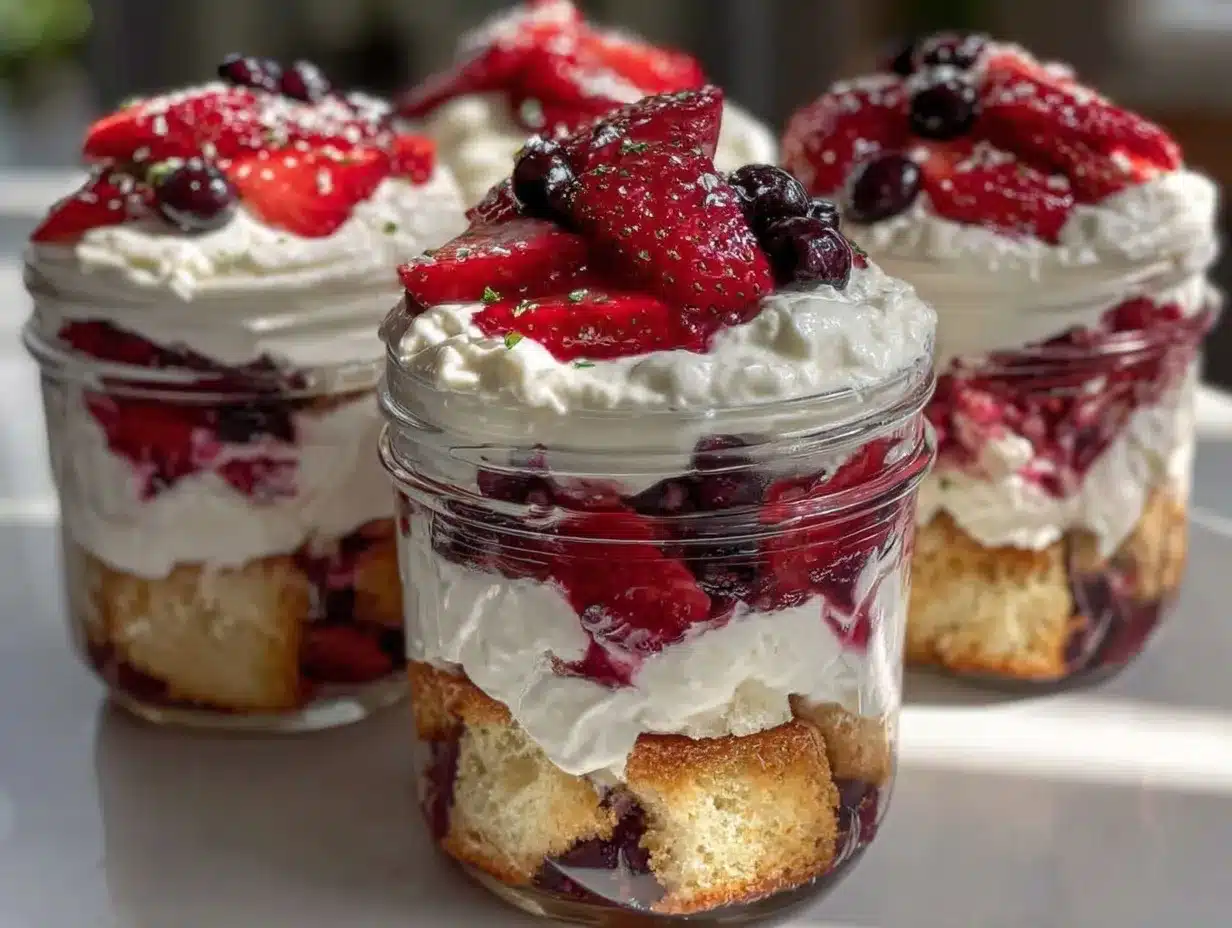
- Layer the Trifle Jars (10 minutes): Start by placing a layer of cake cubes at the bottom of each jar (about ¼ cup or 60 grams). Next, add a spoonful of whipped cream, followed by a layer of sliced strawberries, then blueberries. Repeat these layers until the jar is nearly full, finishing with a dollop of whipped cream on top.
- Garnish and Chill (at least 1 hour): Top each jar with a few fresh mint leaves for a pop of color and freshness. Cover the jars with lids or plastic wrap and refrigerate for at least 1 hour before serving. This resting time lets the cake soak up the berry juices and flavors meld beautifully.
If you’re in a hurry, you can serve immediately, but the flavors deepen after chilling. Watch out not to let the cake sit too long or it might get overly soggy—1 to 2 hours is just right.
Cooking Tips & Techniques
Whipping cream can be a bit tricky if you haven’t done it before, but here’s what I learned from a dozen batches of this recipe:
- Keep everything cold. Chill your bowl, beaters, and cream beforehand. Warm cream won’t whip properly.
- Don’t overbeat the cream. When you see soft peaks that hold shape but still look smooth, stop. Overbeaten cream turns grainy and can turn into butter (trust me, been there!).
- Layer gently. When assembling, use a spoon or small spatula to avoid breaking the cake cubes too much. You want distinct layers that look pretty.
- Use fresh berries at peak ripeness. They’re juicier and sweeter, which makes the whole trifle taste brighter. If berries are a bit tart, a light dusting of sugar before layering can balance the flavors.
- Multitask smart. While the cream chills, prep the fruit and cake. This saves time and keeps everything fresh.
One time, I forgot the vanilla in the whipped cream and the jars tasted fine but lacked that extra oomph. Vanilla really ties the flavors together, so don’t skip it!
Variations & Adaptations
This recipe is flexible and fun to tweak depending on your mood, dietary needs, or what’s in season:
- Dietary swaps: Use coconut whipped cream or dairy-free whipped topping to make it vegan. Gluten-free cake or crumbled gluten-free cookies work well for gluten-free versions.
- Seasonal fruits: Swap berries for peaches, mango, or kiwi in summer. In winter, pomegranate seeds or canned cherries can add color and flavor.
- Flavor twists: Add a splash of liqueur like Grand Marnier or Amaretto to the whipped cream for adult-only jars. Or mix in some lemon zest for a bright citrus note.
- Different cakes: Try using chocolate cake jar parfaits style layers with chocolate cake and whipped cream for a richer alternative.
- Personal favorite: I once added a layer of crushed graham crackers lightly mixed with cinnamon for a slight crunch and spice—turned out surprisingly delicious!
Serving & Storage Suggestions
Serve these Easy Red White and Blue Berry Trifle Jars chilled, straight from the fridge. They’re perfect for picnic coolers or outdoor parties where you want a mess-free dessert option. The clear jars show off the beautiful layers, making them a delightful centerpiece on any dessert table.
Pair the jars with light beverages like iced tea, lemonade, or a sparkling rosé for a refreshing combo. If it’s a brunch setting, they go great alongside classic breakfast items or even a savory frittata.
Store leftovers in the fridge with lids on to keep the cake from drying out. They’ll keep well for up to 2 days, but honestly, they rarely last that long! When reheating, it’s best to enjoy them cold, but if you prefer, let them sit at room temperature for 10 minutes before serving to soften the cream slightly.
Over time, the flavors meld and the cake absorbs more berry juices, making the dessert even juicier and more flavorful. Just watch the texture to avoid it becoming too mushy.
Nutritional Information & Benefits
This dessert is a light indulgence, especially compared to heavier cakes or pies. Each trifle jar (about 8 ounces or 240 ml) roughly contains:
| Calories | 250-300 kcal |
|---|---|
| Fat | 12-15 grams |
| Carbohydrates | 35-40 grams |
| Protein | 3-4 grams |
| Sugar | 25-30 grams |
The fresh berries provide antioxidants, vitamin C, and fiber, which add a nutritional boost along with their vibrant flavor. Whipped cream contributes a source of calcium and fat for satiety, while the angel food cake keeps things light with its airy texture.
This recipe is naturally gluten-containing unless you substitute the cake, and contains dairy unless you use alternatives. It’s a balanced treat that fits nicely into a summer eating plan—especially when portioned mindfully.
Conclusion
If you’re searching for a dessert that’s easy to make, visually stunning, and beloved by all ages, these Easy Red White and Blue Berry Trifle Jars are a winner. The recipe invites you to layer fresh fruit, fluffy cake, and silky cream into a simple yet special treat that feels festive without fuss.
Feel free to make it your own with different fruits, cakes, or flavor twists. I love how versatile these jars are—whether for a backyard barbecue, a picnic, or even a quiet summer evening dessert.
Next time you want a dessert that’s both charming and effortless, remember these jars. And if you try them, I’d love to hear how you customized your layers or what occasion you served them for—drop a comment or share your photos!
Here’s to sweet, colorful moments that bring people together, one jar at a time.
FAQs About Easy Red White and Blue Berry Trifle Jars
Can I prepare these trifle jars ahead of time?
Yes! They’re best assembled a few hours before serving and chilled for at least 1 hour. Avoid making them more than a day ahead to prevent the cake from becoming too soggy.
What can I use instead of angel food cake?
Pound cake, sponge cake, or gluten-free cake alternatives all work well. Just cut into small cubes for layering.
How do I make dairy-free whipped cream?
Use chilled coconut cream whipped with a bit of powdered sugar and vanilla. It whips up similarly and adds a subtle coconut flavor.
Can I add other berries or fruits?
Absolutely! Raspberries, blackberries, peaches, or mangoes can be swapped in depending on season and preference.
What if I don’t have mason jars?
Any clear glasses or small dessert bowls work great. The idea is to showcase those pretty layers in an individual serving size.
Pin This Recipe!
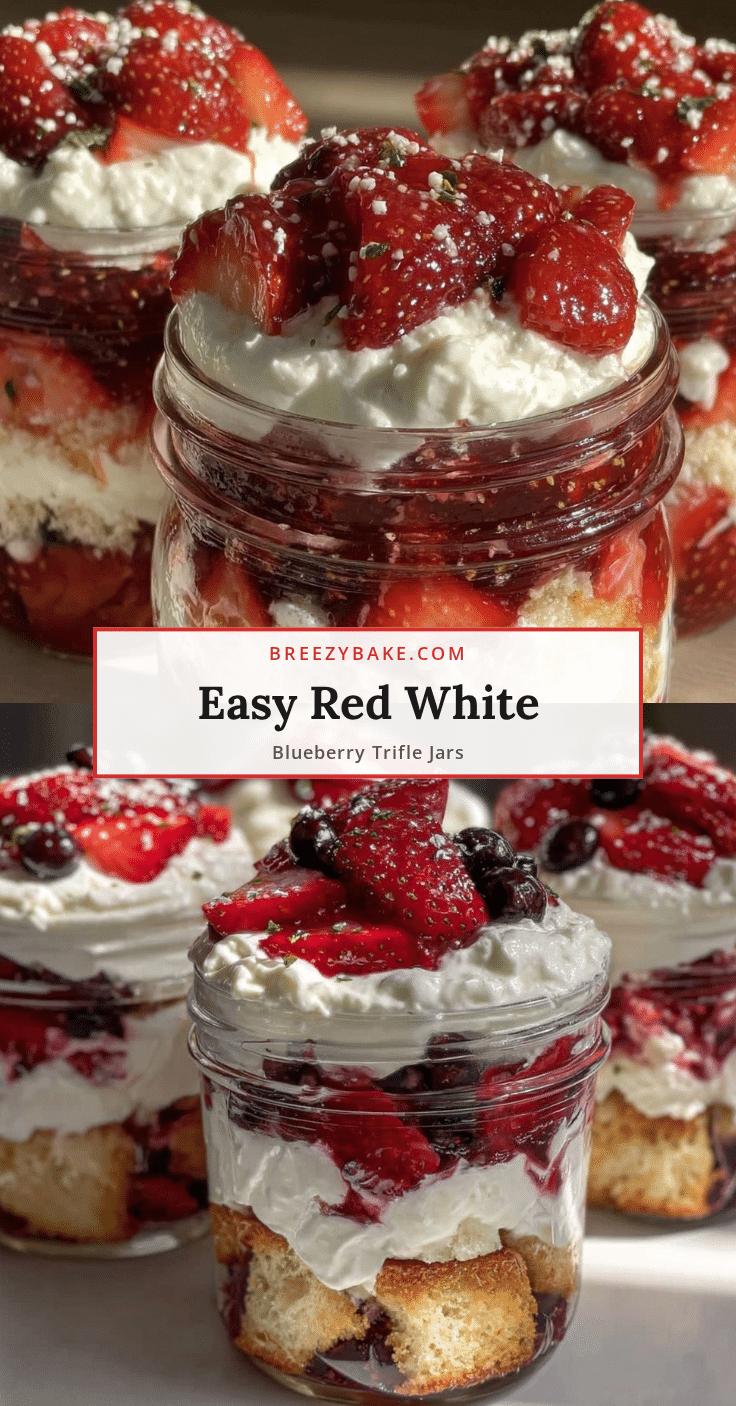
Easy Red White and Blue Berry Trifle Jars Recipe Perfect for 4th of July Dessert
A quick and festive layered dessert featuring angel food cake, fresh strawberries and blueberries, and whipped cream, perfect for summer gatherings and patriotic celebrations.
- Prep Time: 20 minutes
- Cook Time: 0 minutes
- Total Time: 1 hour 20 minutes
- Yield: 4 servings 1x
- Category: Dessert
- Cuisine: American
Ingredients
- 8 ounces angel food cake, cut into bite-sized cubes
- 1 cup fresh strawberries, hulled and sliced
- 1 cup fresh blueberries
- 1 cup heavy whipping cream, chilled
- 2 tablespoons powdered sugar
- 1 teaspoon vanilla extract
- Fresh mint leaves for garnish (optional)
Instructions
- Prepare the whipped cream: Pour 1 cup of chilled heavy whipping cream into a cold mixing bowl. Add 2 tablespoons powdered sugar and 1 teaspoon vanilla extract. Beat with an electric mixer or balloon whisk on medium-high speed until soft peaks form. Stop before stiff peaks develop to keep it light and smooth.
- Cube the angel food cake into 1-inch pieces, keeping them uniform for even layering.
- Hull and slice the strawberries thinly if large, to layer well in the jars.
- Layer the trifle jars starting with about 1/4 cup of cake cubes at the bottom, followed by a spoonful of whipped cream, then a layer of sliced strawberries, and a layer of blueberries. Repeat layers until jars are nearly full, finishing with a dollop of whipped cream on top.
- Garnish each jar with fresh mint leaves if desired. Cover jars with lids or plastic wrap and refrigerate for at least 1 hour before serving to allow flavors to meld and cake to soak berry juices.
Notes
Chill mixing bowl and beaters before whipping cream for best results. Stop whipping cream at soft peaks to avoid graininess. Serve chilled and consume within 2 days for best texture. Substitute pound cake or gluten-free cake for variations. Coconut cream can be used for dairy-free version.
Nutrition
- Serving Size: 1 jar (8 ounces or 2
- Calories: 275
- Sugar: 27.5
- Sodium: 150
- Fat: 13.5
- Saturated Fat: 8
- Carbohydrates: 37.5
- Fiber: 2
- Protein: 3.5
Keywords: berry trifle, 4th of July dessert, patriotic dessert, easy trifle jars, angel food cake dessert, summer dessert, no-bake dessert


