“Hey, did you see those star-shaped treats I brought to the barbecue?” my neighbor asked as kids darted around the yard, their laughter punctuating the summer air. I had to chuckle because, honestly, this recipe for Festive Crispy Red White and Blue Rice Krispie Treat Stars was born out of a last-minute scramble before the Fourth of July. I wasn’t even sure how it would turn out—colored marshmallows and all—but those vibrant, crispy stars ended up stealing the show.
The whole thing kicked off when I realized the bag of plain Rice Krispies was the only thing left in the pantry, and the dessert table was looking pretty sad. A quick run to grab some patriotic food coloring and marshmallows had me mixing up batch after batch. I was skeptical about coloring marshmallows—it seemed like a messy gamble—but the results? Bright, chewy, and delightfully crispy stars that held their shape better than I expected.
What really surprised me was how these treats brought everyone together—from toddlers to grandparents, each grabbing a star and smiling as if it was the best thing they’d tasted all day. That crunchy, sweet, and slightly nostalgic flavor combo got me hooked. Since then, I’ve found myself making these treats for every summer gathering, sometimes tweaking the colors or shapes, but never straying far from that simple magic.
So, if you’re looking for an easy, fun, and festive recipe that feels like a little celebration in every bite, these Festive Crispy Red White and Blue Rice Krispie Treat Stars might just be your new go-to. They’re not just for patriotic holidays either—think summer picnics or any day you want a pop of color and crunch. There’s something quietly satisfying about mixing, molding, and watching those stars come to life. It’s a small delight that sticks with you, you know?
Why You’ll Love This Recipe
After many attempts and modifications (some more colorful than others), I’ve landed on this version of Festive Crispy Red White and Blue Rice Krispie Treat Stars as a true crowd-pleaser. Here’s why it’s become such a staple in my summer recipe collection:
- Quick & Easy: Ready in under 30 minutes, these treats are perfect when you need a festive dessert without hours in the kitchen.
- Simple Ingredients: No fancy or hard-to-find items—just marshmallows, cereal, butter, and food coloring, which you probably already have or can easily get.
- Perfect for Patriotic Celebrations: Ideal for Independence Day, Memorial Day, or any occasion where red, white, and blue make the party pop.
- Crowd-Pleaser: Kids adore the sweet crunch, and adults appreciate the nostalgic vibe that these stars bring to the table.
- Unbelievably Delicious: The texture is crispy yet chewy, with a buttery sweetness that’s just right—not too sticky or heavy.
What sets this recipe apart? I’ve experimented with food coloring techniques to get the marshmallows just right—using gel colors for vibrant hues without the mess. Plus, shaping them into stars adds a festive flair that’s both fun and photogenic (great for impressing without stress!).
Honestly, these treats have a way of making you pause and smile, especially when you see the bright red, white, and blue stars lined up on a platter. They’re a sweet little tradition that turns ordinary ingredients into something memorable.
What Ingredients You Will Need
This recipe uses simple, wholesome ingredients to deliver bold color and satisfying texture without any fuss. Most of these are pantry staples, and the few extras like food coloring can be swapped or skipped depending on your mood or availability.
- Rice Krispies Cereal: 6 cups (about 150g) – the base, providing that iconic crispy snap. I like to go with Kellogg’s for best texture.
- Marshmallows: 10 oz (about 285g) regular or mini marshmallows – the glue that holds everything together. You can substitute with vegan marshmallows if preferred.
- Unsalted Butter: 3 tablespoons (about 42g), melted – adds richness and smoothness.
- Gel Food Coloring: Red and blue gels – these give vibrant colors without watering down the mixture. You can skip if you want classic white stars or just do one color.
- Vanilla Extract: 1 teaspoon – adds a subtle depth of flavor.
- Non-stick Spray or Butter: for greasing the pan and star-shaped cookie cutters.
Optional additions:
- Edible Glitter or Sprinkles: for decorating the stars and adding extra festive sparkle.
- Almond Extract: swap with vanilla for a nutty twist.
When selecting marshmallows, firm, fresh ones melt smoother and hold the shape better. If you want a gluten-free version, make sure your cereal is certified gluten-free. I’ve also used frozen berries to add a natural red tint, but it changes the texture slightly.
Equipment Needed
- Large Mixing Bowl: for combining the cereal and marshmallow mixture comfortably.
- Medium Saucepan: to melt butter and marshmallows evenly without scorching.
- Star-Shaped Cookie Cutters: various sizes—key for getting those crisp star shapes. If you don’t have star cutters, you can use a sharp knife or any other festive shapes.
- Wooden Spoon or Silicone Spatula: for stirring the sticky mixture.
- Non-stick Baking Sheet or Parchment Paper: to press the mixture onto and prevent sticking.
- Non-stick Spray or Butter: to grease cookie cutters and surfaces.
If cookie cutters aren’t in your budget, I’ve found that a simple sharp knife and a steady hand work just fine—just press the mixture into a pan, let it set, and cut out stars after cooling. A silicone spatula is my personal favorite for scraping every bit of the marshmallow mix out of the pan without a mess. For melting, a double boiler works well too if you want to avoid any burning risk.
Preparation Method
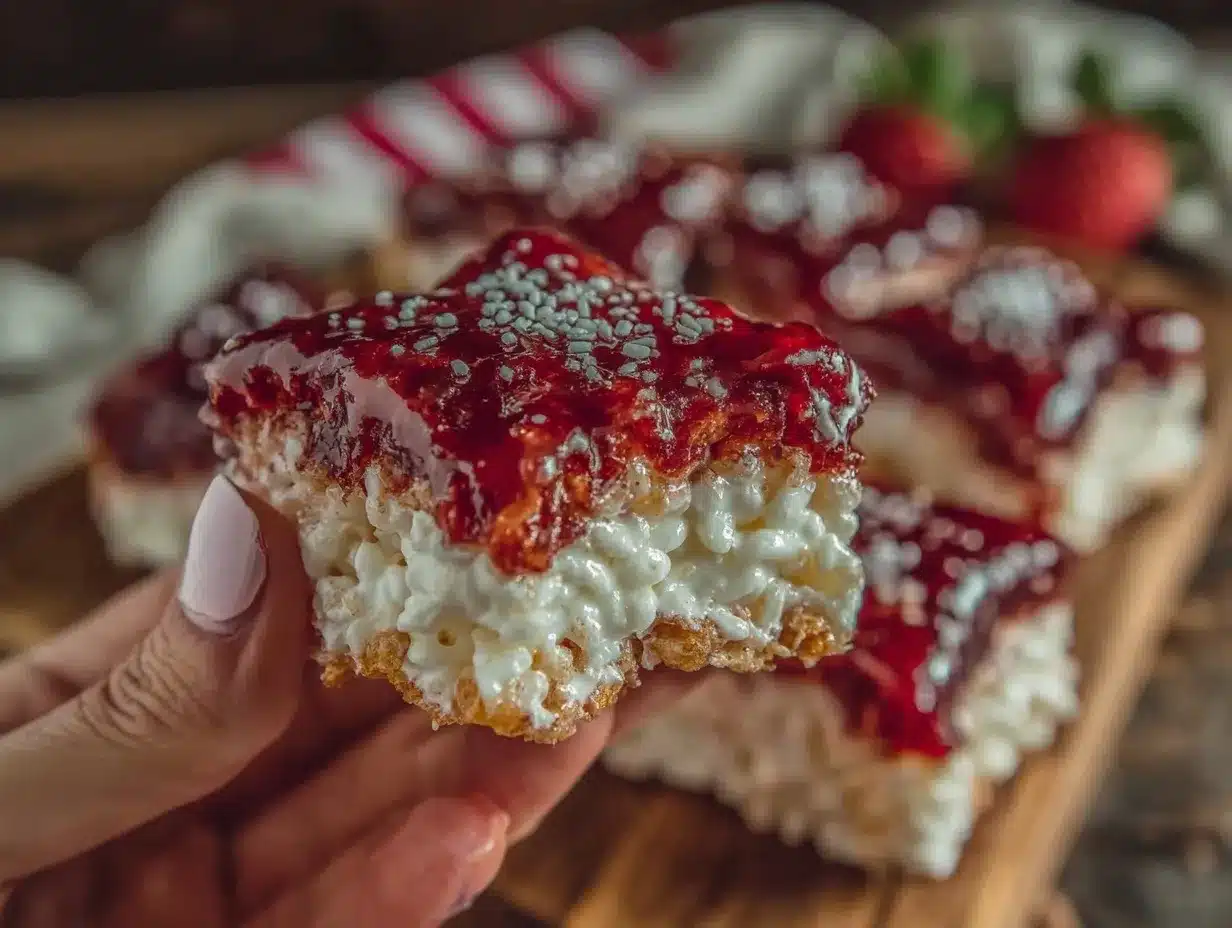
- Prepare Your Workspace: Lightly grease a 9×13-inch (23×33 cm) baking pan with butter or non-stick spray. Set out your star cookie cutters and line a baking sheet with parchment paper. This prep saves you from sticky surprises later.
- Melt Butter and Marshmallows: In a medium saucepan over low heat, melt 3 tablespoons (42g) of unsalted butter. Stir frequently to avoid browning. Once melted, add 10 oz (285g) marshmallows and stir continuously until smooth and fully melted—about 4-5 minutes. The mixture should be glossy and slightly thick but pourable.
- Add Flavor and Color: Remove from heat. Stir in 1 teaspoon vanilla extract. Divide the marshmallow mixture evenly into three bowls. Quickly stir red gel food coloring into one bowl, blue into another, leaving the last one plain white. Work fast as the mixture will start to set.
- Mix with Cereal: To each colored marshmallow bowl, add 2 cups (50g) Rice Krispies cereal. Fold gently but thoroughly so the cereal is well coated without crushing it.
- Press Into Pan: Working with one color at a time, press the mixture into the greased pan in an even layer about 1-inch (2.5 cm) thick. You can do all colors side by side or in layers if you want a striped effect, but side-by-side gives each star a solid color.
- Cool and Set: Let the mixture cool and firm up at room temperature for about 30 minutes. If you’re impatient like me, a quick chill in the fridge for 15 minutes helps.
- Cut Out Stars: Using star-shaped cookie cutters, cut out stars from each colored section. Grease the cutters lightly to prevent sticking. Press firmly but gently to keep the edges crisp. Transfer stars onto a parchment-lined baking sheet.
- Decorate (Optional): Add edible glitter, sprinkles, or drizzle with melted white chocolate for extra pizzazz. Let any decoration set before serving.
- Serve and Enjoy: These treats are best fresh but can be stored (covered) for a day or two without losing their crispness.
Pro tip: When mixing in the food coloring, use gel colors instead of liquid to avoid thinning the marshmallow. Also, don’t over-press the mixture into the pan—too much pressure crushes the cereal and makes the treats dense instead of crispy.
Cooking Tips & Techniques
Making the perfect Festive Crispy Red White and Blue Rice Krispie Treat Stars is more about timing and texture than anything else. Here are some tricks I’ve picked up along the way:
- Use Fresh Marshmallows: Older marshmallows can be dry and won’t melt as smoothly, leaving you with lumpy treats.
- Low and Slow Melting: Keep the heat low while melting butter and marshmallows to avoid scorching, which gives a burnt taste.
- Gel Food Coloring Is Key: Liquid colors water down the marshmallow mixture, making it too sticky and soft. Gels keep the texture intact and the colors vibrant.
- Don’t Overmix the Cereal: Stir gently to keep the cereal crispy and prevent it from turning into mush.
- Grease Your Hands: Sticky mixture can drive you crazy. Lightly butter your hands or use a silicone spatula to press the mixture into pans or molds.
- Timing for Cutting: Cut stars once the treats have firmed up but before they get too cold and hard—otherwise, they might crack or crumble.
- Storage Matters: Store in an airtight container at room temperature to keep treats from drying out or getting soggy.
I once tried cutting these stars while the mixture was still warm—let’s just say it turned into a sticky, misshapen mess. Waiting for the right moment makes all the difference.
Variations & Adaptations
The beauty of this recipe is how easy it is to customize. Here are a few ways to make these stars your own:
- Flavor Twists: Swap vanilla for almond or coconut extract for a new flavor dimension.
- Color Changes: Use natural food colorings like beet powder for red or spirulina for blue if you want a healthier spin.
- Shape Swaps: If stars aren’t your thing, try hearts, circles, or even letters for birthdays or special occasions.
- Gluten-Free or Vegan: Use gluten-free cereal and vegan marshmallows to suit dietary needs without sacrificing taste.
- Add Mix-ins: Toss in mini chocolate chips, rainbow sprinkles, or chopped nuts for extra texture and fun.
Personally, I once tried layering the colors in stripes inside the pan to create a red-white-blue flag effect. It took a bit more patience, but the look was worth the extra effort! If you want a fun summer twist, you might also enjoy pairing these with a refreshing treat like the chocolate-covered strawberry mousse cups.
Serving & Storage Suggestions
These crispy stars are best served at room temperature, fresh from the pan or chilled slightly if you prefer a firmer bite. They make a colorful centerpiece for dessert tables or picnic baskets.
For a fun presentation, arrange the stars on a platter or stack them with a drizzle of white chocolate for a bit of elegance. They pair wonderfully with fresh berries or a cold glass of lemonade.
To store, place the stars in an airtight container at room temperature for up to 3 days. Avoid refrigerating unless you live in a very humid climate, as moisture can make them soggy. If you want to store longer, freeze the stars in a sealed bag for up to a month; thaw at room temperature before serving.
Reheating isn’t necessary, but if you want to soften them slightly, a 10-second zap in the microwave works—just don’t overdo it or they’ll get sticky.
Over time, the stars’ flavors meld gently, making them even more satisfying the next day. This makes them a great make-ahead treat for parties or potlucks—like a colorful cousin to the pink velvet cookie crumble board I love assembling for special gatherings.
Nutritional Information & Benefits
Each serving (about one medium star) contains roughly 120-150 calories, mostly from carbohydrates and sugars, with a small amount of fat from the butter. While these treats are definitely indulgent, the portion size makes them easy to enjoy without going overboard.
Rice Krispies cereal is low in fat and provides some iron and B vitamins, though the marshmallows add mostly simple sugars. Using gel food coloring keeps additives minimal compared to liquid dyes.
For those with dietary concerns, these treats can be adapted gluten-free and vegan, as mentioned earlier. They’re not suitable for nut allergies unless you skip any mix-ins.
From a wellness perspective, these stars offer a nostalgic, joyful treat that fits into a balanced diet when enjoyed occasionally. I find that sharing them at celebrations brings a little happiness boost, which counts for something!
Conclusion
Making Festive Crispy Red White and Blue Rice Krispie Treat Stars has become one of those small kitchen traditions I appreciate—the kind that’s quick, colorful, and brings people together around a simple sweet. They’re easy enough for even a last-minute dessert and flexible enough to suit many occasions or dietary needs.
Give yourself permission to experiment with colors, shapes, and flavors to make them your own. I love how this recipe lets me add a little sparkle to summer gatherings without fuss or fancy ingredients.
If you try making these stars, I’d love to hear how you customize them or what memories they bring up for your family. There’s something special about a treat that’s both crispy and soft, festive and familiar.
Happy cooking, and may your celebrations be as bright and sweet as these little stars!
FAQs About Festive Crispy Red White and Blue Rice Krispie Treat Stars
Can I use mini marshmallows instead of regular ones?
Yes! Mini marshmallows melt just as well and can even make stirring easier. Just use the same total weight (10 oz or 285g).
How do I prevent the marshmallow mixture from sticking to my hands?
Lightly grease your hands with butter or use a silicone spatula to press and shape the mixture. This keeps things less sticky and easier to handle.
Can these treats be made ahead of time?
Definitely! They store well in an airtight container at room temperature for up to 3 days and can be frozen for longer storage.
What’s the best way to get vibrant red and blue colors?
Gel food coloring is your best bet. It provides rich hues without adding extra liquid that can alter texture.
Are these treats suitable for gluten-free diets?
They can be! Just make sure to use gluten-free Rice Krispies cereal and check your marshmallows are gluten-free as well.
Pin This Recipe!
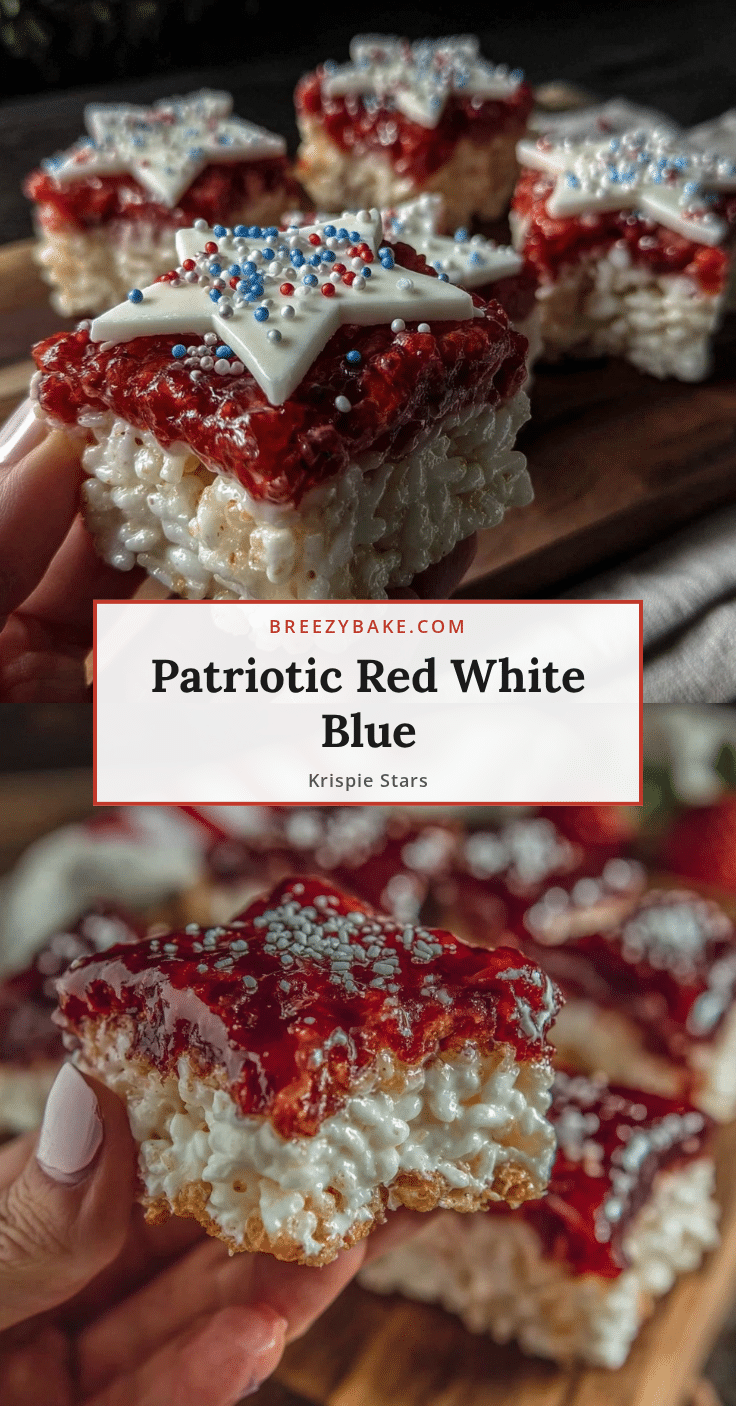
Festive Crispy Red White and Blue Rice Krispie Treat Stars
These colorful and crispy Rice Krispie treat stars are a quick, easy, and festive dessert perfect for patriotic celebrations or any summer gathering. They combine vibrant red, white, and blue marshmallow mixtures with classic crispy cereal for a nostalgic and crowd-pleasing treat.
- Prep Time: 10 minutes
- Cook Time: 10 minutes
- Total Time: 30 minutes
- Yield: About 24 medium stars 1x
- Category: Dessert
- Cuisine: American
Ingredients
- 6 cups Rice Krispies cereal (about 150g)
- 10 oz (285g) regular or mini marshmallows
- 3 tablespoons (42g) unsalted butter, melted
- Red gel food coloring
- Blue gel food coloring
- 1 teaspoon vanilla extract
- Non-stick spray or butter for greasing
- Optional: edible glitter or sprinkles for decoration
- Optional: almond extract (can substitute vanilla extract)
Instructions
- Lightly grease a 9×13-inch baking pan with butter or non-stick spray. Set out star cookie cutters and line a baking sheet with parchment paper.
- In a medium saucepan over low heat, melt 3 tablespoons of unsalted butter, stirring frequently to avoid browning.
- Add 10 oz marshmallows to the melted butter and stir continuously until smooth and fully melted, about 4-5 minutes.
- Remove from heat and stir in 1 teaspoon vanilla extract.
- Divide the marshmallow mixture evenly into three bowls. Quickly stir red gel food coloring into one bowl, blue into another, leaving the last one plain white.
- To each colored marshmallow bowl, add 2 cups (50g) Rice Krispies cereal. Fold gently but thoroughly to coat the cereal without crushing it.
- Working with one color at a time, press the mixture into the greased pan in an even 1-inch thick layer. Arrange colors side by side for solid color stars.
- Let the mixture cool and firm up at room temperature for about 30 minutes, or chill in the fridge for 15 minutes if desired.
- Using star-shaped cookie cutters, cut out stars from each colored section. Grease cutters lightly to prevent sticking and press firmly but gently.
- Transfer stars onto a parchment-lined baking sheet.
- Optional: decorate with edible glitter, sprinkles, or drizzle with melted white chocolate. Let decorations set before serving.
- Serve fresh or store in an airtight container at room temperature for up to 3 days.
Notes
Use gel food coloring to avoid thinning the marshmallow mixture. Do not over-press the cereal mixture to keep treats crispy. Fresh marshmallows melt smoother and hold shape better. Store in airtight container at room temperature for up to 3 days or freeze for up to 1 month. Let treats cool before cutting to avoid crumbling.
Nutrition
- Serving Size: One medium star
- Calories: 135
- Sugar: 18
- Sodium: 90
- Fat: 3
- Saturated Fat: 2
- Carbohydrates: 27
- Protein: 1
Keywords: Rice Krispie treats, patriotic dessert, red white and blue, Fourth of July, easy dessert, summer treats, marshmallow treats, crispy snacks


