“You have to try these bars — seriously, they’re like summer in a bite!” That was the unexpected text from my neighbor last weekend, just as the sun was peeking through the clouds after a rainy morning. I was skeptical; frozen treats usually mean hours of fuss or a blender battle, but this time, the promise was for something effortless and fresh. Turns out, those Refreshing No-Bake Frozen Strawberry Lemonade Bars weren’t just easy—they were downright addictive.
There’s something about the way the tart lemony zing meets the sweet, juicy strawberries that makes it impossible to stop at one square. Honestly, I’ve made them three times this week alone. The kitchen smells like a summer picnic, even though it’s barely warming up outside yet. The bars have this perfect icy, creamy texture that feels like a little reset after a long day—no oven, no stress, just pure refreshment.
I kept thinking about how perfect they’d be for a backyard get-together or even a quick solo treat after work. Plus, with strawberries still popping up at the market, it felt like the universe was nudging me to share this recipe with anyone who needs a little bright spot in their day.
So, if you’re craving something cool and tangy without the hassle, these bars might just become your new favorite go-to. It’s the kind of recipe that sticks around because it’s simple, satisfying, and honestly, a little bit joyful.
Why You’ll Love This Recipe
After testing this recipe multiple times (and sharing with a few friends who quickly became fans), I can say these Refreshing No-Bake Frozen Strawberry Lemonade Bars hit all the right notes. Here’s why they stand out:
- Quick & Easy: No baking means you can whip these up in about 20 minutes, then just freeze and relax. Perfect for those hot afternoons when turning on the oven feels like a mistake.
- Simple Ingredients: You don’t need any specialty items. Most are pantry staples or fresh produce you can grab at any grocery store or farmer’s market.
- Perfect for Summer: Whether it’s a picnic, a casual party, or just a cooling snack, these bars chill out guests with a refreshing burst of flavor.
- Crowd-Pleaser: Kids love the fruity sweetness, and adults appreciate the subtle tartness that balances it out. They’re a win across ages.
- Unbelievably Delicious: The combo of real strawberries and fresh lemon juice creates a natural brightness that’s not too sweet and totally satisfying.
What really sets this recipe apart is the way the base comes together—no complicated steps, just blending and layering. The crust is buttery but crumbly, holding the filling perfectly without getting soggy. And I love that you can swap in different citrus or berries if you want to experiment.
Honestly, it’s one of those recipes that makes you close your eyes after the first bite and just savor the moment. It’s a little slice of sunshine that’s easy enough for a weekday treat but special enough to share at a summer gathering. If you’re a fan of fruity desserts like the Creamy Pink Strawberry Cream Puff Bars or the Chocolate-Covered Strawberry Ice Cream Mousse Cups, you’ll find this recipe equally irresistible.
What Ingredients You Will Need
This recipe uses simple, wholesome ingredients to deliver bold flavor and a satisfying texture without any fuss. Most of these are staples or fresh seasonal picks, and you can easily swap a few items to suit your pantry or preferences.
- For the crust:
- 1 ½ cups graham cracker crumbs (about 12 full sheets, finely crushed)
- ⅓ cup unsalted butter, melted (I prefer Kerrygold for richness)
- 3 tablespoons granulated sugar (balances the tart filling)
- For the filling:
- 2 cups fresh strawberries, hulled and chopped (use ripe, juicy berries for best flavor)
- ½ cup freshly squeezed lemon juice (about 3 lemons; fresh is key here)
- 1 cup powdered sugar (adjust to taste if you like it less sweet)
- 1 ½ cups cream cheese, softened (room temperature for smooth blending)
- 1 teaspoon pure vanilla extract (adds warmth and depth)
- 1 cup heavy whipping cream, chilled (for that creamy, light texture)
- Optional garnish:
- Thin lemon slices or whole small strawberries for topping
- Fresh mint leaves (adds a nice pop of color and freshness)
Ingredient tips: Look for full-fat cream cheese and whipping cream to get the best texture and flavor. If you want a dairy-free option, try swapping cream cheese and heavy cream with coconut cream and a dairy-free cream cheese alternative.
Also, if you can’t find graham crackers, digestive biscuits or even crushed shortbread cookies work well for the crust. When I’ve made this in spring, I’ve swapped strawberries for fresh raspberries or a berry mix, which keeps it bright but offers a twist.
Equipment Needed
- 9×9-inch square baking pan (glass or metal works fine; glass makes it easier to see when bars are set)
- Mixing bowls (a couple of medium-size ones for crust and filling)
- Electric hand mixer or stand mixer (helps whip the cream and blend the filling smoothly)
- Food processor or blender (to puree the strawberries finely)
- Measuring cups and spoons (for accuracy—yes, even with no bake!)
- Rubber spatula (for folding the whipped cream gently)
- Plastic wrap or aluminum foil (to cover and freeze the bars)
If you don’t have a food processor, a blender or even a sturdy fork can work to mash the strawberries, though the texture might be chunkier. I’ve used a handheld mixer for whipping cream and cream cheese and it works just as well as a stand mixer.
For budget-friendly options, you can find basic baking pans and hand mixers online or at local stores without breaking the bank. I keep a silicone spatula handy since it scrapes bowls like a dream and lasts forever.
Preparation Method
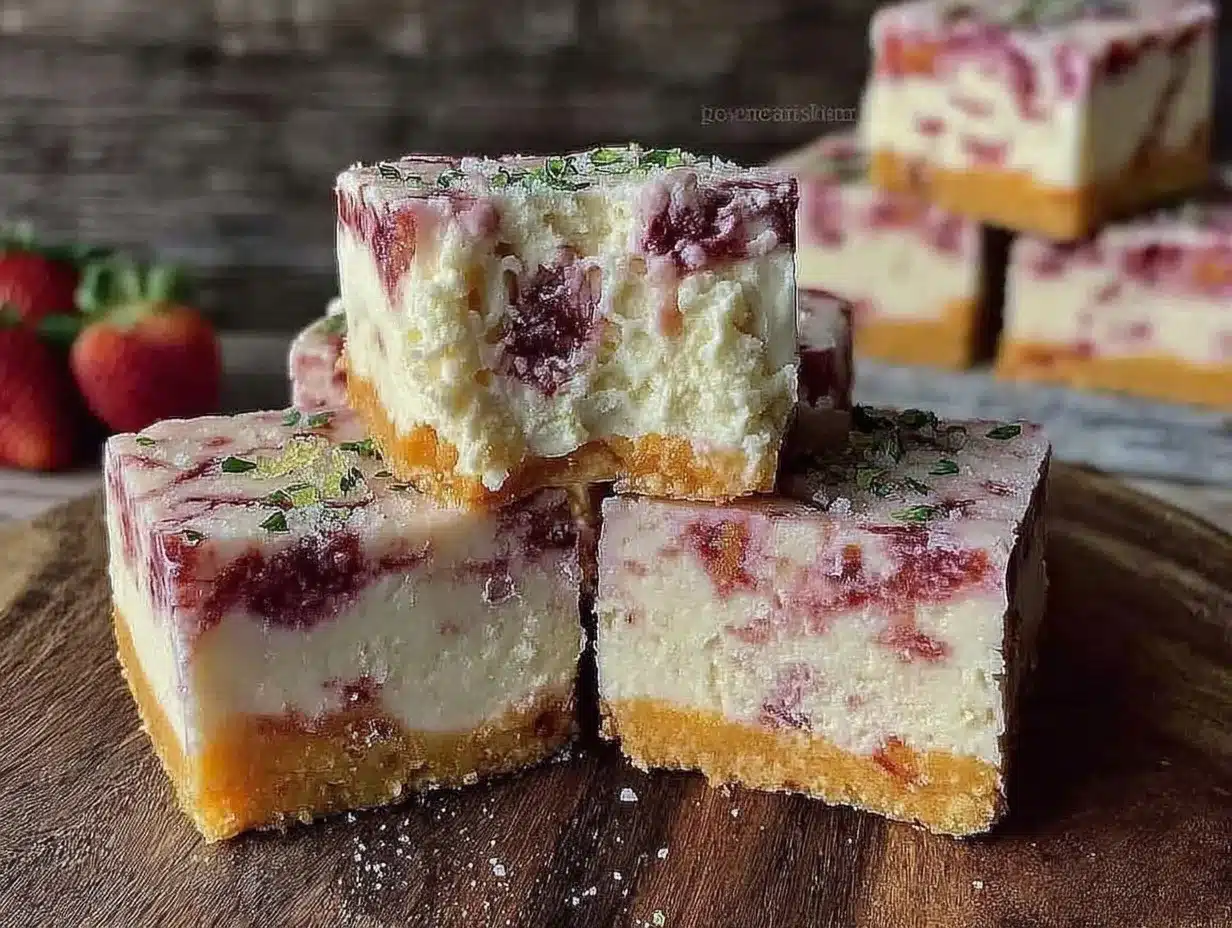
- Prepare the crust: In a medium bowl, combine 1 ½ cups graham cracker crumbs, ⅓ cup melted unsalted butter, and 3 tablespoons granulated sugar. Stir until the mixture resembles wet sand and holds together when pressed. This should take about 3 minutes.
- Press the crust: Transfer the crust mixture into your 9×9-inch pan. Use the back of a spoon or a flat-bottomed glass to press firmly and evenly into the bottom. You want a compact base but not too thick—about ¼ inch depth is good. Place the pan in the freezer while you prepare the filling, so the crust firms up. This chilling takes roughly 10 minutes.
- Make the strawberry puree: In a food processor or blender, pulse 2 cups of fresh strawberries until smooth. You can leave it slightly chunky if you prefer texture, but a smooth puree blends better with the filling. This step takes about 2 minutes.
- Mix the filling base: In a large bowl, beat 1 ½ cups softened cream cheese with 1 cup powdered sugar and 1 teaspoon vanilla extract until smooth and creamy. Use an electric mixer on medium speed; scraping the sides occasionally helps get a silky texture. This will take about 3-5 minutes.
- Add lemon juice and strawberry puree: Slowly beat in ½ cup fresh lemon juice, followed by the strawberry puree. Mix until well combined, and you have a smooth, pink mixture. The tangy lemon and sweet strawberry balance beautifully here.
- Whip the cream: In a separate chilled bowl, whip 1 cup heavy cream to stiff peaks using a hand or stand mixer. This usually takes around 3-4 minutes on medium-high speed. Be careful not to overwhip or you’ll end up with butter!
- Fold whipped cream into filling: Gently fold the whipped cream into the cream cheese mixture using a rubber spatula. Use slow, sweeping motions to keep the airy texture intact. This step helps keep the bars light and creamy rather than dense.
- Assemble the bars: Pour the filling over the chilled crust and spread evenly with a spatula. Smooth the top carefully to get an even layer.
- Freeze until set: Cover the pan tightly with plastic wrap or foil and freeze for at least 4 hours, preferably overnight. The bars should be firm to the touch but still soft enough to cut cleanly.
- Serve and garnish: Before serving, let the bars sit at room temperature for 5-10 minutes to soften slightly. Garnish with thin lemon slices, fresh strawberries, or mint leaves for a pretty presentation.
Pro tip: If your bars are too frozen to cut nicely, leave them out a bit longer or run a sharp knife under hot water before slicing for clean edges.
Cooking Tips & Techniques
One key to these bars turning out just right is the texture of the filling. I learned the hard way that room temperature cream cheese is non-negotiable—cold cream cheese turns lumpy and makes mixing frustrating. So, let it sit out for at least 30 minutes beforehand.
Another tip: whip your cream to stiff peaks but not grainy. It should hold its shape but still be smooth. Overwhipping can cause the mixture to separate, which you don’t want in a no-bake dessert.
When folding whipped cream into the filling, take your time and use a gentle hand. This maintains the lightness that makes the bars feel like a treat rather than a heavy slice.
For the crust, pressing firmly is important so it holds together after freezing. If it’s too loose, the bars will crumble when cut. I like to freeze the crust before adding the filling to keep it crisp.
Timing-wise, prepping everything in stages works best. While the crust chills, you can blend the strawberries and whip the filling. This multitasking saves time and keeps things moving smoothly.
Lastly, if you want to avoid freezer burn or off-flavors, wrap the bars tightly and consider storing them in an airtight container or freezer bag after freezing.
Variations & Adaptations
- Berry Twist: Swap strawberries for raspberries, blueberries, or blackberries. Mixed berries work great too, especially fresh in summer or frozen in cooler months.
- Gluten-Free Crust: Use gluten-free graham crackers or almond flour mixed with melted butter for a nutty flavor and gluten-free option.
- Dairy-Free Version: Replace cream cheese and heavy cream with coconut cream and a plant-based cream cheese alternative. The texture will be a bit different but still delicious and refreshing.
- Extra Citrus Kick: Add a teaspoon of lemon zest or lime juice to the filling for a sharper citrus note.
- Alcohol Infusion: For adults-only gatherings, a splash of limoncello or vodka mixed into the filling gives a grown-up twist without overpowering the bars.
Personally, I’ve tried adding a layer of crushed pistachios on top just before freezing—adds a fun crunch and a pop of color that guests adore. You can also drizzle a little white chocolate over the top right before serving for a sweet contrast.
Serving & Storage Suggestions
These bars are best served slightly thawed—about 5 to 10 minutes out of the freezer—so they’re creamy but still hold their shape. Cut them into small squares for easy snacking or slightly larger pieces for dessert plates.
Pair with a cold glass of iced tea, sparkling water with lemon, or even a chilled rosé for a summer vibe. If you want to turn them into a more indulgent treat, a dollop of whipped cream or a scoop of vanilla ice cream on the side works wonders.
To store, cover the bars tightly with plastic wrap or transfer them to an airtight container and keep frozen. They’ll stay fresh for up to 2 weeks. When reheating or thawing, avoid leaving them out too long or they’ll get mushy.
Flavors actually deepen after a day in the freezer, so making them a day ahead is a great option for parties or meal prep. Just remember to let them soften a bit before serving so the texture remains perfect.
Nutritional Information & Benefits
Each serving of these Refreshing No-Bake Frozen Strawberry Lemonade Bars packs a good mix of nutrients and indulgence. Strawberries are rich in vitamin C and antioxidants, which support immunity and skin health. The lemon juice adds a bright dose of vitamin C as well.
Thanks to the cream cheese and heavy cream, these bars provide calcium and protein, though they are still a dessert and best enjoyed in moderation.
For those watching carbs or sugar, you can reduce powdered sugar or swap for a natural sweetener like erythritol with some tweaking to maintain texture.
Since the recipe can be adapted gluten-free and dairy-free, it suits many dietary needs without sacrificing flavor or satisfaction.
Conclusion
These Refreshing No-Bake Frozen Strawberry Lemonade Bars quickly became a staple in my recipe box because they’re just that easy and tasty. Whether you’re craving a quick cool-down treat or want to impress at your next summer gathering, this recipe delivers both simplicity and flavor.
Feel free to tweak the berries, citrus, or crust to make it your own. I love how adaptable it is without losing that fresh, bright character.
Honestly, it’s one of those recipes I keep coming back to, especially after a long day when I just want something sweet and satisfying without turning on the oven.
Give it a try and let me know how you personalize your bars — I’d love to hear your twists and tips!
FAQs
Can I make these bars ahead of time?
Absolutely! They actually taste better after setting overnight in the freezer. Just cover tightly to avoid freezer burn.
How do I cut the bars without them falling apart?
Let bars thaw for 5-10 minutes at room temperature before slicing. Using a sharp knife dipped in hot water and wiped dry helps get clean cuts.
Can I use frozen strawberries?
Yes, but thaw and drain excess liquid before blending to avoid a watery filling.
Is it possible to make these bars vegan?
Yes! Use vegan cream cheese and coconut cream instead of dairy and ensure your crust uses vegan-friendly cookies or crackers.
What’s the best way to store leftovers?
Keep bars in an airtight container in the freezer for up to 2 weeks. Thaw briefly before serving for best texture.
Pin This Recipe!
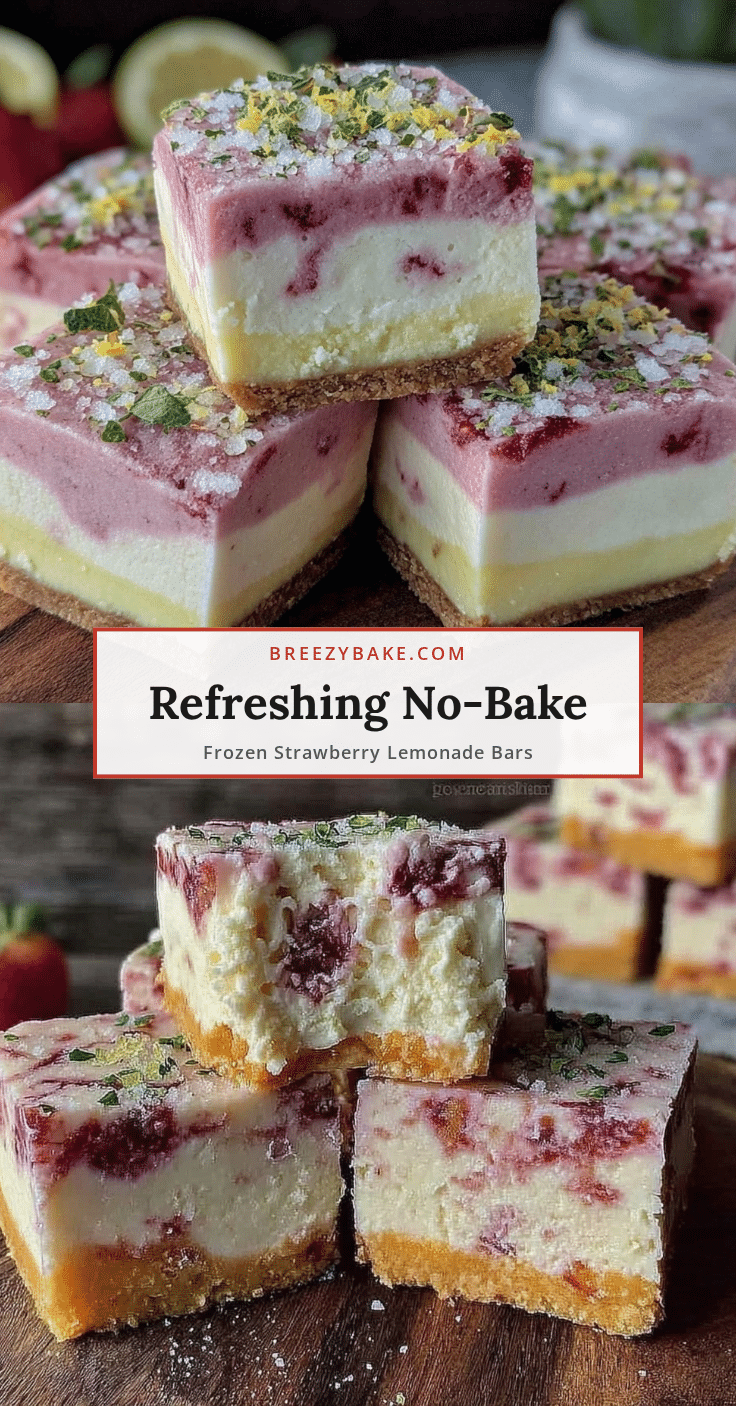
Refreshing No-Bake Frozen Strawberry Lemonade Bars
These no-bake frozen bars combine tart lemon juice with sweet strawberries for a refreshing summer treat that’s easy to make and perfect for any occasion.
- Prep Time: 20 minutes
- Cook Time: 0 minutes
- Total Time: 4 hours 20 minutes
- Yield: 16 servings 1x
- Category: Dessert
- Cuisine: American
Ingredients
- 1 ½ cups graham cracker crumbs (about 12 full sheets, finely crushed)
- ⅓ cup unsalted butter, melted
- 3 tablespoons granulated sugar
- 2 cups fresh strawberries, hulled and chopped
- ½ cup freshly squeezed lemon juice (about 3 lemons)
- 1 cup powdered sugar
- 1 ½ cups cream cheese, softened
- 1 teaspoon pure vanilla extract
- 1 cup heavy whipping cream, chilled
- Optional garnish: thin lemon slices, whole small strawberries, fresh mint leaves
Instructions
- In a medium bowl, combine graham cracker crumbs, melted butter, and granulated sugar. Stir until mixture resembles wet sand and holds together when pressed, about 3 minutes.
- Press the crust mixture firmly and evenly into the bottom of a 9×9-inch pan to about ¼ inch depth. Freeze for 10 minutes to firm up.
- Puree the fresh strawberries in a food processor or blender until smooth or slightly chunky, about 2 minutes.
- In a large bowl, beat softened cream cheese with powdered sugar and vanilla extract until smooth and creamy, about 3-5 minutes.
- Slowly beat in lemon juice followed by the strawberry puree until well combined.
- In a separate chilled bowl, whip heavy cream to stiff peaks, about 3-4 minutes.
- Gently fold whipped cream into the cream cheese mixture using a rubber spatula to keep the mixture light and airy.
- Pour the filling over the chilled crust and spread evenly with a spatula.
- Cover the pan tightly with plastic wrap or foil and freeze for at least 4 hours or overnight until firm.
- Before serving, let bars sit at room temperature for 5-10 minutes to soften slightly. Garnish with lemon slices, strawberries, or mint leaves.
Notes
Use room temperature cream cheese for smooth blending. Whip cream to stiff peaks but avoid overwhipping. Press crust firmly and freeze before adding filling to prevent sogginess. Let bars soften 5-10 minutes before slicing for clean cuts. For dairy-free, substitute cream cheese and heavy cream with coconut cream and dairy-free alternatives. For gluten-free, use gluten-free graham crackers or almond flour crust.
Nutrition
- Serving Size: 1 bar (assuming 16 b
- Calories: 210
- Sugar: 13
- Sodium: 110
- Fat: 15
- Saturated Fat: 9
- Carbohydrates: 18
- Fiber: 1
- Protein: 3
Keywords: no-bake, frozen, strawberry, lemonade, bars, summer dessert, easy dessert, refreshing, no oven


