Introduction
“You’ve got curry again? Seriously?” my roommate groaned, as I brought another steaming plate of chicken katsu curry to the table. Honestly, I couldn’t blame him—I’d made this dish three times that week. It started one hectic evening when I was craving something comforting but quick after a long day of juggling work calls and grocery runs. I improvised with what I had—panko breadcrumbs, chicken breasts, a jar of curry roux, and some rice—and guess what? It turned into a genuine kitchen win.
The magic was in how crispy the chicken came out, paired with that silky, fluffy Japanese rice soaking up the rich curry sauce. I remember that first bite clearly—the crunchy exterior giving way to tender, juicy chicken, all wrapped in a warm, savory blanket of curry. It was the kind of meal that made the chaos outside the kitchen fade away, even if just for a moment. Now, whenever I make this crispy chicken katsu curry with fluffy Japanese rice, it feels like a little reset button, comforting and satisfying in all the right ways.
There’s just something about the texture contrast and the layers of flavor that kept me coming back. Plus, it’s no fuss—no fancy ingredients, no crazy prep, just honest cooking that fills the belly and soothes the soul. I think that’s why this recipe has stuck around in my rotation, showing up on random weeknights and impromptu dinners alike. If you ever find yourself craving a meal that’s crispy, hearty, and soul-soothing, this might be your new go-to too.
Why You’ll Love This Recipe
This crispy chicken katsu curry with fluffy Japanese rice has been thoroughly tested in my kitchen, and each time it nails the balance between texture, flavor, and ease. Here’s why it might just become your favorite comfort food:
- Quick & Easy: The whole meal comes together in about 40 minutes, perfect for busy weeknights or those last-minute dinner plans when you want something satisfying without the hassle.
- Simple Ingredients: You likely already have most of what you need—panko, chicken, Japanese curry roux, and rice. No obscure spices or complicated sauces required.
- Perfect for Cozy Dinners: Whether it’s a chilly evening or you just want a meal that feels like a hug, this dish fits the bill.
- Crowd-Pleaser: My friends, who aren’t always the biggest fans of curry, have asked for this again and again. Kids love the crunchy chicken, and adults appreciate the rich curry sauce.
- Unbelievably Delicious: The crispy panko crust contrasts beautifully with the tender chicken inside, while the Japanese curry sauce adds a warm, slightly sweet, and savory depth that’s truly comforting.
What sets this recipe apart is the attention paid to the texture of the rice and the chicken. I always use short-grain Japanese rice to get that perfect fluffy stickiness, which holds the sauce just right. The chicken is pounded thin for even cooking and coated generously with panko, which I recommend from brands like Kikkoman for authentic crunch. Plus, the curry sauce is simmered slowly with a touch of honey for a subtle sweetness that feels like a gentle surprise.
This isn’t just another chicken curry; it’s a dish that brings comfort food vibes with a Japanese twist—and trust me, it’s the kind of meal you’ll want to make again and again, just like I have.
What Ingredients You Will Need
This recipe uses simple, wholesome ingredients to deliver bold flavor and satisfying texture without the fuss. Most items are pantry staples, and the fresh chicken and rice make it feel like a home-cooked feast. Here’s what you’ll need:
For the Chicken Katsu
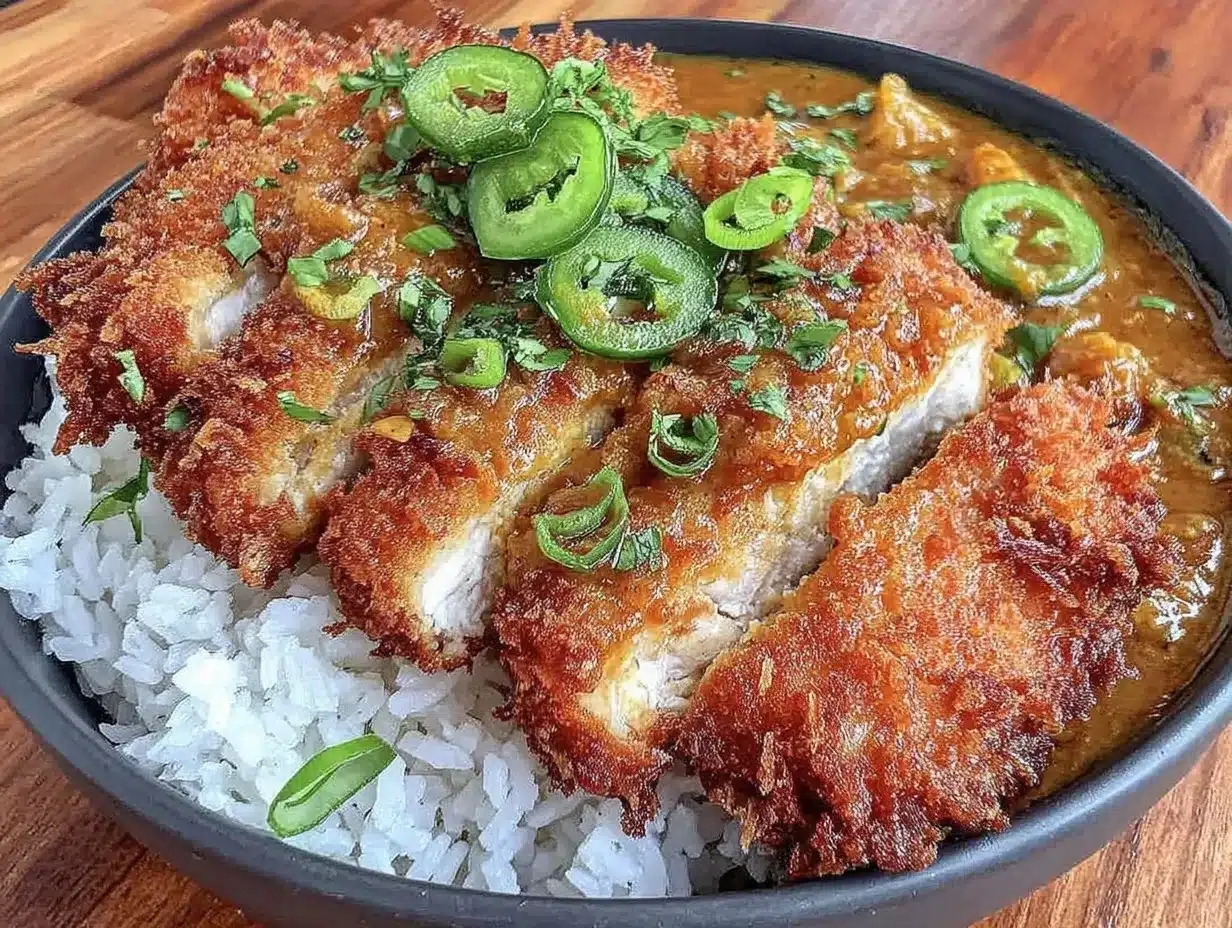
- 2 boneless, skinless chicken breasts (about 12 oz / 340 g), pounded to about ½ inch (1.25 cm) thickness
- Salt and black pepper, to taste
- ½ cup (60 g) all-purpose flour
- 2 large eggs, beaten, room temperature
- 1 to 1 ½ cups (100-150 g) panko breadcrumbs (Japanese-style breadcrumbs for the crispiest crust)
- Vegetable oil (or canola oil) for frying (about 1 inch depth)
For the Curry Sauce
- 1 medium onion, finely chopped
- 2 medium carrots, peeled and sliced
- 2 medium potatoes, peeled and diced
- 3 cups (720 ml) chicken broth or water
- 1 box (100 g) Japanese curry roux blocks (mild or medium heat, I use Golden Curry brand)
- 1 tablespoon honey or maple syrup (optional, for gentle sweetness)
For the Rice
- 1 ½ cups (270 g) Japanese short-grain rice (look for brands like Nishiki or Koshihikari)
- 1 ¾ cups (420 ml) water
Ingredient notes: If you want to keep this gluten-free, swap the all-purpose flour for rice flour and choose a gluten-free panko alternative. For dairy-free curry, double-check your curry roux ingredients or make a simple homemade roux with curry powder and broth. Using fresh vegetables is best, but frozen carrots and potatoes work in a pinch.
Equipment Needed
- Heavy-bottomed frying pan or cast iron skillet for frying chicken (deep enough for about 1 inch of oil)
- Medium saucepan with a lid for cooking rice (or a rice cooker if you have one, which makes life easier!)
- Medium pot for simmering curry sauce
- Mixing bowls for dredging chicken in flour, egg, and panko
- Sharp knife and cutting board
- Tongs or slotted spoon for frying chicken
- Meat mallet or rolling pin (for pounding chicken evenly)
If you don’t have a deep pan for frying, a wok or even a deep skillet works well. I’ve tried both and prefer cast iron for its heat retention, but nonstick pans can help with cleanup. For rice, a quality rice cooker is a game-changer, but stovetop works perfectly fine if you pay attention to simmer time and resting.
Preparation Method
- Prepare the Rice: Rinse the Japanese short-grain rice under cold water until the water runs clear to remove excess starch. Drain well.
Place rice and 1 ¾ cups (420 ml) water in a saucepan. Let it soak for 20-30 minutes if you can spare the time (this helps it cook more evenly).
Bring to a boil over medium-high heat uncovered, then reduce heat to low, cover, and simmer for 15 minutes. Turn off heat and let it rest, covered, for 10 minutes. Fluff with a fork before serving. - Prep the Chicken: Pound chicken breasts evenly to about ½ inch (1.25 cm) thickness. Season both sides with salt and pepper.
Set up a dredging station: one bowl with flour, one with beaten eggs, and one with panko breadcrumbs.
Coat chicken first in flour, shaking off excess, then dip into egg, then press firmly into panko to coat well. Set aside on a plate. - Fry the Chicken: Heat about 1 inch of vegetable oil in a heavy pan to 350°F (175°C). Test by dropping a few breadcrumbs in; they should sizzle immediately.
Carefully add chicken breasts, cooking 3-4 minutes per side, until golden brown and cooked through (internal temp 165°F / 74°C). Avoid overcrowding the pan; fry in batches if needed.
Transfer cooked chicken to a wire rack or paper towels to drain excess oil. - Make the Curry Sauce: In a medium pot, sauté chopped onions in a tablespoon of oil over medium heat until translucent and slightly caramelized (about 5-7 minutes).
Add carrots and potatoes, stirring for 2 minutes.
Pour in chicken broth and bring to a boil. Reduce heat and simmer for 15-20 minutes, or until vegetables are tender.
Turn off heat, break curry roux into blocks, and stir into the pot until fully dissolved.
Turn heat back to low and simmer gently for 5 minutes until sauce thickens. Stir in honey if using to balance flavors. - Slice & Serve: Slice the crispy chicken katsu into strips.
Plate a generous scoop of fluffy Japanese rice, ladle curry sauce around or over the rice, then place chicken strips on top.
Garnish with chopped scallions or pickled ginger if you like.
Serve immediately for best texture contrast.
Cooking Tips & Techniques
Getting that perfect crisp on your chicken katsu while keeping the inside juicy can be tricky, but a few tricks helped me every time:
- Pounding the chicken evenly is key to quick, uniform cooking. It prevents dryness in thinner areas and undercooking in thicker parts.
- Use panko breadcrumbs specifically—they’re lighter and airier than regular breadcrumbs and give that signature crunch.
- Don’t skip the resting step after frying. Letting the chicken sit on a wire rack (not paper towels) keeps the crust crispy by allowing excess oil to drip away.
- Control oil temperature carefully. Too hot, and the crust burns before the chicken cooks through; too cool, and the chicken absorbs excess oil and becomes greasy.
- When cooking rice, rinsing is essential to avoid gummy clumps. The soak time is optional but does make a difference, especially with stovetop methods.
- Simmer curry gently—boiling can cause the roux to separate or scorch, giving a bitter taste.
I’ve also learned from experience that prepping all ingredients before frying saves a lot of stress. Once you start frying, things move fast, and it’s nice to have everything ready to go. For a shortcut, you can use frozen pre-cut veggies, but fresh always tastes better.
Variations & Adaptations
There’s lots of room to make this crispy chicken katsu curry with fluffy Japanese rice your own, depending on your taste or dietary needs:
- Vegetarian Version: Swap chicken for firm tofu or eggplant slices, bread and fry them the same way. Use vegetable broth and vegetarian curry roux.
- Spicy Twist: Add a teaspoon of cayenne or chili powder to the curry roux or sprinkle shichimi togarashi (Japanese seven-spice) on the chicken before serving.
- Gluten-Free Option: Use rice flour and gluten-free panko breadcrumbs. Check curry roux ingredients carefully or make a homemade curry sauce with gluten-free curry powder and cornstarch.
- Air Fryer Friendly: For less oil, try air frying the breaded chicken at 375°F (190°C) for about 15 minutes, flipping halfway. It won’t be quite the same crunch but still delicious.
- Seasonal Veggies: Swap potatoes and carrots for sweet potatoes, pumpkin, or green beans depending on the season.
I personally love adding a splash of coconut milk to the curry for a creamier texture sometimes, especially when making it for guests. It adds a subtle richness that’s hard to resist.
Serving & Storage Suggestions
This dish is best enjoyed fresh, right after plating, while the chicken is still crispy and the rice is warm and fluffy. Serve with a side of lightly pickled cucumbers or a simple green salad to cut through the richness.
For drinks, a cold Japanese beer or green tea pairs beautifully, balancing the curry’s warm spices.
If you have leftovers, store the curry sauce and rice separately from the chicken in airtight containers in the refrigerator for up to 2 days. Reheat the curry and rice gently on the stove or microwave, and crisp the chicken again in a hot oven or toaster oven for 5-7 minutes to bring back some crunch.
Keep in mind, the longer the chicken sits in the sauce, the softer the crust becomes, so serving immediately is ideal. The flavors in the curry actually deepen overnight, so the sauce can taste even better the next day.
Nutritional Information & Benefits
Per serving, this meal provides approximately 600-700 calories, featuring a balanced mix of protein from the chicken, carbohydrates from the rice, and fiber and vitamins from the vegetables in the curry. The chicken offers lean protein essential for muscle repair and satiety.
Japanese short-grain rice is a great source of energy, with a stickier texture that’s easier for digestion compared to some other rice types. The curry roux contains turmeric and other spices which have anti-inflammatory properties.
For those watching gluten or carbs, substitutions like gluten-free panko or cauliflower rice can be made, though they change the experience slightly.
Overall, this recipe strikes a nice balance between indulgence and nourishment, making it a comforting meal you can feel good about.
Conclusion
This crispy chicken katsu curry with fluffy Japanese rice recipe has earned a permanent spot in my kitchen for good reason. It’s approachable, satisfying, and full of textures and flavors that make you pause and appreciate simple ingredients done well. Whether you’re cooking for one or feeding a group, this meal delivers without fuss or fancy tricks.
Feel free to tweak it based on what you have on hand or your spice preference. I find myself making it over and over, sometimes switching up the veggies or trying a new curry roux brand. It’s that kind of recipe that welcomes your personal touch.
When you make it, I’d love to hear how it turned out or any fun twists you tried. And if you enjoy hearty, crispy chicken dishes, you might also appreciate the crispy super bowl chicken nacho crust pizza or the healthy chicken veggie skillet wraps I’ve shared before. Happy cooking!
FAQs
Can I use chicken thighs instead of breasts for this recipe?
Absolutely! Boneless, skinless chicken thighs work great and stay juicy. Just adjust the cooking time slightly since thighs can be thicker and may take a bit longer to cook through.
How do I make the Japanese rice fluffier?
Rinsing the rice well to remove excess starch and soaking it for 20-30 minutes before cooking helps achieve that signature fluffy texture. Also, let the rice rest covered after cooking to finish steaming.
Is there a vegetarian curry roux option?
Yes, some brands offer vegetarian or vegan curry roux blocks. Alternatively, you can make your own curry sauce using curry powder, vegetable broth, and a thickening agent like cornstarch.
Can I bake the chicken katsu instead of frying?
You can bake it for a lighter option: place breaded chicken on a wire rack over a baking sheet, spray with oil, and bake at 425°F (220°C) for about 20-25 minutes, flipping halfway. It won’t be as crispy as frying, but still tasty.
How long can I store leftovers?
Store curry sauce and rice separately from chicken in the fridge for up to 2 days. Reheat gently and crisp the chicken again in the oven for best texture.
Pin This Recipe!
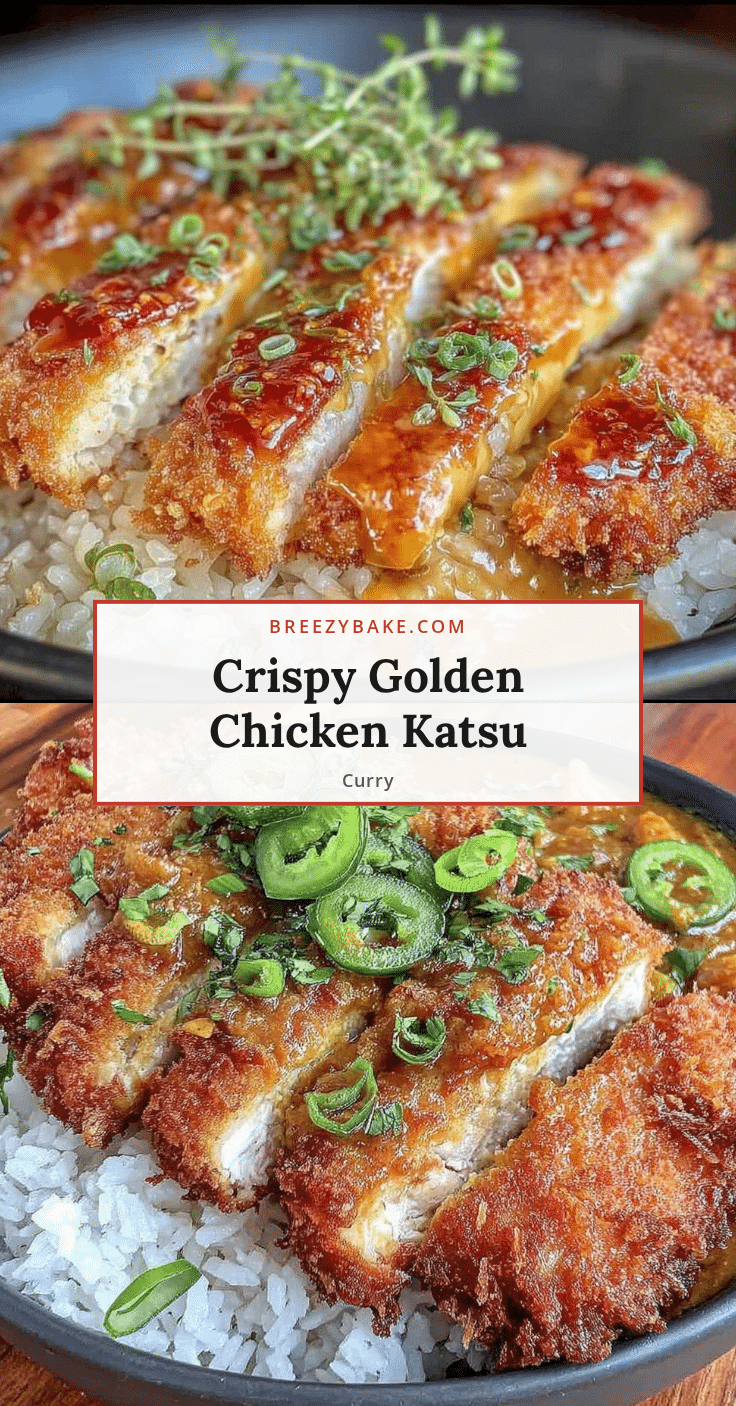
Crispy Chicken Katsu Curry Recipe Perfect for Fluffy Japanese Rice
A comforting and crispy chicken katsu served with fluffy Japanese short-grain rice and rich, savory Japanese curry sauce. Quick and easy to prepare, perfect for cozy dinners.
- Prep Time: 15 minutes
- Cook Time: 25 minutes
- Total Time: 40 minutes
- Yield: 2 servings 1x
- Category: Main Course
- Cuisine: Japanese
Ingredients
- 2 boneless, skinless chicken breasts (about 12 oz / 340 g), pounded to about ½ inch (1.25 cm) thickness
- Salt and black pepper, to taste
- ½ cup (60 g) all-purpose flour
- 2 large eggs, beaten, room temperature
- 1 to 1 ½ cups (100–150 g) panko breadcrumbs (Japanese-style breadcrumbs for the crispiest crust)
- Vegetable oil (or canola oil) for frying (about 1 inch depth)
- 1 medium onion, finely chopped
- 2 medium carrots, peeled and sliced
- 2 medium potatoes, peeled and diced
- 3 cups (720 ml) chicken broth or water
- 1 box (100 g) Japanese curry roux blocks (mild or medium heat, Golden Curry brand recommended)
- 1 tablespoon honey or maple syrup (optional, for gentle sweetness)
- 1 ½ cups (270 g) Japanese short-grain rice (brands like Nishiki or Koshihikari)
- 1 ¾ cups (420 ml) water
Instructions
- Prepare the Rice: Rinse the Japanese short-grain rice under cold water until the water runs clear to remove excess starch. Drain well. Place rice and 1 ¾ cups (420 ml) water in a saucepan. Let it soak for 20-30 minutes if possible. Bring to a boil over medium-high heat uncovered, then reduce heat to low, cover, and simmer for 15 minutes. Turn off heat and let it rest, covered, for 10 minutes. Fluff with a fork before serving.
- Prep the Chicken: Pound chicken breasts evenly to about ½ inch (1.25 cm) thickness. Season both sides with salt and pepper. Set up a dredging station: one bowl with flour, one with beaten eggs, and one with panko breadcrumbs. Coat chicken first in flour, shaking off excess, then dip into egg, then press firmly into panko to coat well. Set aside on a plate.
- Fry the Chicken: Heat about 1 inch of vegetable oil in a heavy pan to 350°F (175°C). Test by dropping a few breadcrumbs in; they should sizzle immediately. Carefully add chicken breasts, cooking 3-4 minutes per side, until golden brown and cooked through (internal temp 165°F / 74°C). Avoid overcrowding the pan; fry in batches if needed. Transfer cooked chicken to a wire rack or paper towels to drain excess oil.
- Make the Curry Sauce: In a medium pot, sauté chopped onions in a tablespoon of oil over medium heat until translucent and slightly caramelized (about 5-7 minutes). Add carrots and potatoes, stirring for 2 minutes. Pour in chicken broth and bring to a boil. Reduce heat and simmer for 15-20 minutes, or until vegetables are tender. Turn off heat, break curry roux into blocks, and stir into the pot until fully dissolved. Turn heat back to low and simmer gently for 5 minutes until sauce thickens. Sti…
- Slice & Serve: Slice the crispy chicken katsu into strips. Plate a generous scoop of fluffy Japanese rice, ladle curry sauce around or over the rice, then place chicken strips on top. Garnish with chopped scallions or pickled ginger if desired. Serve immediately for best texture contrast.
Notes
Pound chicken evenly for uniform cooking. Use Japanese-style panko breadcrumbs for best crunch. Rest chicken on a wire rack after frying to keep crust crispy. Control oil temperature carefully to avoid greasy or burnt crust. Rinse and soak rice for fluffier texture. Simmer curry gently to prevent bitterness. For gluten-free, substitute flour and panko accordingly. Air fryer and baking options available for lighter cooking.
Nutrition
- Serving Size: 1 serving (includes
- Calories: 650
- Sugar: 8
- Sodium: 900
- Fat: 25
- Saturated Fat: 4
- Carbohydrates: 70
- Fiber: 6
- Protein: 40
Keywords: chicken katsu, Japanese curry, crispy chicken, Japanese rice, comfort food, panko chicken, curry sauce, easy dinner


