The moment my kitchen filled with the sharp-sweet aroma of sour cherries simmering, I knew something special was happening. Honestly, I wasn’t planning on making a pie that day—just a quick snack to use up a basket of tart cherries that looked a little sad on the counter. I’d always been a bit wary of sour cherry pie, thinking it might be too puckery or dry. But that afternoon, I decided to take a chance and whip up what would become my perfect sour cherry pie with flaky lattice crust.
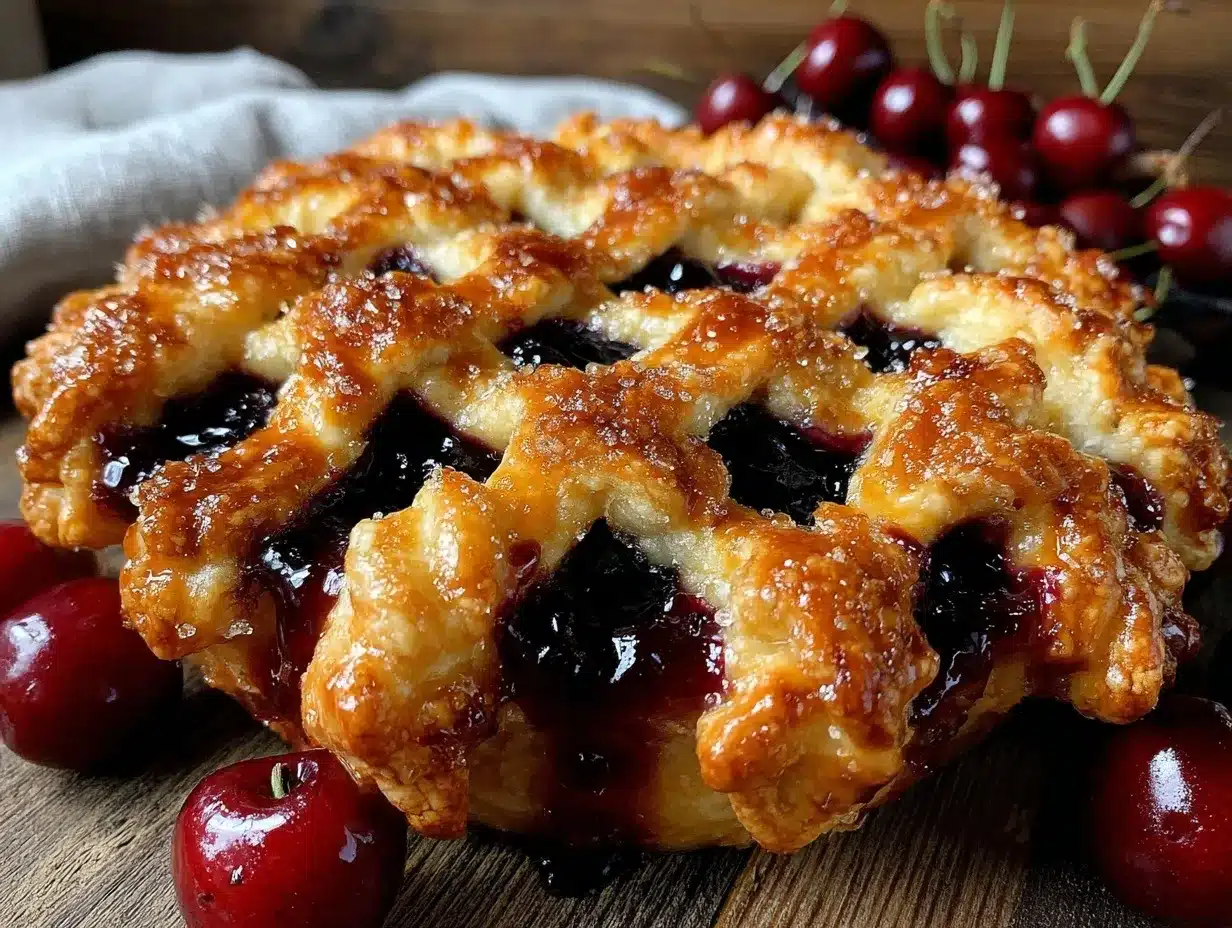
There’s something quietly satisfying about weaving those golden strips of crust over a bubbling, ruby-red cherry filling. The crust, flaky and tender, contrasts beautifully with the bright, juicy cherries. It’s a simple recipe, but you know, the kind that sticks with you—not because it’s fussy, but because it just hits the right note every single time. It’s one of those pies that people ask for again and again, and I don’t mind sharing the secrets behind it.
Years ago, I stumbled upon this recipe while poking through an old family cookbook, and it quickly became my go-to for potlucks and cozy Sunday dinners. It’s not just a pie; it’s a little moment of calm and joy in the kitchen. And if you’re wondering what makes this sour cherry pie stand out, well, it’s all in the balance—the tartness of the cherries, the buttery crust, and that classic lattice top that lets the filling peek through like a jewel.
So, if you’ve got a basket of sour cherries or a craving for a pie that’s both nostalgic and fresh, this recipe might just become your new favorite too.
Why You’ll Love This Recipe
After making this perfect sour cherry pie with flaky lattice crust more times than I can count, I’ve picked up a few insights that really make it shine. This isn’t just any pie; it’s a recipe that feels approachable but delivers on taste and texture every time. Here’s why it’s worth your time:
- Quick & Easy: From start to finish, you can have this pie ready to pop in the oven in about 30 minutes, making it great for those last-minute dessert plans or weekend baking bursts.
- Simple Ingredients: No need for fancy or hard-to-find stuff. The recipe uses pantry staples and fresh cherries—nothing complicated, nothing intimidating.
- Perfect for Gatherings: Whether it’s a picnic, holiday dessert table, or a cozy dinner, this pie fits right in and impresses without stress.
- Crowd-Pleaser: Kids and adults alike love the balance of sweet and tart, and the flaky crust is always a hit.
- Unbelievably Delicious: The lattice crust isn’t just for looks—it crisps up beautifully, adding that buttery crunch that pairs so well with the juicy cherry filling.
What really sets this recipe apart is the crust technique. I’ve found that chilling the dough and handling it gently makes all the difference in achieving that flaky texture. Plus, the lattice top isn’t just decorative—it lets the filling bubble and caramelize just right. I also like to add a touch of almond extract to the filling for a subtle, unexpected twist that brightens the whole pie.
This sour cherry pie recipe isn’t just about dessert. It’s about the warm, satisfied silence that follows the first bite. And honestly, it’s become my go-to when I want to share something homemade that feels both classic and a little special, without any fuss.
What Ingredients You Will Need
This recipe uses simple, wholesome ingredients to deliver bold flavor and a satisfying texture without the fuss. Most of these are pantry staples, with the star being fresh or frozen sour cherries—both work great depending on the season.
- For the crust:
- All-purpose flour – 2 ½ cups (310g), sifted for a tender crust
- Unsalted butter – 1 cup (226g), cold and cubed (I like Plugrá or Kerrygold for richness)
- Granulated sugar – 1 tablespoon (adds subtle sweetness)
- Salt – 1 teaspoon (balances the sweetness)
- Ice water – 6 to 8 tablespoons (keeps the dough flaky, add gradually)
- For the filling:
- Sour cherries – 5 cups (about 700g), pitted (fresh or frozen, thawed and drained)
- Granulated sugar – 1 cup (200g), adjust if cherries are very tart
- Cornstarch – 3 tablespoons (thickens the filling without cloudiness)
- Almond extract – ½ teaspoon (optional, but it adds a lovely depth)
- Lemon juice – 1 tablespoon (brightens the tart cherries)
- Butter – 2 tablespoons, cut into small pieces (for richness in the filling)
- For the topping:
- Egg yolk – 1, beaten with 1 tablespoon water (for egg wash, adds golden color)
- Coarse sugar – 1 tablespoon (sprinkled on top for crunch and sparkle)
If you want a gluten-free crust, I recommend trying almond flour mixed with tapioca starch, but for the classic flaky texture, all-purpose flour does the trick best. And if you don’t have almond extract, vanilla works fine, but that little nutty hint really makes the filling sing.
In summer, swapping fresh cherries with frozen works just fine, and sometimes I sneak in a handful of fresh blueberries for a twist. This pie is pretty forgiving, so feel free to experiment a bit.
Equipment Needed
- 9-inch (23 cm) pie dish – ceramic or glass works well for even baking
- Mixing bowls – medium and large for dough and filling
- Pastry blender or food processor – for cutting butter into flour quickly (I use a pastry blender, but a fork works if you don’t have one)
- Rolling pin – for rolling out the dough evenly (a lightly floured surface helps keep it from sticking)
- Sharp knife or pizza cutter – to cut the lattice strips
- Baking sheet – to place the pie on while baking (to catch any drips)
- Cooling rack – to let the pie cool properly before slicing
If you’re short on tools, no worries! You can use your hands to gently mix the dough if you don’t have a pastry blender. I’ve done it plenty of times, and it just takes a bit more patience. Also, a silicone baking mat helps with rolling out dough without sticking, but parchment paper does the job just as well.
Keeping your butter and water cold is crucial, so I often pop the mixing bowl in the fridge while prepping other ingredients—helps the dough stay flaky instead of greasy. Trust me, it’s one of those little things that makes all the difference.
Preparation Method
- Make the crust dough: In a large bowl, whisk together the sifted flour, sugar, and salt. Add the cold, cubed butter. Use a pastry blender or your fingertips to cut the butter into the flour until the mixture resembles coarse crumbs with pea-sized pieces of butter remaining. This texture is key for a flaky crust. (About 5 minutes)
- Add ice water: Gradually sprinkle 6 tablespoons of ice water over the flour mixture. Gently mix with a fork or your hands until the dough just comes together. Add more water, one tablespoon at a time, if needed. The dough should hold together without being sticky. Divide into two discs, wrap in plastic, and refrigerate for at least 1 hour. (Hands-on time: 10 minutes, chilling time: 1 hour)
- Prepare the filling: In a medium bowl, combine the pitted sour cherries, sugar, cornstarch, almond extract, and lemon juice. Toss gently until everything is evenly coated. Let it sit while the dough chills so the flavors meld. (5 minutes)
- Roll out the bottom crust: On a lightly floured surface, roll one dough disc into a 12-inch (30 cm) circle. Carefully transfer it into your pie dish, letting the edges hang over slightly. Press gently to fit the dish and trim excess dough to about 1 inch beyond the rim. (10 minutes)
- Add the filling: Pour the cherry filling evenly into the crust. Dot the filling with the small butter pieces to add richness and prevent dryness.
- Create the lattice top: Roll out the second dough disc into another 12-inch circle. Using a sharp knife or pizza cutter, slice into ¾-inch (2 cm) strips. Lay half the strips parallel across the pie, then weave the remaining strips perpendicular to create a lattice pattern. Trim and crimp the edges to seal.
- Apply egg wash and sugar: Brush the lattice crust with the beaten egg yolk and water mixture. Sprinkle coarse sugar on top for a subtle crunch and sparkle.
- Bake the pie: Place the pie on a baking sheet and bake in a preheated 375°F (190°C) oven for 45-55 minutes. The filling should bubble through the lattice, and the crust should turn golden brown. If the edges brown too quickly, cover them with foil halfway through baking.
- Cool completely: Remove the pie from the oven and cool on a rack for at least 3 hours to let the filling set properly. This step is tough to wait for, but it’s worth it!
Pro tip: I like to prepare the dough the night before and keep it chilled, so it’s ready to roll out when I’m craving pie. It makes the whole process feel less rushed. Also, if you notice the filling looks too runny before baking, adding an extra tablespoon of cornstarch helps without altering the taste.
Cooking Tips & Techniques
Making the perfect sour cherry pie with flaky lattice crust requires a few tricks I’ve learned along the way. First, keeping everything cold is key—cold butter, cold water, even chilling your mixing bowl if you can. Warm butter is the enemy of flakiness.
When cutting the butter into the flour, don’t overwork it. You want little lumps of butter still visible—that creates those pockets of steam that puff up the crust. Trust me, it’s worth the extra effort.
Rolling out the dough evenly is another challenge. If it’s too thick, the crust can be doughy and heavy; too thin, and it might tear or burn. I aim for about ⅛ inch (3 mm) thickness. If the dough feels sticky, a quick chill in the fridge helps.
For the lattice crust, patience is your friend. Cutting uniform strips and weaving them carefully keeps the pie looking charming and professional. If your strips break, just pinch them back together. Imperfections are part of the charm, honestly.
During baking, watch that the edges don’t brown too fast. I use a pie crust shield or foil strips to protect them after 30 minutes. Also, placing the pie on a baking sheet catches any bubbles that overflow and keeps your oven clean.
Finally, cooling the pie completely before slicing is non-negotiable. I’ve learned the hard way that slicing too soon turns the filling into a runny mess. Waiting is the hardest part, but it gives you that perfect slice every time.
Variations & Adaptations
While the classic sour cherry pie is a winner, there are plenty of ways to tweak it based on what you have or prefer:
- Gluten-Free Crust: Swap the all-purpose flour for a gluten-free blend or almond flour plus tapioca starch. Just keep an eye on the dough’s moisture as gluten-free flours behave differently.
- Sweet Cherry Version: If sour cherries aren’t your thing, try sweet Bing cherries. You’ll want to reduce the sugar slightly since they’re naturally sweeter.
- Spiced Cherry Pie: Add a pinch of cinnamon, nutmeg, or even a dash of ground ginger to the filling for a warm, cozy flavor twist.
- Vegan Adaptation: Use a plant-based butter substitute and substitute the egg wash with almond milk or aquafaba (chickpea water) for brushing the crust.
- Double Crust Instead of Lattice: For a simpler top, roll out the second disc and place it whole over the filling. Cut a few slits for steam to escape and decorate with a fork or knife edge.
One variation I love to make around the holidays is adding a splash of bourbon or brandy to the cherry filling. It adds a subtle warmth and complexity that guests always comment on. If you want dessert bars instead of pie, check out my pink strawberry cream puff bars for a fruity, flaky alternative.
Serving & Storage Suggestions
This perfect sour cherry pie is best served slightly warm or at room temperature, so the filling is juicy but not too runny. A scoop of vanilla ice cream or a dollop of whipped cream pairs beautifully, adding a creamy contrast to the tart cherries.
For presentation, slicing the pie with a sharp serrated knife and wiping between cuts keeps the slices neat. The lattice crust makes for a pretty, rustic look that’s perfect for sharing at brunches or holiday dinners.
Leftovers keep well covered at room temperature for up to two days. For longer storage, wrap tightly and refrigerate for up to 4 days. You can also freeze slices wrapped in foil and plastic wrap for up to 3 months. To reheat, warm gently in a 325°F (160°C) oven for about 15 minutes—this revives the crust’s flakiness and warms the filling evenly.
Flavors actually develop and deepen if you let the pie rest overnight in the fridge, so if you can wait, it’s worth it. I often make this pie the day before a gathering and find the next-day slices even tastier.
If you’re curious about other crowd-pleasing desserts to serve alongside, consider something like the chocolate-covered strawberry ice cream mousse cups—they’re a lovely, light contrast for a dessert spread.
Nutritional Information & Benefits
This sour cherry pie balances indulgence with some nutritional perks. A typical slice (1/8th of the pie) provides roughly:
| Calories | 320 |
|---|---|
| Fat | 15g |
| Carbohydrates | 42g |
| Fiber | 3g |
| Sugar | 26g |
| Protein | 3g |
Sour cherries are rich in antioxidants and vitamin C, which help fight inflammation and support immune health. The almond extract adds a hint of healthy fats when using natural almond products. While this pie contains gluten and dairy, you can adapt it for dietary needs as noted.
From a wellness perspective, I appreciate that this recipe uses real ingredients without artificial preservatives or additives. It’s a dessert that tastes homemade and honest, that you can feel good about sharing with family and friends.
Conclusion
This perfect sour cherry pie with flaky lattice crust is the kind of recipe that makes you look forward to dessert without any stress. It’s straightforward, forgiving, and delivers that classic combination of tart, sweet, and buttery that everyone loves. Whether you’re baking for a crowd or just treating yourself, it’s a recipe you can come back to again and again.
Don’t hesitate to make it your own—add a pinch of spice, swap ingredients based on what’s in your pantry, or try out different crust styles. I’ve found that the best pies come when you add your personal touch, and this one is a great base for that.
One last note: I adore how this pie pairs with other special desserts like the pink velvet cookie crumble board for a festive spread that feels both cozy and celebratory. So go ahead, bake it, share it, savor it—and maybe keep a slice for yourself, too.
FAQs About Perfect Sour Cherry Pie with Flaky Lattice Crust
Can I use frozen sour cherries for this pie?
Yes, frozen sour cherries work well. Just thaw and drain them thoroughly to avoid a watery filling. You might want to add a little extra cornstarch to help thicken.
How do I prevent the crust from getting soggy?
Use cold butter and ice water when making the dough, and chill the dough before baking. Also, dotting the filling with small butter pieces helps keep moisture balanced. Baking on a lower rack can help crisp the bottom crust.
What’s the best way to store leftover pie?
Cover leftover pie loosely at room temperature for up to 2 days or refrigerate for up to 4 days. For longer storage, freeze slices wrapped tightly and reheat gently in the oven.
Can I make this pie ahead of time?
Absolutely! You can make the crust and filling separately and assemble just before baking. The pie can also be baked and then reheated—it tastes even better after resting overnight.
How do I get a perfect lattice crust?
Roll the dough evenly and cut strips about ¾ inch wide. Lay strips in one direction first, then weave the others over and under. It’s okay if it’s not perfect—practice helps, and a rustic look is charming!
Pin This Recipe!
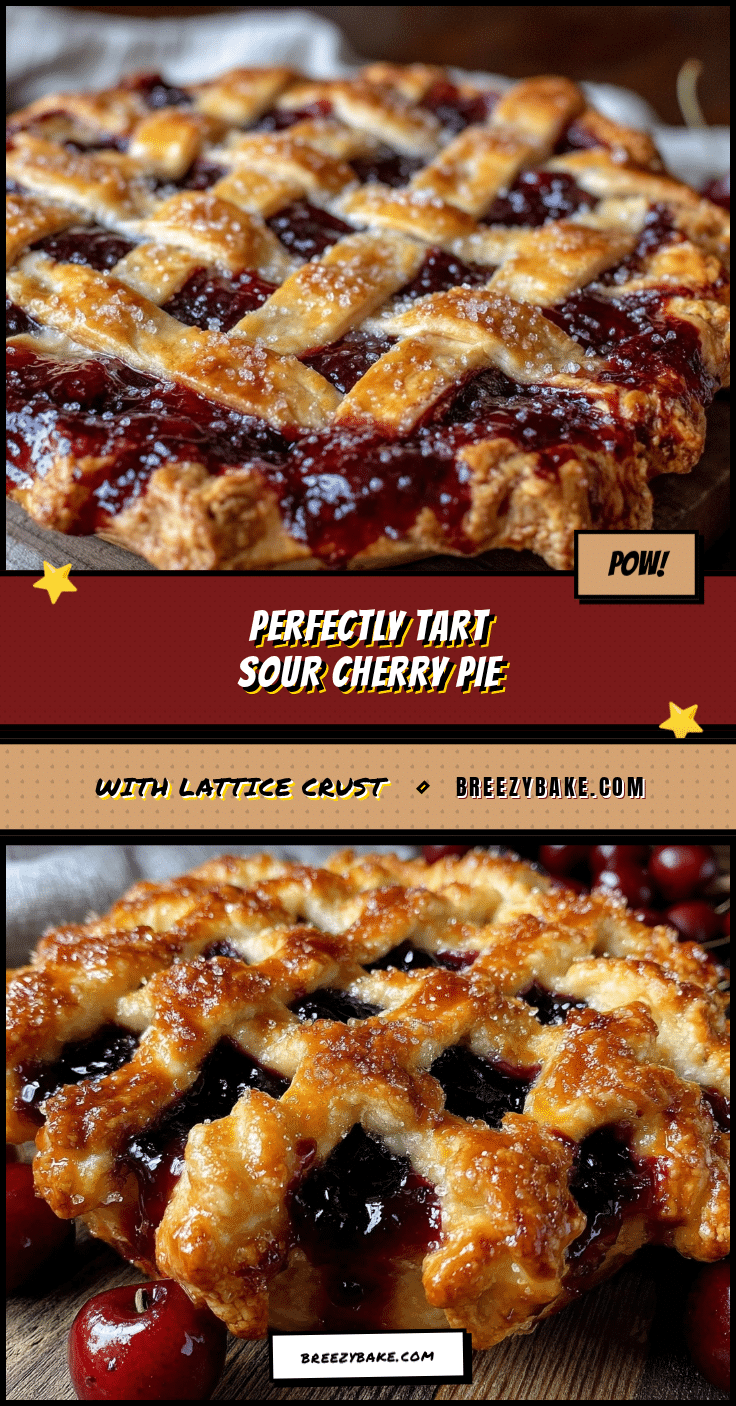
Perfect Sour Cherry Pie Recipe Easy Flaky Lattice Crust Tutorial
A classic sour cherry pie with a flaky, buttery lattice crust that balances tart cherries with a sweet, tender crust. This easy recipe is perfect for gatherings and everyday treats.
- Prep Time: 15 minutes
- Cook Time: 50 minutes
- Total Time: 4 hours 5 minutes
- Yield: 8 servings 1x
- Category: Dessert
- Cuisine: American
Ingredients
- 2 ½ cups (310g) all-purpose flour, sifted
- 1 cup (226g) unsalted butter, cold and cubed
- 1 tablespoon granulated sugar (for crust)
- 1 teaspoon salt
- 6 to 8 tablespoons ice water
- 5 cups (about 700g) sour cherries, pitted (fresh or frozen, thawed and drained)
- 1 cup (200g) granulated sugar (for filling)
- 3 tablespoons cornstarch
- ½ teaspoon almond extract (optional)
- 1 tablespoon lemon juice
- 2 tablespoons butter, cut into small pieces (for filling)
- 1 egg yolk, beaten with 1 tablespoon water (for egg wash)
- 1 tablespoon coarse sugar (for topping)
Instructions
- Make the crust dough: In a large bowl, whisk together sifted flour, sugar, and salt. Add cold, cubed butter. Use a pastry blender or fingertips to cut butter into flour until mixture resembles coarse crumbs with pea-sized pieces of butter remaining (about 5 minutes).
- Add ice water: Gradually sprinkle 6 tablespoons ice water over flour mixture. Gently mix with fork or hands until dough just comes together. Add more water, one tablespoon at a time, if needed. Dough should hold together without being sticky. Divide into two discs, wrap in plastic, and refrigerate for at least 1 hour.
- Prepare the filling: In a medium bowl, combine pitted sour cherries, sugar, cornstarch, almond extract, and lemon juice. Toss gently until evenly coated. Let sit while dough chills.
- Roll out the bottom crust: On a lightly floured surface, roll one dough disc into a 12-inch circle. Transfer into pie dish, letting edges hang over slightly. Press gently to fit and trim excess dough to about 1 inch beyond rim.
- Add the filling: Pour cherry filling evenly into crust. Dot filling with small butter pieces.
- Create the lattice top: Roll out second dough disc into 12-inch circle. Using sharp knife or pizza cutter, slice into ¾-inch strips. Lay half strips parallel across pie, then weave remaining strips perpendicular to create lattice pattern. Trim and crimp edges to seal.
- Apply egg wash and sugar: Brush lattice crust with beaten egg yolk and water mixture. Sprinkle coarse sugar on top.
- Bake the pie: Place pie on baking sheet and bake in preheated 375°F (190°C) oven for 45-55 minutes until filling bubbles and crust is golden brown. Cover edges with foil if browning too quickly.
- Cool completely: Remove pie from oven and cool on rack for at least 3 hours to let filling set before slicing.
Notes
Keep butter and water cold to ensure a flaky crust. Chill dough for at least 1 hour before rolling. Use foil to protect crust edges if browning too fast. Cool pie completely before slicing to avoid runny filling. Frozen cherries can be used if thawed and drained well. Add extra cornstarch if filling seems too runny. Almond extract adds a subtle nutty flavor; vanilla can be substituted.
Nutrition
- Serving Size: 1 slice (1/8th of pi
- Calories: 320
- Sugar: 26
- Fat: 15
- Carbohydrates: 42
- Fiber: 3
- Protein: 3
Keywords: sour cherry pie, lattice crust, flaky pie crust, cherry pie recipe, easy pie recipe, homemade pie, dessert, baking


