Introduction
“Hey, did you bring those mini cheesecakes?” my friend texted as I pulled into the parking lot for the graduation party. Honestly, I wasn’t sure if my latest experiment with these creamy mini cheesecake bites would be a hit or a total flop. See, I wasn’t really aiming for perfection—I just wanted a quick, no-fuss dessert to toss together between work calls and last-minute party prep. But as I handed out those tiny bites, the way everyone’s eyes lit up (and the almost immediate requests for the recipe) caught me off guard.
What started as a rushed idea made with pantry staples turned into the star of the party, proving that sometimes the simplest things are the most memorable. The creamy texture, just the right touch of sweetness, and that perfect little crust? It all came together in a way I didn’t expect, but now I’m hooked. I find myself making these mini cheesecake bites again and again—sometimes for casual weekend treats, other times for celebrations like this graduation bash where finger foods are king.
It’s funny—desserts can be so intimidating, but these mini cheesecakes? They feel like a quiet promise that you can make something special without the stress. And isn’t that what a good party treat is all about?
Why You’ll Love This Recipe
- Quick & Easy: These creamy mini cheesecake bites come together in under 30 minutes of prep, making them ideal for last-minute graduation party treats or spontaneous get-togethers.
- Simple Ingredients: No need for fancy or hard-to-find items—most of these ingredients are pantry staples or easy to grab at any grocery store.
- Perfect for Graduation Celebrations: Their small, bite-sized form makes them easy to serve and enjoy without the mess, perfect for mingling guests.
- Crowd-Pleaser: Both kids and adults keep coming back for more, which is honestly the best compliment at any party.
- Unbelievably Delicious: The creamy texture paired with a buttery graham cracker crust strikes that perfect balance between rich and light—comfort food that feels fancy without the fuss.
This recipe isn’t just another cheesecake variation. I tweak the cream cheese blend and use a touch of sour cream to get that silky smooth finish that almost melts in your mouth. Plus, I like to add a hint of vanilla and lemon zest to brighten the flavor, which makes these bites stand out from the usual crowd.
Whether you’re aiming to impress without stress or just want an easy dessert that feels homemade, these mini cheesecake bites have a way of quietly stealing the show. They’re the kind of treat that sticks around in your memory, not because they’re flashy, but because they’re just right.
What Ingredients You Will Need
This recipe uses simple, wholesome ingredients that come together to deliver bold flavor and a perfectly creamy texture without any extra fuss. Most are pantry staples, and substitutions are easy if you need to accommodate dietary preferences.
- For the Crust:
- Graham cracker crumbs, about 1 cup (I recommend Honey Maid for a nice balance of sweetness and crunch)
- Unsalted butter, 4 tablespoons, melted (adds richness and helps bind the crust)
- Granulated sugar, 2 tablespoons (for just a touch of sweetness)
- For the Cheesecake Filling:
- Cream cheese, 16 ounces (450 grams), softened (use full fat for best creaminess)
- Sour cream, 1/2 cup (120 ml) (this keeps the texture silky and adds a subtle tang)
- Granulated sugar, 3/4 cup (150 grams)
- Large eggs, 2, at room temperature (helps with structure and smoothness)
- Vanilla extract, 1 teaspoon (pure vanilla is best for flavor depth)
- Lemon zest from one lemon (brightens the overall flavor—optional but highly recommended)
- Optional Toppings:
- Fresh berries (strawberries, blueberries, or raspberries)
- Fruit preserves or jam (for a sweet, glossy finish)
- Chocolate drizzle or chopped nuts
If you’re looking for a gluten-free option, swapping out the graham cracker crumbs with almond flour or gluten-free cookie crumbs works beautifully. For a dairy-free version, try substituting cream cheese and sour cream with plant-based alternatives like cashew cream cheese (though the texture will shift slightly).
Equipment Needed
- Mini muffin pan (12-cup size) – essential for shaping these cheesecake bites perfectly. If you don’t have one, small silicone baking cups can work too.
- Mixing bowls – at least two, one for the crust and another for the filling.
- Electric mixer or stand mixer – makes beating the cream cheese smooth and lump-free way easier.
- Measuring cups and spoons – for precision.
- Spatula – for scraping down the bowl and smoothing the filling.
- Optional: Zester – for lemon zest (a microplane works great).
For those on a budget, a hand mixer will do the trick instead of a stand mixer. I’ve also found that lining the muffin pan with silicone liners makes cleanup quicker, especially if you want to keep the crust intact when serving. Just be careful not to overfill the cups to avoid spillage while baking.
Preparation Method
- Preheat your oven to 325°F (160°C). This lower temperature helps the cheesecakes bake gently without cracking.
- Prepare the crust: In a medium bowl, mix 1 cup graham cracker crumbs, 4 tablespoons melted unsalted butter, and 2 tablespoons sugar until the mixture feels like wet sand.
- Press the crust firmly into the bottom of each cup in your mini muffin pan, about 1 tablespoon per cup. I find using the back of a teaspoon helps pack it evenly. Bake this crust for 5 minutes, then remove from oven and let cool slightly.
- Mix the filling: In a large bowl, beat the softened cream cheese with an electric mixer on medium speed until smooth and creamy—no lumps! Add 3/4 cup sugar and beat again until combined.
- Add sour cream, eggs, vanilla extract, and lemon zest to the cream cheese mixture. Beat on low speed just until everything is combined (overmixing can cause cracks).
- Pour the filling over the pre-baked crust in each muffin cup, filling about 3/4 full. This usually takes about 2 tablespoons per cup.
- Bake the cheesecakes for 18 to 22 minutes. The centers should still jiggle slightly when you gently shake the pan—that’s the key to creamy texture.
- Cool completely at room temperature for about 30 minutes, then chill in the fridge for at least 2 hours (overnight is even better).
- Remove from pan carefully using a small knife to loosen edges if needed. Add toppings like fresh berries or a dollop of jam before serving.
Pro tip: If cracks appear, a quick fix is to smooth them over with a bit of leftover sour cream before chilling—it blends right in! Also, don’t rush the chilling step; it helps the flavors marry and the texture firm up perfectly.
Cooking Tips & Techniques
One of the trickiest parts of making mini cheesecakes is avoiding cracks and drying out. Here’s what I’ve learned from plenty of trial runs:
- Room temperature ingredients matter. Cold cream cheese or eggs can cause lumps or uneven baking. Let things sit out for 30 minutes before mixing.
- Don’t overbeat. While you want a smooth filling, overmixing can whip too much air into the batter, causing cracks during baking.
- Gentle baking temperature. Baking at 325°F (160°C) rather than higher temps keeps the cheesecake from puffing up and cracking.
- Check doneness by jiggle. The center should wobble slightly—if it’s firm, you may overbake and end up with a crumbly texture.
- Chill well. Patience pays off here; chilling helps the cream cheese set and flavors deepen.
Also, when pressing the crust, I learned it’s better to pack it tightly—this helps it hold together when you serve. A loose crust is honestly my biggest pet peeve, so taking a minute here makes a huge difference.
And if you’re baking for a crowd, prepping the crust and filling ahead and assembling later can save you some serious stress. I often make these mini cheesecake bites the night before parties and keep them chilled until it’s showtime.
Variations & Adaptations
These mini cheesecake bites are a blank canvas for flavor fun:
- Berry Swirl: Gently fold in a few spoonfuls of raspberry or strawberry preserves into the filling before baking for a pretty marbled effect and fruity pop.
- Chocolate Lovers’ Twist: Add 1/4 cup melted dark chocolate to the filling and use crushed chocolate wafer cookies for the crust.
- Lemon Poppy Seed: Add 1 tablespoon poppy seeds and increase lemon zest to 2 teaspoons for a bright, textured bite.
- Dairy-Free: Swap cream cheese and sour cream with cashew-based cream cheese and coconut yogurt. The texture is a bit different but still creamy and dreamy.
- Gluten-Free: Use gluten-free graham cracker crumbs or ground almonds for the crust.
I once tried a mint-chocolate version inspired by my mint chocolate cake jar parfaits, swapping in peppermint extract and sprinkling mini chocolate chips on top. It was a hit at a winter party and made me appreciate just how versatile these mini bites can be.
Serving & Storage Suggestions
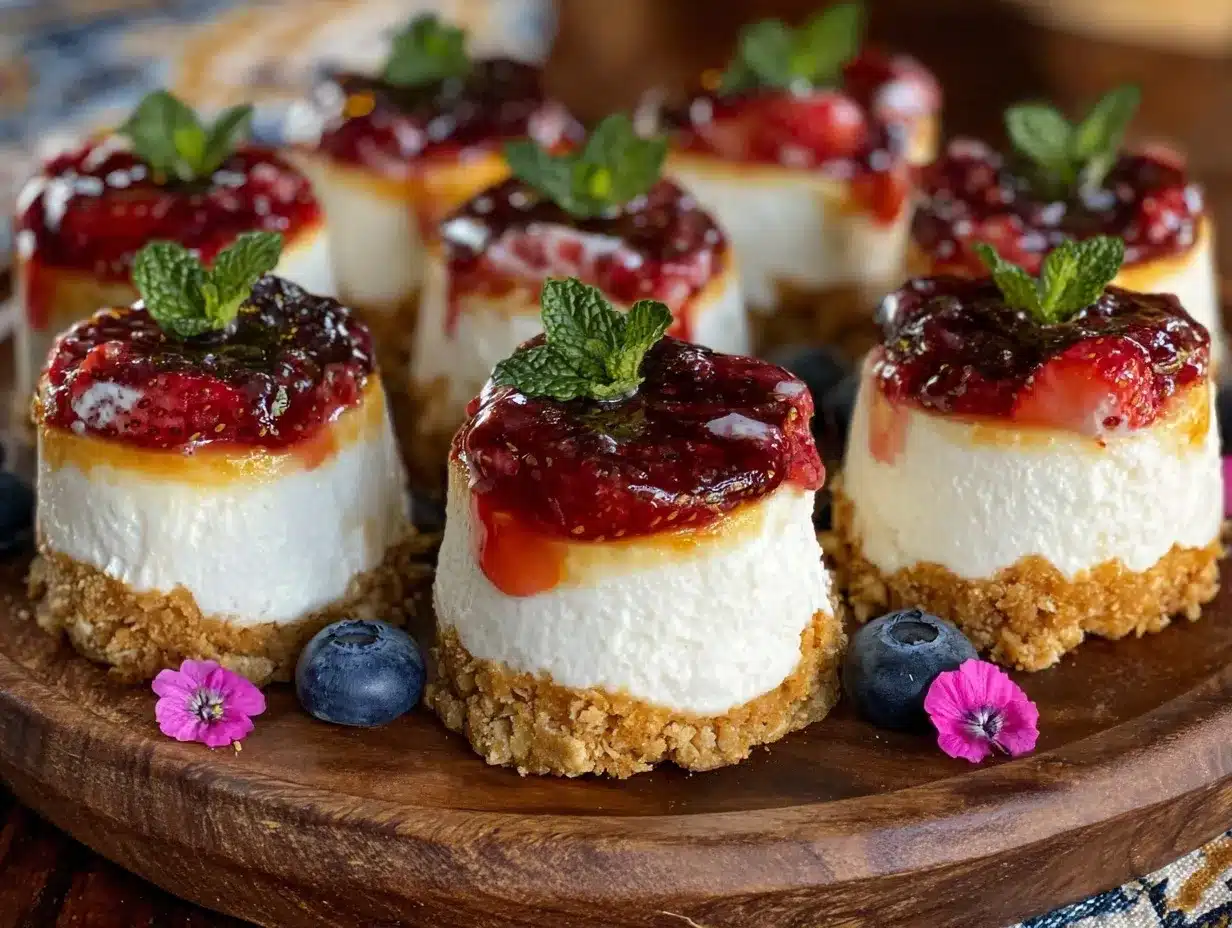
These creamy mini cheesecake bites are best served chilled or at cool room temperature, making them perfect for outdoor graduation parties or backyard celebrations. They look adorable arranged on a pretty platter, especially with fresh berries or edible flowers for a pop of color.
Pair them with sparkling lemonade, iced tea, or even a light dessert wine for a grown-up touch. They also hold up well alongside other finger foods like savory sliders or veggie platters.
For storage, keep the cheesecake bites covered tightly in the refrigerator for up to 4 days. You can freeze them, too—wrap individually in plastic wrap and place in an airtight container for up to 2 months.
When ready to enjoy, thaw in the fridge overnight and bring to room temperature for about 15 minutes before serving. The flavors mellow and blend beautifully the next day, making them even more crowd-pleasing.
Nutritional Information & Benefits
Each mini cheesecake bite contains roughly:
| Calories | 130 kcal |
|---|---|
| Fat | 9g |
| Carbohydrates | 10g |
| Protein | 2g |
The cream cheese provides a good source of calcium and protein, while the lemon zest adds a touch of vitamin C. Using real butter and natural ingredients keeps the recipe free from artificial additives.
If you’re mindful of sugar, you can reduce the granulated sugar slightly or swap in a natural sweetener like honey or maple syrup, though it will change the texture a bit.
These bites fit nicely into a balanced diet when enjoyed as an occasional treat, especially paired with fresh fruit toppings that bring in fiber and antioxidants.
Conclusion
These creamy mini cheesecake bites are one of those recipes that feel like a secret weapon for easy, impressive party desserts. They’re approachable enough for any home cook, yet deliver that rich, silky texture that makes guests ask for seconds (and thirds). I love how customizable they are—whether you stick with the classic or play around with flavors, each bite offers that satisfying cream cheese goodness without the fuss of a full-sized cheesecake.
If you try this recipe, don’t hesitate to tweak it to your taste—maybe add a swirl of jam, or a hint of spice. That’s part of the fun, you know? And if you’re interested in more easy, crowd-pleasing desserts, you might enjoy the strawberry cream puff bars or the chocolate-covered strawberry mousse cups—both sweet treats that are as delightful as they sound.
Happy baking, and here’s to making your next graduation party (or any occasion) a little sweeter.
FAQs
Can I make these mini cheesecake bites ahead of time?
Absolutely! They actually taste better after chilling overnight, which helps the flavors develop and the texture firm up perfectly.
How do I prevent cracks in the cheesecake bites?
Use room temperature ingredients, avoid overmixing the batter, bake at a lower temperature (325°F/160°C), and don’t overbake—look for a slight jiggle in the center when done.
Can I freeze these mini cheesecakes?
Yes, wrap them tightly in plastic wrap and place in an airtight container. Freeze for up to 2 months. Thaw in the fridge overnight before serving.
What can I use instead of graham cracker crumbs?
Almond flour, gluten-free cookie crumbs, or crushed digestive biscuits are great alternatives depending on your dietary needs.
Are these mini cheesecakes suitable for kids?
Definitely! They’re bite-sized and not overly sweet, making them a hit with kids and adults alike at parties or family gatherings.
Pin This Recipe!
Creamy Mini Cheesecake Bites

These creamy mini cheesecake bites are quick and easy to make, perfect for graduation parties or any celebration. They feature a buttery graham cracker crust and a silky smooth cream cheese filling with a hint of lemon zest.
- Prep Time: 25 minutes
- Cook Time: 22 minutes
- Total Time: 3 hours
- Yield: 12 servings 1x
- Category: Dessert
- Cuisine: American
Ingredients
- 1 cup graham cracker crumbs
- 4 tablespoons unsalted butter, melted
- 2 tablespoons granulated sugar (for crust)
- 16 ounces cream cheese, softened
- 1/2 cup sour cream
- 3/4 cup granulated sugar (for filling)
- 2 large eggs, room temperature
- 1 teaspoon vanilla extract
- Lemon zest from one lemon
- Optional toppings: fresh berries, fruit preserves or jam, chocolate drizzle or chopped nuts
Instructions
- Preheat your oven to 325°F (160°C).
- In a medium bowl, mix graham cracker crumbs, melted butter, and 2 tablespoons sugar until the mixture feels like wet sand.
- Press the crust firmly into the bottom of each cup in a 12-cup mini muffin pan, about 1 tablespoon per cup. Bake for 5 minutes, then remove and let cool slightly.
- In a large bowl, beat the softened cream cheese with an electric mixer on medium speed until smooth and creamy.
- Add 3/4 cup sugar and beat until combined.
- Add sour cream, eggs, vanilla extract, and lemon zest to the cream cheese mixture. Beat on low speed just until combined.
- Pour the filling over the pre-baked crust in each muffin cup, filling about 3/4 full (about 2 tablespoons per cup).
- Bake for 18 to 22 minutes until centers jiggle slightly when shaken.
- Cool completely at room temperature for about 30 minutes, then chill in the refrigerator for at least 2 hours or overnight.
- Remove from pan carefully using a small knife to loosen edges if needed. Add optional toppings before serving.
Notes
Use room temperature ingredients to avoid lumps and cracks. Do not overmix the batter to prevent air bubbles that cause cracks. Bake at a lower temperature (325°F) and look for a slight jiggle in the center to ensure creamy texture. Chill well for best flavor and texture. For gluten-free, substitute graham cracker crumbs with almond flour or gluten-free cookie crumbs. For dairy-free, use plant-based cream cheese and sour cream alternatives.
Nutrition
- Serving Size: 1 mini cheesecake bi
- Calories: 130
- Fat: 9
- Carbohydrates: 10
- Protein: 2
Keywords: mini cheesecake bites, creamy cheesecake, graduation party treats, easy dessert, bite-sized cheesecake