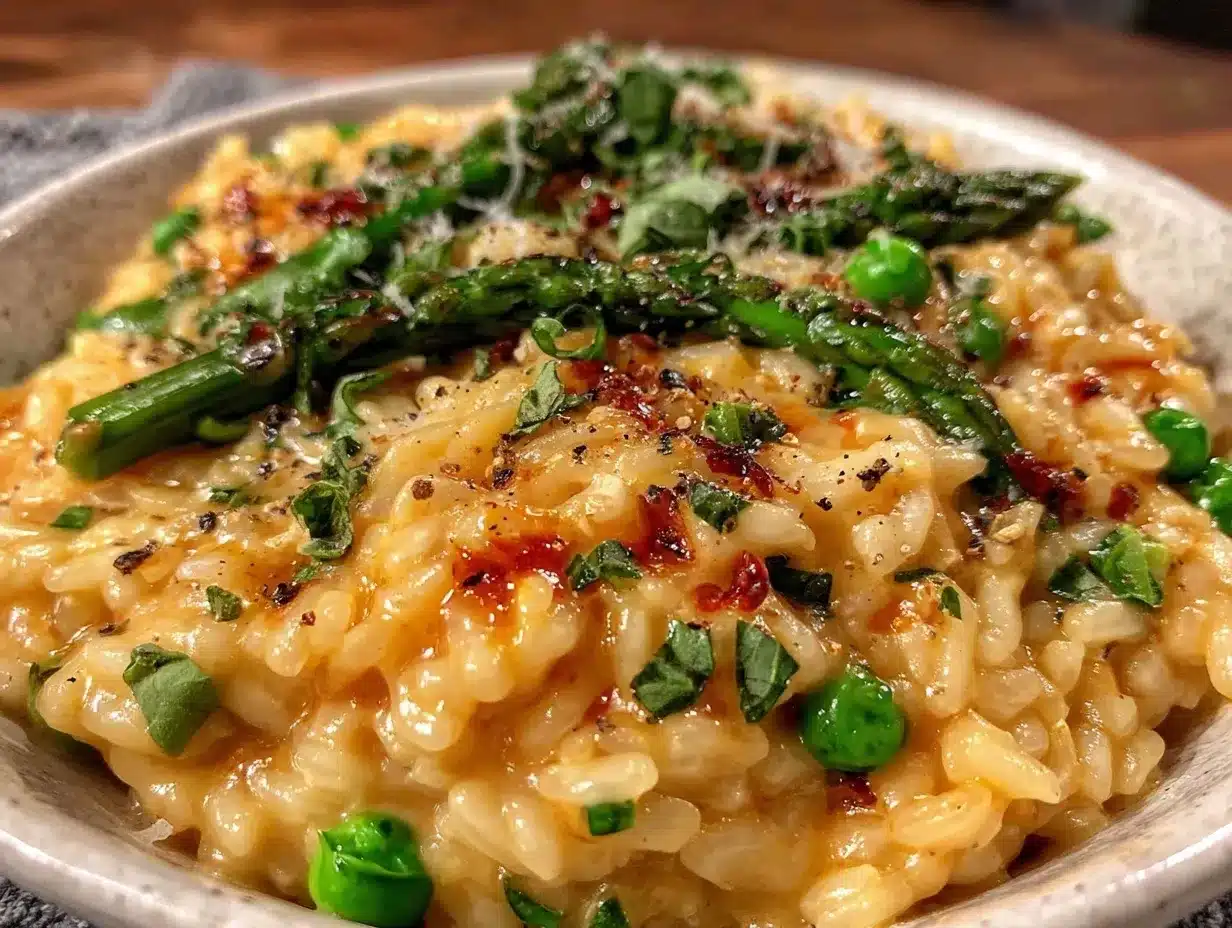
There’s something about the soft hum of the kitchen late on a Sunday afternoon that makes me want to slow down and savor the moment. This creamy spring pea risotto with browned butter was born one such quiet day, when the world outside was still waking up and I had the kitchen all to myself. Honestly, I wasn’t planning to make anything fancy—just a quick dish to use up a bag of fresh peas I’d forgotten about in the fridge. But as the browned butter bubbled gently in the pan and the arborio rice started to soak up the warm broth, I realized this simple meal was turning into something unexpectedly special.
At first, I was skeptical about risotto. It seemed intimidating with all the stirring and slow additions of broth. But this recipe, with its bright green peas and nutty browned butter, felt like a friendly version of something elegant. The aroma alone was enough to make me pause and inhale deeply, that sweet, grassy scent of spring peas mingling with the toasty, caramel notes of butter that had been cooked just right. The texture was dreamy—silky and rich without being heavy, each grain tender yet distinct.
What stuck with me most was how this creamy spring pea risotto with browned butter could turn a quiet moment into a small celebration. It wasn’t just dinner; it was a reminder to appreciate the simple things, the flavors that bring comfort without fuss. Now, whenever I come across fresh peas in season, this dish is my go-to, a little ritual that makes the end of the day feel both restful and delicious.
Why You’ll Love This Recipe
- Quick & Easy: Comes together in about 35 minutes, perfect for a weeknight dinner that feels special without the fuss.
- Simple Ingredients: Uses staples you probably already have plus fresh spring peas—nothing complicated or hard to find.
- Perfect for Seasonal Eating: Celebrates spring’s bounty with peas at their sweetest and freshest.
- Crowd-Pleaser: Creamy, buttery, and bright, it’s always a hit whether you’re cooking for family or friends.
- Unbelievably Delicious: The browned butter adds a nutty depth that sets this risotto apart from the usual versions.
This isn’t just another risotto recipe. What makes it different is the browned butter step, which adds a layer of flavor that’s honestly addictive. Plus, blending in fresh peas gives it a vibrant color and fresh sweetness that wakes up your taste buds. I’ve tested this recipe multiple times (sometimes twice in a week!) and the balance between creamy rice, sweet peas, and nutty butter never fails to impress.
It’s the kind of dish that feels cozy and indulgent but also light enough to enjoy without a food coma afterward. Whether you’re looking to impress guests or just treat yourself after a long day, this risotto offers that perfect mix of comfort and elegance. You might find yourself closing your eyes after the first bite, savoring the creamy texture and the subtle layers of flavor that make it stand out.
What Ingredients You Will Need
This recipe uses simple, wholesome ingredients to deliver bold flavor and satisfying texture without the fuss. Most are pantry staples, with fresh peas adding a seasonal pop. Here’s what you’ll want to gather:
- Arborio rice: 1 cup (200 g) – the classic short-grain rice that gives risotto its creamy texture. I prefer Carnaroli when I can find it, but arborio works beautifully.
- Fresh spring peas: 1 ½ cups (225 g), shelled – adds sweetness and vibrant color. Frozen peas work in a pinch but fresh are best.
- Unsalted butter: 4 tablespoons (55 g), divided – half for the browned butter, half for finishing the risotto. Use good quality like Kerrygold for the richest flavor.
- Shallot: 1 small, finely chopped – brings a subtle onion sweetness without overpowering.
- Garlic: 1 clove, minced – just enough to add a little savory depth.
- Vegetable broth: About 4 cups (960 ml), kept warm – the liquid risotto slowly absorbs. Low-sodium broth gives you control over seasoning.
- Dry white wine: ½ cup (120 ml) – optional, but it brightens the flavor and adds acidity to balance the richness.
- Parmesan cheese: ½ cup (50 g), freshly grated – for a salty, nutty finish. Parmigiano-Reggiano is my go-to.
- Salt and freshly ground black pepper: to taste – seasoning is key to bringing out all the flavors.
- Fresh mint or basil: A few leaves, finely chopped (optional) – adds a fragrant, fresh note that complements the peas beautifully.
If you want to swap out any ingredients, almond flour or gluten-free broth can help make this risotto gluten-free, while coconut oil can replace butter for dairy-free versions. Just keep in mind that the browned butter flavor is a signature here and hard to replicate exactly.
Equipment Needed
- Heavy-bottomed saucepan or deep skillet – for even heat distribution and preventing burning during slow cooking.
- Medium saucepan – to keep your broth warm on the stove.
- Wooden spoon or heatproof spatula – for stirring the risotto gently and frequently.
- Fine grater or microplane – to freshly grate Parmesan cheese.
- Small bowl – for mixing browned butter if you prefer to prepare it separately.
You don’t need fancy tools for this recipe. A regular non-stick or stainless steel pan works fine. I personally find that a heavy-bottomed pan helps avoid hotspots that can scorch the rice or butter. If you don’t have a microplane, a fine box grater or pre-grated cheese will do in a pinch, though fresh-grated really makes a difference.
Preparation Method
- Warm the broth: Pour your vegetable broth into a medium saucepan and keep it at a low simmer on the stove. This ensures the rice cooks evenly without cooling down each addition. (About 5 minutes)
- Brown the butter: In your heavy-bottomed pan, melt 2 tablespoons (28 g) of butter over medium heat. Let it cook, swirling occasionally, until it turns golden with nutty aromas and browned bits appear on the bottom—about 3-4 minutes. Remove from heat and set aside, keeping warm.
- Sauté shallots and garlic: Add the remaining 2 tablespoons (28 g) of butter to the pan and melt over medium-low heat. Toss in the finely chopped shallot and cook gently until translucent, about 2-3 minutes. Add the minced garlic and sauté for another 30 seconds until fragrant. Avoid browning the garlic here to prevent bitterness.
- Toast the rice: Stir in the arborio rice, coating each grain with the buttery shallot mixture. Toast for about 1-2 minutes until the edges become translucent but the center stays opaque. This step helps build the creamy texture later.
- Deglaze with wine: Pour in the white wine and stir continuously until it’s mostly absorbed, about 2-3 minutes. The wine adds brightness and depth to the risotto’s flavor.
- Add broth gradually: Using a ladle, add about ½ cup (120 ml) of warm broth to the rice. Stir gently but frequently, allowing the rice to absorb the liquid before adding more. Repeat this process for about 20 minutes, until the rice is tender but still has a slight bite (al dente). The stirring releases starch, creating the risotto’s signature creaminess.
- Cook the peas: When the rice is almost done, stir in the fresh peas. Cook for another 3-4 minutes, letting them soften and brighten the dish.
- Finish with browned butter and cheese: Remove the risotto from heat. Stir in the browned butter you set aside earlier and the freshly grated Parmesan. Season with salt and pepper to taste. If using fresh herbs like mint or basil, fold them in now for a fresh pop of flavor.
- Rest and serve: Let the risotto sit for a minute or two to thicken slightly. Serve immediately, garnished with extra Parmesan or herbs if desired.
Pro tip: Keep the broth warm to maintain the right cooking temperature. If your risotto seems too thick, add a splash more broth or even a little hot water to loosen it up. The texture should be creamy and slightly fluid—not dry or sticky.
Cooking Tips & Techniques
The secret to a perfect risotto lies in patience and attention. Stirring is key because it helps release the rice’s starches, which create that luscious, creamy texture. But honestly, you don’t have to stir nonstop—gentle, frequent stirring works just fine (and saves your arm).
Browned butter adds a rich, nutty flavor that’s easy to overlook but makes a big difference here. Keep your eye on the butter as it browns—it can go from perfect to burnt in seconds, so remove it from heat once you see golden flecks and smell that toasted aroma.
Using fresh peas in season is a game changer. Frozen peas can work, but fresh add a vibrant snap and sweetness that really lifts the dish.
One mistake I made early on was adding all the broth at once. That’s a no-go because risotto needs to absorb liquid slowly. Adding broth in small increments keeps the rice cooking evenly and prevents mushiness.
Timing-wise, this recipe pairs well with prepping a simple salad or dessert while the risotto cooks—multitasking makes the whole meal come together smoothly without stress.
Variations & Adaptations
- Vegan version: Swap butter for olive oil or vegan margarine and use nutritional yeast instead of Parmesan. The browned butter flavor can be mimicked by lightly toasting the oil with a bit of garlic.
- Protein boost: Stir in cooked shrimp, chicken, or crispy pancetta for a heartier dinner.
- Seasonal twist: Replace peas with asparagus tips or fresh fava beans in spring, or even roasted mushrooms in fall for a different flavor profile.
- Low-carb option: Use cauliflower rice instead of arborio, though the texture will be different. Cook cauliflower rice gently with the broth and toss in peas and browned butter at the end.
- Herb variation: Try tarragon or chives instead of mint or basil for a subtle change in aroma and taste.
Personally, I once added a squeeze of lemon juice at the end for a bright contrast, which was surprisingly refreshing and balanced the richness beautifully.
Serving & Storage Suggestions
Serve this creamy spring pea risotto warm, ideally right off the stove when it’s at its creamiest. It pairs wonderfully with a crisp green salad and a glass of chilled white wine or sparkling water with lemon.
If you’re making ahead, risotto can be stored in an airtight container in the fridge for up to 2 days. To reheat, gently warm it in a pan over low heat with a splash of broth or water to loosen the creamy texture. Microwave works too, but stir halfway through to avoid dry spots.
Flavors tend to meld more after resting, so leftovers can taste even better the next day. Just remember risotto thickens as it cools, so adding liquid when reheating is key to recapturing that perfect creaminess.
Nutritional Information & Benefits
This risotto offers a good balance of carbohydrates, protein, and fat, making it a comforting yet nourishing meal. Peas provide a boost of plant-based protein, fiber, and vitamins A, C, and K, which support immunity and bone health.
Browned butter adds richness but use unsalted butter to control sodium. Arborio rice supplies energy-giving carbs, and Parmesan adds calcium and a touch of protein. This dish is naturally gluten-free if you use gluten-free broth, making it accessible for many dietary needs.
From a wellness perspective, the fresh peas and herbs add antioxidants and freshness that lighten the dish, so it feels less heavy than traditional creamy risottos—perfect for a balanced meal that satisfies both body and soul.
Conclusion
This creamy spring pea risotto with browned butter is one of those recipes that feels like a small indulgence but is surprisingly straightforward to make. It’s the kind of dish that sticks with you—a little bowl of comfort and freshness rolled into one. I love how it takes simple ingredients and turns them into something that feels thoughtful and special without needing a lot of fuss.
Feel free to tweak the herbs or swap in your favorite seasonal veggies to make it your own. Whether you’re cooking for a quiet night in or a casual gathering, this risotto delivers on flavor and texture every time. I hope it becomes a favorite in your kitchen, too.
Give it a try and let me know how you customize it—I’m always curious about new spins on this cozy classic. Happy cooking!
FAQs
Can I use frozen peas instead of fresh peas?
Yes, frozen peas work well if fresh ones aren’t available. Just add them a bit earlier to make sure they cook through and soften.
What’s the best way to brown butter without burning it?
Use a light-colored pan so you can watch the color change easily. Melt butter over medium heat and swirl the pan frequently. Remove from heat as soon as it turns golden with brown specks and smells nutty.
Can I make risotto without wine?
Absolutely! You can skip the wine and just start adding warm broth after toasting the rice. The risotto will still be delicious, just a little less bright.
How do I know when the risotto is done?
The rice should be tender but still have a slight bite (al dente). It should be creamy and a bit loose in texture, not dry or mushy.
Can I prepare this risotto in advance?
You can make it a day ahead and store it refrigerated. Reheat gently with a splash of broth or water to bring back the creamy texture before serving.
Pin This Recipe!
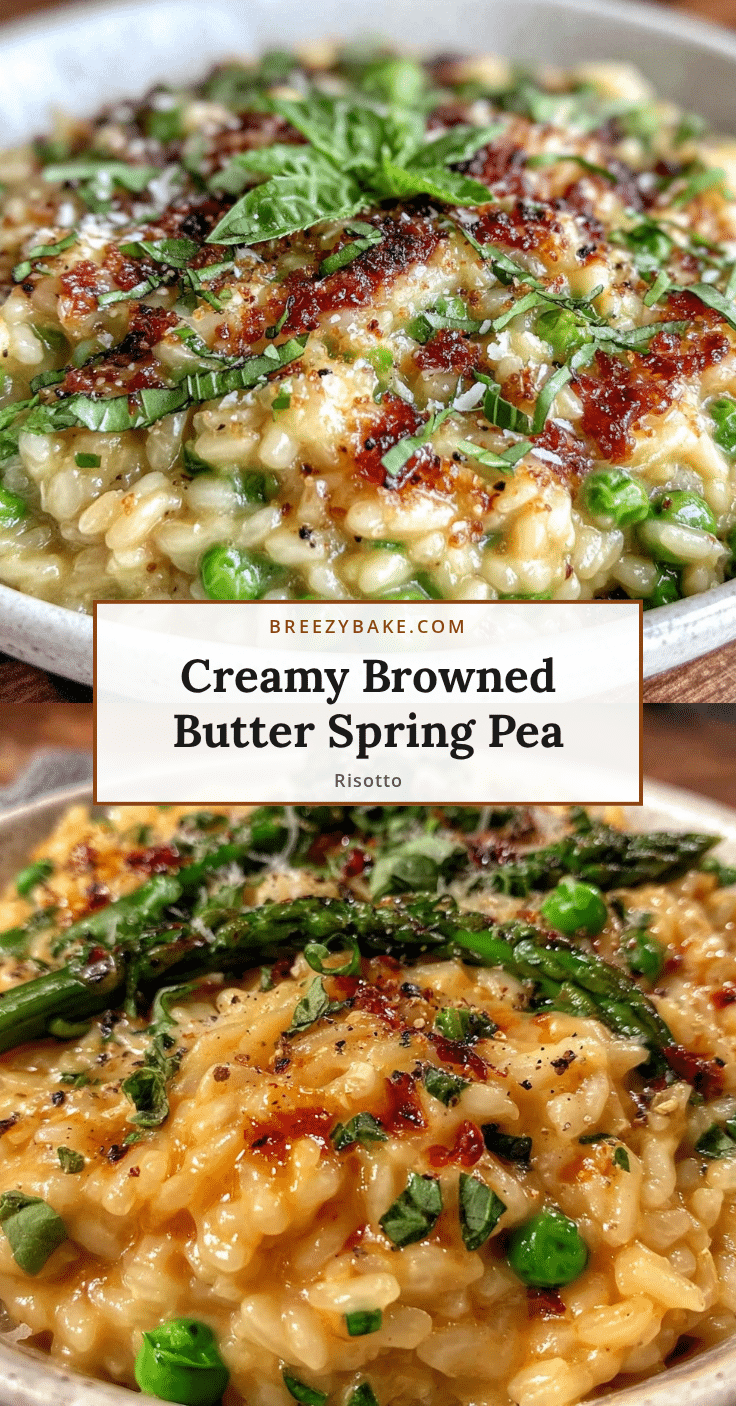
Creamy Spring Pea Risotto with Browned Butter

A creamy and elegant risotto featuring fresh spring peas and nutty browned butter, perfect for a comforting yet light dinner.
- Prep Time: 10 minutes
- Cook Time: 25 minutes
- Total Time: 35 minutes
- Yield: 4 servings 1x
- Category: Main Course
- Cuisine: Italian
Ingredients
- 1 cup (200 g) Arborio rice
- 1 ½ cups (225 g) fresh spring peas, shelled
- 4 tablespoons (55 g) unsalted butter, divided
- 1 small shallot, finely chopped
- 1 clove garlic, minced
- About 4 cups (960 ml) vegetable broth, kept warm
- ½ cup (120 ml) dry white wine (optional)
- ½ cup (50 g) freshly grated Parmesan cheese
- Salt and freshly ground black pepper, to taste
- A few leaves fresh mint or basil, finely chopped (optional)
Instructions
- Warm the vegetable broth in a medium saucepan and keep it at a low simmer (about 5 minutes).
- In a heavy-bottomed pan, melt 2 tablespoons (28 g) of butter over medium heat. Cook, swirling occasionally, until golden with nutty aromas and browned bits appear (3-4 minutes). Remove from heat and keep warm.
- Add the remaining 2 tablespoons (28 g) butter to the pan and melt over medium-low heat. Add the finely chopped shallot and cook gently until translucent (2-3 minutes). Add minced garlic and sauté for 30 seconds until fragrant, avoiding browning.
- Stir in the Arborio rice, coating each grain with the buttery shallot mixture. Toast for 1-2 minutes until edges become translucent but center remains opaque.
- Pour in the white wine and stir continuously until mostly absorbed (2-3 minutes).
- Add about ½ cup (120 ml) of warm broth to the rice. Stir gently but frequently, allowing the rice to absorb the liquid before adding more. Repeat for about 20 minutes until rice is tender but still al dente.
- When rice is almost done, stir in the fresh peas and cook for another 3-4 minutes until softened.
- Remove from heat. Stir in the browned butter reserved earlier and freshly grated Parmesan. Season with salt and pepper to taste. Fold in fresh herbs if using.
- Let the risotto rest for 1-2 minutes to thicken slightly. Serve immediately, garnished with extra Parmesan or herbs if desired.
Notes
Keep broth warm to maintain cooking temperature. Stir gently but frequently to release starches for creaminess. Remove butter from heat as soon as browned to avoid burning. Fresh peas preferred for best flavor and texture. If risotto is too thick, add a splash of broth or hot water to loosen.
Nutrition
- Serving Size: 1 cup risotto
- Calories: 350
- Sugar: 5
- Sodium: 400
- Fat: 15
- Saturated Fat: 9
- Carbohydrates: 40
- Fiber: 4
- Protein: 10
Keywords: risotto, spring peas, browned butter, creamy risotto, easy dinner, vegetarian, Italian recipe