“Hey, have you ever tried poking holes in a cake just to fill them with jello?” my friend asked me one summer afternoon, waving a brightly colored box of gelatin at me like it was some secret ingredient. Honestly, I was skeptical — I mean, cake is cake, right? But that casual invitation turned into a mini obsession that lasted for weeks. This Flavorful Red White and Blue Jello Poke Cake with Cool Whip isn’t just a festive dessert; it’s a nostalgia-packed, fun-to-make treat that somehow makes every gathering feel like a party.
One afternoon, after a long day of juggling work and errands (you know how it goes), I found myself craving something bright and cool—not too heavy but still satisfying. I grabbed a simple yellow cake mix, poked holes all over it (talk about easy prep), and poured in layers of red and blue jello, then topped everything with a fluffy cloud of Cool Whip. The colors swirled into the cake like a summer sky, and the taste? Honestly, it was like a bite of pure joy with every forkful.
What stuck with me wasn’t just the eye-catching red, white, and blue layers but that perfect harmony of flavors and textures: the soft, moist cake, the wobbly jello pockets, and the cool, creamy topping. It’s just the kind of dessert that makes you pause and smile, whether it’s a holiday barbecue or a casual get-together. That little poke-and-pour trick changed my view on cake completely — it’s not just dessert; it’s an experience that feels homemade and festive, without the fuss.
So if you’ve been hesitant about trying a poke cake with jello or wondered if Cool Whip can really do the trick as a topping, this recipe might just change your mind—like it did mine. It’s simple, colorful, and honestly, the kind of recipe you’ll find yourself making over and over, especially when you want a fun, crowd-pleasing dessert that doesn’t feel intimidating. Ready to see why this Flavorful Red White and Blue Jello Poke Cake with Cool Whip has quietly become my go-to for summer celebrations? Let’s get into it.
Why You’ll Love This Flavorful Red White and Blue Jello Poke Cake Recipe with Easy Cool Whip Topping
This recipe has been tested more times than I can count—sometimes twice in one week—because it’s just that good. The magic lies in its simplicity and those layers of bright, festive flavor that are surprisingly easy to pull together. Here’s why this cake stands out:
- Quick & Easy: You can whip up this cake in under an hour, making it perfect for last-minute barbecues or spontaneous dessert cravings.
- Simple Ingredients: No need to hunt down specialty items; most are pantry staples like boxed cake mix, Jello packets, and Cool Whip, which means fewer trips to the store.
- Perfect for Summer Celebrations: Whether it’s the Fourth of July, Memorial Day, or any day that calls for a splash of red, white, and blue, this cake fits right in.
- Crowd-Pleaser: Kids love the colorful layers, and adults appreciate the refreshing cool topping, making it a dessert that everyone asks for again.
- Unbelievably Delicious: The moist cake with jello-infused pockets is a textural delight—soft, juicy, and topped with light, fluffy Cool Whip that balances sweetness perfectly.
This isn’t your average poke cake. The trick that sets it apart is layering the red and blue jello separately, so you get distinct pockets of flavor in every bite rather than a muddled mix. Plus, the Cool Whip topping adds a lightness that keeps it from feeling heavy or overly sweet. I’ve tried other poke cake recipes before, but this one nails the festive vibe and taste every single time. Honestly, it’s the kind of dessert that makes you close your eyes after the first bite and think, “Yep, this is summer on a plate.”
If you’re curious about other fun and easy dessert ideas that bring that wow-factor with minimal effort, you might really enjoy the Creamy Valentines Pink Strawberry Crème Puff Bars or the Decadent Chocolate Covered Strawberry Ice Cream Mousse Cups. Both recipes share that same vibe of easy, colorful, and crowd-pleasing sweets.
What Ingredients You Will Need
This recipe uses simple, wholesome ingredients to deliver bold flavor and satisfying texture without the fuss. The ingredients are mostly pantry staples, and substitutions are easy if you want to tweak it for dietary needs or personal taste.
- Yellow Cake Mix (about 15.25 oz / 432 g): The base of the cake. I usually reach for Betty Crocker or Duncan Hines for consistent results.
- Water (1 cup / 240 ml): For mixing the cake batter.
- Vegetable Oil (1/3 cup / 80 ml): Adds moistness to the cake. Can substitute with melted coconut oil for a subtle twist.
- Eggs (3 large): For structure and richness, at room temperature.
- Red Jello Mix (3 oz / 85 g): Use strawberry or cherry flavor for vibrant color and sweet tartness.
- Blue Jello Mix (3 oz / 85 g): Blue raspberry is my go-to for a bold, fruity punch.
- Boiling Water (1 cup / 240 ml for each Jello flavor): To dissolve the gelatin.
- Cool Whip Topping (1 tub, about 8 oz / 227 g): For that light, creamy finish. Feel free to use a dairy-free version if needed.
Optional but recommended for garnish and extra flavor:
- Fresh strawberries and blueberries (adds a fresh burst and pretty decoration)
- Mint leaves (for a subtle herbal note and color contrast)
For a gluten-free option, you can swap the yellow cake mix with a trusted gluten-free mix like Namaste Foods Yellow Cake Mix. And if you want to make it a bit lighter, swapping Cool Whip for homemade whipped cream works beautifully (though it won’t hold up quite as long).
Equipment Needed
- 9×13 Inch Baking Pan: The perfect size for this cake; glass or metal pans both work well. I prefer glass because it heats evenly and makes it easier to see the layers as you poke and pour the jello.
- Mixing Bowls: At least two—one for the cake batter and one or two for dissolving the jello mixes.
- Electric Mixer or Whisk: For mixing the cake batter smoothly. A handheld mixer saves time, but a sturdy whisk works if you don’t mind a little arm workout.
- Measuring Cups and Spoons: Accuracy matters here, especially with liquids and jello packets.
- Toothpick or Fork: For poking holes in the cooled cake. A fork creates slightly bigger holes, which I find lets more jello seep in.
- Spatula: For spreading the Cool Whip evenly on top.
For budget-conscious cooks, you don’t need any fancy gadgets to pull this off. Just a simple baking pan and some bowls will do the trick. If you bake often, investing in a good electric mixer will save you a ton of effort—not just here but for recipes like the Mint Chocolate Cake Jar Parfaits I love making around the holidays.
Preparation Method
- Preheat your oven to 350°F (175°C) and grease your 9×13 inch baking pan lightly with butter or non-stick spray. This helps the cake release easily after baking.
- Mix the cake batter: In a large bowl, combine the yellow cake mix, 1 cup (240 ml) water, 1/3 cup (80 ml) vegetable oil, and 3 large eggs. Use an electric mixer on medium speed for about 2 minutes until smooth and well blended. The batter should be pourable but thick enough to hold shape.
- Bake the cake: Pour the batter evenly into your prepared pan. Bake for 30-35 minutes, or until a toothpick inserted in the center comes out clean. Oven temperatures vary, so start checking around 28 minutes.
- Cool the cake completely: This is key! Let the cake cool in the pan for at least 30 minutes at room temperature. If you poke the cake too soon, the jello will just run off instead of soaking in.
- Prepare the Jello mixtures: While the cake cools, dissolve the red jello packet in 1 cup (240 ml) boiling water. Stir for about 2 minutes until fully dissolved. Repeat with the blue jello in a separate bowl. Let both cool to room temperature but not set.
- Poke the cake: Using a fork or toothpick, poke holes all over the surface of the cooled cake—about 1 inch apart. I like to make the holes close enough to get plenty of jello in each bite but not so close the cake falls apart.
- Pour the red Jello: Pour the cooled red jello evenly over one half of the cake, letting it seep into the holes. Use a spoon to gently spread if needed to cover evenly.
- Chill for 10 minutes: Pop the cake into the fridge just to let the red jello absorb a bit without setting fully.
- Pour the blue Jello: Pour the blue jello over the other half of the cake. This layered approach keeps the colors vibrant and distinct.
- Refrigerate for at least 4 hours: Or overnight if possible. The jello needs time to fully set inside the cake, creating those signature colorful pockets of flavor.
- Add the Cool Whip topping: Once the jello is set, spread a generous layer of Cool Whip evenly over the top. This adds a creamy, light finish that balances the sweet jello and moist cake perfectly.
- Garnish and serve: Top with fresh strawberries and blueberries if desired, and a few mint leaves for color and freshness. Slice and enjoy chilled.
Pro tip: When pouring the jello, pour slowly and let it settle into the holes instead of stirring or pushing it around, which can break the cake apart. Also, patience is key—don’t rush the chilling process or the jello won’t set right.
Cooking Tips & Techniques
Honestly, the best thing I learned after a few tries is to nail the cooling and poking steps. Trying to poke a warm cake? Disaster. The holes close back up or the jello runs off. Letting the cake cool completely is non-negotiable for that perfect poke-and-pour effect.
Another tip: use boiling water to dissolve the jello fully—it won’t set properly otherwise. I once tried using hot tap water, and the blue layer was a sad, runny mess. Lesson learned.
When spreading Cool Whip, keep it chilled but soft. If it’s straight from the fridge and too stiff, let it sit for a few minutes before spreading to avoid tearing the delicate cake surface. You want a smooth, fluffy layer that feels like a cloud.
Timing-wise, prepping the jello while the cake bakes saves time. Also, chilling after each jello pour helps keep the colors distinct instead of blending into a purplish mess. Trust me, I made that mistake once, and the kids were not impressed.
If you want to speed things up, you can try using instant jello mixes that set faster, but the texture isn’t quite as nice as the traditional gelatin packets. For a more grown-up twist, I’ve even added a splash of fresh lemon juice to the red jello mix to cut the sweetness a bit.
Variations & Adaptations
This recipe is pretty flexible, so it’s easy to make it your own or suit different dietary needs.
- Dietary Variation: Use sugar-free jello packets to reduce sugar content, or swap the Cool Whip for coconut whipped cream for a dairy-free version.
- Seasonal Twist: Instead of red and blue jello, try strawberry and lime or raspberry and lemon for a springtime vibe. You can even layer fresh pureed fruit gelatin for a natural flavor boost.
- Flavor Boost: Add a teaspoon of vanilla extract to your cake batter for extra warmth, or mix in some finely shredded coconut into the Cool Whip topping for texture.
- Cooking Method Adjustment: If you prefer cupcakes, bake the batter in muffin tins and poke smaller holes for individual servings—just watch the baking time (about 18-20 minutes).
- Personal Favorite Variation: One time, I swapped the blue jello for a blueberry gelatin and topped the cake with fresh whipped cream and a sprinkle of toasted almonds. The crunch added a lovely contrast to the soft, wobbly cake.
Serving & Storage Suggestions
This Red White and Blue Jello Poke Cake with Cool Whip is best served chilled straight from the fridge. The Cool Whip topping stays fluffy and the jello pockets are at their juiciest.
For serving, slice into squares and garnish with fresh berries and mint leaves to accentuate the patriotic colors. It pairs wonderfully with cold lemonade or iced tea for a refreshing summer combo.
Store leftovers covered tightly with plastic wrap or in an airtight container in the refrigerator for up to 3 days. The jello and cake flavor actually deepen over time, but the topping might weep a little after day two.
To reheat, I don’t recommend warming this cake since it loses the jello’s texture. Instead, let it come to room temperature for about 15 minutes if you prefer it less cold.
Nutritional Information & Benefits
Estimated per serving (based on 12 servings): approximately 250 calories, 3 g protein, 35 g carbohydrates, 10 g fat.
The key ingredients bring some benefits too: gelatin (from the jello) contains collagen which may support joint health. The cake provides a quick energy boost from carbs, while the Cool Whip topping adds a creamy texture with moderate fat content.
If you’re mindful of gluten, swapping to a gluten-free cake mix keeps this dessert safe for those with gluten intolerance. Dairy-free Cool Whip alternatives make it friendly for lactose-sensitive diets as well.
While this cake is definitely an indulgence, it’s a fun and colorful way to enjoy a sweet treat without complicated prep or hard-to-find ingredients.
Conclusion
This Flavorful Red White and Blue Jello Poke Cake with Cool Whip is proof that simple ingredients and a little creativity can transform an ordinary cake into a festive, memorable dessert. Its moist texture, vibrant colors, and light topping make it a favorite for all kinds of celebrations—especially those sunny summer afternoons where dessert is the highlight.
Feel free to tweak the flavors, try different jello combinations, or add your own twist to make it your signature dessert. I keep coming back to this recipe because it’s easy, fun, and always gets a smile from everyone who tries it. Plus, it’s a great companion to other easy treats like the Pink Velvet Cookie Crumble Board for a colorful dessert spread.
Give it a shot the next time you want a no-fuss, crowd-pleasing dessert that’s as delightful to make as it is to eat. I’d love to hear how you customize it or what occasion you serve it for!
FAQs About Flavorful Red White and Blue Jello Poke Cake with Cool Whip
Can I use homemade cake instead of boxed cake mix?
Absolutely! A simple yellow or white cake recipe works just as well. Just make sure it’s baked and fully cooled before poking and adding the jello.
How long should I let the jello set in the cake?
At least 4 hours in the fridge is best, but overnight chilling gives the most flavorful, fully set jello pockets.
Can I make this cake ahead of time?
Yes! Make it a day in advance and keep it refrigerated. The flavors meld and the jello settles nicely, making it even better the next day.
What if I don’t have Cool Whip?
You can use homemade whipped cream or even a cream cheese frosting for a richer topping, though the texture will be different.
Is it possible to make this cake gluten-free or dairy-free?
Yes. Use a gluten-free yellow cake mix and a dairy-free Cool Whip alternative to suit dietary restrictions without sacrificing flavor.
Pin This Recipe!

Flavorful Red White and Blue Jello Poke Cake Recipe with Easy Cool Whip Topping

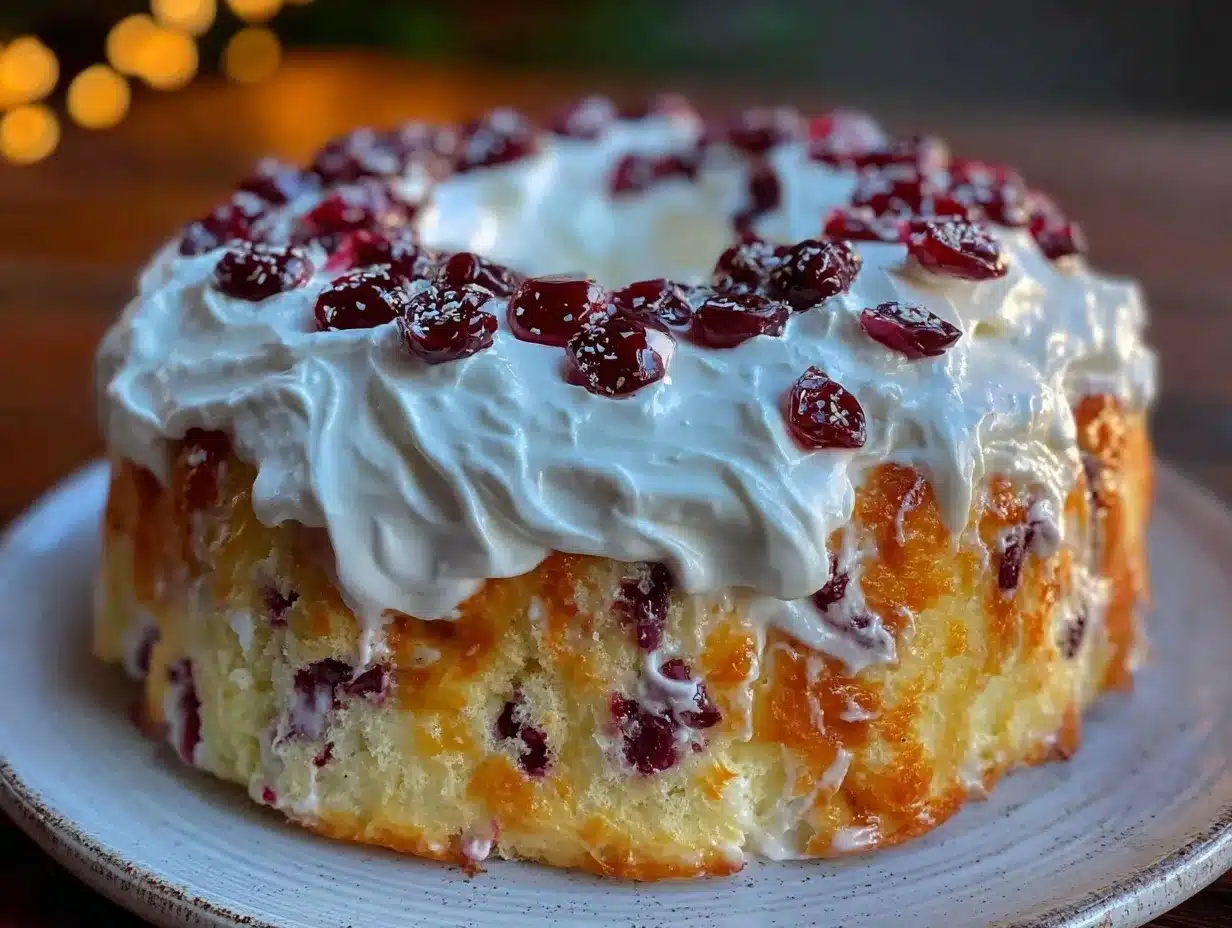
A festive and nostalgic poke cake featuring layers of red and blue jello poured into a moist yellow cake, topped with light and fluffy Cool Whip. Perfect for summer celebrations and easy to make with pantry staples.
- Prep Time: 15 minutes
- Cook Time: 35 minutes
- Total Time: 5 hours
- Yield: 12 servings 1x
- Category: Dessert
- Cuisine: American
Ingredients
- 1 box Yellow Cake Mix (about 15.25 oz / 432 g)
- 1 cup Water (240 ml)
- 1/3 cup Vegetable Oil (80 ml)
- 3 large Eggs, room temperature
- 1 packet Red Jello Mix (3 oz / 85 g), strawberry or cherry flavor
- 1 packet Blue Jello Mix (3 oz / 85 g), blue raspberry flavor
- 1 cup Boiling Water (240 ml) for each Jello flavor
- 1 tub Cool Whip Topping (about 8 oz / 227 g)
- Optional: Fresh strawberries and blueberries for garnish
- Optional: Mint leaves for garnish
Instructions
- Preheat your oven to 350°F (175°C) and grease a 9×13 inch baking pan lightly with butter or non-stick spray.
- In a large bowl, combine the yellow cake mix, 1 cup water, 1/3 cup vegetable oil, and 3 large eggs. Mix on medium speed for about 2 minutes until smooth and well blended.
- Pour the batter evenly into the prepared pan and bake for 30-35 minutes, or until a toothpick inserted in the center comes out clean.
- Cool the cake completely in the pan for at least 30 minutes at room temperature.
- Dissolve the red jello packet in 1 cup boiling water, stirring for about 2 minutes until fully dissolved. Repeat with the blue jello in a separate bowl. Let both cool to room temperature but not set.
- Using a fork or toothpick, poke holes all over the surface of the cooled cake about 1 inch apart.
- Pour the cooled red jello evenly over one half of the cake, letting it seep into the holes. Spread gently if needed.
- Chill the cake in the refrigerator for 10 minutes to let the red jello absorb slightly.
- Pour the blue jello over the other half of the cake, keeping the colors distinct.
- Refrigerate the cake for at least 4 hours or overnight to allow the jello to fully set inside the cake.
- Spread a generous layer of Cool Whip evenly over the top of the set jello.
- Garnish with fresh strawberries, blueberries, and mint leaves if desired. Slice and serve chilled.
Notes
Let the cake cool completely before poking holes to prevent jello from running off. Pour jello slowly and avoid stirring to keep the cake intact. Chill after each jello pour to maintain distinct colors. Use boiling water to dissolve jello fully. Cool Whip should be softened slightly before spreading for a smooth finish. For gluten-free, use a gluten-free yellow cake mix; for dairy-free, use dairy-free Cool Whip alternatives.
Nutrition
- Serving Size: 1 slice (1/12th of c
- Calories: 250
- Fat: 10
- Carbohydrates: 35
- Protein: 3
Keywords: poke cake, jello poke cake, red white and blue dessert, summer dessert, patriotic cake, easy dessert, Cool Whip topping