Let me tell you, the scent of rich chocolate mingling with cool mint and that subtle hint of coffee wafting from my oven is enough to make anyone’s mouth water. The first time I baked these Irresistible St. Patrick’s Mint Mocha Cookie Bars, I was instantly hooked—the kind of moment where you pause, take a deep breath, and just smile because you know you’re onto something truly special. It was a chilly March afternoon years ago, when I was knee-high to a grasshopper, helping my grandma whip up something festive for St. Patrick’s Day.
Back then, I never imagined that a simple cookie bar recipe could pack so much punch in flavor and nostalgia. I stumbled upon the idea by trying to recreate my favorite mint mocha latte in a handheld treat. My family couldn’t stop sneaking them off the cooling rack (and I can’t really blame them). Honestly, these bars are dangerously easy to make and offer pure, nostalgic comfort—perfect for brightening up your Pinterest cookie board or for sharing with friends at a cozy get-together.
You know what? After testing this recipe multiple times (in the name of research, of course), it quickly became a staple for family gatherings and gifting. If you’re a fan of that refreshing mint-chocolate-coffee combo, you’re going to want to bookmark this one—it feels like a warm hug in every bite.
Why You’ll Love This Recipe
Honestly, these Irresistible St. Patrick’s Mint Mocha Cookie Bars bring together everything you want from a treat—comfort, flavor, and ease. As someone who’s baked for years and tested countless cookie bar recipes, I’m confident this one stands out for several reasons:
- Quick & Easy: Comes together in under 40 minutes, perfect for busy weeknights or last-minute cravings.
- Simple Ingredients: No fancy grocery trips needed; you likely already have everything in your kitchen.
- Perfect for St. Patrick’s Day Celebrations: Great for potlucks, festive brunches, or as a sweet treat to impress your guests.
- Crowd-Pleaser: Always gets rave reviews from kids and adults alike, thanks to its balanced mint and mocha flavor.
- Unbelievably Delicious: The chewy texture combined with the rich mocha and refreshing mint creates next-level comfort food.
This recipe isn’t just another cookie bar—it’s the best version you’ll find. The secret lies in blending finely chopped fresh mint with classic espresso powder, giving these bars a depth of flavor that’s both familiar and exciting. Plus, the subtle crunch of semi-sweet chocolate chips adds a satisfying texture that keeps you coming back for more. It’s comfort food reimagined—faster, fresher, but with soul-soothing satisfaction. Whether you’re impressing guests or craving a cozy snack, these bars won’t disappoint.
What Ingredients You Will Need
This recipe uses simple, wholesome ingredients to deliver bold flavor and satisfying texture without the fuss. Most of these are pantry staples, and you can easily swap a few to suit your dietary preferences.
- All-purpose flour – 2 cups (240g), for that perfect cookie bar structure
- Granulated sugar – 1 cup (200g), adds sweetness and crunch
- Unsalted butter, softened – 1/2 cup (113g) (adds richness; I prefer Land O’Lakes for best texture)
- Large eggs – 2, room temperature to bind everything smoothly
- Espresso powder – 1 tablespoon, for that unmistakable mocha kick (I recommend Medaglia D’Oro)
- Pure peppermint extract – 1 teaspoon, for fresh mint flavor
- Baking powder – 1 teaspoon, helps the bars rise just right
- Salt – 1/2 teaspoon, balances sweetness
- Semi-sweet chocolate chips – 1 cup (175g), adds melty chocolate pockets
- Green food coloring – Optional, for that festive St. Patrick’s Day vibe
- Powdered sugar – for dusting (optional)
Substitution tips: Use almond flour for a gluten-free option, but keep in mind it might change texture slightly. Swap peppermint extract with fresh chopped mint leaves if you prefer a more natural mint flavor. You can use dairy-free butter and egg replacers to make these vegan-friendly, but the texture may vary.
Equipment Needed
- 9×13-inch baking pan – standard size works perfectly for these bars
- Mixing bowls – one large and one medium for dry and wet ingredients
- Electric hand mixer or stand mixer – helps blend ingredients smoothly (though whisk and elbow grease work too!)
- Rubber spatula – for folding in chocolate chips gently
- Measuring cups and spoons – accuracy matters here
- Cooling rack – to cool bars evenly after baking
If you don’t have a 9×13-inch pan, a similar-sized oven-safe dish will do, but watch your baking time closely. For mixing, I’ve used both handheld mixers and stand mixers—both get the job done, but a stand mixer makes it easier, especially on busy days. When it comes to maintenance, keeping your baking pans greased or lined with parchment paper saves time and cleanup.
Preparation Method
- Preheat your oven to 350°F (175°C). Grease your 9×13-inch baking pan or line it with parchment paper for easy removal later. This step sets the stage for baking success and prevents sticking.
- Mix dry ingredients: In a medium bowl, whisk together 2 cups (240g) all-purpose flour, 1 teaspoon baking powder, 1 tablespoon espresso powder, and 1/2 teaspoon salt. The espresso powder adds a subtle mocha depth without overpowering—trust me, it’s magic!
- Cream butter and sugar: In a large bowl, beat 1/2 cup (113g) softened unsalted butter and 1 cup (200g) granulated sugar with an electric mixer until light and fluffy (about 3-4 minutes). This is key for that tender crumb.
- Add eggs and extract: Beat in 2 large eggs one at a time, then mix in 1 teaspoon peppermint extract (and green food coloring if using). The batter will smell heavenly at this point.
- Combine wet and dry: Gradually add the dry mixture to the wet, mixing on low speed just until combined. Don’t overmix or the bars might turn dense.
- Fold in chocolate chips: Using a rubber spatula, gently fold in 1 cup (175g) semi-sweet chocolate chips, distributing them evenly.
- Pour batter into pan: Spread the batter evenly in the prepared pan, smoothing the top with your spatula.
- Bake: Place in the oven and bake for 25-30 minutes. Bars should be golden around the edges and a toothpick inserted in the center should come out with a few moist crumbs (not wet batter!).
- Cool: Let the bars cool completely on a wire rack before slicing into squares. This prevents crumbling and helps flavors meld.
- Optional finishing touch: Dust with powdered sugar for a festive look right before serving.
Pro tip: If you notice the bars browning too quickly, loosely tent with foil halfway through baking. Also, stirring in the dry ingredients slowly helps avoid a floury mess in your kitchen (learned that one the hard way!).
Cooking Tips & Techniques
Getting these Mint Mocha Cookie Bars just right takes a bit of finesse, but nothing too complicated—let’s be honest, who wants fuss on a festive day?
- Room temperature eggs and butter: This avoids lumps and helps everything blend smoothly.
- Don’t overmix: Once you add flour, mix just until combined. Overworking the batter can make your bars tough.
- Espresso powder strength: Using too much can make the bars bitter. Stick to 1 tablespoon unless you’re a serious coffee fan.
- Chilling the batter: For thicker bars, chill the batter for 15 minutes before baking.
- Test doneness: Insert a toothpick; moist crumbs mean perfect gooeyness inside. Dry crumbs mean overbaked.
I once baked these bars for a crowd and forgot the peppermint extract—huge mistake! The mint is what makes these bars shine. Also, multitasking by prepping dry and wet ingredients separately saves you time and keeps the process smooth. And hey, if your bars seem a bit soft after cooling, just pop them in the fridge for 20 minutes to firm up.
Variations & Adaptations
These cookie bars are pretty versatile, so feel free to tweak them to suit your taste, dietary needs, or the season.
- Dietary swaps: Use coconut sugar instead of granulated sugar for a lower glycemic index. Swap all-purpose flour for gluten-free flour blends.
- Flavor twists: Add crushed peppermint candies or Andes mints on top before baking for extra minty crunch. Try white chocolate chips instead of semi-sweet for a sweeter touch.
- Seasonal adaptations: Swap the peppermint extract with orange zest and a dash of cinnamon for a festive winter variation.
- Cooking method changes: These bars can be baked in muffin tins for individual portions. Adjust baking time to 18-20 minutes.
- Personal variation: I once stirred in a handful of chopped toasted walnuts for a delightful crunch that surprised my family.
Serving & Storage Suggestions
These bars are best served at room temperature, so the chocolate chips are melty but not gooey. For a festive touch, dust with powdered sugar or drizzle some mint-infused chocolate ganache on top.
Pair these bars with a hot cup of coffee or a creamy latte for a perfect afternoon pick-me-up. They’re also fantastic alongside vanilla ice cream for a dessert that feels indulgent yet familiar.
Store leftovers in an airtight container at room temperature for up to 3 days. For longer storage, refrigerate for up to a week or freeze for up to 3 months—just thaw at room temperature before serving. Reheating in the microwave for 10-15 seconds brings back that fresh-baked warmth.
Over time, the mint and mocha flavors actually meld and deepen, so if you’re patient, you’ll find the bars taste even better the next day. Just don’t tell anyone I said that—they’ll want to hoard them all!
Nutritional Information & Benefits
Each serving (one bar, assuming 12 bars per pan) contains approximately:
| Calories | 220 kcal |
|---|---|
| Fat | 11g |
| Carbohydrates | 28g |
| Protein | 3g |
| Sugar | 18g |
Besides being a delightful treat, these bars provide a small caffeine boost thanks to the espresso powder, which can perk you up without needing that extra cup of coffee. Peppermint extract and fresh mint are known for aiding digestion and adding a refreshing taste without extra calories.
For those watching gluten or dairy, simple substitutions make this recipe accessible for many diets. Just note that chocolate chips may contain dairy or soy allergens. As always, I recommend checking labels if allergies are a concern.
Conclusion
In a nutshell, these Irresistible St. Patrick’s Mint Mocha Cookie Bars are a must-try for anyone who loves the perfect blend of mint, mocha, and chocolate in a chewy, easy-to-make treat. You can customize the flavors, swap ingredients, or keep it classic—the recipe’s flexibility is part of the charm.
I love this recipe because it reminds me of family traditions and cozy moments while still feeling fresh and fun for any occasion. Now it’s your turn to make it your own! Go ahead, bake a batch, and watch your friends and family disappear into cookie bar bliss.
Don’t forget to share your thoughts, tweaks, or photos in the comments—I’d love to hear how your batch turns out. Happy baking and may your St. Patrick’s Day be filled with sweet, minty joy!
FAQs
Can I make these cookie bars ahead of time?
Absolutely! These bars store well for several days and even taste better after the flavors meld. Just keep them in an airtight container at room temperature or refrigerate for longer freshness.
What if I don’t have espresso powder?
You can substitute instant coffee granules or omit it entirely, though the mocha flavor will be less pronounced. For a milder coffee flavor, 1 tablespoon of brewed espresso works too.
Are these bars gluten-free?
Not as written, but you can swap the all-purpose flour for a 1:1 gluten-free flour blend. Just note the texture may be a bit different.
Can I use fresh mint instead of peppermint extract?
Yes! Finely chop fresh mint leaves and fold them into the batter. You may want to reduce or omit the peppermint extract to avoid overpowering mintiness.
How do I prevent the bars from being too dry?
Make sure not to overbake—check them a few minutes before the timer. Also, using room temperature ingredients and not overmixing helps keep the bars moist and tender.
Pin This Recipe!

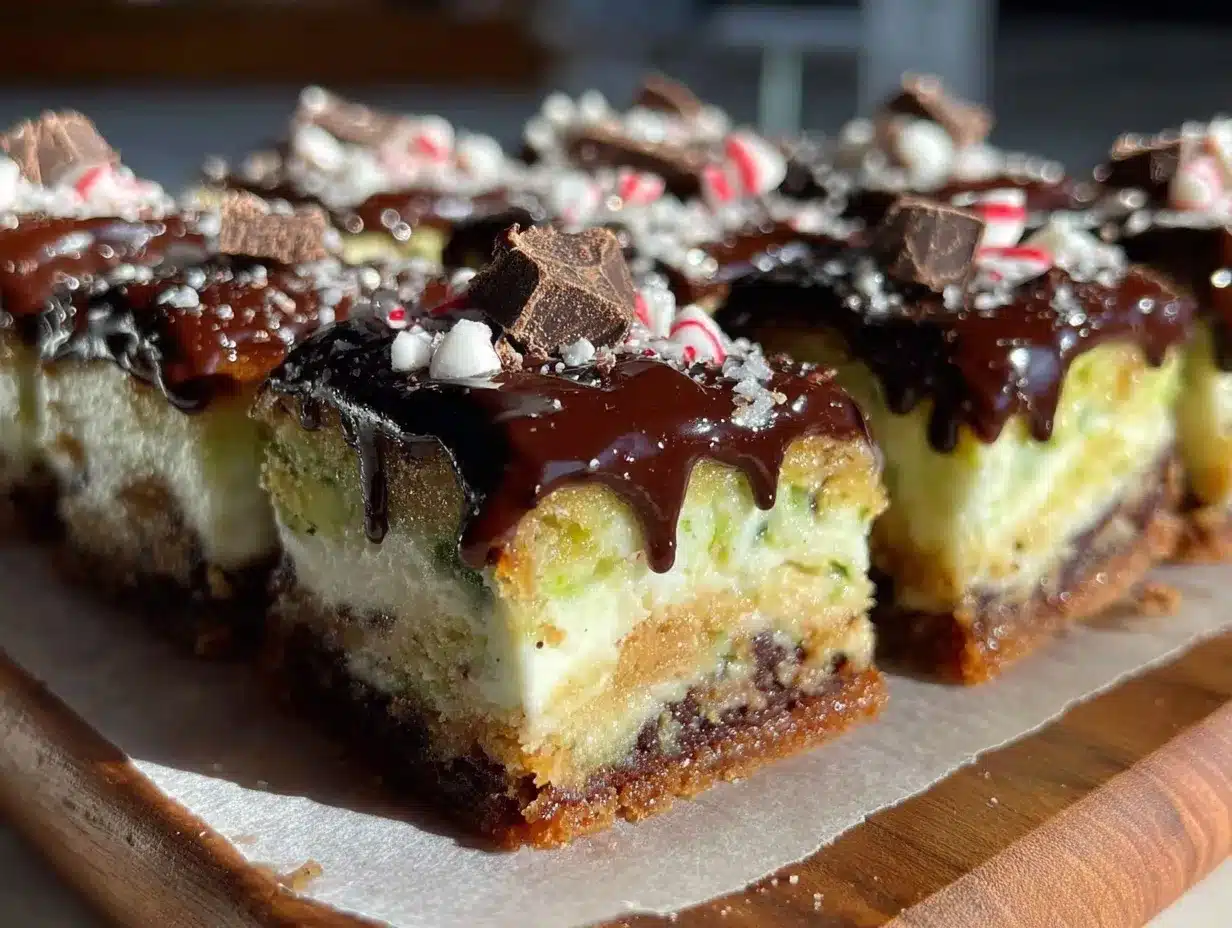
Irresistible St. Patrick’s Mint Mocha Cookie Bars
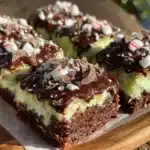
These chewy cookie bars combine rich chocolate, refreshing mint, and a subtle coffee mocha flavor, perfect for St. Patrick’s Day celebrations or cozy gatherings.
- Prep Time: 15 minutes
- Cook Time: 25-30 minutes
- Total Time: 40-45 minutes
- Yield: 12 servings 1x
- Category: Dessert
- Cuisine: American
Ingredients
- 2 cups (240g) all-purpose flour
- 1 cup (200g) granulated sugar
- 1/2 cup (113g) unsalted butter, softened
- 2 large eggs, room temperature
- 1 tablespoon espresso powder
- 1 teaspoon pure peppermint extract
- 1 teaspoon baking powder
- 1/2 teaspoon salt
- 1 cup (175g) semi-sweet chocolate chips
- Green food coloring (optional)
- Powdered sugar for dusting (optional)
Instructions
- Preheat your oven to 350°F (175°C). Grease a 9×13-inch baking pan or line it with parchment paper.
- In a medium bowl, whisk together the flour, baking powder, espresso powder, and salt.
- In a large bowl, beat the softened butter and granulated sugar with an electric mixer until light and fluffy, about 3-4 minutes.
- Beat in the eggs one at a time, then mix in the peppermint extract and green food coloring if using.
- Gradually add the dry ingredients to the wet ingredients, mixing on low speed just until combined. Do not overmix.
- Gently fold in the semi-sweet chocolate chips using a rubber spatula.
- Spread the batter evenly in the prepared pan and smooth the top.
- Bake for 25-30 minutes until bars are golden around the edges and a toothpick inserted in the center comes out with a few moist crumbs.
- Cool completely on a wire rack before slicing into squares.
- Optional: Dust with powdered sugar before serving.
Notes
Use room temperature eggs and butter for smooth blending. Avoid overmixing after adding flour to keep bars tender. Tent with foil if browning too quickly. Chilling batter for 15 minutes before baking yields thicker bars. Bars can be stored at room temperature for 3 days, refrigerated for up to a week, or frozen for up to 3 months.
Nutrition
- Serving Size: 1 bar (assuming 12 b
- Calories: 220
- Sugar: 18
- Fat: 11
- Carbohydrates: 28
- Protein: 3
Keywords: mint mocha cookie bars, St. Patrick’s Day dessert, chocolate mint bars, espresso cookie bars, easy cookie bars