“Are you sure that’s just frosting?” my niece asked, eyes wide as I handed her a sugar cookie dripping with glossy, smooth icing. Honestly, I get that a lot when I make this perfect bakery-style sugar cookie flood frosting recipe. It started on a chaotic Saturday afternoon when I only had a few minutes and a handful of ingredients on hand. I was half-dreading decorating sugar cookies for a last-minute party, expecting a sticky mess or a frosting disaster.
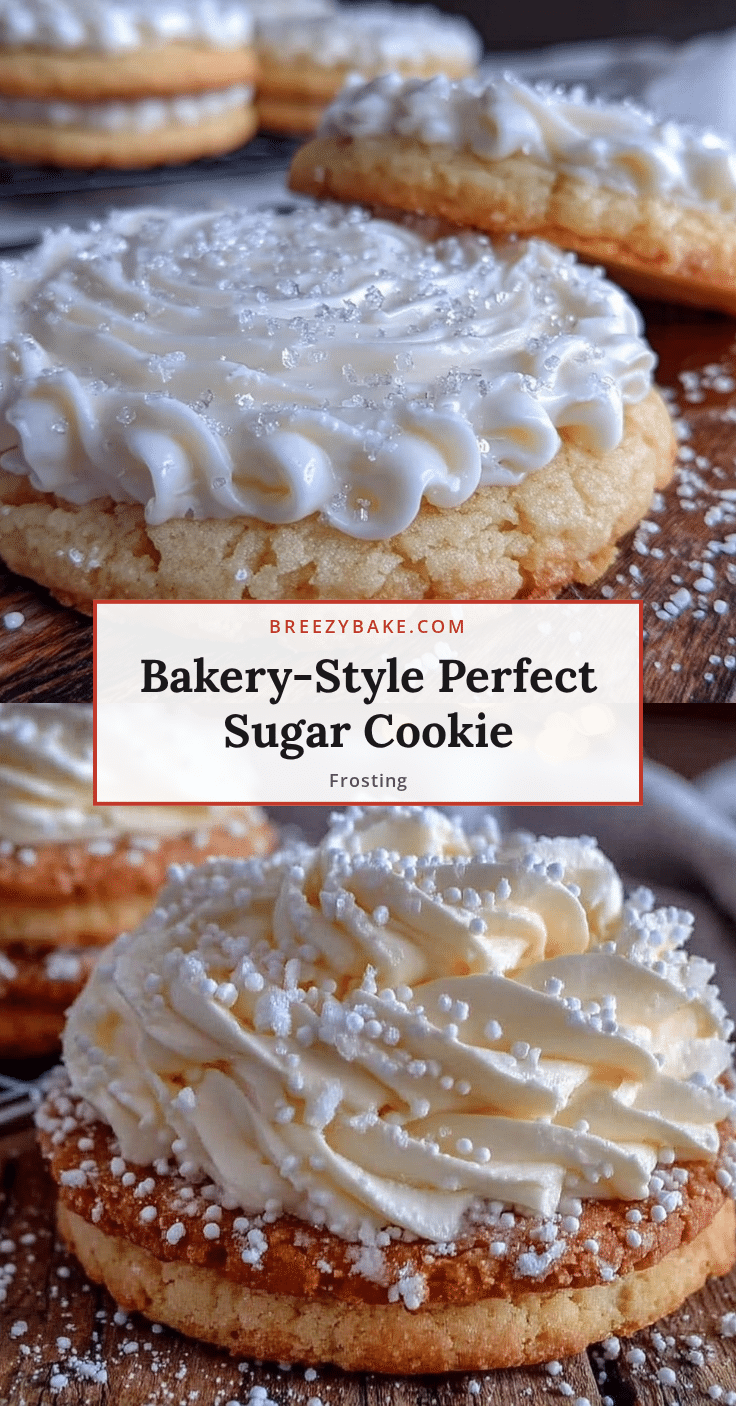
But, surprise! This frosting flowed like a dream, settled with a satin finish, and hardened just right — no cracking, no dull spots. Soon, friends were asking for the recipe, and I found myself making it again and again, tweaking just a little each time. The frosting’s silky texture and subtle sweetness made every cookie look like it came from a fancy bakery, not my cluttered kitchen.
It’s funny how something so simple turned into a go-to secret for making sugar cookies that wow at every get-together. What stuck with me most is how this frosting feels like a little moment of calm and creativity in a busy household — a way to slow down and enjoy the process without stress. That’s why I’m sharing this recipe today, hoping you find the same quiet satisfaction I do every time I spread this perfect bakery-style sugar cookie flood frosting on a fresh batch.
Why You’ll Love This Recipe
This perfect bakery-style sugar cookie flood frosting recipe has been tested more times than I can count, and here’s why it’s earned a permanent spot in my baking repertoire:
- Quick & Easy: Comes together in under 15 minutes, perfect for last-minute decorating sessions or spontaneous cookie cravings.
- Simple Ingredients: No fancy or hard-to-find items needed — just pantry staples you likely already have.
- Perfect for Any Occasion: Whether it’s holiday cookies, birthday parties, or casual afternoon treats, this frosting fits right in.
- Crowd-Pleaser: Kids and adults alike are always impressed by the smooth, glossy finish and delicate sweetness.
- Unbelievably Delicious: Unlike some frostings that are too sweet or chalky, this one balances flavor and texture beautifully.
What really sets this frosting apart is the technique — mixing at just the right speed and adding water gradually to achieve that perfect flood consistency. It’s not runny but not stiff either. I also add a tiny pinch of cream of tartar to stabilize it, which honestly makes all the difference when you’re piping fine details or flooding large areas.
And if you’re curious, this frosting pairs amazingly with the sugar cookies from my pink velvet cookie crumble board recipe — together, they’re like a match made in sweet heaven.
So, whether you’re a newbie or someone who’s tried every frosting recipe out there, this one’s worth a shot. It’s the kind of frosting that makes you close your eyes after the first bite and smile — the kind that turns simple cookies into little works of art without the stress.
What Ingredients You Will Need
This perfect bakery-style sugar cookie flood frosting recipe uses simple, wholesome ingredients to deliver that bold flavor and satisfying texture without fuss. Most are pantry staples, so you won’t need a special trip to the store.
- Powdered Sugar (Confectioners’ Sugar) – 4 cups (480g), sifted for smoothness. I prefer Domino brand for the finest texture.
- Egg Whites or Meringue Powder – 3 large egg whites (about 90g) or 3 tablespoons meringue powder with 6 tablespoons water. Using meringue powder is safer if you’re concerned about raw eggs, and it helps stabilize the frosting.
- Fresh Lemon Juice or Vanilla Extract – 1 teaspoon. Lemon juice adds a subtle tang, balancing the sweetness, but vanilla works beautifully too.
- Water – 2 to 4 tablespoons (30-60 ml), added gradually to reach the perfect flood consistency.
- Cream of Tartar – 1/8 teaspoon (optional but recommended). Helps stabilize the frosting and prevent cracking.
- Food Coloring – Gel-based preferred for vibrant colors without thinning the frosting (optional).
If you want a dairy-free version, just swap egg whites for meringue powder; it’s worked well for me every time. Also, in warmer months, I sometimes add a teaspoon of corn syrup for extra shine, but it’s not essential.
For a more festive touch, I’ve even mixed in a bit of peppermint extract during the holidays — it’s a small tweak that makes a big difference.
Equipment Needed
Getting that perfect bakery-style flood frosting means having the right tools on hand, but nothing too fancy or expensive.
- Electric Mixer: Stand or hand mixer with a whisk attachment. Whisking by hand is possible but tedious — trust me, the mixer is a game-changer.
- Sifting Basket or Fine Mesh Sieve: To sift the powdered sugar for a silky-smooth result.
- Mixing Bowls: Medium-sized, preferably glass or metal for stability during whisking.
- Rubber Spatula: For scraping down bowl sides and folding ingredients.
- Piping Bags and Tips: Small round tips (#1 or #2) for outlining and flooding details. You can also use zip-top bags with a small cut in one corner as a budget-friendly alternative.
- Toothpicks or Scribe Tool: For smoothing out bubbles and perfecting edges after flooding.
Personally, my trusty KitchenAid mixer has seen countless batches of this frosting, but any mixer with good whisk power will do. Keeping your bowls and utensils grease-free is essential — even a tiny bit of fat can cause the frosting to deflate.
Preparation Method

- Sift the powdered sugar into a large mixing bowl to remove lumps and ensure a smooth texture. This step takes about 3-5 minutes but makes all the difference.
- Mix egg whites and cream of tartar (if using fresh eggs) or prepare meringue powder with water according to package instructions. Beat on medium speed until frothy but not stiff, about 1-2 minutes.
- Add lemon juice or vanilla extract to the egg whites or meringue mixture and gently combine.
- Gradually add the sifted powdered sugar to the wet ingredients, mixing on low speed with your electric mixer. The mixture will be thick and stiff at this point.
- Slowly add water, one tablespoon at a time, mixing after each addition. Watch for that perfect flood consistency — it should flow smoothly off a spoon but hold its shape without running off a cookie.
- Adjust the consistency as needed. Add a few drops more water if too thick, or a small pinch of powdered sugar if too thin. This usually takes 5-7 minutes.
- Divide the frosting into separate bowls if you want different colors. Add gel food coloring a drop at a time and mix until you get the shades you desire.
- Transfer frosting to piping bags fitted with small round tips for outlining and larger tips or no tip for flooding. Snip the bag tip carefully — too big and you lose control, too small and it slows you down.
- Outline your sugar cookies first, then flood the inside with thinner frosting. Use a toothpick or scribe tool to pop tiny bubbles and smooth edges while the frosting is still wet.
- Let cookies dry at room temperature for at least 4 hours or overnight before stacking or packaging. This step is key for that smooth, firm finish.
When I’m in a rush, I’ve learned that placing the cookies in front of a fan speeds drying without causing cracks or dull spots. Also, be patient — rushing this step often leads to frosting flaws that are tough to fix later.
Cooking Tips & Techniques
Mastering this bakery-style sugar cookie flood frosting takes a few tricks I’ve picked up the hard way:
- Whisk at Medium Speed: Too slow and the frosting won’t aerate; too fast and it might become too fluffy and dry.
- Add Water Slowly: Gradual additions keep the consistency in check — flooding frosting should be pourable but not watery.
- Use Gel Food Coloring: Liquid colors thin the frosting, which messes with consistency and drying time.
- Stay Away from Grease: Even a tiny bit of butter or oil on utensils or bowls can deflate your frosting.
- Outline Before Flooding: This helps keep the flood icing where you want it and prevents colors from running.
- Work in Small Batches: Frosting can dry out quickly once exposed, so only mix what you need at a time.
- Fixing Bubbles: Use a toothpick to gently pop them before the frosting sets.
Once, I accidentally used room-temperature eggs that were just a bit too warm, and my frosting took forever to stiffen. Lesson learned: cold eggs make a difference in stability. Also, I always line my baking surface with parchment paper to avoid sticking and ease cleanup.
Multitasking tip: While cookies bake, I prep and color the frosting. That way, everything lines up perfectly for decorating as soon as the cookies cool.
Variations & Adaptations
Feel free to make this frosting your own with these variations:
- Flavor Twists: Swap vanilla for almond, peppermint, or citrus extracts to match your cookie theme.
- Diet-Friendly: Use aquafaba (chickpea water) instead of egg whites for a vegan-friendly option — the texture is surprisingly similar.
- Seasonal Colors: Mix in natural colorants like beet powder for pinks or matcha for green hues, perfect for themed treats.
- Thicker Consistency: Add a little more powdered sugar to make a piping consistency frosting, great for detailed decorations.
- Faster Drying: Add a teaspoon of corn syrup to boost shine and speed up drying time during humid days.
One time, I swapped out lemon juice for a splash of orange blossom water — it was subtle but gave cookies a delightful floral hint. It’s fun to experiment, especially if you have a baking project like my creamy pink strawberry cream puff bars where complementary flavors really shine.
Serving & Storage Suggestions
These cookies with the perfect bakery-style flood frosting are best served at room temperature, letting the frosting’s smooth texture and bright colors shine. Display them on a pretty platter or stack them carefully for gifting.
They pair beautifully with a cup of tea, coffee, or even a cold glass of milk. If you want to get a little fancy, try them alongside a fresh berry parfait or a light mousse for a dessert spread.
To store, keep cookies in an airtight container at room temperature for up to 3 days. If you need longer, freeze them in a single layer on a baking sheet, then transfer to a freezer bag. Thaw at room temperature before serving — the frosting retains its silky finish surprisingly well.
Reheating isn’t necessary and might soften the frosting too much, but if you do, a gentle warm-up in a low oven (about 200°F / 93°C) for a few minutes works.
One neat thing I’ve noticed is the frosting’s flavor deepens slightly after a day, making the cookies taste even richer — so if you can wait, that’s a little bonus.
Nutritional Information & Benefits
This perfect bakery-style sugar cookie flood frosting is mostly sugar and egg whites, so it’s a treat to enjoy in moderation. Here’s a quick snapshot per serving (about one frosted cookie):
| Calories | 90-110 |
|---|---|
| Fat | 0.1g (negligible) |
| Carbohydrates | 23g |
| Sugar | 21g |
| Protein | 0.5g |
Key ingredients like egg whites provide a bit of protein and help keep the frosting light. If you use meringue powder, it’s pasteurized and safe for most diets, but avoid if allergic to eggs. For gluten-free fun, pair this frosting with your favorite gluten-free sugar cookie dough.
While this frosting is sweet, it’s a nice option compared to buttercream for those wanting less fat and a cleaner finish. I find it’s also less heavy on the palate, making it easier to enjoy more than one cookie (don’t tell!).
Conclusion
So, there you have it — a perfect bakery-style sugar cookie flood frosting recipe that’s approachable, reliable, and downright fun to make. I love how it turns simple cookies into eye-catching treats, whether for a big celebration or a quiet afternoon indulgence.
Feel free to tweak the flavors, colors, and techniques to match your style — that’s the joy of frosting! I promise once you get the hang of this recipe, you’ll find yourself reaching for it again and again, just like I do.
If you give it a try, I’d love to hear how it turns out or any creative spins you put on it. And if you’re looking for more inspiration to pair with your decorated sugar cookies, you might enjoy the decadent chocolate-covered strawberry ice cream mousse cups — they’re a perfect summer treat to balance the sweet and creamy.
Happy decorating, and may your cookie frosting always flow just right!
FAQs About Perfect Bakery-Style Sugar Cookie Flood Frosting
What is flood frosting and how is it different from regular icing?
Flood frosting is thinner than regular icing, designed to “flood” or fill in cookie outlines smoothly, creating a smooth, glossy surface. Regular icing is thicker and used for piping or decorations that need to hold shape.
Can I make this frosting ahead of time?
Yes! You can prepare the frosting a day ahead. Store it in an airtight container and stir gently before using. You might need to adjust the consistency with a little water.
How do I fix frosting that’s too runny or too thick?
If it’s too runny, add a small amount of sifted powdered sugar. If too thick, add water drop by drop until it flows smoothly but holds shape.
Is it safe to use raw egg whites in this frosting?
Raw egg whites carry a slight risk of salmonella. Use pasteurized egg whites or meringue powder for a safer option, especially when serving to kids or vulnerable individuals.
How long does it take for the flooded frosting to dry completely?
Typically, it takes 4 to 6 hours at room temperature to dry fully. For best results, let cookies sit overnight before stacking or packaging.
Pin This Recipe!
Perfect Bakery-Style Sugar Cookie Flood Frosting Recipe

A quick and easy bakery-style sugar cookie flood frosting that flows smoothly, dries with a satin finish, and hardens perfectly without cracking or dull spots. Perfect for decorating sugar cookies with a glossy, professional look.
- Prep Time: 10 minutes
- Cook Time: 0 minutes
- Total Time: 4 hours 10 minutes
- Yield: About 24 frosted sugar cookies 1x
- Category: Dessert
- Cuisine: American
Ingredients
- 4 cups (480g) powdered sugar (confectioners’ sugar), sifted
- 3 large egg whites (about 90g) or 3 tablespoons meringue powder with 6 tablespoons water
- 1 teaspoon fresh lemon juice or vanilla extract
- 2 to 4 tablespoons (30–60 ml) water, added gradually
- 1/8 teaspoon cream of tartar (optional but recommended)
- Gel-based food coloring (optional)
- 1 teaspoon corn syrup (optional, for extra shine and faster drying)
Instructions
- Sift the powdered sugar into a large mixing bowl to remove lumps and ensure a smooth texture.
- Mix egg whites and cream of tartar (if using fresh eggs) or prepare meringue powder with water according to package instructions. Beat on medium speed until frothy but not stiff, about 1-2 minutes.
- Add lemon juice or vanilla extract to the egg whites or meringue mixture and gently combine.
- Gradually add the sifted powdered sugar to the wet ingredients, mixing on low speed with your electric mixer until thick and stiff.
- Slowly add water, one tablespoon at a time, mixing after each addition until the frosting reaches the perfect flood consistency—smoothly flowing off a spoon but holding shape without running.
- Adjust consistency as needed by adding a few drops more water if too thick, or a small pinch of powdered sugar if too thin.
- Divide the frosting into separate bowls if coloring. Add gel food coloring a drop at a time and mix until desired shades are achieved.
- Transfer frosting to piping bags fitted with small round tips for outlining and larger tips or no tip for flooding. Snip the bag tip carefully.
- Outline sugar cookies first, then flood the inside with thinner frosting. Use a toothpick or scribe tool to pop bubbles and smooth edges while frosting is wet.
- Let cookies dry at room temperature for at least 4 hours or overnight before stacking or packaging.
Notes
Use pasteurized egg whites or meringue powder for safety. Add water gradually to achieve perfect flood consistency. Avoid grease on utensils and bowls to prevent deflating frosting. Let cookies dry at room temperature for at least 4 hours or overnight. Use gel food coloring to avoid thinning frosting. For faster drying and extra shine, add a teaspoon of corn syrup. Aquafaba can be used as a vegan substitute for egg whites.
Nutrition
- Serving Size: One frosted sugar co
- Calories: 90110
- Sugar: 21
- Fat: 0.1
- Carbohydrates: 23
- Protein: 0.5
Keywords: sugar cookie frosting, flood frosting, bakery-style frosting, sugar cookie decoration, easy frosting recipe, cookie decorating, meringue powder frosting