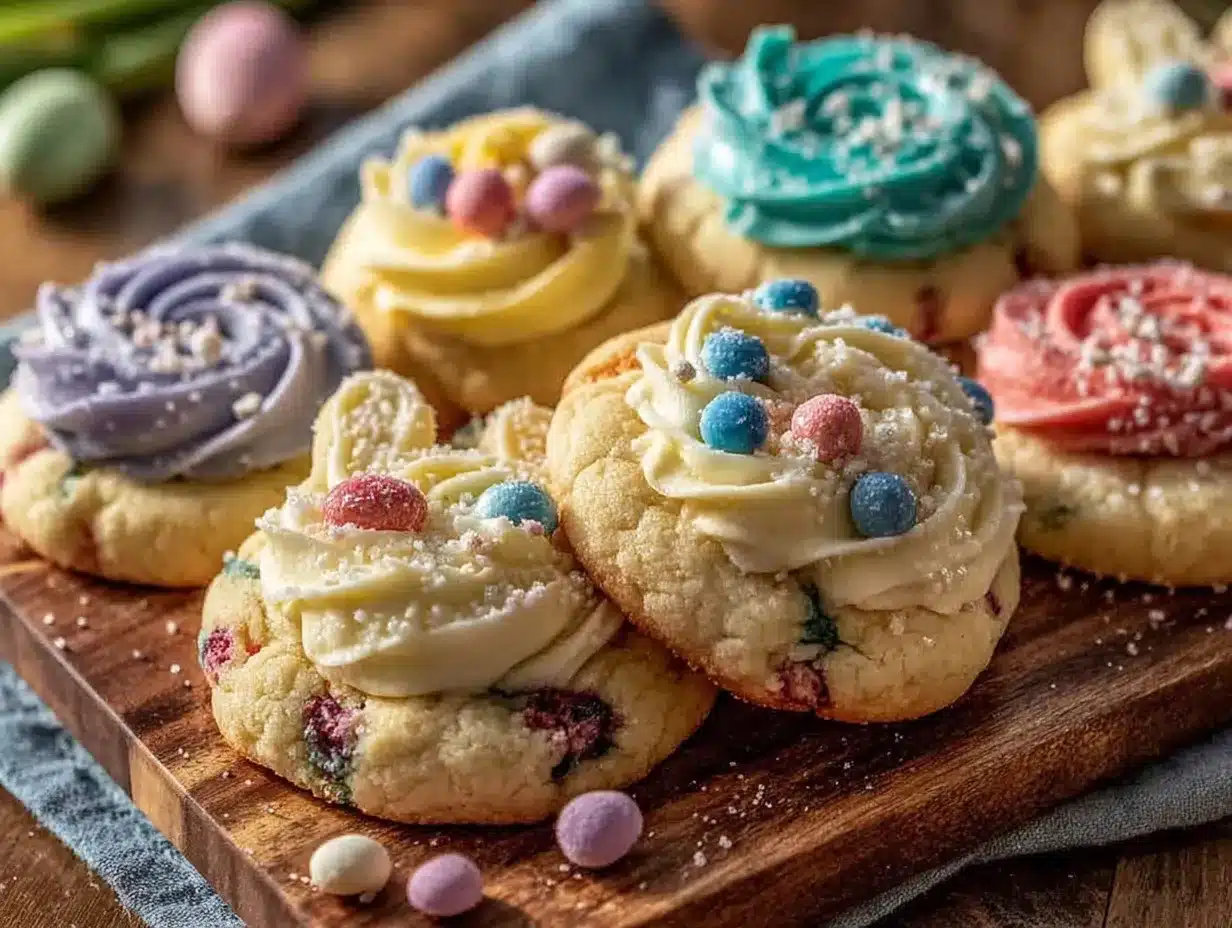
“Wait, you baked Easter cookies already?” my neighbor asked as I handed her a pastel bunny-shaped sugar cookie, glossy royal icing catching the morning sun. Honestly, I wasn’t planning on it. The kitchen was a bit chaotic that weekend—kids bouncing off the walls, a last-minute request for something festive, and me juggling a million tiny tasks. But somehow, in the middle of all that, these Perfect Pastel Easter Sugar Cookies with Glossy Royal Icing came together like a little miracle.
I wasn’t even sure if the royal icing would turn out right on my first try; I’d never really trusted it before, always worried it would crack or dull. But this recipe proved me wrong—smooth, shiny, and just the right level of sweet. Over the next few days, I found myself making them again and again, tweaking colors and shapes, watching the kids’ faces light up with every bite. These cookies became that quiet joy in a hectic weekend, something simple but special that felt like a little celebration in every pastel-hued bite.
There’s something about the way the royal icing dries glossy and smooth that makes you want to linger just a second longer before taking a bite. That’s why this recipe stuck with me—it’s not just about Easter, it’s about those small moments when simple things feel just right, you know? I still find myself reaching for this cookie dough when I want a little creative break or a sweet treat that’s as pretty as it is tasty.
Why You’ll Love This Recipe
Having made these Perfect Pastel Easter Sugar Cookies with Glossy Royal Icing more times than I can count, I can say with confidence this recipe delivers on all fronts. It’s the kind of recipe that works whether you’re a seasoned baker or a casual weekend cook. Here’s why it’s one of my go-tos:
- Quick & Easy: The dough comes together in about 15 minutes, and the icing whips up faster than you’d expect—perfect for those last-minute Easter plans or spontaneous baking sessions.
- Simple Ingredients: No need to hunt for fancy or exotic items. Most are pantry staples like butter, sugar, and powdered sugar, with just a splash of lemon juice to brighten the royal icing.
- Perfect for Easter & Spring Celebrations: The pastel colors and cute shapes make these cookies a hit for brunches, potlucks, or even a festive afternoon tea.
- Crowd-Pleaser: Kids adore decorating them, and adults keep coming back for more—there’s a reason they vanish so quickly!
- Unbelievably Delicious: The cookie itself has a tender crumb with a slight crisp edge that contrasts beautifully with the glossy, melt-in-your-mouth icing.
- Unique Touch: Unlike many sugar cookies, this recipe includes a subtle vanilla bean infusion and a royal icing technique that results in a flawless, shiny finish without cracking or dullness.
Honestly, the magic is in the balance—the dough isn’t too sweet, and the royal icing’s glossy sheen adds that wow factor. I’ve tried other sugar cookie recipes, but this one always wins for Easter celebrations. If you loved my strawberry cream puff bars or the pink velvet cookie crumble board, you’ll appreciate how this cookie recipe brings that same mix of fun and flavor to your table.
What Ingredients You Will Need
This recipe uses simple, wholesome ingredients to deliver bold flavor and a satisfying texture without fuss. Most items are staples you probably have, making it easy to pull together even on short notice.
- For the cookie dough:
- 2 ½ cups (315g) all-purpose flour – I like King Arthur for consistent texture
- 1 teaspoon baking powder
- ½ teaspoon salt
- ¾ cup (170g) unsalted butter, softened – room temperature butter makes mixing a breeze
- 1 cup (200g) granulated sugar
- 1 large egg, room temperature
- 1 tablespoon pure vanilla extract or vanilla bean paste (adds lovely depth)
- 2 tablespoons whole milk – or swap for almond milk if preferred
- For the glossy royal icing:
- 3 large egg whites or 4 tablespoons pasteurized egg whites (to avoid raw eggs)
- 4 cups (480g) powdered sugar, sifted for smooth icing
- 1 tablespoon fresh lemon juice (brightens flavor and helps icing set)
- Gel food coloring in pastel shades (pink, lavender, mint, pale yellow) – I prefer AmeriColor gels for vibrant, smooth color
- 1 teaspoon vanilla extract (optional, for subtle flavor)
Feel free to swap all-purpose flour for a gluten-free blend if needed, but note the texture may vary slightly. When selecting butter, unsalted is key to control salt levels, and softened butter helps get the perfect crumb. For the royal icing, pasteurized egg whites are a safe bet, especially if kids will be involved in decorating.
Equipment Needed
- Mixing bowls – at least two, one for dough and one for icing
- Electric mixer or stand mixer with paddle attachment – makes creaming butter and beating icing so much easier
- Rolling pin – a smooth one, about 12 inches long, works best
- Cookie cutters – Easter themed shapes like bunnies, eggs, and flowers (various sizes add charm)
- Baking sheets lined with parchment paper or silicone mats – prevents sticking and helps even baking
- Cooling racks – to cool cookies completely before icing
- Small piping bags or zip-top bags with corner snipped – for piping royal icing
- Toothpicks or scribe tools – handy for spreading and fixing icing details
If you don’t have a stand mixer, a hand mixer works just fine, though it can take a bit longer. I’ve also used a rolling pin with removable rings to get consistent dough thickness, which helps cookies bake evenly. For budget-friendly options, parchment paper works great instead of silicone mats, just keep an eye on the baking time.
Preparation Method
- Mix Dry Ingredients: In a medium bowl, whisk together 2 ½ cups (315g) all-purpose flour, 1 teaspoon baking powder, and ½ teaspoon salt. Set aside. This ensures even distribution and prevents clumps in the dough. (Approx. 5 minutes)
- Cream Butter and Sugar: In a large bowl, beat ¾ cup (170g) softened unsalted butter and 1 cup (200g) granulated sugar using an electric mixer on medium speed until fluffy and pale, about 3-4 minutes. This step is key for light texture—don’t rush it.
- Add Wet Ingredients: Beat in 1 large room-temperature egg, then add 1 tablespoon vanilla extract and 2 tablespoons milk. Mix until smooth, scraping bowl sides occasionally. The dough will start smelling amazing right here.
- Combine Dry and Wet: Gradually add the flour mixture to the wet ingredients, mixing on low speed just until combined. Avoid overmixing; the dough should be soft but not sticky. If it feels sticky, chill for 10 minutes.
- Chill Dough: Wrap the dough in plastic wrap and refrigerate for at least 1 hour, or up to overnight. This step helps the dough firm up, making it easier to roll and cut. I’ve skipped chilling before, but the cookies tend to spread too much then.
- Preheat Oven and Prepare Baking Sheets: Preheat your oven to 350°F (175°C). Line baking sheets with parchment paper or silicone mats.
- Roll and Cut Cookies: Lightly flour your surface and rolling pin. Roll dough to about ¼ inch (6 mm) thickness. Use Easter-themed cookie cutters to cut shapes, placing them 1 inch (2.5 cm) apart on baking sheets.
- Bake: Bake cookies for 8-10 minutes until edges are just starting to turn golden. Keep an eye on them—overbaking dries the cookies out.
- Cool: Let cookies cool on the baking sheet for 5 minutes, then transfer to cooling racks to cool completely before decorating. Warm cookies can melt the royal icing and ruin that glossy finish.
- Prepare Royal Icing: In a clean bowl, whisk 3 large egg whites (or 4 tablespoons pasteurized whites) until foamy. Gradually sift in 4 cups (480g) powdered sugar and add 1 tablespoon lemon juice. Beat on high speed for 5-7 minutes until the icing forms stiff, shiny peaks.
- Color Icing: Divide icing into small bowls and tint with gel food coloring to your desired pastel shades. Stir gently to keep the icing airy and smooth.
- Pipe and Flood Cookies: Transfer icing to piping bags. Outline each cookie with a thicker icing line, then flood the inside with a thinner consistency. Use a toothpick to gently spread icing and pop any air bubbles.
- Dry and Store: Let icing dry at room temperature for 6-8 hours or overnight for the best glossy finish. Store decorated cookies in an airtight container.
Pro tip: If your royal icing starts to harden while decorating, add a few drops of water and mix gently to restore the right consistency. Also, don’t rush the drying—patience makes the difference between dull and glossy icing.
Cooking Tips & Techniques
Getting the perfect pastel Easter sugar cookies with glossy royal icing isn’t rocket science, but a few tricks make a world of difference.
- Butter Temperature: Softened, not melted. I’ve learned this the hard way—the dough needs that creamy butter for structure, or you’ll end up with flat cookies.
- Rolling Dough Evenly: Use a rolling pin with thickness guides or place dowels on either side of the dough to roll evenly. Uneven dough means uneven baking, which is no fun when you want uniform cookies to decorate.
- Chilling is Crucial: Don’t skip chilling. It helps the dough rest, reduces spreading, and improves flavor. Sometimes I chill overnight to save time on baking day.
- Royal Icing Consistency: For outlining, use thicker icing that holds its shape. For flooding, thin it with a few drops of water until it flows smoothly but isn’t too runny. I usually test on parchment first.
- Keep Icing Covered: Royal icing dries out quickly. When not using, cover bowls with damp cloth or plastic wrap to keep it workable.
- Practice Piping: If you’re new to royal icing, practice piping simple shapes on parchment before decorating cookies. It helps build confidence and control.
- Decorating Timing: Work on one color or section at a time and let outlines set before flooding. This avoids colors bleeding into one another.
- Handling Mistakes: If icing cracks or bubbles, gently use a damp toothpick to smooth it out before it dries all the way.
One time, I tried rushing the icing drying by putting cookies in the fridge—big mistake. The icing lost its sheen and cracked. So, trust the drying time at room temp for that perfect glossy finish.
Variations & Adaptations
These cookies are pretty versatile, so you can easily tweak them to fit your needs or mood.
- Gluten-Free Option: Swap all-purpose flour with a 1-to-1 gluten-free baking blend. The texture changes slightly, but the royal icing and flavor remain delightful.
- Vegan Version: Use vegan butter and substitute the egg with ¼ cup unsweetened applesauce or flax egg. For royal icing, try a powdered sugar glaze with aquafaba instead of egg whites.
- Flavor Twists: Add almond extract instead of vanilla for a nutty note, or zest some lemon or orange into the dough for a fresh citrus kick.
- Color Variations: Beyond pastels, try bolder spring colors or even ombré effects by blending shades in your royal icing. I once made a batch inspired by the Dr. Seuss rainbow cupcake pops, and it was a hit!
- Baking Methods: If you want to go gluten-free and dairy-free, pairing this cookie base with a no-bake glaze can be fun, though it lacks the glossy royal icing finish.
One personal favorite: I swapped out traditional pastel colors for a muted natural palette using beet and matcha powders to dye the icing. It made the cookies feel a little more grown-up but just as festive.
Serving & Storage Suggestions
These Perfect Pastel Easter Sugar Cookies are best served at room temperature, letting the royal icing shine in all its glossy glory. I like arranging them on a pretty platter with a few fresh spring flowers or pastel napkins to match the vibe.
For pairing, they’re delightful with a cup of Earl Grey tea or a light, fruity lemonade—perfect for an Easter brunch or afternoon snack. If you’re looking to balance out the sweetness, try serving alongside healthy chicken veggie skillet wraps for a savory contrast at your gathering.
To store, keep cookies in an airtight container layered with parchment paper between them, at room temperature for up to 5 days. Avoid the fridge—it can dull the icing’s shine. For longer storage, freeze undecorated cookies wrapped tightly for up to 3 months, then thaw and decorate fresh.
Reheating isn’t necessary, but if you want to soften the cookie slightly, a quick 5-second zap in the microwave does the trick—just avoid heating too long or the icing might melt.
Flavors tend to mellow and deepen after a day or two, so if you can, make them a day ahead and let that happen naturally.
Nutritional Information & Benefits
Each cookie (based on a 3-inch size) contains approximately:
| Calories | 150 |
|---|---|
| Fat | 7g |
| Carbohydrates | 22g |
| Protein | 1.5g |
| Sugar | 14g |
While these cookies lean into the sweet side, the ingredient quality matters. Using real butter, fresh eggs, and pure vanilla extract means you’re avoiding artificial additives common in store-bought sweets. The lemon juice in the icing adds a touch of vitamin C, and the egg whites provide a bit of protein and structure.
If you need to avoid gluten or dairy, substitutions outlined above can help maintain a similar taste and texture. Note that royal icing contains egg whites, so it’s not suitable for egg allergies unless you use an aquafaba alternative.
From a wellness perspective, these cookies are a treat best enjoyed in moderation, but they bring joy and beautiful moments to the table, which is a kind of nourishment all on its own.
Conclusion
These Perfect Pastel Easter Sugar Cookies with Glossy Royal Icing have become a staple in my seasonal baking rotation because they bring together simplicity, beauty, and taste in such an effortless way. Whether you’re baking with kids, preparing a festive dessert board, or just craving a sweet moment, this recipe holds up and shines.
Feel free to play around with colors, shapes, and flavors to make it your own. I’ve always found that the best cookies are the ones made with a little love and a dash of experimentation. If you try this recipe, I’d love to hear how your pastel creations turned out or any fun twists you gave them!
Happy baking and may your Easter celebrations be as sweet and glossy as these cookies.
FAQs
Can I make the cookie dough ahead of time?
Absolutely! You can prepare the dough and refrigerate it for up to 3 days or freeze for up to 3 months. Just thaw before rolling and cutting.
How do I get that perfect glossy finish on royal icing?
Use fresh egg whites or pasteurized whites, beat the icing until stiff peaks form, and let it dry at room temperature without rushing. Avoid refrigerating as it dulls the shine.
Can I use store-bought icing instead of making royal icing?
Store-bought icing usually doesn’t dry with the same glossy, hard finish. For best results and that professional look, homemade royal icing is recommended.
What if my royal icing cracks after drying?
That usually means the icing was too thick or dried too fast. Try thinning the icing slightly with water next time and let it dry slowly at room temperature.
Are these cookies suitable for kids to decorate?
Definitely! The dough is easy to roll and cut, and the royal icing is great for piping and flooding. Just use pasteurized egg whites or an egg-free glaze if raw eggs are a concern.
Pin This Recipe!
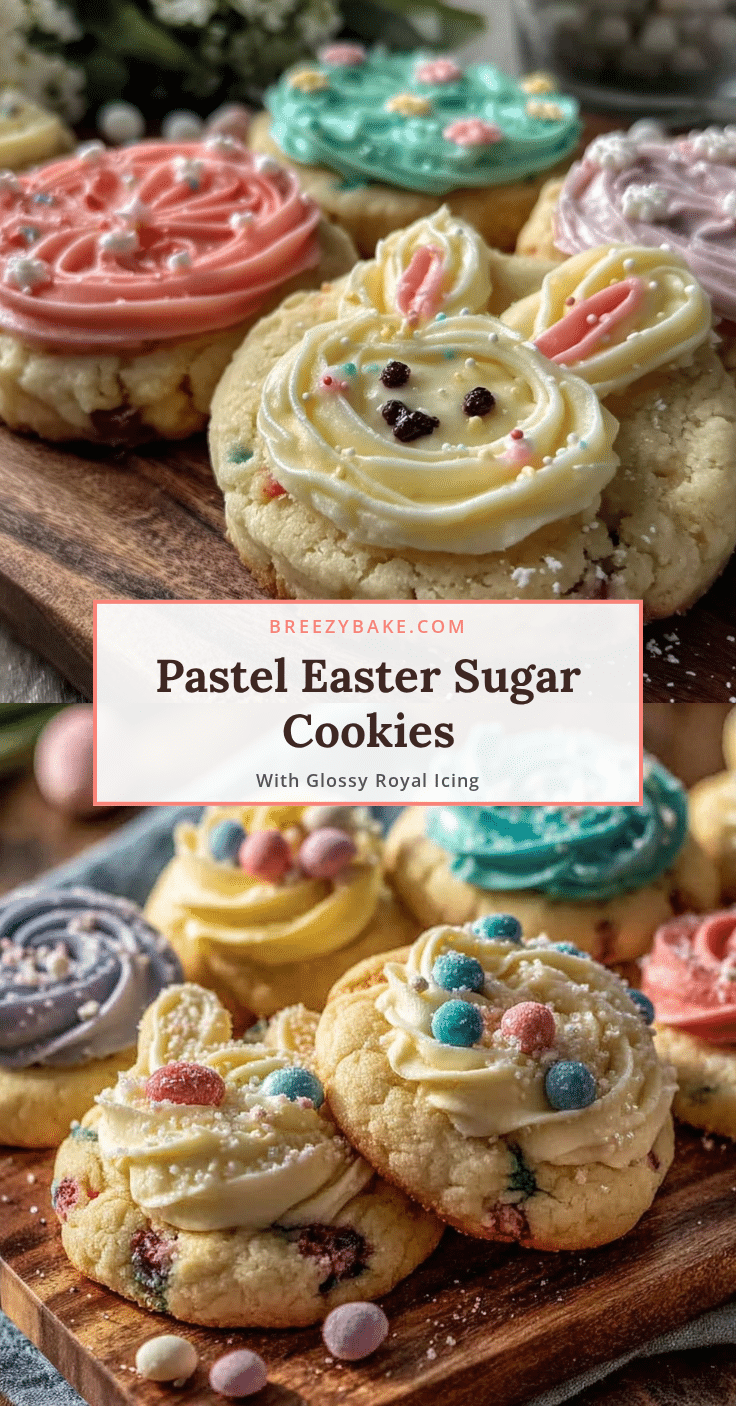
Perfect Pastel Easter Sugar Cookies Recipe with Glossy Royal Icing

These pastel Easter sugar cookies feature a tender crumb with a slight crisp edge, topped with smooth, glossy royal icing that dries to a flawless finish. Perfect for festive celebrations and decorating fun.
- Prep Time: 15 minutes
- Cook Time: 10 minutes
- Total Time: 1 hour 35 minutes
- Yield: 24 cookies 1x
- Category: Dessert
- Cuisine: American
Ingredients
- 2 ½ cups (315g) all-purpose flour
- 1 teaspoon baking powder
- ½ teaspoon salt
- ¾ cup (170g) unsalted butter, softened
- 1 cup (200g) granulated sugar
- 1 large egg, room temperature
- 1 tablespoon pure vanilla extract or vanilla bean paste
- 2 tablespoons whole milk (or almond milk)
- 3 large egg whites or 4 tablespoons pasteurized egg whites
- 4 cups (480g) powdered sugar, sifted
- 1 tablespoon fresh lemon juice
- Gel food coloring in pastel shades (pink, lavender, mint, pale yellow)
- 1 teaspoon vanilla extract (optional)
Instructions
- Mix dry ingredients: whisk together flour, baking powder, and salt in a medium bowl; set aside.
- Cream butter and sugar: beat softened butter and granulated sugar on medium speed until fluffy, about 3-4 minutes.
- Add wet ingredients: beat in egg, vanilla extract, and milk until smooth.
- Combine dry and wet: gradually add flour mixture to wet ingredients, mixing on low speed until just combined; avoid overmixing.
- Chill dough: wrap dough in plastic wrap and refrigerate for at least 1 hour or up to overnight.
- Preheat oven to 350°F (175°C) and line baking sheets with parchment paper or silicone mats.
- Roll and cut cookies: lightly flour surface and rolling pin; roll dough to ¼ inch thickness; cut with Easter-themed cookie cutters and place 1 inch apart on baking sheets.
- Bake cookies for 8-10 minutes until edges start to turn golden; avoid overbaking.
- Cool cookies on baking sheet for 5 minutes, then transfer to cooling racks to cool completely before decorating.
- Prepare royal icing: whisk egg whites until foamy; gradually sift in powdered sugar and add lemon juice; beat on high speed for 5-7 minutes until stiff, shiny peaks form.
- Color icing: divide icing into small bowls and tint with gel food coloring to desired pastel shades.
- Pipe and flood cookies: outline each cookie with thicker icing, then flood inside with thinner icing; use toothpick to spread icing and pop air bubbles.
- Dry and store: let icing dry at room temperature for 6-8 hours or overnight; store decorated cookies in an airtight container.
Notes
Use softened, not melted butter for best dough texture. Chill dough to prevent spreading. For royal icing, use fresh or pasteurized egg whites and let icing dry at room temperature for a glossy finish. If icing hardens while decorating, add a few drops of water to restore consistency. Avoid refrigerating decorated cookies to maintain shine.
Nutrition
- Serving Size: 1 cookie (3-inch siz
- Calories: 150
- Sugar: 14
- Fat: 7
- Carbohydrates: 22
- Protein: 1.5
Keywords: Easter cookies, sugar cookies, royal icing, pastel cookies, holiday baking, glossy icing, spring dessert