My niece showed up at my door at 9 PM on a Tuesday, two days before Halloween, with a bag of powdered sugar and a wide, pleading grin. The only thing in my pantry was a carton of egg whites I’d been saving for a quiche that never happened. She wanted to make something spooky for her class party, and I had exactly zero candy, zero cake mix, and zero patience for a trip to the grocery store. That’s when I remembered the forgotten science of meringue — stiff peaks, low heat, and a whole lot of air. We had everything for these ghost meringue cookies except the chocolate chips, which I found buried behind a bag of frozen peas. Honestly, it felt like a small miracle.
The first batch came out looking more like lumpy clouds than ghosts, but the second? They actually looked like tiny, grinning spirits. My niece called them “the cutest ghosts ever,” which is high praise from a kid who usually only likes things with sprinkles. We experimented with the eyes — some too big, some too small, and a few that looked like they were judging us. By the end of the night, we had a tray of perfectly pale, crispy little ghosts with chocolate chip eyes that stared back at us with just the right amount of charm.
These ghost meringue cookies have become our official pre-Halloween tradition. They’re light, crunchy, and vanish faster than any candy bar at a party. There’s something deeply satisfying about watching a simple mixture of egg whites and sugar transform into something so whimsical. And honestly, if I can pull these off on a Tuesday night with a distracted nine-year-old, you can absolutely make them for your next gathering. No fancy equipment, no stressful techniques — just a little patience and a lot of powdered sugar.
Why You’ll Love This Recipe
These ghost meringue cookies are more than just a cute Halloween treat. They’re genuinely foolproof once you know the tricks, and they deliver on flavor, texture, and presentation without requiring a pastry degree. Let me tell you why this recipe deserves a spot in your holiday rotation.
- Quick & Easy : From start to finish, these come together in about 2 hours, but most of that is hands-off baking time. The active prep is only 15 minutes.
- Simple Ingredients : You need exactly four ingredients — egg whites, sugar, cream of tartar, and mini chocolate chips. That’s it. No fancy extracts, no specialty flours.
- Perfect for Halloween Parties : These ghosts are the star of any spooky spread. They’re adorable, portable, and way less messy than cupcakes or frosted cookies.
- Crowd-Pleaser : Kids go absolutely wild for them, and adults appreciate the light, airy texture that doesn’t weigh you down like traditional cookies.
- Unbelievably Delicious : The outside is crisp and delicate, while the inside stays slightly chewy. The tiny chocolate chips add just enough richness to balance the sweetness.
What makes these different from other meringue recipes is the specific technique I’ve refined over several batches. I use a slightly lower oven temperature and a longer drying time to ensure the ghosts hold their shape without browning. No one wants a tan ghost, right? I also add a pinch of cream of tartar for stability, which means even beginner bakers get stiff peaks without any anxiety.
This recipe is the kind that makes you feel like a kitchen magician. It’s comfort food turned into art — lighter than air, sweet enough to satisfy, and so charming that you’ll want to make them for every holiday, not just Halloween. Perfect for impressing guests without stress, or turning a simple Tuesday night into a memory.
What Ingredients You Will Need
This recipe uses a handful of basic ingredients to create something that looks way more impressive than it actually is. Every component has a specific job, and I’ll walk you through what to look for so you don’t end up with flat, sad ghosts.
- Egg Whites (4 large, room temperature) : Room temperature egg whites whip up higher and faster than cold ones. Separate your eggs carefully — even a speck of yolk can ruin the meringue. I recommend cracking each egg into a small bowl first, then transferring the whites to your mixing bowl. This saves the whole batch if one yolk breaks.
- Granulated Sugar (1 cup / 200g) : Regular white sugar works perfectly here. Avoid powdered sugar or brown sugar — they change the texture and stability. For the smoothest meringue, use superfine sugar if you have it, or pulse regular sugar in a food processor for a few seconds.
- Cream of Tartar (1/2 teaspoon) : This acidic powder stabilizes the egg whites and helps them hold stiff peaks. If you don’t have it, substitute with 1 teaspoon of lemon juice or white vinegar. I prefer cream of tartar because it doesn’t add any flavor.
- Vanilla Extract (1 teaspoon) : Pure vanilla extract gives the meringues a warm, sweet flavor. You can use imitation vanilla in a pinch, but pure extract really does taste better. For a fun twist, try peppermint or almond extract instead.
- Mini Chocolate Chips (1/3 cup / 60g) : These become the ghost eyes and mouths. Mini chips work best because they’re small enough to look like cute little faces. Regular chocolate chips are too big and heavy — they’ll sink or make the ghosts look goofy. I like Ghirardelli or Enjoy Life mini chips for consistent size and flavor.
- Salt (a tiny pinch) : Just a small pinch enhances the sweetness and balances the flavor. Don’t skip it — it makes a surprising difference.
For the best results, use fresh eggs. Older egg whites actually whip up better because they’re thinner, but I’ve had great success with both fresh and week-old eggs. Just make sure they’re at room temperature before you start.
If you’re looking for a dairy-free or gluten-free option, you’re in luck — this recipe is naturally both. The only potential issue is the chocolate chips, so check the label if you have strict dietary needs. Most mini chocolate chips are dairy-free, but some brands add milk solids.
Equipment Needed
You don’t need a professional bakery setup for these ghost meringue cookies, but having the right tools makes the process smoother and more enjoyable. Here’s what you’ll need:
- Electric Stand Mixer or Hand Mixer : Whipping egg whites by hand is possible, but it takes forever and your arm will hate you. A stand mixer with the whisk attachment is ideal, but a hand mixer works just fine. I’ve used both, and the stand mixer gives slightly more consistent results because you can walk away while it whips.
- Large Mixing Bowl : Make sure your bowl is completely clean and dry. Any grease or residue can prevent the egg whites from whipping properly. Glass, stainless steel, or ceramic bowls work best — avoid plastic because it can hold onto oils.
- Piping Bags with Round Tip : A piping bag gives you control over the ghost shapes. Use a large round tip (about 1/2 inch) or just snip the corner of a zip-top bag. I’ve done both, and honestly, the zip-top bag method is easier for beginners.
- Baking Sheets Lined with Parchment Paper : Parchment paper prevents sticking and makes cleanup a breeze. Silicone baking mats also work, but parchment gives a crisper bottom. Don’t use wax paper — it will melt in the oven.
- Cooling Rack : Meringues need to cool completely before storage. A wire rack allows air to circulate and prevents condensation from making them sticky.
If you don’t have a piping bag, don’t stress. You can spoon the meringue onto the baking sheet and shape it with the back of a spoon. The ghosts will look more rustic, but they’ll still taste amazing. I actually prefer the spoon method for a more homemade, imperfect look.
Preparation Method
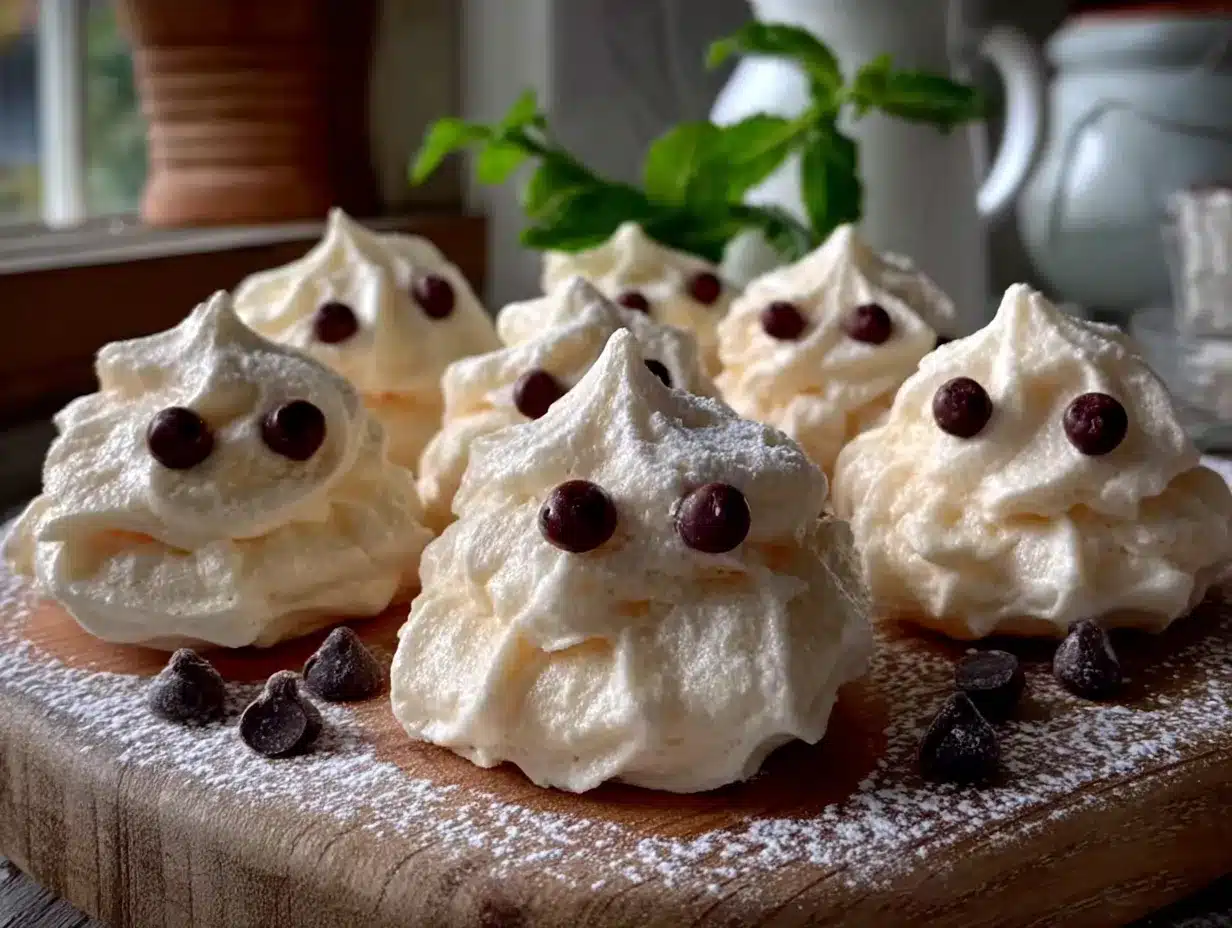
Now for the fun part — making these adorable little ghosts. Follow these steps carefully, and you’ll have a tray full of cute, crispy spirits in no time.
- Preheat your oven to 200°F (93°C) . Yes, that’s very low. Meringues dry out slowly rather than bake, which keeps them white and crisp. Line two baking sheets with parchment paper and set them aside.
- Prepare your egg whites . Separate 4 large eggs while they’re cold — it’s easier to keep the yolks intact. Let the whites sit at room temperature for 15-20 minutes. Cold egg whites take longer to whip and don’t reach full volume.
- Add cream of tartar . Place the room-temperature egg whites and cream of tartar in your clean mixing bowl. Beat on medium speed until foamy, about 1 minute. The mixture should look like bubble bath — light and frothy with small bubbles.
- Gradually add sugar . With the mixer running on medium-high, add the sugar one tablespoon at a time. This takes about 2-3 minutes. Adding sugar slowly prevents the meringue from deflating. Trust me, I learned this the hard way after dumping it all in at once and ending up with soup.
- Whip to stiff peaks . Continue beating on high speed for 5-7 minutes. The meringue is ready when it holds a stiff peak — if you lift the whisk, the meringue stands straight up without drooping. It should also look glossy and smooth, not grainy. Rub a tiny bit between your fingers; if it feels gritty, keep whipping.
- Add vanilla and salt . Beat in the vanilla extract and a tiny pinch of salt on low speed for just 10 seconds. Overmixing at this stage can deflate your beautiful meringue.
- Prepare your piping bag . Fit a piping bag with a large round tip or snip a 1/2-inch opening from a zip-top bag. If you’re using a zip-top bag, double-bag it to prevent blowouts — meringue is surprisingly forceful.
- Pipe the ghosts . Hold the piping bag straight up and pipe a tall, round blob about 2 inches wide. Pull the bag straight up to create a peak on top. This peak will flatten slightly during baking, so make it taller than you think. Leave about 1 inch between each ghost.
- Add the chocolate chip eyes . Gently press two mini chocolate chips into each ghost for eyes, and one or two for a mouth. Don’t push them in too deep, or they’ll disappear inside the meringue. I like to make some with surprised faces and some with grumpy expressions — it adds personality.
- Bake low and slow . Place the baking sheets in the preheated oven and bake for 60-75 minutes. The meringues are done when they lift easily off the parchment paper and sound hollow when tapped on the bottom. They should be dry to the touch but not browned at all.
- Cool completely . Turn off the oven and leave the meringues inside with the door slightly open for 30 minutes. This prevents cracking from sudden temperature changes. Then transfer them to a wire rack to cool completely.
Sensory cues to watch for: The meringue should feel smooth and glossy before piping, not grainy or dull. During baking, the ghosts will puff up slightly but shouldn’t spread. If they start browning, your oven is too hot — crack the door open or lower the temperature by 10 degrees.
Cooking Tips & Techniques
After making these ghost meringue cookies more times than I can count, I’ve collected a few tricks that make the process smoother and the results more reliable. Let me share what I’ve learned through trial and error.
Perfect stiff peaks every time: The biggest mistake people make is underwhiping or overwhiping the meringue. Underwhipped meringue won’t hold its shape and will spread into flat puddles. Overwhipped meringue looks dry and curdled, and it will weep liquid during baking. The sweet spot is when the meringue is glossy and holds a peak that doesn’t flop over. If you’re unsure, stop the mixer and lift the whisk — the peak should stand up straight with just a tiny curl at the tip.
Humidity is your enemy: Meringues hate humid days. The sugar absorbs moisture from the air, making the cookies sticky and soft instead of crisp. If it’s raining or super humid, either wait for a drier day or extend the baking time by 15-20 minutes. I once made these on a muggy August afternoon, and they never fully dried out — lesson learned.
Don’t open the oven door: I know it’s tempting to peek, but opening the oven door lets out heat and moisture, which can cause the meringues to collapse or crack. Wait until the minimum baking time has passed before checking. Use the oven light instead — it’s your best friend during meringue baking.
Multitasking strategy: While the meringue is whipping, prepare your piping bag and line your baking sheets. This saves time and keeps the meringue from sitting too long after it’s whipped. Meringue starts deflating the moment you stop mixing, so work quickly once it’s ready.
Consistency tip: For the most consistent results, weigh your egg whites instead of relying on the number of eggs. Four large eggs typically yield about 120-140 grams of egg white. If you have extra, adjust the sugar proportionally — roughly 1 cup of sugar per 120g of egg white.
Variations & Adaptations
One of the best things about this recipe is how easily it adapts to different tastes, diets, and occasions. Here are some variations I’ve tried and loved.
- Halloween Fun : Add a drop of orange or purple food coloring to the meringue before piping for colorful ghosts. Gel food coloring works best because it doesn’t add extra liquid. You can also use black sanding sugar for sparkly ghosts.
- Peppermint Ghosts : Swap the vanilla extract for 1/2 teaspoon of peppermint extract. Crush a candy cane and sprinkle the pieces on top before baking. These are perfect for winter holidays or a Christmas-themed party.
- Lemon or Lime Ghosts : Replace vanilla with lemon or lime zest and 1 teaspoon of citrus juice. The acidity adds a bright, tangy flavor that cuts through the sweetness. These are refreshing for spring or summer gatherings.
- Chocolate-Dipped Ghosts : After baking and cooling, dip the bottoms of the meringues in melted dark chocolate. Let them set on parchment paper. The combination of crispy meringue and rich chocolate is absolutely addictive.
- Vegan Option : Use aquafaba (the liquid from a can of chickpeas) instead of egg whites. Whip 1/2 cup of aquafaba with 1/2 teaspoon cream of tartar until stiff peaks form, then add sugar as directed. The texture is slightly different — a bit more chewy — but still delicious.
- Gluten-Free : This recipe is naturally gluten-free, so no changes needed. Just double-check your chocolate chips if you have celiac disease or a severe sensitivity.
I’ve personally tried the lemon variation for a spring party, and they were gone before the cupcakes. The citrus flavor pairs beautifully with the sweet meringue, and the yellow ghosts looked adorable with tiny chocolate chip eyes. Don’t be afraid to experiment — meringue is surprisingly forgiving as long as you follow the basic technique.
Serving & Storage Suggestions
These ghost meringue cookies are best served at room temperature, straight from the cooling rack. They’re light, airy, and practically melt in your mouth. Here’s how to make the most of them.
Serving temperature: Room temperature is ideal. If you’ve stored them in the fridge, let them sit out for 10-15 minutes before serving. Cold meringues can feel slightly chewy instead of crisp.
Presentation ideas: Arrange the ghosts on a platter with a few spooky decorations — think fake cobwebs, plastic spiders, or orange and black sprinkles. For a Halloween party, I like to pile them in a glass jar tied with a black ribbon. They also look amazing on a dessert board alongside other treats like pink velvet cookie crumble board or chocolate-covered strawberry ice cream mousse cups for a fun contrast.
Complementary dishes: These meringues pair beautifully with hot chocolate, coffee, or a glass of cold milk. For a dessert spread, serve them alongside triple chocolate strawberry cookie hearts or mint cream cookie swirl squares for a mix of textures and flavors.
Storage instructions: Store the meringues in an airtight container at room temperature for up to 2 weeks. Do not refrigerate — the moisture will make them sticky and soft. If you live in a humid climate, add a silica gel packet or a few grains of rice to the container to absorb excess moisture.
Freezing: You can freeze baked meringues for up to 3 months. Place them in a single layer in a freezer-safe container with parchment paper between layers. Thaw at room temperature for 15 minutes before serving. The texture remains surprisingly good after freezing.
Flavor development: Interestingly, these meringues taste even better after a day or two. The flavors meld together, and the texture becomes perfectly crisp throughout. So don’t worry about making them ahead — they actually improve with time.
Nutritional Information & Benefits
These ghost meringue cookies are a lighter alternative to traditional cookies, but they’re still a treat. Here’s the estimated nutritional breakdown per cookie (based on 24 cookies):
| Nutrient | Amount per Cookie |
|---|---|
| Calories | 45 |
| Total Fat | 1g |
| Saturated Fat | 0.5g |
| Cholesterol | 0mg |
| Sodium | 15mg |
| Total Carbohydrates | 10g |
| Sugars | 9g |
| Protein | 1g |
Health benefits: Meringues are naturally fat-free and cholesterol-free since they’re made only from egg whites. They’re also low in calories compared to butter-based cookies. Egg whites are a good source of protein and contain no saturated fat, making these a slightly healthier indulgence.
Dietary considerations: This recipe is gluten-free, dairy-free (if using dairy-free chocolate chips), and nut-free. It’s suitable for most dietary restrictions, though it does contain eggs. For a vegan option, use aquafaba as mentioned in the variations section.
Allergen note: The main allergens are eggs and potentially dairy from the chocolate chips. Always check your ingredient labels if you’re cooking for someone with allergies.
Personal wellness perspective: I love that these cookies satisfy my sweet tooth without the heavy feeling that comes from butter and flour-based desserts. They’re perfect for when you want something sweet but don’t want to derail your healthy eating goals. Plus, they’re so light that one or two feel like a real treat without overdoing it.
Conclusion
These ghost meringue cookies are proof that the best recipes often come from unexpected moments. What started as a last-minute Halloween project with my niece has become a tradition I genuinely look forward to every year. They’re simple enough for a weeknight, impressive enough for a party, and so adorable that they never fail to make people smile.
I encourage you to make these your own. Experiment with different extracts, try different face expressions, or serve them alongside your favorite fall treats. The beauty of this recipe is its flexibility — you can dress it up or keep it simple, and it always delivers.
If you make these ghost meringue cookies, I’d love to hear about it. Drop a comment below with your favorite variation, or share a photo of your ghost creations. Don’t forget to tag me on social media so I can see your spooky masterpieces. Happy baking, and may your ghosts always be cute and your chocolate chips always stay put!
Frequently Asked Questions
Can I use liquid egg whites from a carton?
Yes, but they don’t whip up as well as fresh egg whites. Carton egg whites are pasteurized, which slightly changes their protein structure. If you use them, add an extra tablespoon of cream of tartar and whip for a few minutes longer. The meringues will be slightly less stable but still workable.
Why did my meringues crack during baking?
Cracking usually happens from temperature shock. Either the oven is too hot, or you opened the door too early. Make sure your oven is at exactly 200°F (93°C) and resist the urge to peek for the first 45 minutes. Also, let the meringues cool gradually in the oven with the door cracked open.
Can I make these without a piping bag?
Absolutely. Spoon the meringue onto the baking sheet and use the back of a spoon to shape it into a ghost-like blob. The shapes will be more rustic, but they’ll taste exactly the same. I actually prefer this method for a more homemade look.
How do I know when the meringues are fully baked?
They should lift easily off the parchment paper without sticking. Tap one gently on the bottom — it should sound hollow, like tapping on an empty eggshell. The outside should be dry and crisp, not tacky or soft. If they’re still sticky, bake for another 10-15 minutes.
Can I double this recipe?
Yes, but don’t try to whip more than 8 egg whites at once in a standard stand mixer. The bowl isn’t big enough for proper aeration. Make two separate batches instead. The extra time is worth it for guaranteed success.
Pin This Recipe!
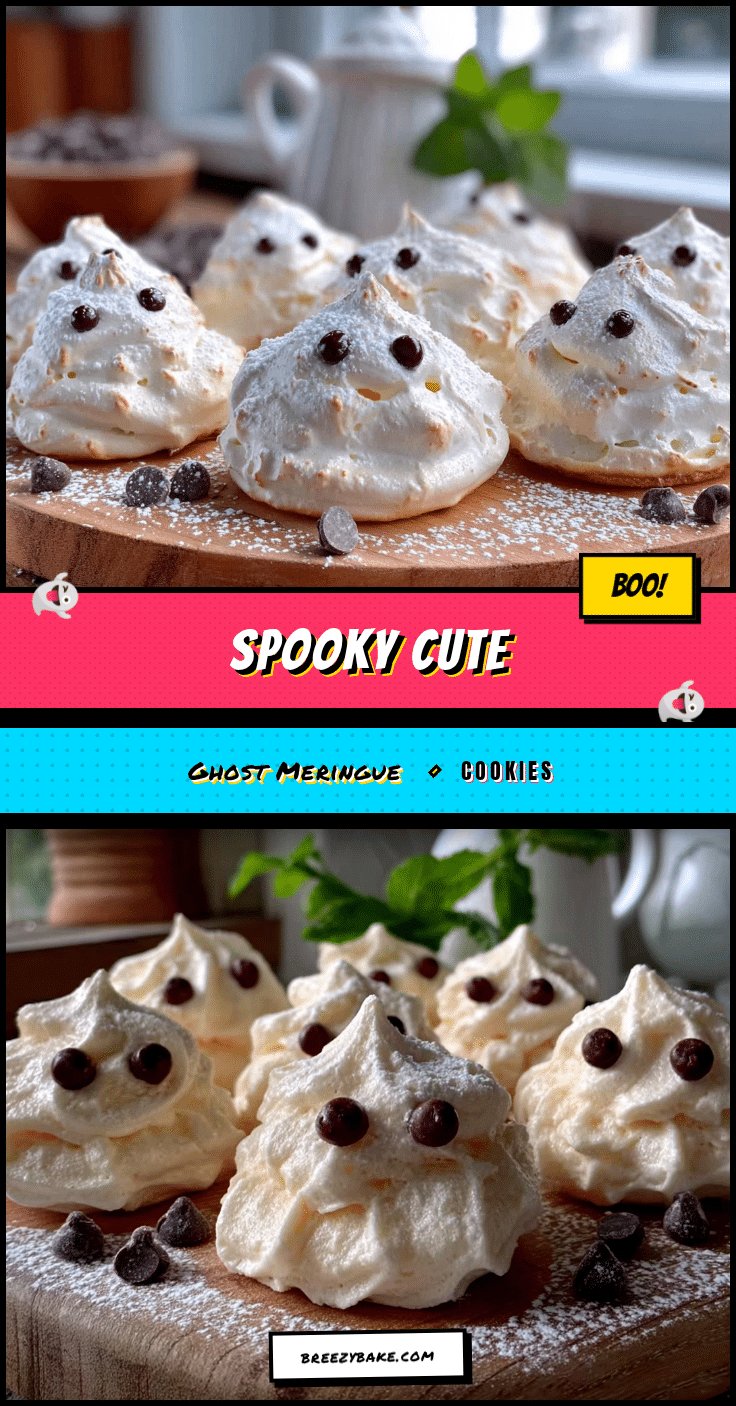
50+ Easy Ghost Meringue Cookies with Chocolate Chip Eyes
These ghost meringue cookies are light, crunchy, and vanish faster than any candy bar at a party. They’re simple enough for a weeknight, impressive enough for a party, and so adorable that they never fail to make people smile.
- Prep Time: 15 minutes
- Cook Time: 60-75 minutes
- Total Time: 1 hour 45 minutes to 2 hours
- Yield: 24 cookies 1x
- Category: Dessert
- Cuisine: American
Ingredients
- 4 large egg whites, room temperature
- 1 cup (200g) granulated sugar
- 1/2 teaspoon cream of tartar
- 1 teaspoon vanilla extract
- 1/3 cup (60g) mini chocolate chips
- A tiny pinch of salt
Instructions
- Preheat your oven to 200°F (93°C). Line two baking sheets with parchment paper and set them aside.
- Separate 4 large eggs while they’re cold. Let the whites sit at room temperature for 15-20 minutes.
- Place the room-temperature egg whites and cream of tartar in your clean mixing bowl. Beat on medium speed until foamy, about 1 minute.
- With the mixer running on medium-high, add the sugar one tablespoon at a time. This takes about 2-3 minutes.
- Continue beating on high speed for 5-7 minutes until the meringue holds a stiff peak and looks glossy and smooth.
- Beat in the vanilla extract and a tiny pinch of salt on low speed for just 10 seconds.
- Fit a piping bag with a large round tip or snip a 1/2-inch opening from a zip-top bag.
- Pipe tall, round blobs about 2 inches wide onto the prepared baking sheets, pulling the bag straight up to create a peak on top. Leave about 1 inch between each ghost.
- Gently press two mini chocolate chips into each ghost for eyes, and one or two for a mouth.
- Bake for 60-75 minutes. The meringues are done when they lift easily off the parchment paper and sound hollow when tapped on the bottom.
- Turn off the oven and leave the meringues inside with the door slightly open for 30 minutes. Then transfer them to a wire rack to cool completely.
Notes
For best results, use room temperature egg whites. Humidity can affect meringues, so avoid making them on rainy days. Don’t open the oven door during baking. Meringues can be stored in an airtight container at room temperature for up to 2 weeks. They can also be frozen for up to 3 months.
Nutrition
- Serving Size: 1 cookie
- Calories: 45
- Sugar: 9
- Sodium: 15
- Fat: 1
- Saturated Fat: 0.5
- Carbohydrates: 10
- Protein: 1
Keywords: ghost meringue cookies, Halloween cookies, meringue cookies, easy Halloween dessert, ghost cookies, chocolate chip meringue, spooky treats


