I was standing in the middle of the baking aisle at my local grocery store last Tuesday, staring at a can of pumpkin puree like it held the secrets to the universe, when the smell hit me. Not from the can, but from somewhere deeper — that warm, spiced scent of my aunt’s tiny apartment on a rainy October afternoon, the one where she’d always have a batch of something pumpkin on the counter. I was maybe nine years old, sitting on a wobbly stool at her kitchen island, watching her roll out dough with a flour-dusted wine bottle because she’d lost her rolling pin years ago. She’d wink and say, “Necessity is the mother of invention, kiddo,” and I’d believe her. That memory, that specific feeling of being small and safe and slightly sticky with cinnamon, came rushing back so hard I almost dropped my shopping basket. I bought the pumpkin, grabbed some coconut sugar on a whim, and drove home with a single mission: to make a cookie that felt exactly like that moment. Something wholesome, something mini, something that tasted like a hug in sugar form. These Wholesome Mini Pumpkin Pie Sugar Cookies are the result of that grocery store daydream — a little bit of memory, a lot of trial and error, and honestly, some of the best baking I’ve done in a long time. They’re not just cookies; they’re tiny edible time machines. And let me tell you, if you’ve ever chased a flavor from your past, you know exactly what I mean.
Why You’ll Love This Recipe
I’ve tested these little guys about six times now, and I’m not ashamed to admit I ate the failures. It was research. After working as a recipe developer for a small health-focused blog a few years back, I learned that the best recipes aren’t just about flavor — they’re about balance. These cookies hit that sweet spot between indulgence and feeling good about what you’re eating. Here’s why they’ve become my go-to fall bake:
- Quick & Easy: From start to finish, you’re looking at about 25 minutes. No chilling, no complicated steps — just mix, scoop, and bake. Perfect for those afternoons when a craving hits out of nowhere.
- Simple Ingredients: You probably have most of this in your pantry right now. No weird flours or obscure spices. I promise, no one’s hunting down amaranth flour for these.
- Perfect for Fall Gatherings: They’re bite-sized, so they disappear at parties, potlucks, or just standing in your kitchen staring into the fridge. Great for Thanksgiving appetizers or cozy movie nights.
- Crowd-Pleaser: I brought a batch to my neighbor’s book club last week, and three people asked for the recipe before they even finished their first cookie. Kids love them, adults love them, and honestly, I’ve seen a dog try to steal one off the counter.
- Unbelievably Delicious: The texture is this perfect marriage of soft sugar cookie and tender pumpkin pie filling. It’s like a hand pie and a cookie had a beautiful, tiny baby. The coconut sugar adds this subtle caramel note that regular sugar just can’t touch.
What makes these different from every other pumpkin cookie out there? It’s the ratio. I spent a solid week tweaking the pumpkin-to-flour balance so you get that distinct pumpkin pie flavor without the cookie turning into a soggy mess. Plus, using a bit of almond flour gives them a tender crumb that almost melts. This isn’t just another pumpkin cookie recipe — it’s the one I’d serve to someone who says they don’t like pumpkin desserts. It’s that good.
What Ingredients You Will Need
This recipe uses simple, wholesome ingredients to deliver that nostalgic pumpkin pie flavor without any of the guilt. Most of these are pantry staples, but I’ve included a few notes on what to look for to get the best results.
For the Cookies
- 1 cup (120g) all-purpose flour — I use King Arthur Flour for consistent results, but any brand works. For a gluten-free version, swap with a 1:1 gluten-free blend.
- 1/2 cup (60g) almond flour — This adds tenderness and a subtle nuttiness. Bob’s Red Mill is my go-to. Do not skip this — it’s the secret to the texture.
- 1/2 teaspoon baking soda — Helps them puff up just enough without spreading too thin.
- 1/4 teaspoon baking powder — For that extra little lift.
- 1 teaspoon pumpkin pie spice — You can use store-bought or make your own with 1/2 teaspoon cinnamon, 1/4 teaspoon ginger, 1/4 teaspoon nutmeg, and a pinch of cloves.
- 1/2 teaspoon ground cinnamon — Because more cinnamon is always the answer.
- 1/4 teaspoon salt — Balances the sweetness and brings out the pumpkin flavor.
- 1/2 cup (113g) unsalted butter, softened — Make sure it’s at room temperature. Cold butter won’t cream properly. I use Kerrygold for its rich flavor, but any unsalted butter works.
- 1/2 cup (100g) coconut sugar — This is my favorite swap for regular sugar. It has a lower glycemic index and adds a subtle caramel flavor. If you don’t have it, light brown sugar works perfectly.
- 1 large egg, room temperature — Cold eggs can seize the batter. Leave it out for 15 minutes before starting.
- 1/2 cup (120g) pumpkin puree — Not pumpkin pie filling! Make sure you’re getting 100% pure pumpkin. Libby’s is reliable, but store brands work too. Pat it dry with a paper towel if it looks watery.
- 1 teaspoon vanilla extract — Pure vanilla, not imitation. It makes a difference.
For the Glaze
- 1 cup (120g) powdered sugar — Sift it if it’s lumpy.
- 2-3 tablespoons milk — Any milk works. I use oat milk for a dairy-free option.
- 1/4 teaspoon vanilla extract — Just a tiny bit for flavor.
- Pinch of pumpkin pie spice — For that pretty speckled look on top.
Equipment Needed
You don’t need a fancy bakery setup for these. Here’s what I used in my tiny kitchen with limited counter space:
- Mixing bowls — One large, one medium. I use glass bowls because they don’t hold onto smells.
- Electric hand mixer or stand mixer — A hand mixer works perfectly. I actually prefer it because I can feel when the butter is properly creamed. If you’re mixing by hand, be prepared for a workout — the pumpkin makes the batter a bit stiff.
- Baking sheets — Two if you have them. I use Nordic Ware because they don’t warp. Line with parchment paper or a silicone mat.
- Cookie scoop — A 1-tablespoon scoop is ideal for mini cookies. I got mine for five bucks at a kitchen supply store.
- Cooling rack — Essential for letting the glaze set properly. I’ve used the oven rack in a pinch, but a real cooling rack is better.
- Whisk — For the glaze.
- Spatula — Rubber or silicone for scraping the bowl clean.
Budget-friendly tip: If you don’t have a cookie scoop, use two spoons to drop the dough. It’s not as uniform, but they’ll still taste amazing. I did that for years before I caved and bought the scoop.
Preparation Method
Alright, let’s get into it. I’ve broken this down step by step, with all the little notes I wish someone had told me the first time I made these.
- Preheat your oven to 350°F (175°C). Line two baking sheets with parchment paper or silicone baking mats. Trust me on the parchment — these cookies can stick if you’re not careful.
- In a medium bowl, whisk together the all-purpose flour, almond flour, baking soda, baking powder, pumpkin pie spice, cinnamon, and salt. Make sure there are no lumps. I once skipped this step and ended up with a pocket of baking soda in one cookie. It was not pleasant.
- In a large bowl, beat the softened butter and coconut sugar together until light and fluffy. This takes about 2-3 minutes with a hand mixer on medium speed. You’re looking for a color change — it should go from pale yellow to almost beige. The coconut sugar won’t dissolve completely, and that’s fine. It adds texture.
- Add the egg, pumpkin puree, and vanilla extract to the butter mixture. Beat until just combined. Don’t overmix here. The batter will look a bit curdled at first — that’s the pumpkin doing its thing. It’ll come together.
- Gradually add the dry ingredients to the wet ingredients, mixing on low speed. I add it in three batches, scraping down the sides of the bowl with a spatula after each addition. The dough will be soft and slightly sticky. That’s exactly what you want.
- Scoop tablespoon-sized balls of dough onto the prepared baking sheets. Leave about 2 inches between each cookie — they spread a little. If the dough is too sticky to handle, pop it in the fridge for 10 minutes. I learned this the hard way when my first batch turned into one giant cookie.
- Bake for 10-12 minutes, or until the edges are set and the tops look slightly cracked. The centers will still be soft. That’s good — they’ll continue cooking on the hot sheet. I start checking at 10 minutes because my oven runs hot. Yours might be different, so keep an eye on them.
- Let the cookies cool on the baking sheet for 5 minutes. This is crucial. If you try to move them right away, they’ll fall apart. After 5 minutes, transfer them to a wire rack to cool completely. I almost cried the first time I rushed this step.
- While the cookies cool, make the glaze. In a small bowl, whisk together the powdered sugar, milk, vanilla extract, and a pinch of pumpkin pie spice. Start with 2 tablespoons of milk and add more if needed. You want it thick enough to coat the back of a spoon but thin enough to drizzle.
- Once the cookies are completely cool, drizzle the glaze over the tops. I use a spoon and just go back and forth. If you want to get fancy, transfer the glaze to a small zip-top bag, snip off a corner, and pipe it on. Let the glaze set for about 15 minutes before serving.
A quick note: The glaze will harden slightly but stay a bit soft. That’s the texture you want — not rock hard, but not runny. If you’re serving these at a party, glaze them right before guests arrive for the prettiest presentation.
Cooking Tips & Techniques
I’ve made enough mistakes in the kitchen to fill a cookbook of failures, so let me save you some trouble.
Don’t overmix the dough. I know I said this already, but it bears repeating. Overmixing develops the gluten in the flour, which makes cookies tough and dense. You want tender, not tough. Mix until you don’t see any more white streaks, then stop. Put the mixer down. Walk away.
Room temperature ingredients matter. I used to think this was one of those fussy chef rules that didn’t actually make a difference. I was wrong. Cold butter doesn’t cream properly, and cold egg can seize the batter. Leave everything out on the counter for 15-20 minutes before you start. Your cookies will thank you.
Watch your oven like a hawk. Every oven is a liar. Mine runs hot on the left side and cool on the right, so I rotate the baking sheet halfway through. If your cookies are browning unevenly, that’s your cue to rotate. Also, if you’re baking two sheets at once, swap their positions halfway through.
The pumpkin moisture trap. Pumpkin puree is surprisingly watery. If your cookies come out flat or gummy, the pumpkin might be too wet. Before adding it to the batter, dump the puree onto a paper towel-lined plate and pat it dry. This one trick changed my pumpkin baking forever. I learned it after a particularly sad batch of pumpkin muffins that tasted more like pudding.
Chill if you need to. If your dough feels too soft to scoop, don’t fight it. Pop it in the fridge for 10-15 minutes. This also helps the cookies hold their shape better. I do this on humid days or when my kitchen is warm from other cooking.
Variations & Adaptations
One of the best things about this recipe is how flexible it is. Here are a few ways I’ve played around with it:
Vegan version: Swap the butter for vegan butter (I like Earth Balance), use a flax egg (1 tablespoon ground flaxseed mixed with 3 tablespoons water, let sit for 5 minutes), and use plant-based milk in the glaze. They come out slightly less tender but still delicious. My vegan friend devoured an entire batch at a party last month.
Gluten-free option: Replace the all-purpose flour with a 1:1 gluten-free blend. I’ve used Bob’s Red Mill 1-to-1 Baking Flour with great results. The almond flour is already gluten-free, so you’re halfway there. Just make sure your baking powder is gluten-free too — some brands use wheat starch.
Spice it up: Add a pinch of cayenne pepper or black pepper to the dough for a warm, unexpected kick. Sounds weird, I know, but it’s a classic pumpkin pie trick. The heat brings out the sweetness in a way that’s subtle but magical.
Chocolate drizzle: Instead of the vanilla glaze, melt 1/2 cup of dark chocolate chips with a teaspoon of coconut oil and drizzle that over the cookies. The bitterness of dark chocolate pairs beautifully with the pumpkin spice. I did this for a holiday cookie exchange and they were the first to disappear.
Maple twist: Replace the vanilla extract in the glaze with maple extract, or use 2 tablespoons of real maple syrup and reduce the milk by 1 tablespoon. It adds a cozy, autumn flavor that’s perfect for Thanksgiving.
Serving & Storage Suggestions
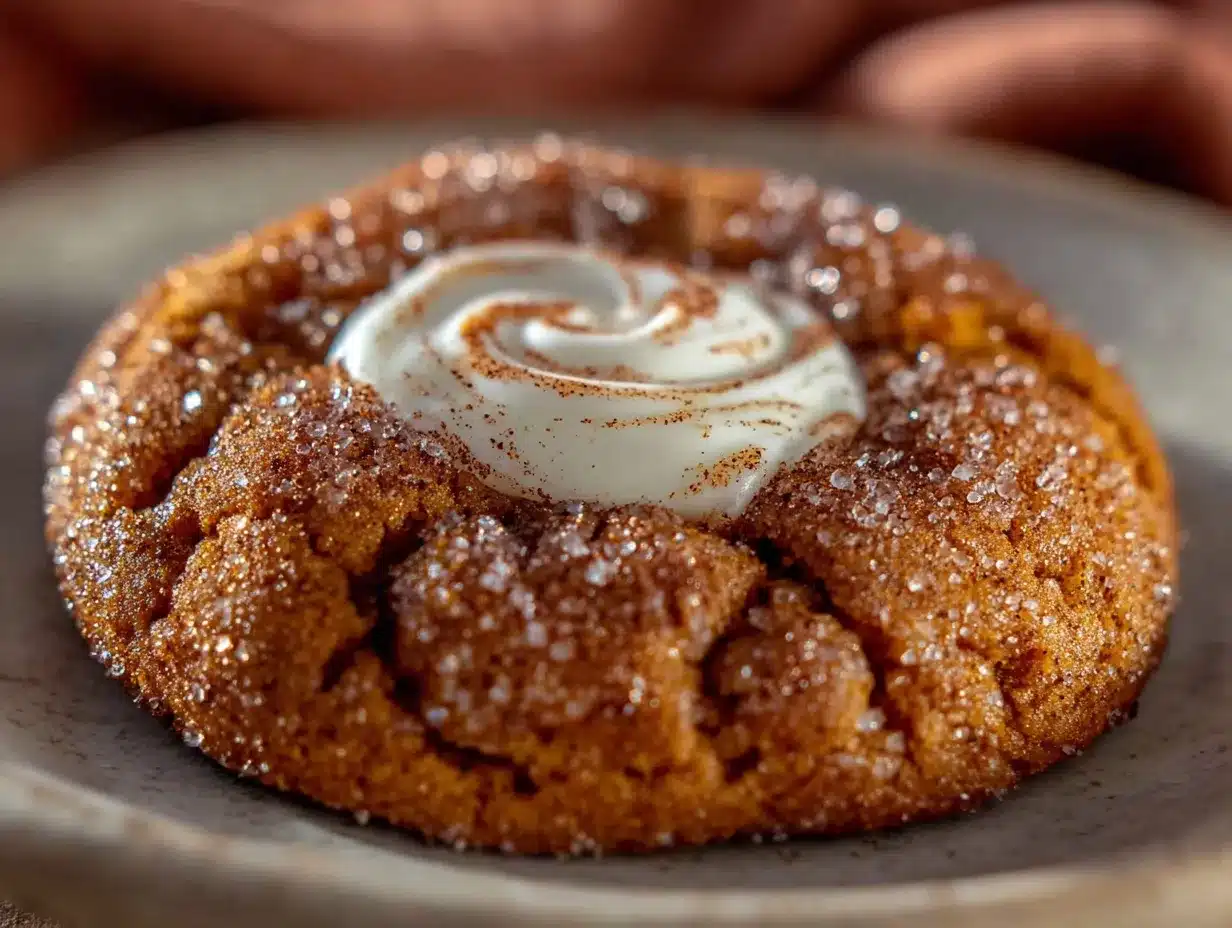
These cookies are best served at room temperature, with the glaze fully set. I like to arrange them on a wooden board or a simple white plate — the orange color pops beautifully against neutral backgrounds. If you’re feeling extra, sprinkle a little more pumpkin pie spice on top right after glazing for a pretty speckled look.
They pair wonderfully with a hot cup of chai tea, a latte, or even a glass of cold milk. For a dessert board, arrange them alongside dark chocolate squares, dried cranberries, and a few candied pecans. It’s an easy, impressive spread for fall gatherings.
Storage: Keep these in an airtight container at room temperature for up to 4 days. Place a piece of parchment paper between layers to prevent sticking. Do not refrigerate them — the fridge dries out baked goods and makes them stale faster. I learned this the hard way with a batch of cookies I was trying to save for a party.
Freezing: You can freeze the baked, unglazed cookies for up to 3 months. Wrap them tightly in plastic wrap, then place in a freezer-safe bag. When you’re ready to serve, thaw at room temperature for about 30 minutes, then glaze and enjoy. You can also freeze the dough — scoop it into balls, freeze on a baking sheet, then transfer to a bag. Bake from frozen, adding 2-3 minutes to the baking time.
The flavors actually deepen after a day or two. I’ve found these cookies taste even better on day two, when the spices have had time to meld and the texture settles. So if you can resist eating them all right away, you’re in for a treat.
Nutritional Information & Benefits
Here’s the approximate nutrition for one cookie (based on 24 cookies):
| Nutrient | Amount per Cookie |
|---|---|
| Calories | 98 |
| Total Fat | 5g |
| Saturated Fat | 2.5g |
| Carbohydrates | 12g |
| Fiber | 1g |
| Sugar | 7g |
| Protein | 2g |
These cookies use coconut sugar, which has a lower glycemic index than regular white sugar, meaning it won’t spike your blood sugar as dramatically. The almond flour adds a bit of protein and healthy fats, and the pumpkin puree is packed with vitamin A and fiber. You’re getting a little bit of nutrition in every bite — which, let’s be honest, is a pretty good excuse to have a second cookie.
They’re not gluten-free by default (unless you make the swap), and they contain dairy and eggs. But with the substitutions I mentioned, you can easily adapt them for most dietary needs. As always, check your labels if you’re cooking for someone with allergies.
Conclusion
These Wholesome Mini Pumpkin Pie Sugar Cookies are more than just a recipe — they’re a little piece of fall that you can hold in your hand. They’re the cookie I keep coming back to, the one that makes my kitchen smell like my aunt’s apartment, the one that disappears faster than I can bake them. Whether you’re making them for a holiday gathering, a cozy weekend treat, or just because you need a moment of pumpkin-spiced happiness, I hope they bring you as much joy as they’ve brought me.
I’d love to hear how they turn out for you! Did you try a variation? Did your family fight over the last one? Drop a comment below and let me know. And if you share them on social media, tag me — I want to see your beautiful creations. Happy baking, friends!
Frequently Asked Questions
Can I use canned pumpkin pie filling instead of pumpkin puree?
No, please don’t. Pumpkin pie filling is pre-sweetened and spiced, which will throw off the sugar and spice balance in this recipe. Stick with 100% pure pumpkin puree. Your cookies will thank you.
Why are my cookies spreading too much?
This usually happens if the butter is too soft or the dough is too warm. Try chilling the dough for 15-20 minutes before baking. Also, make sure you’re not over-creaming the butter and sugar — that can add too much air and cause spreading.
Can I make these cookies without almond flour?
You can, but they won’t have the same tender texture. Replace the almond flour with an equal amount of all-purpose flour. The cookies will be a bit denser and less delicate, but they’ll still taste great.
How do I know when the cookies are done baking?
Look for set edges and slightly cracked tops. The centers will still look soft and a bit underdone — that’s perfect. They’ll continue to set as they cool on the baking sheet. If you wait until the centers look fully baked, they’ll be overdone and dry.
Can I skip the glaze?
Sure, but the cookies will be less sweet and won’t have that pretty finish. If you want to skip the glaze, try dusting the warm cookies with a little powdered sugar and cinnamon instead. It’s a lighter option that still looks lovely.
Print60 Best Wholesome Mini Pumpkin Pie Sugar Cookies
These Wholesome Mini Pumpkin Pie Sugar Cookies are a nostalgic fall treat that combines the soft texture of a sugar cookie with the warm, spiced flavor of pumpkin pie. Made with simple, wholesome ingredients, they’re quick to prepare and perfect for gatherings or cozy afternoons.
- Prep Time: 15 minutes
- Cook Time: 12 minutes
- Total Time: 27 minutes
- Yield: 24 cookies 1x
- Category: Dessert
- Cuisine: American
Ingredients
- 1 cup (120g) all-purpose flour
- 1/2 cup (60g) almond flour
- 1/2 teaspoon baking soda
- 1/4 teaspoon baking powder
- 1 teaspoon pumpkin pie spice
- 1/2 teaspoon ground cinnamon
- 1/4 teaspoon salt
- 1/2 cup (113g) unsalted butter, softened
- 1/2 cup (100g) coconut sugar
- 1 large egg, room temperature
- 1/2 cup (120g) pumpkin puree
- 1 teaspoon vanilla extract
- 1 cup (120g) powdered sugar
- 2–3 tablespoons milk
- 1/4 teaspoon vanilla extract (for glaze)
- Pinch of pumpkin pie spice (for glaze)
Instructions
- Preheat your oven to 350°F (175°C). Line two baking sheets with parchment paper or silicone baking mats.
- In a medium bowl, whisk together the all-purpose flour, almond flour, baking soda, baking powder, pumpkin pie spice, cinnamon, and salt.
- In a large bowl, beat the softened butter and coconut sugar together until light and fluffy, about 2-3 minutes with a hand mixer on medium speed.
- Add the egg, pumpkin puree, and vanilla extract to the butter mixture. Beat until just combined.
- Gradually add the dry ingredients to the wet ingredients, mixing on low speed in three batches, scraping down the sides of the bowl after each addition.
- Scoop tablespoon-sized balls of dough onto the prepared baking sheets, leaving about 2 inches between each cookie.
- Bake for 10-12 minutes, or until the edges are set and the tops look slightly cracked.
- Let the cookies cool on the baking sheet for 5 minutes, then transfer to a wire rack to cool completely.
- While the cookies cool, make the glaze: In a small bowl, whisk together the powdered sugar, milk, vanilla extract, and a pinch of pumpkin pie spice. Start with 2 tablespoons of milk and add more if needed.
- Once the cookies are completely cool, drizzle the glaze over the tops. Let the glaze set for about 15 minutes before serving.
Notes
Don’t overmix the dough. Room temperature ingredients matter. Watch your oven closely and rotate baking sheets if needed. Pat pumpkin puree dry if it looks watery. Chill dough if too soft to scoop. Cookies can be frozen unglazed for up to 3 months. Flavors deepen after a day.
Nutrition
- Serving Size: 1 cookie
- Calories: 98
- Sugar: 7
- Fat: 5
- Saturated Fat: 2.5
- Carbohydrates: 12
- Fiber: 1
- Protein: 2
Keywords: pumpkin cookies, mini cookies, sugar cookies, fall baking, pumpkin pie cookies, wholesome cookies, easy pumpkin cookies


