The last slice disappeared before I even got a picture. My brother-in-law, who never eats dessert, had gone back for thirds. That’s when I knew these Easy No-Bake Football Field Dessert Bars were something special.
I’d been staring at a package of chocolate sandwich cookies and a block of cream cheese, trying to come up with something that felt like game day without turning on the oven. My kitchen was already warm enough, and honestly, I just wanted to sit down and watch the pre-game show with everyone else.
The idea hit me while I was digging through my pantry for something sweet. A chilled, creamy bar that looks like a football field? It sounded ridiculous at first. But the more I thought about it, the more it made sense. It’s fun, it’s festive, and it doesn’t require any baking skills whatsoever.
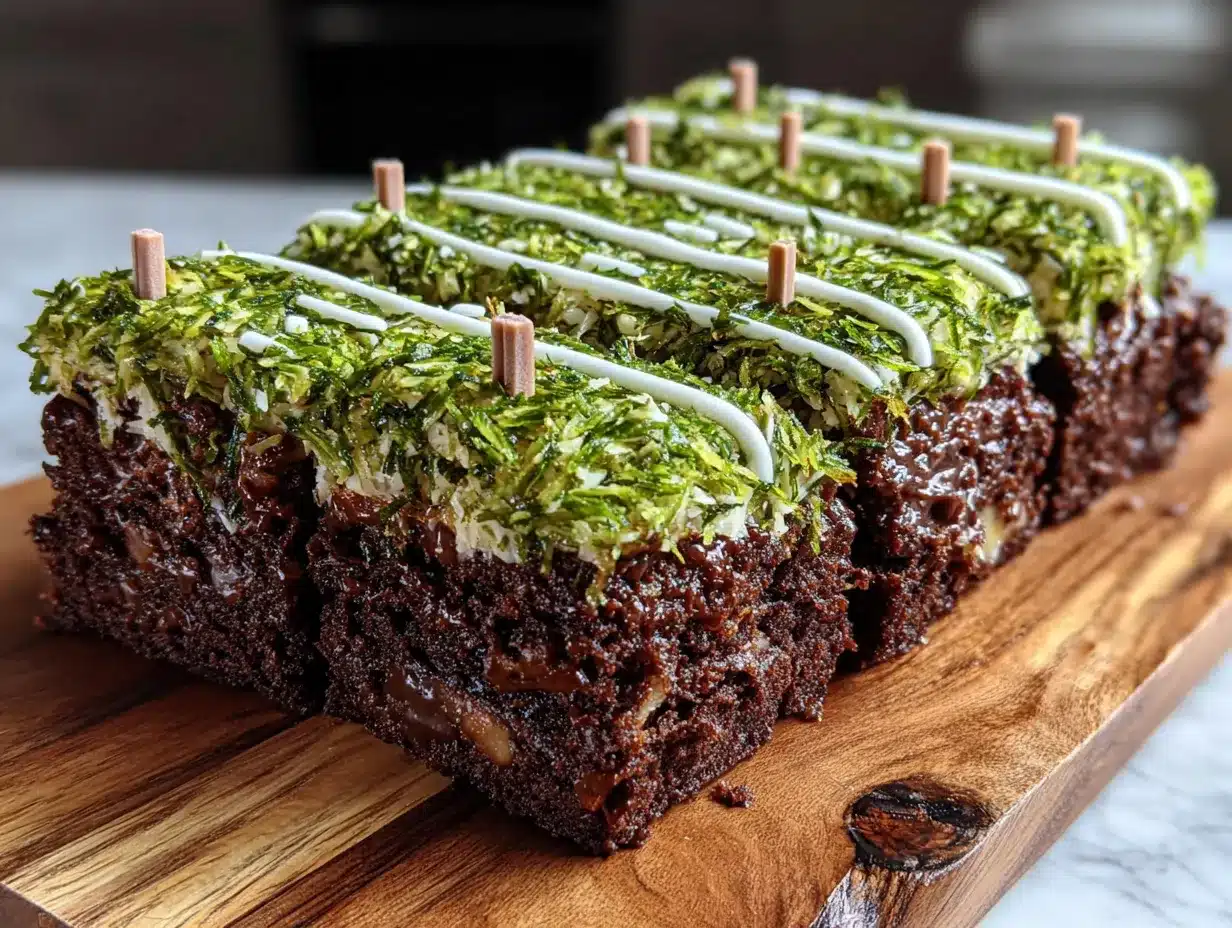
These bars have a buttery cookie crust, a smooth and tangy cream cheese layer, and a fudgy chocolate topping that sets up perfectly in the fridge. The best part? You pipe on little white lines and goal posts to make it look like the real thing. It’s the kind of dessert that makes people smile before they even take a bite.
I’ve made these for three different game-day gatherings now, and every single time, someone asks for the recipe. Not because it’s complicated, but because it’s clever. It looks like you spent hours on it, but really, you just let the fridge do all the work.
So if you need a dessert that brings the fun without the fuss, this one’s for you.
Why You’ll Love This Recipe
Let me tell you why these bars have become my go-to for every football party. First off, they’re no-bake. That means no heating up the kitchen, no worrying about over-baking, and no stress. You mix, you press, you chill. That’s it.
- Quick & Easy: These come together in about 20 minutes of active time. The fridge does the rest. Perfect for when you’re juggling wings, dips, and a house full of people.
- Simple Ingredients: You probably have most of these in your kitchen right now. Chocolate cookies, cream cheese, butter, powdered sugar, and some chocolate chips. No fancy grocery store runs.
- Perfect for Game Day: Let’s face it, football desserts need to be portable and easy to eat while you’re cheering. These bars cut cleanly, hold their shape, and fit right in your hand.
- Crowd-Pleaser: I’ve watched kids, adults, and even picky eaters go back for seconds. The combination of creamy and chocolatey is just irresistible.
- Unbelievably Delicious: The texture is what gets everyone. That crunchy cookie base, the silky cream cheese middle, and the firm chocolate top. It’s like a fancy dessert bar without the bakery price tag.
What makes these different from other no-bake bars is the attention to detail. The cream cheese layer is whipped until it’s light and fluffy, not dense. The chocolate topping is made with a touch of coconut oil for that perfect snap when you bite into it. And the football field design? That’s just pure fun.
This is the kind of dessert that makes you feel like a hero. You walk in with a platter that looks like a mini football field, and everyone loses their mind. It’s comfort food with a side of showmanship, and honestly, that’s my favorite kind of recipe.
What Ingredients You Will Need
This recipe uses simple, pantry-friendly ingredients to create a dessert that looks way more impressive than it actually is. Here’s what you’ll need to grab.
For the Crust
- 24 chocolate sandwich cookies (like Oreos, filling included) — crushed into fine crumbs. I use a food processor for this, but a zip-top bag and a rolling pin work too.
- 5 tablespoons unsalted butter, melted — this binds the crumbs together. Use salted butter if that’s all you have, just skip the extra salt.
For the Cream Cheese Layer
- 16 ounces cream cheese, softened to room temperature — this is crucial. Cold cream cheese will leave you with lumps. Let it sit out for about 30 minutes.
- 1/2 cup granulated sugar — just enough sweetness to balance the tang.
- 1 teaspoon vanilla extract — pure vanilla makes a difference here. I swear by it.
- 2 cups heavy whipping cream — you’ll whip this into stiff peaks. Don’t substitute with milk or half-and-half, it won’t set properly.
For the Chocolate Topping
- 1 1/2 cups semi-sweet chocolate chips — I prefer Ghirardelli for that smooth, rich flavor.
- 2 tablespoons coconut oil — this helps the chocolate set with a nice shine and a clean snap. Refined coconut oil has no coconut taste.
For Decoration
- 1/4 cup white chocolate chips — melted for piping the yard lines and goal posts.
- 1 teaspoon coconut oil or vegetable shortening — to thin the white chocolate for smooth piping.
- Green food coloring — optional, but if you want a brighter field, add a drop or two to the cream cheese layer.
Equipment Needed
You don’t need a fancy kitchen to pull these off. Here’s what I use every time.
- 9×13-inch baking pan — this is the perfect size for these bars. A metal pan works best for even chilling.
- Parchment paper — line your pan with this, leaving some overhang. It makes lifting the bars out a breeze.
- Food processor or zip-top bag — for crushing the cookies into fine crumbs.
- Electric hand mixer or stand mixer — you need this for whipping the cream and beating the cream cheese. A whisk and some elbow grease could work, but your arm will thank you for the mixer.
- Medium saucepan or microwave-safe bowl — for melting the chocolate and coconut oil.
- Small piping bag or zip-top bag — for piping the white chocolate decorations. A tiny round tip gives you more control, but snipping the corner of a bag works great too.
- Offset spatula — helps spread the layers evenly. A regular spatula works, but the offset one is a game-changer.
Preparation Method
Alright, let’s get to the fun part. Here’s how to make these Easy No-Bake Football Field Dessert Bars step by step.
- Prepare your pan. Line a 9×13-inch baking pan with parchment paper, leaving about 2 inches of overhang on the long sides. This will be your handle later. Set it aside.
- Make the crust. Place the 24 chocolate sandwich cookies in a food processor. Pulse until they turn into fine crumbs. You should have about 2 cups of crumbs. Pour them into a medium bowl, add the 5 tablespoons of melted butter, and stir with a fork until every crumb is coated. The mixture should look like wet sand.
- Press the crust. Dump the crumb mixture into your prepared pan. Use the bottom of a measuring cup or a flat glass to press it down firmly and evenly. Don’t skip this step. A tight, compact crust holds everything together. Pop the pan in the fridge while you work on the next layer.
- Whip the cream. In a large mixing bowl, pour in the 2 cups of heavy whipping cream. Beat on medium-high speed with an electric mixer until stiff peaks form. This takes about 3-4 minutes. You’ll know it’s ready when you lift the beaters and the cream stands up straight. Set this aside in the fridge.
- Beat the cream cheese. In another large bowl, beat the softened 16 ounces of cream cheese with the 1/2 cup of sugar and 1 teaspoon of vanilla extract until it’s smooth and fluffy. Scrape down the sides of the bowl a couple of times. If you’re using green food coloring, add a drop or two now and beat until it’s evenly distributed.
- Fold it all together. Take your whipped cream out of the fridge. Gently fold about one-third of it into the cream cheese mixture using a rubber spatula. Once it’s mostly combined, fold in the rest. Be gentle here. You want to keep the mixture light and airy, not deflate it.
- Spread the cream layer. Pull the crust out of the fridge. Spoon the cream cheese mixture over the crust and spread it into an even layer. An offset spatula works great for this. Cover the pan with plastic wrap and refrigerate for at least 4 hours, or overnight. I prefer overnight — the bars cut so much cleaner.
- Make the chocolate topping. When the cream layer is fully set, it’s time for the chocolate. Combine the 1 1/2 cups of chocolate chips and 2 tablespoons of coconut oil in a microwave-safe bowl. Microwave in 30-second bursts, stirring after each, until the chocolate is smooth and glossy. Let it cool for about 5 minutes — you don’t want it hot, just warm.
- Pour the chocolate. Take the pan out of the fridge. Pour the melted chocolate over the cream layer and tilt the pan gently to spread it evenly. Or use your offset spatula. Return the pan to the fridge for another 30 minutes, until the chocolate is firm to the touch.
- Decorate the field. While the chocolate sets, melt the 1/4 cup of white chocolate chips with 1 teaspoon of coconut oil in the microwave. Stir until smooth. Transfer to a small piping bag or a zip-top bag with a tiny corner snipped off. Once the chocolate topping is firm, pipe yard lines across the width of the pan every inch or so. Pipe two small goal posts at one end. You can also add a small football shape in the center if you’re feeling fancy.
- Final chill. Pop the decorated pan back in the fridge for at least 1 hour to let the white chocolate set. Then, use the parchment overhang to lift the entire block out of the pan. Place it on a cutting board.
- Slice and serve. Use a sharp knife to cut the bars into squares. Wipe the knife clean between cuts for the cleanest edges. I like to cut them into 24 small squares, perfect for grabbing and going.
Cooking Tips & Techniques
I’ve made these bars more times than I can count, and I’ve learned a few things along the way. Here are my best tips for perfect results every time.
Room temperature cream cheese is non-negotiable. I learned this the hard way. Cold cream cheese creates lumps that no amount of beating will fix. Set it out on the counter for at least 30 minutes before you start. If you’re in a rush, cut it into small cubes and let them sit for 15 minutes.
Don’t overwhip the cream. You want stiff peaks, but if you keep going, you’ll end up with butter. Stop the mixer the moment the cream holds its shape. And keep it cold — warm cream won’t whip properly.
Press the crust firmly. This is the foundation of the whole bar. If the crust is loose, it will crumble when you cut it. Use a flat-bottomed glass and really lean into it. I sometimes use the bottom of a measuring cup for extra leverage.
Patience is key with the chilling. I know it’s tempting to rush, but each layer needs its time to set. The cream layer needs at least 4 hours, and overnight is better. The chocolate needs a full 30 minutes. If you try to cut too early, you’ll get a mess. Trust the process.
Clean cuts every time. Run your knife under hot water, dry it, then slice. Wipe the blade clean between cuts. This gives you those beautiful, Instagram-worthy squares. A sharp chef’s knife works better than a butter knife here.
Variations & Adaptations
One of the best things about this recipe is how easy it is to tweak. Here are some of my favorite variations.
Gluten-Free Version
Swap the chocolate sandwich cookies for gluten-free chocolate cookies. Most brands have a gluten-free option that tastes just as good. The rest of the ingredients are naturally gluten-free, so you’re good to go.
Peanut Butter Twist
Add 1/2 cup of creamy peanut butter to the cream cheese mixture. Beat it in with the cream cheese and sugar. The peanut butter pairs beautifully with the chocolate topping. My husband begs for this version every time.
Mint Chocolate Field
Add 1/2 teaspoon of peppermint extract to the cream cheese layer. Use mint chocolate chips in the topping instead of semi-sweet. It’s a refreshing twist that works great for holiday parties too. If you love mint, you might also enjoy these creamy St. Patrick’s mint chip cream cheese bars.
Dairy-Free Option
Use dairy-free cream cheese and a dairy-free heavy cream alternative like coconut cream. For the chocolate, choose dairy-free chocolate chips. The texture will be slightly different, but still delicious.
Team Colors
Instead of a green field, tint the cream cheese layer with your favorite team’s colors. A drop of red and blue for a classic look, or orange for a fall vibe. Just add the coloring with the vanilla extract.
Serving & Storage Suggestions
These bars are best served cold, straight from the fridge. The layers are firm, the chocolate snaps, and the cream cheese filling is perfectly chilled. I like to arrange them on a platter that looks like a mini football field for extra fun.
They pair beautifully with other game-day favorites. I love serving them alongside some crispy Super Bowl chicken wing bites for a sweet and savory combo. Or set them out with a bowl of fresh fruit to balance the richness.
For drinks, cold milk is a classic choice. But a hot coffee or a creamy hot chocolate works wonders too. If you’re hosting a party, set up a dessert bar with these bars, some crispy Super Bowl chicken nacho crust pizza, and maybe some crispy Super Bowl bacon ranch chicken flatbread minis for a full spread.
Storage Instructions: Keep the bars in an airtight container in the refrigerator. They’ll stay fresh for up to 5 days. The layers hold up well, and the flavors actually meld together a bit more over time.
Freezer Instructions: These bars freeze beautifully. Place them in a single layer on a baking sheet and freeze until solid. Then transfer them to a freezer-safe container with parchment paper between layers. They’ll keep for up to 2 months. Thaw in the fridge overnight before serving.
Reheating: Don’t reheat these. They’re meant to be enjoyed cold. If you want a slightly softer texture, let them sit at room temperature for about 5 minutes before serving.
Nutritional Information & Benefits
Let’s be real — these are a treat. But here’s a rough estimate for one bar (based on 24 servings).
| Nutrient | Amount per Serving |
|---|---|
| Calories | 285 |
| Total Fat | 22g |
| Saturated Fat | 13g |
| Cholesterol | 55mg |
| Sodium | 135mg |
| Total Carbohydrates | 22g |
| Dietary Fiber | 1g |
| Sugars | 16g |
| Protein | 4g |
Health Benefits: The cream cheese provides a good amount of calcium and protein. Dark chocolate is rich in antioxidants. And hey, dessert is good for the soul, right? If you’re looking for a lighter option, you can use low-fat cream cheese and skip the extra sugar.
Dietary Considerations: This recipe contains dairy and gluten. For a gluten-free version, use gluten-free cookies. For a dairy-free version, use plant-based alternatives. It’s not suitable for vegans unless you use vegan cream cheese and cream.
Conclusion
These Easy No-Bake Football Field Dessert Bars are everything I want in a game-day dessert. They’re fun, they’re delicious, and they’re so simple to make. No oven required, no stress, just pure crowd-pleasing magic.
I love how customizable they are. You can switch up the colors, add different flavors, or keep it classic. Every time I make them, I feel like I’m bringing a little bit of the stadium to my living room.
So go ahead and give them a try. Whip up a batch for your next watch party, or just because it’s Tuesday and you want something sweet. Trust me, the hardest part will be waiting for them to chill.
I’d love to hear how yours turn out! Drop a comment below and let me know if you tried any fun variations. Did you add team colors? Did you go with the peanut butter twist? Share your creations and tag me — I can’t wait to see your football field desserts!
Frequently Asked Questions
Can I make these bars a day ahead?
Absolutely. In fact, I recommend it. Making them a day ahead gives the layers plenty of time to set, and the bars cut much cleaner. Just keep them covered in the fridge until you’re ready to serve.
Can I use regular cookies instead of chocolate sandwich cookies?
You can, but the flavor will be different. Chocolate sandwich cookies give that classic dark crust that contrasts beautifully with the creamy filling. If you use graham crackers or vanilla wafers, the crust will be sweeter and less rich.
My cream cheese layer turned out lumpy. What went wrong?
Most likely, your cream cheese was too cold. Always let it come to room temperature before beating. If you end up with lumps, try beating it a little longer, but the texture won’t be as smooth. For next time, cube the cream cheese and let it sit out for 30 minutes.
How do I get clean, sharp cuts?
Use a sharp chef’s knife and run it under hot water before each cut. Dry it off, then slice. Wipe the blade clean between cuts. This prevents the layers from smearing and gives you those beautiful, clean edges.
Can I freeze these bars for later?
Yes! They freeze wonderfully. Place the cut bars on a baking sheet and freeze until solid. Then transfer them to a freezer-safe container with parchment paper between the layers. They’ll keep for up to 2 months. Thaw in the fridge overnight before serving.
Pin This Recipe!
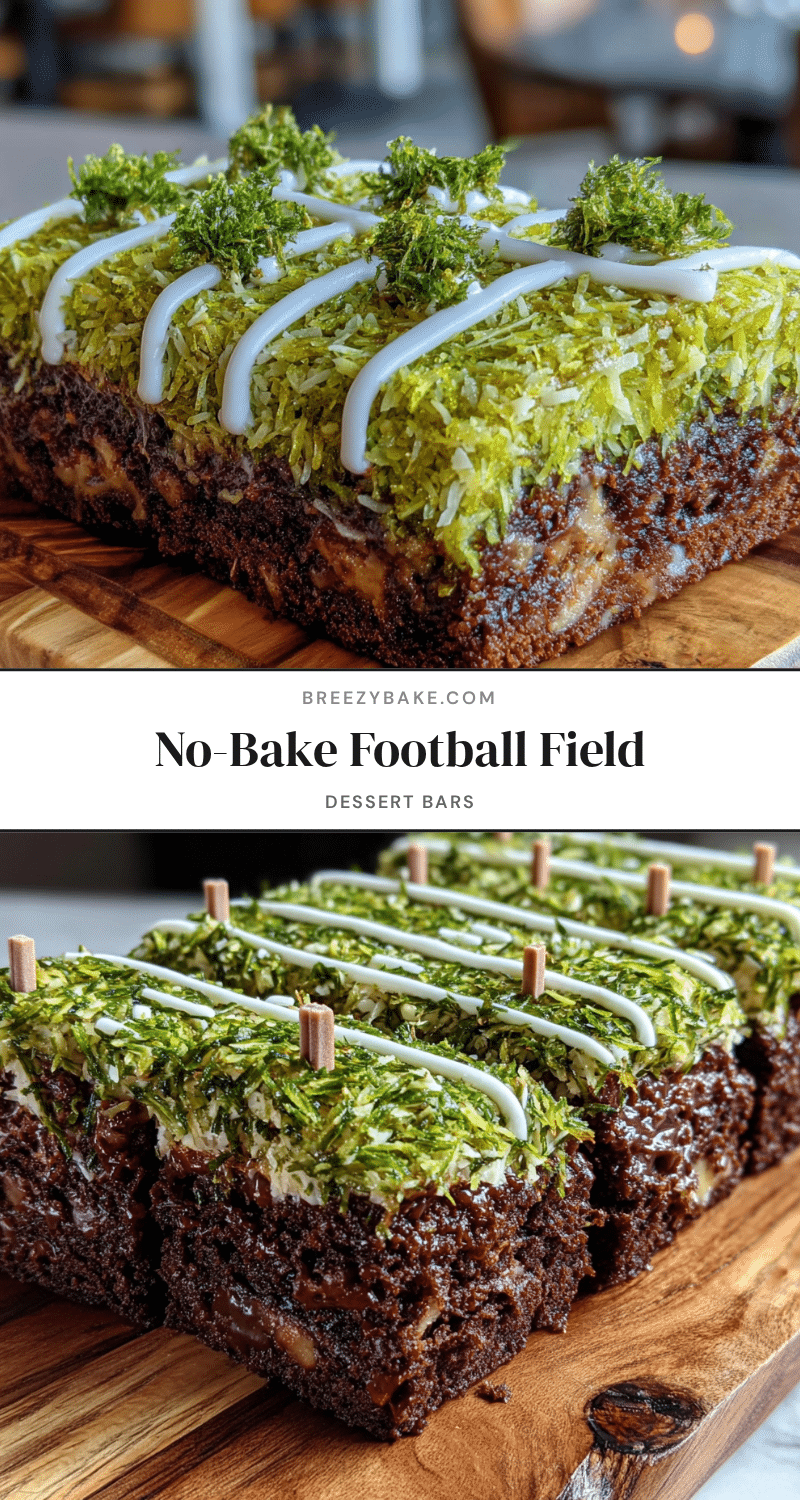
Easy No-Bake Football Field Dessert Bars: Best Game Day Treat

These no-bake dessert bars feature a buttery cookie crust, a smooth cream cheese layer, and a fudgy chocolate topping, decorated like a football field. They’re quick, easy, and perfect for game day gatherings.
- Prep Time: 20 minutes
- Cook Time: 0 minutes
- Total Time: 4 hours 50 minutes (includes chilling)
- Yield: 24 servings 1x
- Category: Dessert
- Cuisine: American
Ingredients
- 24 chocolate sandwich cookies (like Oreos, filling included)
- 5 tablespoons unsalted butter, melted
- 16 ounces cream cheese, softened to room temperature
- 1/2 cup granulated sugar
- 1 teaspoon vanilla extract
- 2 cups heavy whipping cream
- 1 1/2 cups semi-sweet chocolate chips
- 2 tablespoons coconut oil
- 1/4 cup white chocolate chips
- 1 teaspoon coconut oil or vegetable shortening
- Green food coloring (optional)
Instructions
- Line a 9×13-inch baking pan with parchment paper, leaving about 2 inches of overhang on the long sides.
- Crush the 24 chocolate sandwich cookies into fine crumbs using a food processor or zip-top bag. In a medium bowl, combine the crumbs with 5 tablespoons melted butter until the mixture looks like wet sand.
- Press the crumb mixture firmly and evenly into the prepared pan using the bottom of a measuring cup or flat glass. Refrigerate while preparing the next layer.
- In a large mixing bowl, beat 2 cups heavy whipping cream on medium-high speed until stiff peaks form, about 3-4 minutes. Set aside in the fridge.
- In another large bowl, beat 16 ounces softened cream cheese, 1/2 cup sugar, and 1 teaspoon vanilla extract until smooth and fluffy. If using green food coloring, add a drop or two and beat until evenly distributed.
- Gently fold the whipped cream into the cream cheese mixture in thirds, being careful not to deflate the mixture.
- Spread the cream cheese mixture over the chilled crust in an even layer. Cover with plastic wrap and refrigerate for at least 4 hours, preferably overnight.
- When the cream layer is set, combine 1 1/2 cups chocolate chips and 2 tablespoons coconut oil in a microwave-safe bowl. Microwave in 30-second bursts, stirring after each, until smooth. Let cool for about 5 minutes.
- Pour the melted chocolate over the cream layer and spread evenly. Return to the fridge for 30 minutes until firm.
- Melt 1/4 cup white chocolate chips with 1 teaspoon coconut oil in the microwave. Stir until smooth. Transfer to a small piping bag or zip-top bag with a tiny corner snipped off.
- Once the chocolate topping is firm, pipe yard lines across the width of the pan every inch or so. Pipe two small goal posts at one end. Optionally, pipe a small football shape in the center.
- Refrigerate for at least 1 hour to let the white chocolate set. Use the parchment overhang to lift the entire block out of the pan. Slice into squares with a sharp knife, wiping the blade clean between cuts.
Notes
Room temperature cream cheese is essential for a smooth texture. Press the crust firmly to prevent crumbling. Chill each layer thoroughly for clean cuts. For gluten-free, use gluten-free chocolate cookies. For dairy-free, use plant-based alternatives.
Nutrition
- Serving Size: 1 bar
- Calories: 285
- Sugar: 16
- Sodium: 135
- Fat: 22
- Saturated Fat: 13
- Carbohydrates: 22
- Fiber: 1
- Protein: 4
Keywords: no-bake dessert, football field bars, game day dessert, cream cheese bars, chocolate dessert, easy dessert, party dessert


