I was at the hardware store, of all places, picking up a new showerhead on a random Saturday morning. The guy in front of me in line, an older man with paint-splattered jeans and a name tag that read “Buddy,” was arguing with the cashier about the return policy on a caulking gun. I was mentally bracing for a long wait when he turned around, sighed, and just started talking. “You know what’s better than arguing about a caulking gun?” he asked. I didn’t, honestly. “Making my game day dip,” he said. “Seven layers. No fuss. The secret is you don’t overthink it.” He scribbled the ingredients on the back of his receipt—I still have it, tucked in my recipe box. It was the last place I expected a legendary dip recipe to come from, but here we are. Maybe you’ve been there, getting life advice from a stranger in a checkout line. This one stuck with me because it’s the kind of thing you can throw together in fifteen minutes flat, and everyone loses their minds over it. I’ve tweaked it over the years, added homemade chips because, let me tell you, store-bought just doesn’t hit the same, and now it’s my go-to for any game day gathering.
Why You’ll Love This Recipe
Let’s face it, you’re busy. You don’t have time to spend hours in the kitchen before the big game. This dip is the answer to your weeknight prayers. It comes together in under twenty minutes, and I’ve tested this version at least a dozen times to make sure every layer is perfect.
- Quick & Easy: From start to finish, you’re looking at about 15 minutes of active work. The chips bake while you assemble the dip. Talk about efficiency.
- Simple Ingredients: No fancy grocery trips needed. You likely have most of these items in your pantry and fridge already. Buddy’s original list was pure genius for this reason.
- Perfect for Game Day: This is the ultimate crowd-pleaser. It disappears faster than anything else on the snack table, and you’ll be asked for the recipe every single time.
- Crowd-Pleaser: Both kids and adults go crazy for this. It’s got that perfect mix of creamy, crunchy, spicy, and fresh.
- Unbelievably Delicious: The combination of warm refried beans, cool sour cream, and crispy homemade chips is next-level comfort food. It’s not just another dip—it’s the dip.
What makes this different from every other seven-layer dip out there? It’s the homemade chips. They’re sturdy enough to scoop up every single layer without breaking, and they add a salty crunch that you just can’t get from a bag. This is comfort food reimagined—faster, fresher, and with the same soul-soothing satisfaction. Perfect for impressing guests without stress, or turning a simple game day into something memorable.
What Ingredients You Will Need
This recipe uses simple, wholesome ingredients to deliver bold flavor and satisfying texture without the fuss. Most of these are pantry staples, but I’ll share a few tips on picking the best ones.
- For the Homemade Chips:
- 6 large flour or corn tortillas (I prefer flour for sturdiness, but corn works great for a gluten-free option)
- 2 tablespoons olive oil
- 1 teaspoon salt
- ½ teaspoon garlic powder
- ½ teaspoon smoked paprika (optional, but adds a lovely depth)
- For the Dip Layers:
- 1 can (16 oz) refried beans (I recommend Rosarita for the best texture)
- 1 cup sour cream
- 1 cup guacamole (store-bought is fine, or homemade if you have time)
- 1 cup salsa (drain it slightly to avoid a watery dip)
- 1 cup shredded cheddar cheese (or a Mexican blend)
- ½ cup sliced black olives
- ¼ cup chopped green onions
- Optional: 1 teaspoon taco seasoning for the sour cream layer
Look for firm tortillas that are pliable but not stale. For the refried beans, I always go for the vegetarian kind to keep things simple. If you’re feeling adventurous, you can add a layer of seasoned ground beef or shredded chicken, but Buddy’s original was vegetarian, and honestly, it doesn’t need meat. For a dairy-free version, use vegan sour cream and cheese—it works surprisingly well.
Equipment Needed
You don’t need a fancy kitchen for this recipe. Here’s what you’ll need:
- Baking sheet (for the chips)
- Parchment paper (makes cleanup a breeze)
- Small bowl for mixing the oil and spices
- Pastry brush (or just use your hands—I’ve done both)
- Pizza cutter or sharp knife (for cutting the tortillas)
- Serving dish (a clear glass pie plate or a shallow bowl works best to show off the layers)
- Measuring cups and spoons
If you don’t have a pastry brush, don’t sweat it. I’ve used a paper towel to dab the oil on the tortillas in a pinch. It’s not pretty, but it works. For the baking sheet, any rimmed sheet pan will do. Budget-friendly tip: skip the parchment paper and just oil the pan directly—just watch the chips a little closer so they don’t stick.
Preparation Method
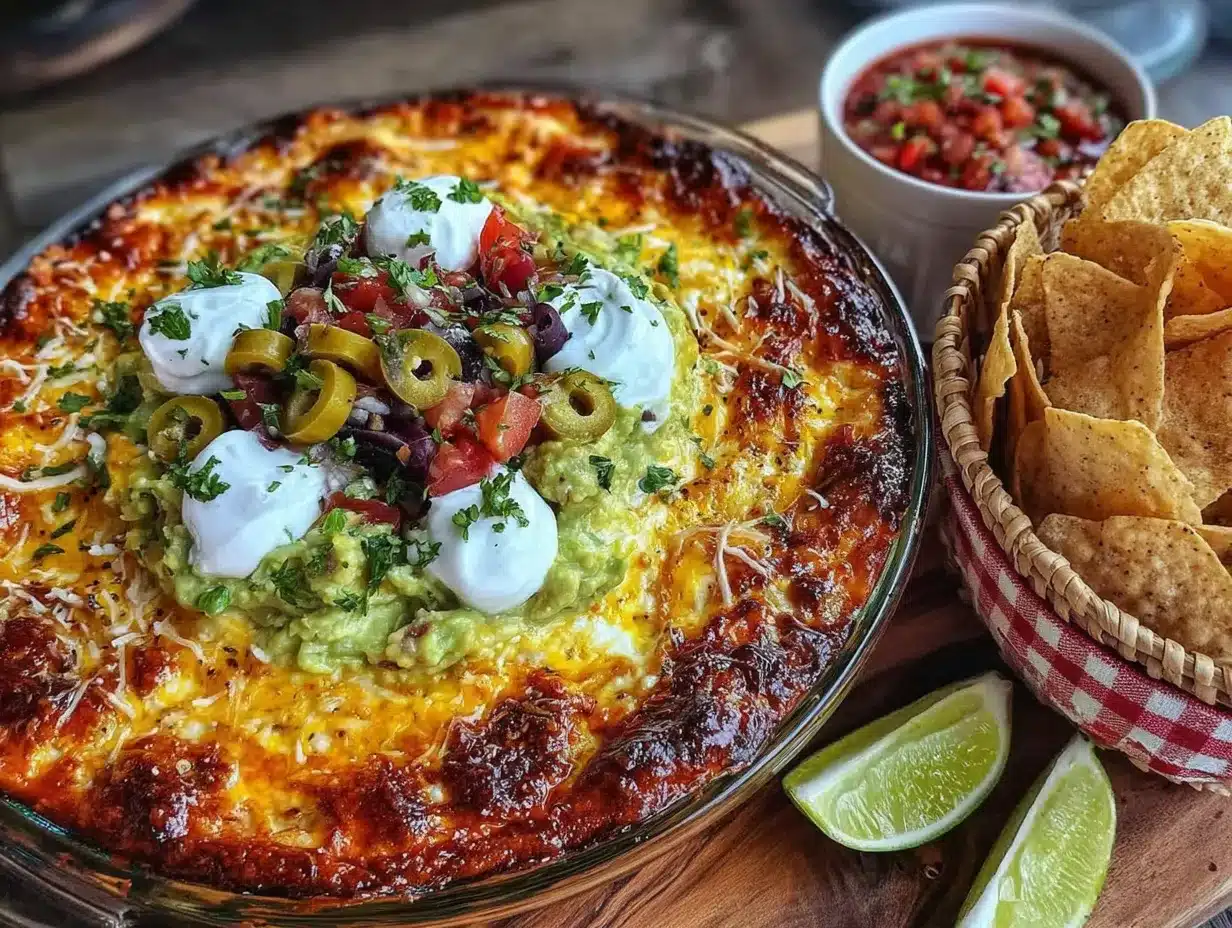
Alright, let’s get cooking. This whole process takes about 15 minutes of active time, plus 10 minutes for the chips to bake. You can do this.
- Preheat your oven to 375°F (190°C). Line a baking sheet with parchment paper. This is your first step, so the oven is ready when you are.
- Make the homemade chips. Stack the tortillas and cut them into triangles using a pizza cutter. I usually cut each tortilla into 8 wedges. In a small bowl, mix the olive oil, salt, garlic powder, and smoked paprika. Brush this mixture lightly over both sides of each tortilla wedge. Place them in a single layer on the baking sheet. Don’t overcrowd them—you might need two batches.
- Bake the chips. Pop them in the oven for 8-10 minutes, flipping halfway through. Keep an eye on them after 7 minutes—they go from golden to burnt fast. They should be lightly browned and crispy. Let them cool on the sheet while you assemble the dip.
- Warm the refried beans. While the chips bake, spoon the refried beans into a microwave-safe bowl and heat them for 1-2 minutes until warm and spreadable. This makes layering so much easier.
- Layer the dip. Grab your serving dish. Spread the warm refried beans evenly on the bottom. This is your foundation, so make it even. Next, spread the sour cream over the beans. If you’re using taco seasoning, mix it into the sour cream first for extra flavor.
- Add the remaining layers. Spoon the guacamole over the sour cream, spreading gently. Then add the drained salsa. Sprinkle the shredded cheese evenly on top, followed by the black olives and green onions. The key here is to go slowly so the layers stay distinct.
- Serve immediately. Place the bowl of dip in the center of a large platter and surround it with the warm homemade chips. Watch it disappear.
One thing I learned the hard way: don’t skip draining the salsa. The first time I made this, my dip turned into a soupy mess because the salsa was too watery. Just give it a quick strain in a fine-mesh sieve before adding it. Your dip will thank you.
Cooking Tips & Techniques
I’ve made this dip more times than I can count, and I’ve picked up a few tricks along the way. Here’s what I’ve learned:
Don’t overbake the chips. I once got distracted during a game and let them go too long. They were edible, but barely. Set a timer for 7 minutes and check them. They’ll continue to crisp up as they cool, so pull them out when they’re just starting to turn golden.
Layer strategically. The order matters. Putting the beans first gives a solid base. The sour cream acts as a barrier to keep the guacamole from getting soggy. Trust the process.
Use room temperature ingredients. If your sour cream and guacamole are cold, they’ll be harder to spread. Let them sit on the counter for 10 minutes before you start. This makes the layers so much cleaner.
Multitask like a pro. While the chips are baking, you can prep all the dip ingredients. Have everything measured and ready to go. This way, you’re not scrambling when the timer goes off.
Make it ahead. You can prep the chips a day in advance and store them in an airtight container. The dip itself is best assembled fresh, but you can have all the components ready and layer them just before serving.
Variations & Adaptations
This recipe is incredibly flexible. Here are a few ways to switch it up:
- Spicy Black Bean Version: Swap the refried beans for seasoned black beans. Mash them slightly with a fork and add a pinch of cayenne pepper for heat. This gives the dip a heartier texture.
- Loaded Meat Lover’s Dip: Add a layer of seasoned ground beef or shredded chicken between the beans and sour cream. Brown the meat with taco seasoning first, then let it cool slightly before adding it. My brother-in-law insists on this version, and it’s always a hit.
- Vegan Friendly: Use vegan sour cream, vegan cheese, and a dairy-free guacamole. The homemade chips are already vegan if you use corn tortillas. I’ve served this at a party with mixed dietary needs, and nobody missed the dairy.
- Seasonal Twist: In summer, swap the salsa for fresh pico de gallo. In fall, add a layer of roasted butternut squash puree. It sounds weird, but it works.
I once tried a version with a layer of pickled jalapeños, and honestly, it was a game-changer. The acidity cuts through the richness perfectly. Just add them sparingly—they can overpower the other flavors.
Serving & Storage Suggestions
This dip is best served at room temperature, so let it sit out for about 15 minutes after assembling if you’ve used cold ingredients. I like to serve it on a large wooden board with the chips arranged around the bowl and a few extra bowls of salsa and guacamole on the side for dipping.
For presentation, use a clear glass dish so the layers are visible. It looks stunning on a buffet table. Pair it with cold beers, margaritas, or a crisp white wine. It also goes great with grilled chicken wings or a simple taco bar.
Storage: If you have leftovers (unlikely, but possible), cover the dip tightly with plastic wrap and refrigerate for up to 2 days. The chips should be stored separately in an airtight container at room temperature. Do not store the chips with the dip—they’ll get soggy.
Reheating: This dip is meant to be served cold or at room temperature, so reheating isn’t recommended. If you want a warm dip, you can assemble it in an oven-safe dish and bake at 350°F (175°C) for 10-15 minutes until the cheese is bubbly. Just skip the guacamole and add it after baking.
The flavors actually meld together a bit after a few hours in the fridge, making it even better the next day. Just bring it to room temperature before serving again.
Nutritional Information & Benefits
Here’s an approximate breakdown per serving (based on 8 servings):
- Calories: 320
- Protein: 10g
- Fat: 18g
- Carbohydrates: 30g
- Fiber: 6g
- Sugar: 4g
The refried beans are a great source of fiber and plant-based protein, which helps keep you full. The avocados in the guacamole provide healthy monounsaturated fats that are good for your heart. The homemade chips are lower in sodium than store-bought versions, and you control the oil content.
This recipe is naturally vegetarian and can be made vegan with simple swaps. It’s also gluten-free if you use corn tortillas. The main allergens are dairy (cheese and sour cream) and gluten (flour tortillas), so adjust accordingly for your guests.
I love that this dip feels indulgent but uses real, whole ingredients. It’s the kind of snack you can feel good about serving—even on game day.
Conclusion
This quick seven-layer dip with homemade chips is the recipe you’ll turn to again and again. It’s fast, forgiving, and always gets rave reviews. Whether you’re hosting a Super Bowl party, a casual get-together, or just need a weeknight snack that feels special, this dip delivers.
I love that it came from a random conversation in a hardware store. It reminds me that the best recipes often come from the most unexpected places. Buddy was right—you don’t need to overthink it. Just layer it up, make some chips, and enjoy.
Now I want to hear from you. Have you tried this dip? Did you add your own twist? Drop a comment below and let me know how it turned out. And if you loved it, share this post with a friend who needs a game day win. Happy dipping!
Frequently Asked Questions
Can I make this dip ahead of time?
Yes, you can prep the chips and all the components a day in advance. Assemble the dip just before serving to keep the layers distinct and fresh. Store the chips in an airtight container at room temperature.
What if I don’t have a pizza cutter for the chips?
No problem. Use a sharp knife to cut the tortillas into triangles. A ruler isn’t necessary—just eyeball it. The chips don’t need to be perfect, just delicious.
Can I use store-bought chips instead of homemade?
Absolutely. The homemade chips add a special touch, but store-bought tortilla chips work just fine. Look for sturdy chips that can hold up to the dip, like restaurant-style ones.
How do I keep the guacamole from turning brown?
Press a layer of plastic wrap directly onto the surface of the guacamole before refrigerating. The lime juice in the guacamole also helps slow down browning. If you’re making it fresh, add a little extra lime juice.
Can I freeze this dip?
Freezing is not recommended. The sour cream and guacamole will separate and become watery when thawed. This dip is best enjoyed fresh or within 2 days of refrigeration.
Pin This Recipe!

Best Quick Seven-Layer Dip with Easy Homemade Chips
A quick and easy seven-layer dip with homemade chips, perfect for game day gatherings. This crowd-pleaser comes together in under 20 minutes with simple ingredients.
- Prep Time: 15 minutes
- Cook Time: 10 minutes
- Total Time: 25 minutes
- Yield: 8 servings 1x
- Category: Appetizer
- Cuisine: Mexican-American
Ingredients
- 6 large flour or corn tortillas
- 2 tablespoons olive oil
- 1 teaspoon salt
- ½ teaspoon garlic powder
- ½ teaspoon smoked paprika (optional)
- 1 can (16 oz) refried beans
- 1 cup sour cream
- 1 cup guacamole
- 1 cup salsa (drained)
- 1 cup shredded cheddar cheese (or Mexican blend)
- ½ cup sliced black olives
- ¼ cup chopped green onions
- Optional: 1 teaspoon taco seasoning for the sour cream layer
Instructions
- Preheat your oven to 375°F (190°C). Line a baking sheet with parchment paper.
- Stack the tortillas and cut them into triangles using a pizza cutter (8 wedges per tortilla).
- In a small bowl, mix the olive oil, salt, garlic powder, and smoked paprika. Brush this mixture lightly over both sides of each tortilla wedge.
- Place the tortilla wedges in a single layer on the baking sheet. Bake for 8-10 minutes, flipping halfway through, until lightly browned and crispy. Let them cool on the sheet.
- While the chips bake, spoon the refried beans into a microwave-safe bowl and heat for 1-2 minutes until warm and spreadable.
- In a serving dish, spread the warm refried beans evenly on the bottom.
- Spread the sour cream over the beans. If using taco seasoning, mix it into the sour cream first.
- Spoon the guacamole over the sour cream, spreading gently.
- Add the drained salsa on top of the guacamole.
- Sprinkle the shredded cheese evenly over the salsa.
- Top with sliced black olives and chopped green onions.
- Serve immediately with the warm homemade chips.
Notes
Don’t skip draining the salsa to avoid a watery dip. The chips can be made a day in advance and stored in an airtight container. For best results, let sour cream and guacamole come to room temperature before spreading. The dip is best served fresh but can be refrigerated for up to 2 days (store chips separately).
Nutrition
- Serving Size: 1 serving (approxima
- Calories: 320
- Sugar: 4
- Sodium: 680
- Fat: 18
- Saturated Fat: 7
- Carbohydrates: 30
- Fiber: 6
- Protein: 10
Keywords: seven-layer dip, game day dip, homemade chips, quick appetizer, party dip, Mexican dip, vegetarian dip


