My brother-in-law, Mark, had claimed for years that he hated pumpkin seeds. ‘Too much work for barely any payoff,’ he’d say, every single October. He’d watch the rest of us carve pumpkins and just walk away from the pile of guts and seeds like it was a biohazard. Then, last Thanksgiving, I made a batch of these crispy cinnamon sugar pumpkin seeds ‘just for myself’ while everyone else was watching football. I set the bowl down on the coffee table, and not five minutes later, I caught him with his hand buried in it, a look of pure betrayal on his face. The crunch was so loud it actually made me look up from my book.
That moment—the quiet satisfaction of watching someone prove themselves wrong—is exactly why this recipe has become a non-negotiable part of my fall hosting routine. I mean, honestly, I get it. Plain, salty pumpkin seeds can be a little… boring. They’re often chewy, or the shell gets stuck in your teeth, and the flavor is just ‘seed.’ But this version? It’s a whole different animal. We’re talking a shatteringly crisp texture, a warm, buttery coating of cinnamon and sugar that caramelizes in the oven, and a salty-sweet balance that makes them dangerously addictive.
Maybe you’ve been there—you want to serve something at your gathering that feels special but isn’t a whole production. Something that says ‘I put in effort’ without you actually having to sweat in the kitchen. These seeds are that dish. They’re the snack that disappears before the main course even hits the table, and the best part? People will ask you for the recipe, and you’ll get to smile and say, ‘Oh, it’s just pumpkin seeds.’ The conversion arc is real, and I’m here to help you pull it off at your next dinner party.
Why You’ll Love This Recipe
This isn’t just another pumpkin seed recipe. After dozens of batches—some burnt, some soggy, some just plain sad—I’ve dialed in every variable to make sure these come out perfect every single time. Here’s why this one is different:
- Effortlessly Impressive: You can prep these in under 10 minutes. The oven does the heavy lifting, which means you’re free to focus on your guests and the rest of your menu.
- Simple Pantry Ingredients: No weird extracts or hard-to-find spices. If you’ve got pumpkin seeds, butter, sugar, and cinnamon, you’re already in business. You probably have everything right now.
- Perfect for Entertaining: Set out a bowl of these at your next fall gathering, and I promise you, they’ll be the most talked-about item on the table. They’re the perfect pre-dinner nibble or a sweet finish alongside coffee.
- Crowd-Pleaser Across the Board: Kids love the sweet crunch, adults love the sophisticated flavor, and even the skeptics (like Mark) will be converted. I’ve tested this on picky eaters and food snobs alike.
- Unbelievably Addictive Texture: The secret is a quick parboil that removes the seed’s natural enzyme inhibitors and ensures every single seed gets perfectly crispy, not chewy. It’s a game-changer.
This recipe is the result of my own kitchen trials—the batch that was too burnt, the one that was too soggy, and finally, the one that made me close my eyes after the first bite. It’s comfort food reimagined: a little healthier than a cookie, but with the same soul-soothing satisfaction. Perfect for impressing guests without the stress, or turning a simple post-carving ritual into something memorable.
What Ingredients You Will Need
This recipe uses simple, wholesome ingredients to deliver bold flavor and satisfying texture without any fuss. Most of these are pantry staples, especially if you’ve just carved a pumpkin.
- Fresh Pumpkin Seeds: About 1 ½ cups, scooped straight from a medium-sized pumpkin. Don’t rinse them too aggressively; a little bit of pumpkin flesh left on adds flavor. If you’re using store-bought raw pepitas, the texture will be slightly different, but it still works.
- Water: For the parboiling step. This is non-negotiable for the crispiest results. I use filtered water, but tap is fine.
- Salt: 1 teaspoon for the boiling water, plus a pinch for the final seasoning. I prefer fine sea salt for even distribution.
- Unsalted Butter: 3 tablespoons, melted. I use unsalted so I can control the salt level. If you only have salted, just skip the extra pinch at the end.
- Granulated Sugar: 2 tablespoons. This gives the seeds their sweet crunch. You can experiment with coconut sugar for a deeper flavor, but the texture will be slightly grittier.
- Ground Cinnamon: 1 ½ teaspoons. I’m partial to Saigon cinnamon for its intense, warm flavor, but regular cinnamon works beautifully.
- Vanilla Extract: ½ teaspoon. A little splash rounds out the sweetness and adds a cozy, aromatic note. Use pure vanilla if you have it; imitation is fine in a pinch.
Ingredient Selection Tips: When scooping seeds from a fresh pumpkin, look for ones that are plump and not shriveled. The larger, white ‘carving pumpkin’ seeds work perfectly, but the smaller, darker seeds from a sugar pumpkin are even more tender. If you’re buying pre-shelled seeds, look for raw, unsalted pepitas. I’ve found that the brand ‘Go Raw’ has a consistently good texture.
Substitution Guidance: For a dairy-free version, swap the butter with coconut oil or a high-quality vegan butter. The flavor profile will shift slightly, but it’s still delicious. If you want a bit of heat, add a pinch of cayenne pepper to the sugar mixture—it’s a fantastic surprise for your guests.
Equipment Needed
You don’t need a fancy kitchen to pull this off. Here’s what you’ll need:
- Medium Saucepan: For boiling the seeds. Any pot will do, but a heavier bottom helps prevent scorching.
- Colander or Strainer: To drain the seeds after parboiling. A fine-mesh strainer is ideal so the tiny seeds don’t escape.
- Baking Sheet: A rimmed baking sheet is crucial—you don’t want melted butter dripping onto the floor of your oven. I use a half-sheet pan (18×13 inches).
- Parchment Paper or Silicone Baking Mat: This makes cleanup a breeze and prevents the seeds from sticking. I prefer parchment for easy disposal.
- Mixing Bowls: One large bowl for tossing the seeds with butter and sugar, and one small bowl for mixing the dry ingredients.
- Kitchen Towel: For patting the seeds dry after boiling. A clean, lint-free cloth is best.
- Spatula: For spreading the seeds in an even layer on the baking sheet. A silicone spatula is my go-to.
Budget-Friendly Tip: If you don’t have a silicone baking mat, parchment paper is your best friend. It’s cheap and does the job perfectly. Also, a regular dinner spoon works just fine for stirring—no need for a fancy wooden spoon.
Preparation Method
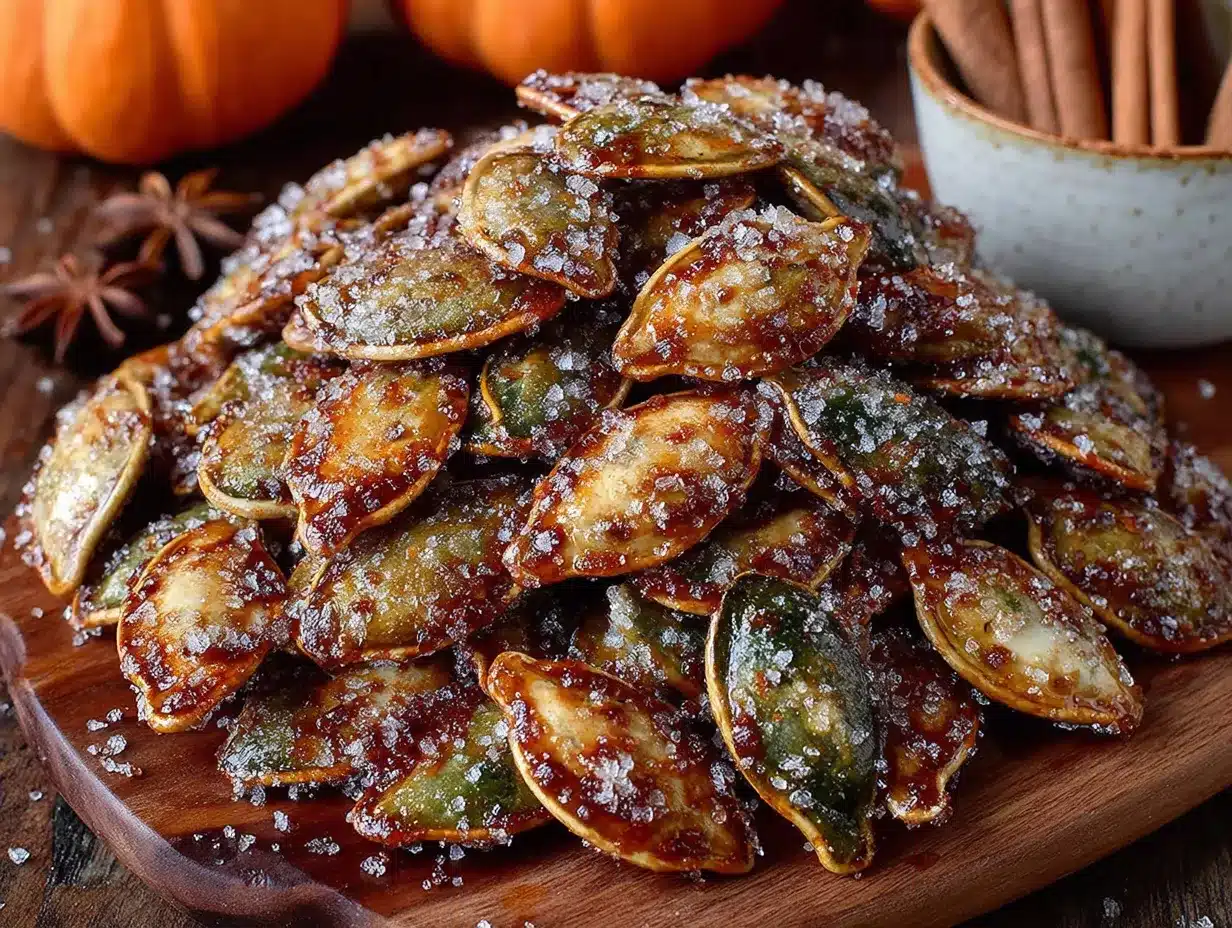
Follow these steps carefully, and you’ll have a bowl of perfectly crispy, sweet, and spiced pumpkin seeds that will steal the show at any gathering.
- Preheat and Prep: Preheat your oven to 300°F (150°C). Line a rimmed baking sheet with parchment paper or a silicone mat. This is a low and slow roast, so patience is key.
- Clean the Seeds: Separate the pumpkin seeds from the stringy pulp. Place them in a colander and rinse under cool water. Don’t worry about getting every last bit of pulp off—a little bit adds flavor. Pick out any broken or shriveled seeds.
- Parboil for Crispiness: Bring 2 cups of water and 1 teaspoon of salt to a boil in a medium saucepan. Add the cleaned pumpkin seeds and boil for exactly 10 minutes. This step is the secret to the shatteringly crisp texture. It softens the outer shell and allows the seasoning to penetrate. You’ll notice the seeds turn a slightly darker color.
- Drain and Dry: Drain the seeds in a colander and spread them out on a clean kitchen towel. Pat them very dry. This is important—any excess moisture will steam the seeds instead of roasting them. Let them sit for 5 minutes to air-dry a bit.
- Mix the Coating: In a large bowl, whisk together the melted butter, granulated sugar, ground cinnamon, and vanilla extract until the sugar is mostly dissolved. The mixture will look a bit grainy, and that’s perfectly fine.
- Toss to Coat: Add the dried pumpkin seeds to the bowl with the butter mixture. Use a spatula to toss them until every seed is evenly coated. Make sure there are no dry spots.
- Spread and Roast: Spread the coated seeds in a single, even layer on the prepared baking sheet. Try not to overlap them too much, or they’ll steam. Roast for 25 minutes, then use a spatula to stir and flip the seeds. This ensures even browning.
- Finish Roasting: Roast for another 20-25 minutes, stirring every 10 minutes. The seeds are done when they are golden brown, dry to the touch, and smell deeply fragrant. They will continue to crisp as they cool, so don’t over-bake them.
- Cool Completely: Remove the baking sheet from the oven and let the seeds cool on the pan for at least 15 minutes. As they cool, they will develop that signature crunch. Once completely cool, transfer to a bowl.
- Final Seasoning: Sprinkle with a tiny pinch of salt right before serving. This final touch balances the sweetness and makes the flavors pop. Serve immediately or store in an airtight container.
Sensory Cue: When the seeds are done, they should sound hollow and crisp when you stir them on the pan. If they sound dull or feel soft, they need more time.
Cooking Tips & Techniques
I’ve learned a few things the hard way, so you don’t have to. Here are my best tips for perfect seeds every time.
Don’t Skip the Parboil: I know it’s an extra step, but it’s the single most important one. I once tried to skip it to save time, and I ended up with chewy, tough seeds that nobody wanted to eat. The 10-minute boil breaks down the seed’s outer layer, allowing it to crisp up beautifully. Trust the process.
Watch the Oven: Oven temperatures can vary wildly. My old oven ran hot, and I burnt two batches before I figured it out. Start checking your seeds at the 20-minute mark. If they’re browning too quickly, reduce the oven temperature by 25°F (15°C). You want a slow, even roast.
Stir, Stir, Stir: This is not a set-it-and-forget-it recipe. Setting a timer to stir every 10 minutes ensures even cooking and prevents the sugar from burning in one spot. I usually do this while I’m cleaning up the kitchen or setting the table.
Multitasking Strategy: While the seeds are parboiling, you can line your baking sheet and mix your dry ingredients. While they’re roasting, you can finish up the rest of your appetizers. They’re a great ‘background’ task that doesn’t demand constant attention.
Cooling is Crucial: Don’t rush the cooling process. If you pack them away while they’re still warm, the steam will make them soggy. I usually let them sit on the baking sheet for a full 20 minutes before transferring them to a serving bowl.
Variations & Adaptations
Once you’ve mastered the basic recipe, feel free to play around. Here are a few of my favorite twists.
- Spicy-Sweet Kick: Add ¼ teaspoon of cayenne pepper and a pinch of smoked paprika to the sugar mixture. The heat builds slowly and pairs beautifully with the cinnamon. I made this version for a game day party, and it was gone in 10 minutes.
- Maple-Pecan Crunch: Replace the granulated sugar with 2 tablespoons of pure maple syrup. After roasting, toss the warm seeds with ¼ cup of finely chopped pecans. The maple syrup creates a slightly chewier, more caramelized coating.
- Pumpkin Pie Spice Blend: Swap the cinnamon for 2 teaspoons of pumpkin pie spice. This version tastes exactly like the holidays. I like to add a tablespoon of brown sugar to the mix for a deeper molasses note.
- Savory Herb Version: For a non-sweet option, skip the sugar and cinnamon. Toss the parboiled seeds with melted butter, 1 teaspoon of garlic powder, 1 teaspoon of dried rosemary, and ½ teaspoon of salt. Roast as directed. This is fantastic on salads or just as a snack.
- Chocolate Drizzle: Once the seeds are completely cool, melt ¼ cup of dark chocolate chips with a teaspoon of coconut oil and drizzle it over the seeds. Let the chocolate set before serving. This turns them into a decadent dessert.
Serving & Storage Suggestions
These seeds are incredibly versatile, and how you serve them can really elevate your hosting game.
Serving Temperature: Serve them at room temperature. They’re best enjoyed within a few hours of roasting, when the crunch is at its peak. For a dinner party, I like to set them out in a beautiful wooden bowl right as guests arrive.
Presentation Tips: For a festive touch, layer them in a clear glass jar with some dried cranberries and a cinnamon stick. Tie a ribbon around the jar for a homemade hostess gift. Alternatively, sprinkle them over a bowl of vanilla ice cream for an easy, impressive dessert.
Complementary Dishes: These seeds pair wonderfully with a cheese board featuring sharp cheddar and creamy brie. They also go great alongside a warm mug of apple cider or a glass of bourbon. For a full spread, serve them with other finger foods like spiced nuts and crispy garlic chicken skewers.
Storage Instructions: Store completely cooled seeds in an airtight container at room temperature. They will stay crispy for up to 5 days. Do not refrigerate them, as the moisture will make them soft.
Reheating Tips: If they lose their crunch after a day or two, spread them on a baking sheet and reheat in a 300°F (150°C) oven for 5 minutes. Let them cool completely before serving again. This refreshes the texture beautifully.
Flavor Development: Interestingly, the cinnamon flavor deepens overnight. Some people actually prefer them on day two, when the spices have had time to meld. I always make a double batch for this reason.
Nutritional Information & Benefits
While these are a treat, they also pack some surprising nutritional benefits.
Estimated Nutritional Values (per ¼ cup serving):
- Calories: 180
- Fat: 14g (mostly healthy unsaturated fats)
- Carbohydrates: 9g
- Fiber: 2g
- Protein: 7g
- Sugar: 6g
Health Benefits: Pumpkin seeds are a fantastic source of magnesium, zinc, and healthy fats. Magnesium is great for sleep and muscle function, while zinc supports your immune system—perfect for the colder months. The fiber content also helps with digestion.
Dietary Considerations: This recipe is naturally gluten-free and can be made dairy-free with a simple butter swap. It’s also vegetarian. If you’re watching your sugar intake, you can reduce the sugar to 1 tablespoon, though the coating will be less pronounced.
Potential Allergens: Contains dairy (butter) and tree nuts if you add the pecan variation. Always check your ingredients if serving to guests with allergies.
My Personal Take: I love that I can serve a snack that feels indulgent but also has some real nutritional value. It’s a win-win for hosting—guests feel satisfied, and I feel good about what I’m putting on the table.
Conclusion
Look, I’m not saying these crispy cinnamon sugar pumpkin seeds will change your life. But I am saying they’ll change your reputation as a host. They’re that snack—the one people hover around, the one that sparks conversation, the one that makes someone ask, ‘Wait, you made these? From a pumpkin?’
This recipe is more than just a way to use up what would otherwise be trash. It’s a small, thoughtful gesture that shows your guests you care about the details. It’s a little bit of sweet, a little bit of spice, and a whole lot of crunch. And honestly, watching someone who swore they hated pumpkin seeds reach for a third handful? That’s the kind of quiet victory every host deserves.
So go ahead—carve that pumpkin, save those seeds, and give this recipe a try. Customize it, make it your own, and don’t be shy about showing it off. When you do, come back and tell me about it in the comments. I’d love to hear about your own conversion stories. Happy hosting!
Frequently Asked Questions
Can I use store-bought raw pumpkin seeds instead of fresh?
Absolutely. Raw, unsalted pepitas work perfectly. Just skip the parboiling step if they are already hulled, as they are more delicate. Roast them for about 15-20 minutes, checking frequently.
Why did my pumpkin seeds turn out chewy instead of crispy?
This usually happens for one of two reasons: you skipped the parboil, or you didn’t dry the seeds thoroughly before coating them. The parboil is essential for texture, and any excess moisture will steam the seeds. Also, make sure they cool completely on the baking sheet.
Can I make these in an air fryer?
Yes! Cook them at 300°F (150°C) for 10-12 minutes, shaking the basket halfway through. Keep a close eye on them, as air fryers cook faster than ovens. The texture will be just as crispy.
How do I prevent the sugar from burning?
The key is to use a low oven temperature (300°F) and stir the seeds every 10 minutes. If you notice the sugar starting to darken too quickly, reduce the heat by 25 degrees. Also, make sure the seeds are in a single layer.
Can I double this recipe for a large party?
Definitely. Just use two baking sheets and rotate them halfway through the cooking time. You may need to add a few extra minutes to the roasting time. Store any leftovers in an airtight container for up to a week.
Pin This Recipe!
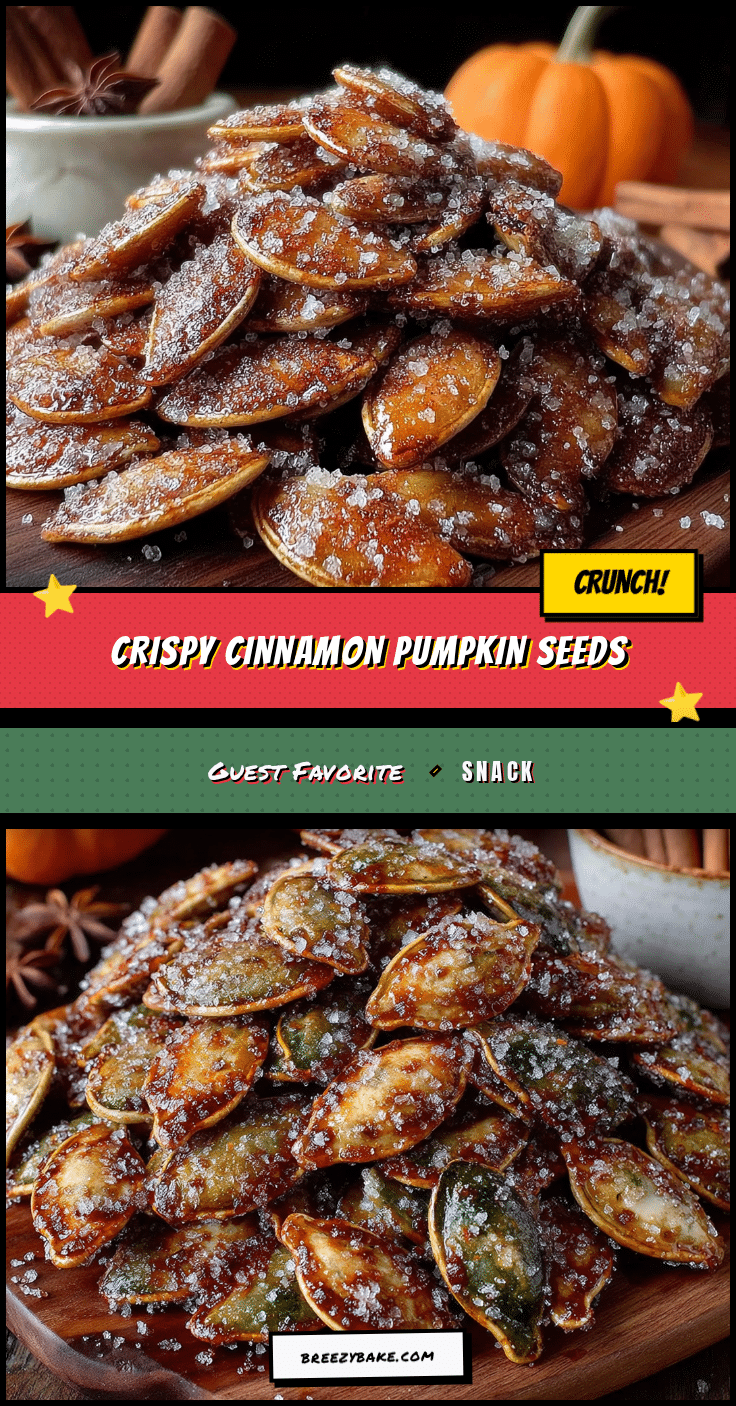
Easy & Crispy Cinnamon Sugar Pumpkin Seeds – Best Snack
These crispy cinnamon sugar pumpkin seeds are a shatteringly crunchy, sweet, and salty snack that will convert even the biggest skeptics. Perfect for fall gatherings, they’re made with simple pantry ingredients and are dangerously addictive.
- Prep Time: 10 minutes
- Cook Time: 45 minutes
- Total Time: 55 minutes
- Yield: 4 servings 1x
- Category: Snack
- Cuisine: American
Ingredients
- 1 ½ cups fresh pumpkin seeds (from a medium pumpkin)
- 2 cups water
- 1 teaspoon fine sea salt (for boiling)
- 3 tablespoons unsalted butter, melted
- 2 tablespoons granulated sugar
- 1 ½ teaspoons ground cinnamon (preferably Saigon)
- ½ teaspoon vanilla extract
- Pinch of fine sea salt (for final seasoning)
Instructions
- Preheat oven to 300°F (150°C). Line a rimmed baking sheet with parchment paper or a silicone mat.
- Separate pumpkin seeds from pulp. Rinse in a colander under cool water; leave a little pulp for flavor. Discard broken or shriveled seeds.
- Bring 2 cups water and 1 teaspoon salt to a boil in a medium saucepan. Add seeds and boil for exactly 10 minutes. Drain.
- Spread drained seeds on a clean kitchen towel and pat very dry. Let air-dry for 5 minutes.
- In a large bowl, whisk together melted butter, sugar, cinnamon, and vanilla until sugar is mostly dissolved (mixture will be grainy).
- Add dried seeds to the bowl and toss with a spatula until evenly coated.
- Spread seeds in a single layer on the prepared baking sheet. Roast for 25 minutes, then stir and flip seeds.
- Roast for another 20-25 minutes, stirring every 10 minutes, until golden brown, dry, and fragrant.
- Let seeds cool on the baking sheet for at least 15 minutes (they will crisp as they cool).
- Sprinkle with a tiny pinch of salt before serving. Serve immediately or store in an airtight container.
Notes
Do not skip the parboiling step—it’s essential for crispiness. Stir every 10 minutes to prevent burning. Cool completely before storing to maintain crunch. For dairy-free, substitute butter with coconut oil or vegan butter. For a spicy-sweet version, add ¼ teaspoon cayenne pepper to the sugar mixture.
Nutrition
- Serving Size: ¼ cup
- Calories: 180
- Sugar: 6
- Sodium: 150
- Fat: 14
- Saturated Fat: 5
- Carbohydrates: 9
- Fiber: 2
- Protein: 7
Keywords: pumpkin seeds, cinnamon sugar, crispy, fall snack, easy, roasted pumpkin seeds, sweet snack, Halloween, Thanksgiving


