My niece looked at me like I had lost my mind. “You want me to put faces on cupcakes that look like tiny ghosts?” she asked, one eyebrow raised in that way only a seven-year-old can master. I had just pulled a batch of mini vanilla cupcakes from the oven and was mixing up a simple buttercream. She was skeptical, and honestly, I was too. I had seen these floating around Pinterest for years and always thought they looked cute but fussy. Like something that would take three hours and result in a kitchen covered in powdered sugar and frustration.
But here is the thing about Halloween baking. It should be fun, not stressful. These adorable mini ghost cupcakes with buttercream faces are proof of that. They came together in under an hour, and the look on my niece’s face when she piped her first ghost—lopsided and leaning a little to the left—was pure magic. She named it Casper the Crooked. And then she ate it.
What makes these mini ghost cupcakes different is how forgiving they are. The buttercream is sturdy enough to hold its shape but soft enough to pipe into those wispy ghost forms. The mini size means you get to eat three without feeling guilty. And the faces? They can be wonky, silly, or serious. Each one ends up with its own personality. That is the kind of baking I can get behind.
So whether you are hosting a Halloween party, making treats for a school event, or just want an excuse to spend an afternoon with sprinkles and frosting, these little ghosts are worth your time. They are the recipe that turned a skeptic into a believer.
Why You Will Love This Recipe
Let me tell you why these mini ghost cupcakes have become my go-to Halloween recipe. I have tested them four times now, tweaking the buttercream consistency and the piping technique until they were just right. Here is what makes them special:
- Quick and Easy: From start to finish, you are looking at about 45 minutes. The cupcakes bake in 12 minutes flat, and the buttercream comes together in another five. Perfect for last-minute Halloween plans or when the kids decide they want to bake at 7 PM on a school night.
- Simple Ingredients: Nothing fancy here. Butter, sugar, flour, eggs, vanilla, and powdered sugar. You probably have everything already. No specialty baking supplies needed.
- Perfect for Halloween Parties: These little guys are the star of any spooky spread. They are bite-sized, easy to grab, and the kids go absolutely crazy for them. I brought a batch to my nephew’s class party and they were gone in five minutes.
- Crowd-Pleaser: Even adults who claim they do not like Halloween sweets end up reaching for a second one. The mini size makes them feel less indulgent, but the buttercream is so light and fluffy you will not stop at one.
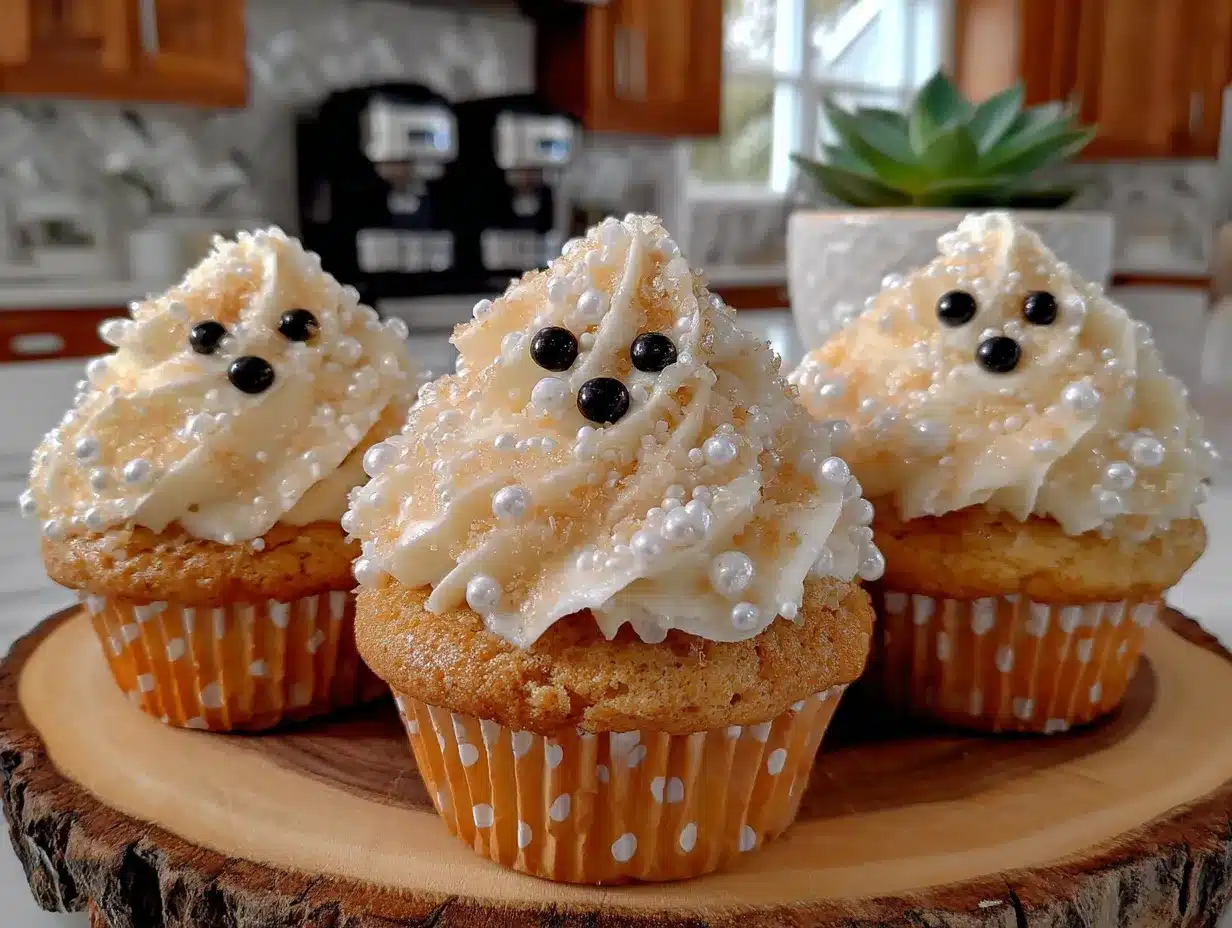
- Unbelievably Adorable: Let’s face it, the faces are what sell these. Each ghost has its own expression, and watching kids (or adults) pipe them is half the fun. They come out looking like a tiny ghost family.
What sets this recipe apart from other Halloween cupcake ideas is the buttercream technique. Instead of trying to pipe perfect ghost shapes, you pipe a swirl that naturally looks like a ghost. The buttercream is whipped just long enough to be airy but still holds its shape. No melting, no collapsing, no stress.
These mini ghost cupcakes are the kind of treat that makes you feel like a baking pro without actually having to be one. They are comfort food with a spooky twist, and honestly, that is the best kind of Halloween baking.
What Ingredients You Will Need
This recipe uses simple, everyday ingredients to create something that looks way more impressive than it actually is. Here is what you will need to make these adorable mini ghost cupcakes with buttercream faces:
For the Mini Cupcakes
- 1 ½ cups all-purpose flour (spooned and leveled) – I use Gold Medal or King Arthur for consistent results. Do not scoop directly from the bag or you will pack in too much flour.
- 1 cup granulated sugar – Regular white sugar works best here. The fine crystals dissolve easily and give the cupcakes a tender crumb.
- 1 ½ teaspoons baking powder – Make sure it is fresh. Old baking powder will give you flat, dense cupcakes.
- ½ teaspoon salt – Fine sea salt or table salt. It balances the sweetness.
- ½ cup unsalted butter, softened to room temperature – Let it sit out for about an hour. Cold butter does not cream properly.
- 2 large eggs, room temperature – If you forgot to take them out, place them in a bowl of warm water for 5 minutes.
- 2 teaspoons vanilla extract – Pure vanilla extract, not imitation. It makes a real difference in flavor.
- ½ cup whole milk, room temperature – Whole milk gives the richest texture, but 2% works in a pinch.
For the Vanilla Buttercream
- 1 cup unsalted butter, softened – Use a good brand like Kerrygold or Land O Lakes. The butter flavor is the star here.
- 3 ½ cups powdered sugar, sifted – Sifting removes lumps and gives you silky smooth frosting. Trust me on this one.
- 2 teaspoons vanilla extract – Again, pure vanilla is worth it.
- 2-3 tablespoons heavy cream – Heavy cream makes the buttercream lighter and fluffier. Milk works but the texture will be slightly denser.
- Pinch of salt – To cut the sweetness.
For the Ghost Faces
- Mini chocolate chips – For the eyes. I prefer Ghirardelli or Toll House. They are small enough to look cute but big enough to handle easily.
- Black decorating gel – For the mouths. You can also use melted chocolate in a piping bag, but the gel is way easier for kids.
- Optional: Orange and black sprinkles – For adding little details like bows or hats. Totally optional but fun.
Ingredient Tips: If you want a slightly less sweet buttercream, add an extra pinch of salt. For a dairy-free version, use plant-based butter and oat milk. The texture will be a bit softer, so chill the piped ghosts for 10 minutes before serving. If you are out of heavy cream, whole milk works—just add it one tablespoon at a time until the frosting reaches the right consistency.
Equipment Needed
You do not need a professional bakery setup for these mini ghost cupcakes. Here is what I use:
- Mini muffin pan – A 24-cup mini muffin pan is ideal. I have a Wilton non-stick one that has lasted years. If you only have a standard 12-cup, just bake in batches.
- Mini cupcake liners – White or black liners look best. The white ones let the ghost stand out, but black adds a fun spooky contrast.
- Electric hand mixer or stand mixer – A hand mixer works perfectly. I use my KitchenAid stand mixer for the buttercream because it whips faster, but a hand mixer gets the job done.
- Piping bags – Disposable piping bags are easiest. You will need one for the buttercream and possibly one for the decorating gel if you go that route.
- Large round piping tip (Wilton 1A or similar) – This gives you that perfect ghost shape. A star tip also works but creates a different texture.
- Small offset spatula – For smoothing the buttercream if needed. Not essential but helpful.
- Cooling rack – Let the cupcakes cool completely before frosting. I use a simple wire rack from Amazon.
- Tweezers – For placing the mini chocolate chips. Sounds silly, but it makes precise placement so much easier, especially with kids.
Budget-Friendly Tip: Skip the piping bags and use a zip-top bag with the corner snipped off. It works just as well for this recipe. I have done it plenty of times when I ran out of proper bags.
Preparation Method
Let me walk you through this step by step. I have made these mini ghost cupcakes four times now, and these are the exact steps that work every single time.
Step 1: Preheat and Prep
Preheat your oven to 350°F (175°C). Line your mini muffin pan with 24 mini cupcake liners. If you only have one pan, line 12 and bake in two batches. The batter holds up fine while the first batch bakes.
Step 2: Mix the Dry Ingredients
In a medium bowl, whisk together the flour, baking powder, and salt. This ensures the baking powder is evenly distributed. Set aside.
Step 3: Cream the Butter and Sugar
In a large bowl, beat the softened butter and granulated sugar together until light and fluffy. This takes about 3 minutes with a hand mixer on medium speed. Scrape down the sides halfway through. The mixture should look pale and slightly increased in volume. Do not rush this step—proper creaming gives the cupcakes their tender texture.
Step 4: Add Eggs and Vanilla
Add the eggs one at a time, beating well after each addition. Then add the vanilla extract and beat until combined. The mixture might look slightly curdled at this point, and that is totally normal.
Step 5: Alternate Dry and Wet Ingredients
With the mixer on low speed, add about one-third of the flour mixture. Then add half of the milk. Repeat, ending with the flour mixture. Mix just until combined. Overmixing will make the cupcakes tough. Scrape the bowl one last time to make sure everything is incorporated.
Step 6: Fill the Liners
Using a small cookie scoop or a tablespoon, fill each liner about two-thirds full. Do not overfill—these mini cupcakes will rise and you want a flat top for the ghost. I use about 1 tablespoon of batter per cup.
Step 7: Bake
Bake for 10-12 minutes. The cupcakes are done when a toothpick inserted into the center comes out clean or with a few moist crumbs. The tops should be lightly golden. Let them cool in the pan for 5 minutes, then transfer to a wire rack to cool completely. Do not frost while they are warm or the buttercream will melt into a puddle.
Step 8: Make the Buttercream
While the cupcakes cool, make the buttercream. In a large bowl, beat the softened butter on medium speed until smooth and creamy, about 2 minutes. Gradually add the sifted powdered sugar, one cup at a time, beating on low speed to avoid a sugar cloud. Add the vanilla extract and a pinch of salt. Add the heavy cream, one tablespoon at a time, and beat on medium-high speed for 3-4 minutes until light and fluffy. The frosting should be stiff enough to hold its shape but soft enough to pipe easily.
Step 9: Pipe the Ghosts
Fit a piping bag with a large round tip (Wilton 1A). Fill the bag with buttercream. Hold the bag straight up and down, about ½ inch above the cupcake. Apply steady pressure and pipe a tall swirl, pulling straight up at the end to create a peak. This peak becomes the top of the ghost’s head. Do not worry if it looks messy—the imperfections make them look more ghost-like.
Step 10: Add the Faces
While the buttercream is still soft, gently press two mini chocolate chips into the frosting for eyes. They should be close together but not touching. Use the black decorating gel to pipe a small mouth. You can do a simple “o” shape, a wavy line, or a little smile. Each ghost gets its own personality. If you want to add sprinkles as bows or hats, do it now before the frosting sets.
Step 11: Chill and Serve
Place the finished cupcakes in the refrigerator for 10-15 minutes to let the buttercream set. This makes them easier to transport and keeps the faces intact. Serve chilled or at room temperature. They taste best within 24 hours.
Sensory Cue: The cupcakes should smell like vanilla and butter when they come out of the oven. The tops should spring back when lightly touched. The buttercream should be glossy and smooth, not greasy or grainy.
Cooking Tips and Techniques
I have learned a few things the hard way so you do not have to. Here are my best tips for perfect mini ghost cupcakes with buttercream faces:
Room Temperature Ingredients Matter. I cannot stress this enough. Cold butter does not cream properly, and cold milk can cause the batter to curdle. Set everything out an hour before you start baking. If you forgot, microwave the milk for 15 seconds and let the butter sit in a warm spot.
Sift Your Powdered Sugar. I skipped this once and ended up with lumpy buttercream. Lumpy frosting does not pipe well, and the lumps show up in the ghost faces. Just sift it. It takes two extra minutes.
Do Not Overfill the Liners. Mini cupcakes rise quickly, and if you fill them too full, they will dome over the top. You want a flat surface for the ghost. Use exactly one tablespoon of batter per cup.
Pipe with Confidence. The first ghost you pipe will look terrible. That is fine. The second will look better. By the third, you will have the hang of it. If the buttercream starts to soften from the heat of your hands, pop the piping bag in the fridge for 10 minutes.
Chill Before Transporting. If you are taking these to a party, refrigerate them for at least 20 minutes. The buttercream firms up and the chocolate chips stay put. I learned this after a sad incident where ghost eyes slid off during a car ride.
Make Ahead Option. Bake the cupcakes a day ahead and store them in an airtight container. Make the buttercream fresh on the day you plan to serve them. The texture is much better that way.
Variations and Adaptations
One of the best things about these mini ghost cupcakes is how easy they are to customize. Here are some variations I have tried:
Chocolate Ghost Cupcakes
Swap out ¼ cup of the flour for unsweetened cocoa powder. The chocolate base pairs beautifully with the vanilla buttercream. These taste like little ghost brownies.
Gluten-Free Version
Use a 1:1 gluten-free baking flour blend. I have tested this with Bob’s Red Mill and it works perfectly. The texture is slightly more crumbly, but the ghosts still hold up.
Vegan Ghost Cupcakes
Use plant-based butter and oat milk in the cupcakes. For the buttercream, use vegan butter and add an extra tablespoon of oat milk to get the right consistency. The flavor is slightly different but still delicious.
Fun Flavor Twists
Add ½ teaspoon of almond extract to the buttercream for a subtle nutty flavor. Or fold in a tablespoon of orange zest for a Halloween citrus vibe. I tried a pumpkin spice version by adding 1 teaspoon of pumpkin pie spice to the cupcake batter, and it was a hit.
Different Ghost Expressions
Get creative with the faces. Use white candy melts for the eyes instead of chocolate chips. Pipe little pink cheeks with strawberry frosting. Add tiny hats or bows using colored frosting. I made a batch where each ghost had a different emotion—happy, sleepy, surprised, grumpy. The kids loved naming them.
Serving and Storage Suggestions
These mini ghost cupcakes are best served the day they are made, but they store surprisingly well. Here is what I recommend:
Serving: Arrange them on a black or orange platter for maximum Halloween effect. They look amazing on a cake stand surrounded by candy corn or pretzel spiders. Serve at room temperature for the softest texture, or straight from the fridge if you want the buttercream to hold its shape longer.
Pairing Ideas: These go perfectly with hot apple cider, pumpkin spice lattes, or a glass of cold milk. For a Halloween party spread, pair them with crispy chicken wing bites for a sweet and savory combo that always works. They also look great next to creamy mint chip cream cheese bars if you want a full dessert table.
Storage: Store in an airtight container in the refrigerator for up to 3 days. The buttercream will firm up, so let them sit at room temperature for 15 minutes before serving. Do not stack them or the ghost faces will smush.
Freezing: You can freeze the unfrosted cupcakes for up to 2 months. Wrap them individually in plastic wrap and place in a freezer bag. Thaw at room temperature, then make fresh buttercream and decorate. The frozen cupcakes taste just as good as fresh.
Flavor Development: Honestly, these taste best within 24 hours. The cupcakes stay moist, and the buttercream is at its fluffiest. After day two, the cupcakes start to dry out slightly, but they are still good.
Nutritional Information and Benefits
Let me be real with you—these are cupcakes. They are a treat, not a health food. But here is the breakdown if you are curious:
Per Mini Cupcake (approximate):
- Calories: 145
- Fat: 8g
- Carbohydrates: 18g
- Protein: 1g
- Sugar: 14g
Health Highlights: The good news is these are mini, so portion control is built in. The butter provides a small amount of vitamin A, and the eggs add protein. If you use the gluten-free version, they become suitable for those with celiac disease. The vanilla extract has been shown to have antioxidant properties in some studies, though honestly, you are not eating these for the health benefits.
Dietary Considerations: These contain dairy, eggs, and gluten in the standard version. For allergen-friendly options, see the variations section above. They are naturally nut-free if you skip the almond extract variation.
My Take: I believe in balance. These mini ghost cupcakes are about joy and celebration, not nutrition. Make them for the fun, the memories, and the smiles. One or two of these will not derail anyone’s healthy eating habits. They are a treat, and treats are part of a happy life.
Conclusion
These adorable mini ghost cupcakes with buttercream faces have become a Halloween tradition in my house, and I think they deserve a spot in yours too. They are simple enough for a weeknight baking session but cute enough to impress at any party. The faces give everyone a chance to be creative, and watching kids pipe their own ghosts is honestly the best part.
I love that this recipe does not require any fancy skills or expensive ingredients. It is approachable, forgiving, and genuinely fun. The ghosts come out looking different every time, and that is the beauty of it. Each one has its own little personality.
If you make these, I want to hear about it. Leave a comment below and tell me what expressions your ghosts ended up with. Did you make them silly, spooky, or somewhere in between? Tag me in your photos—I love seeing your creations. And if you have a variation that works particularly well, share that too. This recipe is meant to be played with.
So grab your apron, preheat that oven, and get ready to make some of the cutest Halloween treats you have ever seen. Your inner skeptic might just become a believer too.
Frequently Asked Questions
Can I use a boxed cake mix for these mini ghost cupcakes?
Absolutely. If you are short on time, a white or vanilla boxed cake mix works perfectly. Just follow the package directions for mini cupcakes. The buttercream recipe stays the same, and no one will know the difference.
My buttercream is too soft to pipe. What do I do?
Pop it in the refrigerator for 15-20 minutes. The butter will firm up and the frosting will hold its shape better. If it is still too soft, beat in an extra ¼ cup of sifted powdered sugar.
How far in advance can I make these?
Bake the cupcakes up to 2 days ahead and store them in an airtight container. Make the buttercream the day you plan to decorate. The assembled cupcakes are best within 24 hours.
Can I use a different frosting?
Sure! Cream cheese frosting works well, though it is softer so chill the ghosts before serving. A chocolate buttercream would also be delicious, though the ghosts will be brown instead of white. For a lighter option, stabilized whipped cream works but will not hold its shape as long.
How do I keep the chocolate chip eyes from falling off?
Press them gently into the buttercream while it is still soft. If the frosting has started to crust, dab a tiny bit of fresh frosting on the back of each chip before placing it. Refrigerating the finished cupcakes for 10 minutes also helps them stay put.
Pin This Recipe!
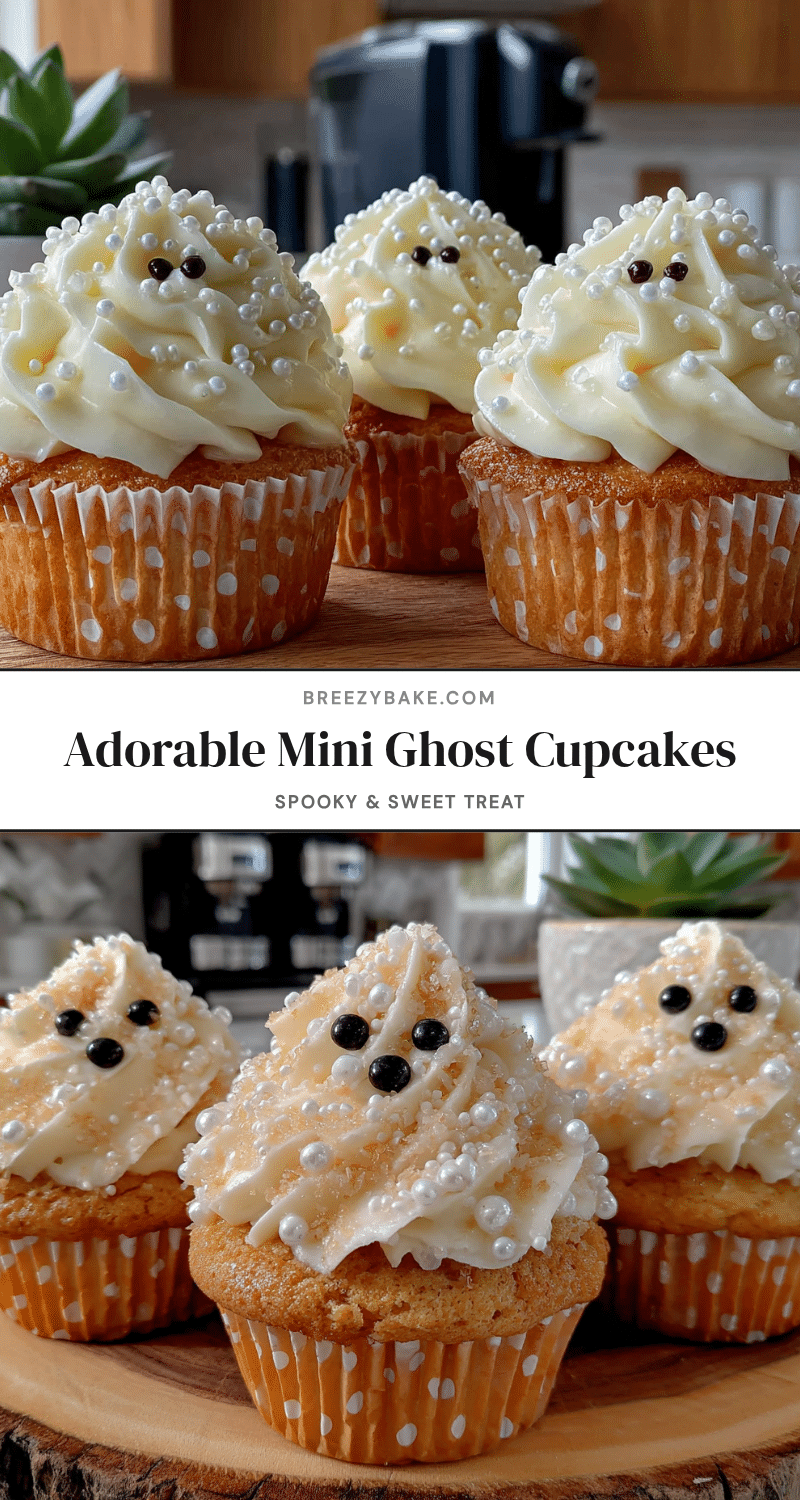
Adorable Mini Ghost Cupcakes with Easy Buttercream Faces
These adorable mini ghost cupcakes with buttercream faces are quick, easy, and perfect for Halloween. With a simple vanilla cupcake base and a forgiving buttercream that pipes into wispy ghost shapes, each ghost gets its own personality. Ready in under an hour, they are a fun, stress-free treat that kids and adults love.
- Prep Time: 15 minutes
- Cook Time: 12 minutes
- Total Time: 45 minutes
- Yield: 24 servings 1x
- Category: Dessert
- Cuisine: American
Ingredients
- 1 ½ cups all-purpose flour (spooned and leveled)
- 1 cup granulated sugar
- 1 ½ teaspoons baking powder
- ½ teaspoon salt
- ½ cup unsalted butter, softened to room temperature
- 2 large eggs, room temperature
- 2 teaspoons vanilla extract
- ½ cup whole milk, room temperature
- 1 cup unsalted butter, softened (for buttercream)
- 3 ½ cups powdered sugar, sifted
- 2 teaspoons vanilla extract (for buttercream)
- 2–3 tablespoons heavy cream
- Pinch of salt (for buttercream)
- Mini chocolate chips (for eyes)
- Black decorating gel (for mouths)
- Optional: Orange and black sprinkles
Instructions
- Preheat oven to 350°F (175°C). Line a mini muffin pan with 24 mini cupcake liners.
- In a medium bowl, whisk together flour, baking powder, and salt. Set aside.
- In a large bowl, beat softened butter and granulated sugar until light and fluffy, about 3 minutes. Scrape down sides.
- Add eggs one at a time, beating well after each. Add vanilla extract and beat until combined.
- With mixer on low, add one-third of the flour mixture, then half of the milk. Repeat, ending with flour. Mix just until combined.
- Fill each liner about two-thirds full (about 1 tablespoon batter per cup).
- Bake for 10-12 minutes until a toothpick inserted comes out clean. Cool in pan 5 minutes, then transfer to wire rack to cool completely.
- For buttercream: Beat softened butter on medium speed until smooth, about 2 minutes. Gradually add sifted powdered sugar, one cup at a time, on low speed. Add vanilla, salt, and heavy cream one tablespoon at a time. Beat on medium-high for 3-4 minutes until light and fluffy.
- Fit a piping bag with a large round tip (Wilton 1A). Fill with buttercream. Hold bag straight up, ½ inch above cupcake. Pipe a tall swirl, pulling straight up to create a peak.
- While buttercream is soft, press two mini chocolate chips for eyes. Use black decorating gel to pipe a mouth. Add optional sprinkles.
- Refrigerate finished cupcakes for 10-15 minutes to set buttercream. Serve chilled or at room temperature.
Notes
Room temperature ingredients are crucial for proper creaming and texture. Sift powdered sugar to avoid lumpy buttercream. Do not overfill liners; use exactly 1 tablespoon batter per cup. Pipe with confidence; first ghost may look messy but improves. Chill before transporting to keep chocolate chips in place. Bake cupcakes a day ahead and make buttercream fresh for best texture.
Nutrition
- Serving Size: 1 mini cupcake
- Calories: 145
- Sugar: 14
- Sodium: 95
- Fat: 8
- Saturated Fat: 5
- Carbohydrates: 18
- Protein: 1
Keywords: mini ghost cupcakes, Halloween cupcakes, buttercream ghosts, easy Halloween treats, mini cupcakes, ghost cupcakes, Halloween baking


