That warm, nutty scent of browning butter — the kind that fills your kitchen before you’ve even cracked an egg — still takes me straight to my friend Clara’s tiny apartment on a rainy October afternoon. I was there to help her test recipes for a fall baking roundup she was working on, and she had this single stick of butter bubbling away in a saucepan while we chatted about nothing important. I remember leaning over the stove, inhaling that deep, almost toasty aroma, and thinking, why don’t I do this more often? She handed me a spatula and said, “Here, you stir. I need to find my vanilla.”
That day, we made a batch of what she called “emergency muffins” — something thrown together with a can of pumpkin she had stashed in the back of her pantry. But the brown butter changed everything. It turned a simple pumpkin muffin into something that felt special, like a bakery secret I’d just been let in on. I scribbled the rough recipe on a napkin, and honestly, I’ve been tweaking it ever since. These perfect brown butter pumpkin muffins with maple glaze are the result of years of that happy accident.
There’s no fussy technique here, just a few smart moves that make all the difference. The brown butter adds a nutty depth that plain melted butter just can’t touch, and the maple glaze — well, let’s just say it’s the kind of sweet finish that makes you lick the spoon without shame. These muffins have become my go-to for cozy fall mornings, last-minute brunch invites, and those afternoons when you just need something warm and comforting. They’re the ones I trust to deliver every single time.
Why You’ll Love This Recipe
I’ve made these muffins more times than I can count, and every batch reminds me why they’re worth the extra few minutes. Here’s what makes them stand out:
- Quick & Easy : From start to finish, these come together in about 35 minutes. The brown butter takes just 5 minutes, and the rest is simple mixing. Perfect for busy mornings or a last-minute dessert.
- Simple Ingredients : You probably have most of these in your kitchen right now. No trips to a specialty store, no obscure flours. Just pantry staples that work beautifully together.
- Perfect for Fall Mornings : These muffins are made for crisp autumn days, but honestly, I make them year-round. They’re great for brunch, Thanksgiving breakfast, or a cozy afternoon snack.
- Crowd-Pleaser : Every time I bring these somewhere, people ask for the recipe. Kids love the sweetness, and adults appreciate the sophisticated brown butter flavor.
- Unbelievably Delicious : The combination of nutty brown butter, warm pumpkin spices, and that maple glaze is next-level comfort food. It’s the kind of muffin that makes you close your eyes after the first bite.
What sets this recipe apart is the technique. Browning the butter adds a depth that can’t be faked, and the maple glaze isn’t just a drizzle — it’s a thick, glossy finish that seeps into the muffin tops just enough. I’ve tested this with regular melted butter, and it’s just not the same. This version is the one I keep coming back to, and I think you will too.
These muffins aren’t just good — they’re the kind that make you feel like you’ve got a secret weapon in your baking arsenal. Perfect for impressing guests without any stress, or turning a simple Tuesday morning into something memorable.
What Ingredients You Will Need
This recipe uses simple, wholesome ingredients that come together to create something truly special. The brown butter does the heavy lifting, while the pumpkin keeps everything tender and moist.
- Unsalted butter (1/2 cup, 1 stick) — You’ll brown this, so unsalted is best to control the salt level. I use Kerrygold for its rich flavor, but any good-quality butter works.
- Canned pumpkin puree (1 cup, about 240g) — Make sure it’s 100% pumpkin, not pumpkin pie filling. Libby’s is my go-to for consistent texture.
- All-purpose flour (1 3/4 cups, 220g) — Spoon and level for accuracy. No need to sift unless your flour is lumpy.
- Granulated sugar (3/4 cup, 150g) — Adds sweetness and helps with browning.
- Light brown sugar (1/2 cup, 100g, packed) — Adds moisture and a hint of molasses flavor that pairs perfectly with pumpkin.
- Large eggs (2) — Room temperature, so they blend smoothly into the batter.
- Vanilla extract (1 teaspoon) — Pure vanilla is best, but imitation works in a pinch.
- Buttermilk (1/4 cup, 60ml) — Adds tang and tenderness. If you don’t have it, add 1 teaspoon of lemon juice to regular milk and let it sit for 5 minutes.
- Pumpkin pie spice (2 teaspoons) — You can use store-bought or make your own with cinnamon, nutmeg, ginger, and cloves.
- Ground cinnamon (1 teaspoon) — For extra warmth.
- Baking soda (1 teaspoon) — Helps the muffins rise.
- Baking powder (1/2 teaspoon) — Adds extra lift.
- Salt (1/2 teaspoon) — Balances the sweetness.
For the Maple Glaze:
- Powdered sugar (1 cup, 120g) — Sifted if clumpy.
- Pure maple syrup (3 tablespoons) — Use the real stuff, not pancake syrup. Grade A dark amber is my favorite for its strong flavor.
- Milk (1-2 tablespoons) — To thin the glaze to your desired consistency.
- Pinch of salt — Just a tiny bit to cut the sweetness.
Ingredient Tips from My Kitchen:
- For the best brown butter, use a light-colored saucepan so you can see the color change. I’ve burned more batches than I’d like to admit with dark pans.
- If your pumpkin puree looks watery, blot it with a paper towel before measuring. This prevents soggy muffins.
- You can substitute the buttermilk with plain Greek yogurt thinned with a little milk. It works great in a pinch.
- For a gluten-free version, use a 1:1 gluten-free flour blend. I’ve had good results with King Arthur’s measure-for-measure flour.
Equipment Needed
You don’t need anything fancy for these muffins, but a few tools make the process smoother.
- 12-cup muffin tin — Standard size works best. If you use a jumbo tin, adjust the baking time by a few minutes.
- Paper liners — I prefer parchment liners for easy release, but regular ones work fine. You can also grease the tin well if you’re out of liners.
- Light-colored saucepan — Essential for browning butter without burning it. A heavy-bottomed pan distributes heat more evenly.
- Large mixing bowl — For the dry ingredients.
- Medium mixing bowl — For the wet ingredients.
- Whisk — For combining dry ingredients and smoothing the batter.
- Rubber spatula — For folding everything together gently.
- Cooling rack — Lets the muffins cool evenly so the glaze doesn’t melt off.
- Small saucepan or microwave-safe bowl — For making the glaze.
Budget-Friendly Alternatives: If you don’t have a cooling rack, you can cool muffins on a clean kitchen towel. No whisk? A fork works in a pinch for mixing dry ingredients. And if you’re short on muffin liners, just grease the tin generously with butter or non-stick spray.
I’ve made these muffins in a friend’s kitchen with mismatched bowls and a bent whisk, and they still turned out perfect. The equipment matters less than the technique, so don’t stress if you’re missing something.
Preparation Method
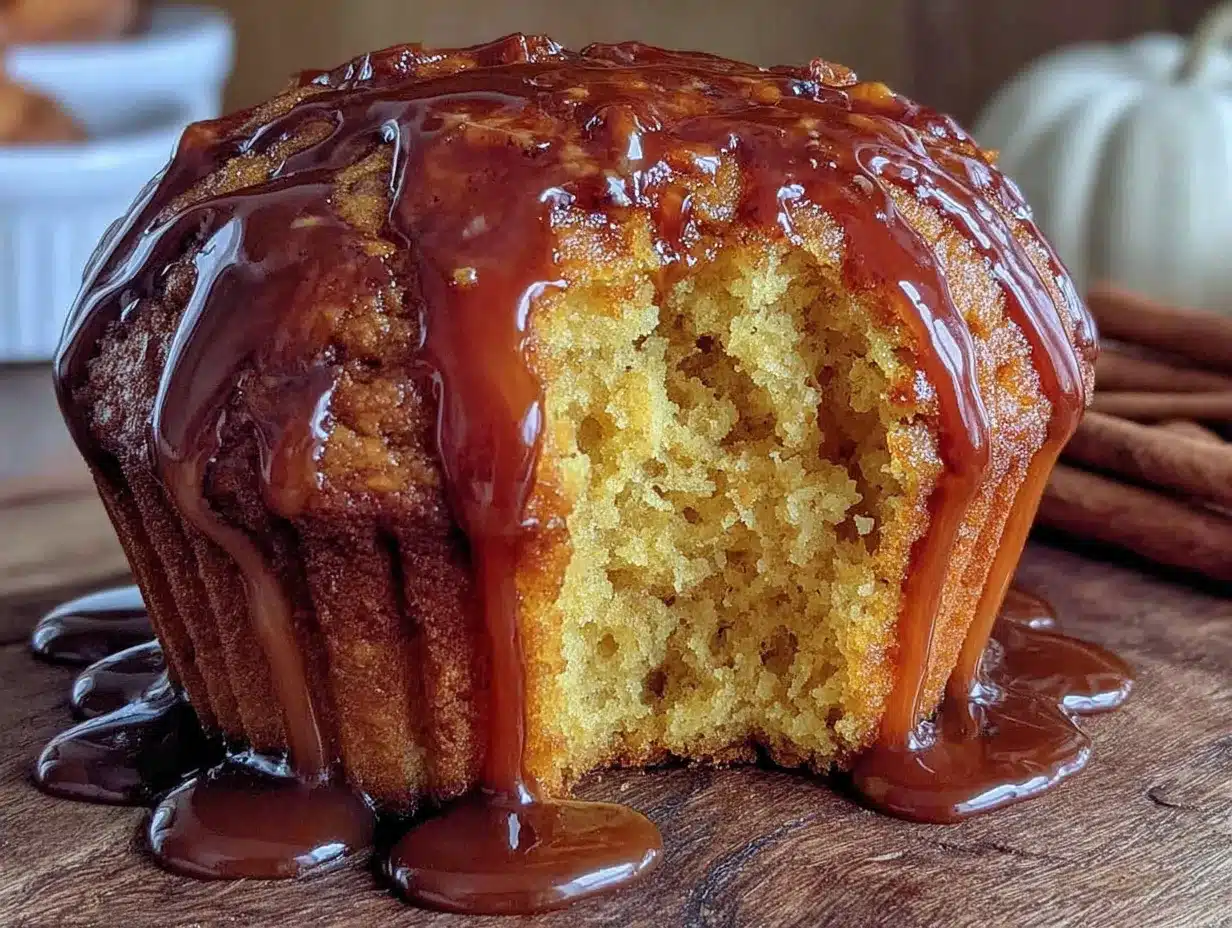
Let’s get to the good part. Follow these steps, and you’ll have the most incredible brown butter pumpkin muffins with maple glaze.
- Preheat your oven to 375°F (190°C). Position the rack in the center. Line a 12-cup muffin tin with paper liners or grease it well.
- Brown the butter. In a light-colored saucepan over medium heat, melt the butter. Stir constantly with a rubber spatula or wooden spoon. After a few minutes, the butter will start to foam and crackle. Keep stirring — you’ll see little brown specks form at the bottom. When the butter smells nutty and turns a golden-brown color, remove it from the heat immediately. This takes about 4-5 minutes. Pour it into a heatproof bowl and let it cool for 10 minutes. Don’t walk away during this step — I’ve burned butter in seconds.
- Mix the dry ingredients. In a large bowl, whisk together the flour, pumpkin pie spice, cinnamon, baking soda, baking powder, and salt. Set aside.
- Combine the wet ingredients. In a medium bowl, whisk together the pumpkin puree, granulated sugar, brown sugar, eggs, vanilla extract, and buttermilk until smooth. The mixture should be thick and slightly glossy.
- Add the browned butter. Slowly pour the cooled browned butter into the wet ingredients, whisking constantly. Make sure to scrape all those brown bits from the bottom of the bowl — that’s where the flavor is. The mixture will look a bit separated at first, but keep whisking until it comes together.
- Combine wet and dry. Pour the wet ingredients into the dry ingredients. Using a rubber spatula, fold gently until just combined. A few streaks of flour are okay — overmixing will make the muffins tough. The batter will be thick and slightly lumpy.
- Fill the muffin cups. Divide the batter evenly among the 12 cups. I use a 1/4-cup scoop for even portions. Each cup should be about 3/4 full. Don’t fill them to the brim or they’ll overflow.
- Bake. Place the tin in the preheated oven and bake for 18-20 minutes, or until a toothpick inserted into the center comes out clean or with a few moist crumbs. The tops should be golden and spring back when lightly touched.
- Cool. Let the muffins cool in the tin for 5 minutes, then transfer them to a cooling rack. Cool completely before glazing — about 20 minutes. If you glaze them while warm, the glaze will melt right off.
- Make the glaze. While the muffins cool, whisk together the powdered sugar, maple syrup, and a pinch of salt in a small bowl. Add milk 1 tablespoon at a time until you reach a thick but pourable consistency. It should be thick enough to coat the back of a spoon but thin enough to drizzle.
- Glaze the muffins. Once the muffins are completely cool, drizzle the glaze over the tops. I like to use a spoon and let it drip naturally, or you can dip the tops directly into the glaze for a thicker coating. Let the glaze set for 5-10 minutes before serving.
Sensory Cues: When the butter is browning, you’ll smell a warm, nutty aroma — that’s your cue to take it off the heat. The batter should be thick and smells like pumpkin pie filling. The muffins are done when the tops are golden and the kitchen smells like a fall bakery.
Cooking Tips & Techniques
Over the years, I’ve learned a few things the hard way. Here are my best tips for perfect brown butter pumpkin muffins every time.
The Brown Butter Secret: This is the most important step. Use a light-colored pan so you can see the color change. Swirl the pan occasionally as the butter melts. When the foam subsides and you see brown specks, it’s done. Pour it into a cool bowl immediately — the hot pan will keep cooking it otherwise. I’ve ruined a batch by leaving it in the pan while I grabbed a whisk.
Don’t Overmix the Batter: I know it’s tempting to keep stirring until it’s perfectly smooth, but stop as soon as the flour disappears. Overmixed muffins become dense and tough. A few lumps are fine. Trust me on this one.
Room Temperature Ingredients Matter: Cold eggs and buttermilk can seize the browned butter and make the batter lumpy. Let them sit on the counter for 20 minutes before starting. If you’re in a hurry, place the eggs in a bowl of warm water for 5 minutes.
Check for Doneness Early: Ovens vary. Start checking at 16 minutes. Insert a toothpick into the center of a muffin — if it comes out clean or with a few moist crumbs, they’re done. If it’s wet batter, give them another 2 minutes.
Cool Completely Before Glazing: This is a lesson I learned the messy way. Warm muffins will turn your beautiful maple glaze into a puddle. Be patient. Let them cool fully on a rack.
Make Ahead Strategy: You can brown the butter up to 3 days in advance and store it in the fridge. Let it come to room temperature before using. The brown bits will settle at the bottom — that’s fine, just scrape them into the batter.
Variations & Adaptations
One of the best things about this recipe is how easy it is to adapt. Here are some of my favorite variations.
Gluten-Free Version: Substitute the all-purpose flour with a 1:1 gluten-free baking flour blend. I’ve used King Arthur’s and Bob’s Red Mill with great results. The texture is slightly more tender, but the flavor is spot on.
Dairy-Free Option: Use vegan butter for browning (Miyoko’s works well) and substitute the buttermilk with unsweetened almond or oat milk mixed with 1 teaspoon of lemon juice. The glaze can be made with non-dairy milk.
Spice It Up: Add 1/4 teaspoon of ground cloves or cardamom for a different flavor profile. Sometimes I add a pinch of black pepper for a subtle warmth that surprises people.
Add Mix-Ins: Fold in 1/2 cup of chopped pecans, walnuts, or chocolate chips after combining the wet and dry ingredients. White chocolate chips with pumpkin are a dream combination.
Maple-Free Glaze: If you’re out of maple syrup, use 2 tablespoons of honey and 1 tablespoon of milk instead. It’s not the same, but it’s still delicious.
Mini Muffins: Use a mini muffin tin and bake for 10-12 minutes. You’ll get about 24 mini muffins. Perfect for parties or snack boxes.
I once made these with a swirl of cream cheese in the center — just dropped a dollop of cream cheese mixed with a little sugar into each muffin cup before baking. It was messy but incredible. Sometimes the best experiments come from a spontaneous idea.
Serving & Storage Suggestions
These muffins are best served slightly warm or at room temperature. The maple glaze should be set and glossy, not sticky. Here’s how to make the most of them.
Serving Ideas: They’re perfect on their own with a cup of coffee or tea. For a more indulgent breakfast, serve them alongside scrambled eggs and fresh fruit. They also make a great dessert with a scoop of vanilla ice cream or a dollop of whipped cream.
Storage: Store any leftover muffins in an airtight container at room temperature for up to 3 days. If you stack them, place a piece of parchment paper between layers to prevent the glaze from sticking. The muffins stay moist and tender for days.
Freezing: These freeze beautifully. Place unglazed muffins in a freezer-safe bag or container for up to 3 months. Thaw at room temperature or microwave for 20 seconds. Glaze them after thawing for the best texture. I always freeze a batch for busy mornings or unexpected guests.
Reheating: Warm a muffin in the microwave for 10-15 seconds for that fresh-baked feel. If you want the tops to stay crisp, reheat in a 300°F oven for 5 minutes. The glaze will soften slightly but still taste amazing.
Flavor Development: Honestly, these muffins taste even better the next day. The flavors meld together, and the pumpkin spice becomes more pronounced. If you can resist eating them all on day one, you’re in for a treat on day two.
Nutritional Information & Benefits
These muffins are a treat, but they also have some redeeming qualities. Here’s a rough estimate per muffin (without glaze):
- Calories: ~220
- Fat: 10g
- Carbohydrates: 30g
- Protein: 4g
- Fiber: 2g
- Sugar: 16g
Health Benefits: Pumpkin is packed with vitamin A, fiber, and antioxidants. It supports eye health and immune function. The brown butter adds healthy fats that help your body absorb fat-soluble vitamins. Plus, the warm spices like cinnamon and ginger have anti-inflammatory properties.
Dietary Considerations: This recipe can be made gluten-free and dairy-free with simple substitutions. It’s not low-carb, but you can reduce the sugar by 1/4 cup without affecting the texture too much. The maple glaze adds extra sugar, so feel free to skip it for a lighter version.
Allergens: Contains wheat, dairy, and eggs. The glaze contains tree nuts if you use pecan or walnut mix-ins.
I’m not a nutritionist, but I do believe in balance. These muffins are a treat, and treats are part of a happy life. Enjoy them without guilt, maybe with a side of fresh fruit or a green smoothie.
Conclusion
These brown butter pumpkin muffins with maple glaze are the kind of recipe that becomes a tradition. They’re simple enough for a weekday morning but special enough for a holiday brunch. The nutty brown butter, warm spices, and sweet maple glaze come together in a way that feels both familiar and exciting.
I love that this recipe is forgiving — you can tweak the spices, swap the glaze, or add your favorite mix-ins, and it still works. It’s the kind of recipe that invites experimentation. So go ahead, make it your own. Add a handful of pecans. Drizzle extra glaze. Share them with someone you love.
When you make these, I’d love to hear how they turn out. Drop a comment below and let me know if you added your own twist, or tag me in your photos. Happy baking, friend. You’ve got this.
Frequently Asked Questions
Can I use homemade pumpkin puree instead of canned?
Yes, you can! Just make sure to drain it well. Homemade pumpkin puree tends to be more watery than canned, so press it through a fine-mesh sieve or pat it dry with paper towels before measuring. Otherwise, your muffins might turn out soggy.
Why did my brown butter burn?
Brown butter can go from perfect to burnt in seconds. Use a light-colored pan so you can see the color change, and keep stirring constantly. Once you see golden-brown specks and smell a nutty aroma, remove it from the heat immediately. Pour it into a cool bowl to stop the cooking process.
Can I make these muffins without the maple glaze?
Absolutely. The muffins are delicious on their own. You can sprinkle the tops with coarse sugar before baking for a crunchy finish, or dust them with powdered sugar after cooling. The glaze adds sweetness, but the muffins hold their own without it.
How do I keep the glaze from melting off?
Wait until the muffins are completely cool before glazing. If they’re even slightly warm, the glaze will melt and run off. Let them cool on a wire rack for at least 20 minutes. For a thicker glaze, add a little more powdered sugar until it’s spreadable rather than pourable.
Can I double this recipe?
Yes, this recipe doubles beautifully. Just make sure you have a large enough bowl for mixing. Brown the butter in two batches to avoid overcrowding the pan — it browns more evenly that way. You’ll get 24 muffins, perfect for a crowd or freezing for later.
Pin This Recipe!
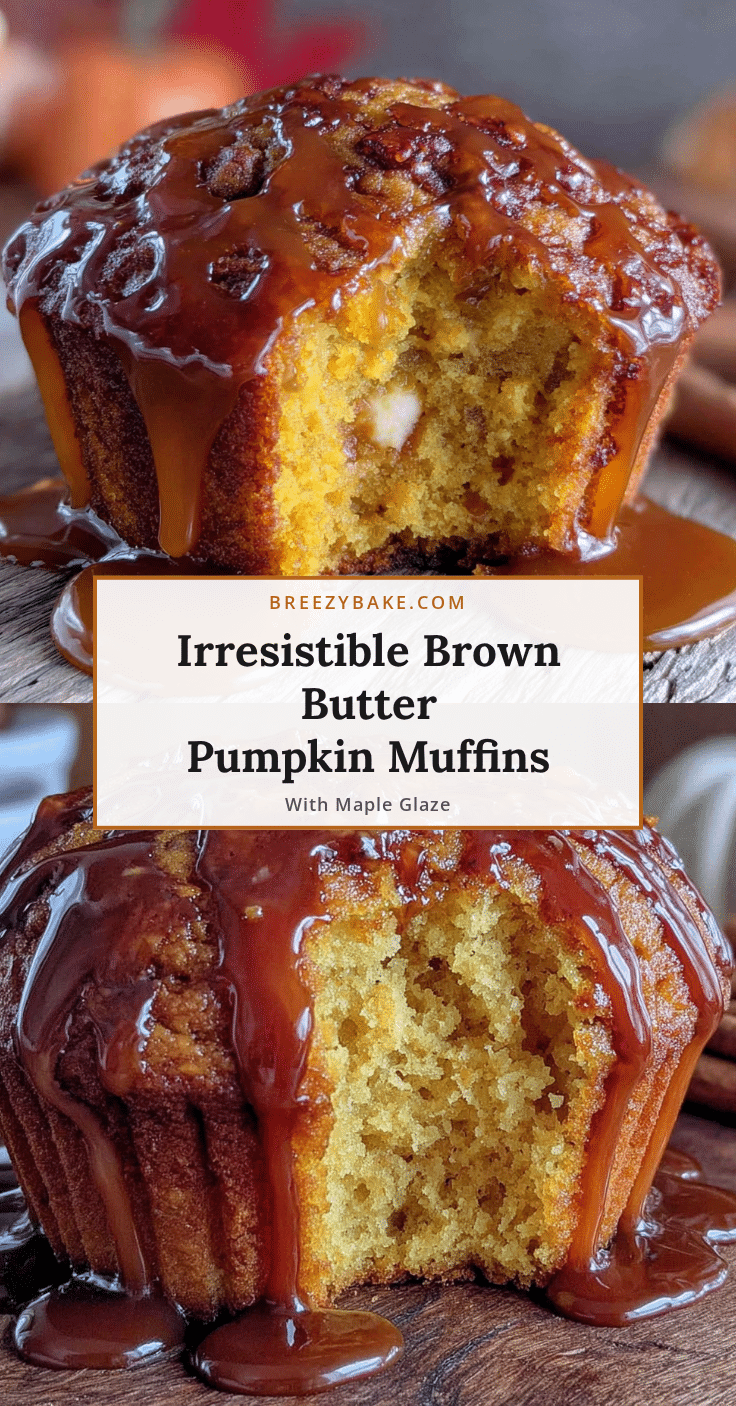
Best Brown Butter Pumpkin Muffins with Maple Glaze
These brown butter pumpkin muffins with maple glaze are the perfect fall treat. The nutty brown butter adds depth, while the maple glaze provides a sweet finish. Quick and easy to make, they’re a crowd-pleaser for any occasion.
- Prep Time: 15 minutes
- Cook Time: 20 minutes
- Total Time: 35 minutes
- Yield: 12 muffins 1x
- Category: Breakfast, Dessert
- Cuisine: American
Ingredients
- 1/2 cup (1 stick) unsalted butter
- 1 cup (240g) canned pumpkin puree
- 1 3/4 cups (220g) all-purpose flour
- 3/4 cup (150g) granulated sugar
- 1/2 cup (100g, packed) light brown sugar
- 2 large eggs, room temperature
- 1 teaspoon vanilla extract
- 1/4 cup (60ml) buttermilk
- 2 teaspoons pumpkin pie spice
- 1 teaspoon ground cinnamon
- 1 teaspoon baking soda
- 1/2 teaspoon baking powder
- 1/2 teaspoon salt
- For the Maple Glaze:
- 1 cup (120g) powdered sugar, sifted
- 3 tablespoons pure maple syrup
- 1–2 tablespoons milk
- Pinch of salt
Instructions
- Preheat your oven to 375°F (190°C). Position the rack in the center. Line a 12-cup muffin tin with paper liners or grease it well.
- Brown the butter: In a light-colored saucepan over medium heat, melt the butter. Stir constantly with a rubber spatula or wooden spoon. After a few minutes, the butter will start to foam and crackle. Keep stirring until you see little brown specks form at the bottom and the butter smells nutty and turns a golden-brown color. Remove from heat immediately (about 4-5 minutes). Pour into a heatproof bowl and let cool for 10 minutes.
- Mix the dry ingredients: In a large bowl, whisk together the flour, pumpkin pie spice, cinnamon, baking soda, baking powder, and salt. Set aside.
- Combine the wet ingredients: In a medium bowl, whisk together the pumpkin puree, granulated sugar, brown sugar, eggs, vanilla extract, and buttermilk until smooth.
- Add the browned butter: Slowly pour the cooled browned butter into the wet ingredients, whisking constantly. Scrape all the brown bits from the bottom of the bowl. Whisk until combined.
- Combine wet and dry: Pour the wet ingredients into the dry ingredients. Using a rubber spatula, fold gently until just combined. A few streaks of flour are okay. The batter will be thick and slightly lumpy.
- Fill the muffin cups: Divide the batter evenly among the 12 cups, filling each about 3/4 full.
- Bake: Place the tin in the preheated oven and bake for 18-20 minutes, or until a toothpick inserted into the center comes out clean or with a few moist crumbs. The tops should be golden and spring back when lightly touched.
- Cool: Let the muffins cool in the tin for 5 minutes, then transfer them to a cooling rack. Cool completely before glazing (about 20 minutes).
- Make the glaze: While the muffins cool, whisk together the powdered sugar, maple syrup, and a pinch of salt in a small bowl. Add milk 1 tablespoon at a time until you reach a thick but pourable consistency.
- Glaze the muffins: Once the muffins are completely cool, drizzle the glaze over the tops. Let the glaze set for 5-10 minutes before serving.
Notes
For the best brown butter, use a light-colored saucepan so you can see the color change. If your pumpkin puree looks watery, blot it with a paper towel before measuring. You can substitute the buttermilk with plain Greek yogurt thinned with a little milk. For a gluten-free version, use a 1:1 gluten-free flour blend. Cool completely before glazing to prevent the glaze from melting off.
Nutrition
- Serving Size: 1 muffin
- Calories: 220
- Sugar: 16
- Sodium: 250
- Fat: 10
- Saturated Fat: 6
- Carbohydrates: 30
- Fiber: 2
- Protein: 4
Keywords: brown butter, pumpkin muffins, maple glaze, fall baking, easy muffins


