The edges are what I made this for — those jagged, dark-amber corners of sourdough where the brown butter has pooled and crisped into something almost caramelized, but savory. That specific crunch that gives way to soft, butter-soaked bread underneath. It’s the whole reason this stuffing exists on my Thanksgiving table. Everything else is secondary.
I was standing in my kitchen last November, staring at a loaf of sourdough that had gone slightly too hard for sandwiches, and I had this thought — what if I browned the butter first? Not just melted it, but really pushed it until it smelled like toasted nuts and something almost butterscotch-like. The sage would go in right at the end, crackling in the hot foam, and then I’d pour the whole thing over torn bread chunks. Honestly, the first batch came out of the oven looking a mess, but tasting like the thing I didn’t know I’d been chasing for years.
This brown butter sage sourdough stuffing recipe is the one that made my aunt (who never compliments anything) stop mid-bite and ask for the recipe. It’s not fancy. It’s just bread, butter, herbs, and patience. But the patience part — that’s where the magic hides.
Why You’ll Love This Recipe
I’ve tested this brown butter sage sourdough stuffing at three different holiday gatherings and one random Tuesday dinner. It passed every single test. Here’s why it stands out from every other stuffing recipe you’ve seen.
- Incredible Texture Contrast : The sourdough holds its shape better than soft sandwich bread, giving you those crispy edges while staying tender in the middle. You get crunch, chew, and softness in every bite.
- Brown Butter Depth : Regular melted butter just doesn’t bring the same nutty, almost-toasty flavor. Browning the butter transforms this from basic stuffing into something that tastes like you spent hours on it (you didn’t).
- Simple Ingredients : You need bread, butter, sage, onion, celery, stock, and eggs. That’s it. No cream-of-anything cans, no weird processed stuff.
- Make-Ahead Friendly : You can prep this completely the day before and bake it off when you’re ready. It actually gets better after resting overnight.
- Crowd-Pleaser Guaranteed : I’ve served this alongside crispy loaded bacon mac and cheese casserole for a Friendsgiving, and both dishes disappeared before the turkey was carved.
This isn’t just another stuffing recipe — it’s the one that makes people close their eyes after the first bite. The brown butter and sage combination creates this aroma that fills your whole house and makes everyone wander into the kitchen asking what smells so good. It’s comfort food that feels special without being fussy.
What Ingredients You Will Need
This recipe uses simple, wholesome ingredients that work together to create layers of flavor. Most of these are pantry staples, which makes this brown butter sage sourdough stuffing accessible even when you’re cooking on a whim.
For the Bread Base
- Sourdough bread (1 large loaf, about 12 cups torn into 1-inch pieces) — Day-old or slightly stale works best. The drier bread absorbs the butter mixture without turning to mush. I prefer a rustic country loaf with a thick crust.
- Unsalted butter (1 cup, 2 sticks) — Use good quality butter here. Since we’re browning it, the butterfat content matters. I use Kerrygold or Plugrà for best results.
- Fresh sage leaves (¼ cup loosely packed, roughly chopped) — Don’t use dried sage for this recipe. The fresh leaves crisp up beautifully in the brown butter and become little flavor bombs throughout the stuffing.
For the Savory Base

- Yellow onion (1 large, diced) — Sweet onions work too, but yellow gives a nice savory backbone.
- Celery stalks (4 large, diced) — The classic aromatic duo. Don’t skip this — it adds that essential Thanksgiving flavor.
- Garlic cloves (4, minced) — Fresh garlic only. The jarred stuff will taste flat here.
- Fresh thyme (2 teaspoons, leaves stripped from stems) — Adds an earthy note that complements the sage beautifully.
- Fresh rosemary (1 tablespoon, finely chopped) — Use sparingly; rosemary can overpower if you’re heavy-handed.
For the Liquid and Binding
- Chicken or vegetable stock (2 to 2½ cups, warmed) — Low-sodium is best so you can control the salt. Homemade stock makes a noticeable difference, but good quality store-bought works fine.
- Large eggs (2, lightly beaten) — These help bind everything together and give the stuffing structure when baked.
- Salt and black pepper (to taste) — I use about 1½ teaspoons of kosher salt and ½ teaspoon of freshly cracked pepper.
Ingredient Tip : If your sourdough is fresh and soft, cube it and spread it on a baking sheet at 300°F for 10-12 minutes to dry it out slightly. This prevents soggy stuffing. I learned this the hard way after my first attempt turned into bread pudding (delicious, but not what I was going for).
Substitution Note : For a gluten-free version, use a sturdy gluten-free sourdough from a bakery you trust. The texture will be slightly different, but the brown butter and sage flavor still shines through beautifully.
Equipment Needed
- Large skillet or sauté pan (12-inch) — Light-colored stainless steel is ideal for browning butter because you can see the milk solids turn amber. Dark nonstick pans make it harder to judge the color.
- 9×13-inch baking dish — Glass or ceramic works best. Metal pans can cause the edges to brown too quickly.
- Large mixing bowl — Big enough to toss the bread cubes without them spilling everywhere. I use my grandmother’s old speckled enamel bowl.
- Chef’s knife and cutting board — A sharp knife makes dicing onions and celery much less painful.
- Wooden spoon or silicone spatula — For stirring the brown butter. Wood won’t scratch your pan and handles the heat well.
- Baking sheet — For toasting the bread cubes if your sourdough isn’t stale enough.
You don’t need anything fancy for this recipe. If you don’t have a 9×13 dish, a large cast-iron skillet works beautifully and gives you even crispier edges. I’ve also made this in a 10-inch cast iron when cooking for a smaller group — just reduce the recipe by a third.
Preparation Method
- Prep the bread first. Tear your sourdough into rough 1-inch pieces. You want irregular shapes — the craggy bits get extra crispy. If your bread is fresh, spread the pieces on a baking sheet and toast at 300°F for 10 minutes. Let them cool completely. This step makes or breaks the texture.
- Brown the butter. Place your 1 cup of butter in a large skillet over medium heat. Let it melt completely, then continue cooking. Swirl the pan occasionally. The butter will foam up, then subside, then foam again. Watch closely — you’re looking for the milk solids at the bottom to turn a deep amber color and the butter to smell nutty and toasty. This takes about 5-7 minutes. Don’t walk away. Burnt butter happens fast.
- Add the sage. Once the butter is beautifully browned, toss in your chopped fresh sage. It will sizzle and crackle immediately. Stir for about 30 seconds until the sage is fragrant and slightly crispy. Remove from heat immediately so the sage doesn’t burn.
- Cook the aromatics. In the same skillet (don’t wash it — all that brown butter goodness is still there), add your diced onion and celery. Cook over medium heat for 6-8 minutes until softened and translucent. Add the minced garlic, thyme, and rosemary. Cook for one more minute until fragrant.
- Combine everything. Transfer your toasted bread cubes to the large mixing bowl. Pour the brown butter-sage mixture over the top, followed by the cooked vegetables. Toss gently with your hands or a large spoon until everything is evenly coated. Take your time here — every bread cube should get some love.
- Add the liquid. In a separate small bowl, whisk together the warmed stock and beaten eggs. Pour this over the bread mixture. Toss gently again. The bread should be moist but not swimming. If it looks dry, add a splash more stock. If it looks soupy, don’t panic — the bread will absorb more as it rests.
- Rest the mixture. Let the stuffing sit for 10-15 minutes before baking. This allows the bread to absorb the liquid evenly. I usually use this time to preheat the oven to 375°F and butter my baking dish.
- Bake to perfection. Transfer the stuffing to your prepared 9×13 baking dish. Spread it evenly but don’t press it down — you want some air pockets for texture. Bake uncovered at 375°F for 35-40 minutes until the top is golden brown and crispy. The edges should be deeply caramelized. Let it rest for 5 minutes before serving.
Sensory Cue : When it’s done, the kitchen will smell like browned butter, sage, and toasted bread. The top should be crackling and golden, and if you peek at the edges, you’ll see those dark amber bits that started this whole thing. That’s how you know it’s right.
Cooking Tips & Techniques
I’ve made this brown butter sage sourdough stuffing at least a dozen times, and I’ve messed it up in almost every way possible. Here’s what I’ve learned.
Don’t rush the brown butter. This is the most important step. Medium heat, patience, and attention. The butter will go through stages: melted, foamy, clear, then foamy again. That second foam is your signal that the milk solids are browning. Swirl the pan constantly during this stage. If you see black specks, you’ve gone too far — start over. It’s worth the extra few minutes.
Toast your bread even if it seems dry. I thought I could skip this step once because my sourdough was already three days old. The stuffing came out dense and heavy. Toasting removes residual moisture and creates those nooks and crannies that trap the brown butter. Don’t skip it.
Use warm stock. Cold stock will shock the eggs and make the stuffing greasy. Warm it on the stove or in the microwave for 30 seconds before adding it. This helps everything emulsify properly.
Let it rest before baking. That 10-15 minute rest isn’t optional. It gives the bread time to absorb the liquid evenly. If you bake it immediately, you’ll end up with dry pockets and soggy spots. Trust the rest.
For extra crispy top : Broil the stuffing for the last 2-3 minutes of baking. Watch it closely — it goes from perfect to burnt very quickly. I learned this after setting off my smoke detector at 6 AM on Thanksgiving morning.
Multitasking strategy : While the bread is toasting, brown your butter. While the aromatics cook, prep your baking dish and whisk the eggs. This recipe comes together in about 45 minutes of active time if you keep moving.
Variations & Adaptations
This brown butter sage sourdough stuffing is flexible. Here are some versions I’ve tried and loved.
Add Sausage for a Heartier Version
Brown 1 pound of bulk breakfast sausage or Italian sausage (casings removed) in the skillet before cooking the aromatics. Remove the sausage, leave the drippings, and proceed with the recipe. Stir the cooked sausage back in when you combine everything. This version is so good it could be a main dish alongside healthy chicken veggie skillet wraps for a non-traditional Thanksgiving.
Make It Vegetarian
Use vegetable stock instead of chicken stock. Add 8 ounces of sautéed mushrooms (cremini or shiitake) along with the aromatics. The mushrooms add an earthy, meaty depth that complements the brown butter beautifully. My vegetarian sister-in-law requests this version every year.
Add Dried Fruit for Sweetness
Stir in ½ cup of dried cranberries, chopped dried apricots, or golden raisins when you combine the bread and butter mixture. The tart-sweet pops of fruit balance the savory brown butter and sage. I tried this on a whim last Christmas and it’s become my favorite variation.
Gluten-Free Adaptation
Use a good quality gluten-free sourdough. Toast it a little longer than regular bread since gluten-free bread tends to be more moist. The texture will be slightly different, but the flavor is still incredible. I’ve tested this with Against the Grain brand and it worked well.
Dairy-Free Version
Substitute the butter with a high-quality vegan butter that’s suitable for browning. Miyoko’s European Style Cultured Vegan Butter works surprisingly well. The browning process is similar, though it takes slightly less time. Use vegetable stock and omit the eggs (or use a flax egg) for a fully vegan stuffing.
Serving & Storage Suggestions
Serving Temperature : Serve this stuffing hot, straight from the oven. Let it rest for 5 minutes after baking so it holds its shape when you scoop it. I like to garnish with a few fresh sage leaves and a sprinkle of flaky sea salt right before serving — it looks beautiful and adds a final pop of flavor.
What to Serve With It : This stuffing pairs beautifully with roasted turkey or chicken, but honestly, I’ve eaten it as a main dish with a simple green salad on the side. It also works alongside healthy air fryer BBQ chicken lettuce wraps for a completely unconventional but delicious meal.
Storage Instructions : Leftover stuffing keeps in an airtight container in the refrigerator for up to 4 days. The texture changes slightly as it sits — the crispy edges soften, but the flavor actually gets better. I honestly prefer day-old stuffing reheated in a skillet with a little extra butter.
Freezing Instructions : You can freeze this stuffing either before or after baking. To freeze unbaked, assemble the stuffing in a disposable aluminum pan, cover tightly with foil, and freeze for up to 3 months. Bake from frozen at 375°F for 55-60 minutes, removing the foil for the last 15 minutes. To freeze baked stuffing, let it cool completely, wrap tightly, and freeze. Reheat in a 350°F oven for 20-25 minutes.
Reheating Tips : For best results, reheat stuffing in a skillet over medium heat with a splash of stock or water. Cover it for the first few minutes to steam through, then uncover to re-crisp the top. The microwave works in a pinch, but you’ll lose that wonderful texture.
Flavor Development : This stuffing is one of those rare dishes that tastes even better the next day. The flavors meld together overnight, and the brown butter notes become more pronounced. I always make extra specifically for leftovers.
Nutritional Information & Benefits
| Nutrient | Amount Per Serving (1 cup) |
|---|---|
| Calories | 285 |
| Total Fat | 16g |
| Saturated Fat | 9g |
| Cholesterol | 65mg |
| Sodium | 420mg |
| Total Carbohydrates | 28g |
| Dietary Fiber | 2g |
| Protein | 7g |
Health Benefits : Sourdough bread is easier to digest than regular bread due to the fermentation process. It also has a lower glycemic index, which means it won’t spike your blood sugar as dramatically. Sage is packed with antioxidants and has anti-inflammatory properties. Brown butter contains conjugated linoleic acid, which has been linked to various health benefits in moderation.
Dietary Considerations : This recipe contains gluten, dairy, and eggs. For gluten-free or dairy-free options, see the variations section above. This stuffing is nut-free and soy-free as written.
Personal Wellness Perspective : I don’t believe in making holiday food “healthy” by stripping away what makes it special. This stuffing is indulgent, and that’s okay. The secret is portion control and balance — a generous serving of this alongside roasted vegetables and a lean protein makes for a satisfying, well-rounded meal.
Conclusion
This brown butter sage sourdough stuffing is the recipe that changed how I think about Thanksgiving sides. It’s proof that a few simple ingredients, treated with care and patience, can create something truly memorable. The crispy edges, the nutty butter, the fragrant sage — every bite tells a story of time well spent in the kitchen.
I love this recipe because it doesn’t try to be anything other than what it is: really good bread, really good butter, and really good herbs. It’s honest cooking. And honestly? That’s the kind of food I want on my table.
Try this recipe for your next holiday gathering, or honestly, for a random Tuesday when you need something comforting. Customize it with sausage or mushrooms or dried fruit — make it your own. And when you do, come back and tell me how it turned out. I’d love to hear about your version.
Leave a comment below or tag me in your photos. Happy cooking, friends!
Frequently Asked Questions
Can I make this stuffing ahead of time?
Absolutely! Assemble the stuffing completely, cover it, and refrigerate for up to 24 hours before baking. Add about 10 minutes to the baking time since you’re starting from cold. This actually makes the flavors meld together even better.
Why did my brown butter burn?
Brown butter burns when the heat is too high or you walk away from it. Keep the heat at medium and watch it constantly. The transition from perfectly browned to burnt happens in about 30 seconds. If you see black specks, it’s too far gone — start fresh.
Can I use dried sage instead of fresh?
You can, but the texture and flavor won’t be the same. Fresh sage crisps up in the brown butter and adds little bursts of flavor throughout. Dried sage will just blend in. If you must use dried, use 1 tablespoon and add it with the other dried herbs rather than to the hot butter.
My stuffing came out soggy. What went wrong?
This usually happens for one of three reasons: the bread wasn’t dried out enough, you added too much stock, or you covered the dish while baking. Next time, toast the bread thoroughly, start with less stock (you can always add more), and bake uncovered for the crispiest results.
Can I cook this stuffing inside a turkey?
I don’t recommend it. This stuffing is designed to be baked separately for maximum texture and food safety. Cooking it inside a turkey often results in soggy stuffing and can lead to uneven cooking temperatures. Trust me — the baked version is better.
Pin This Recipe!
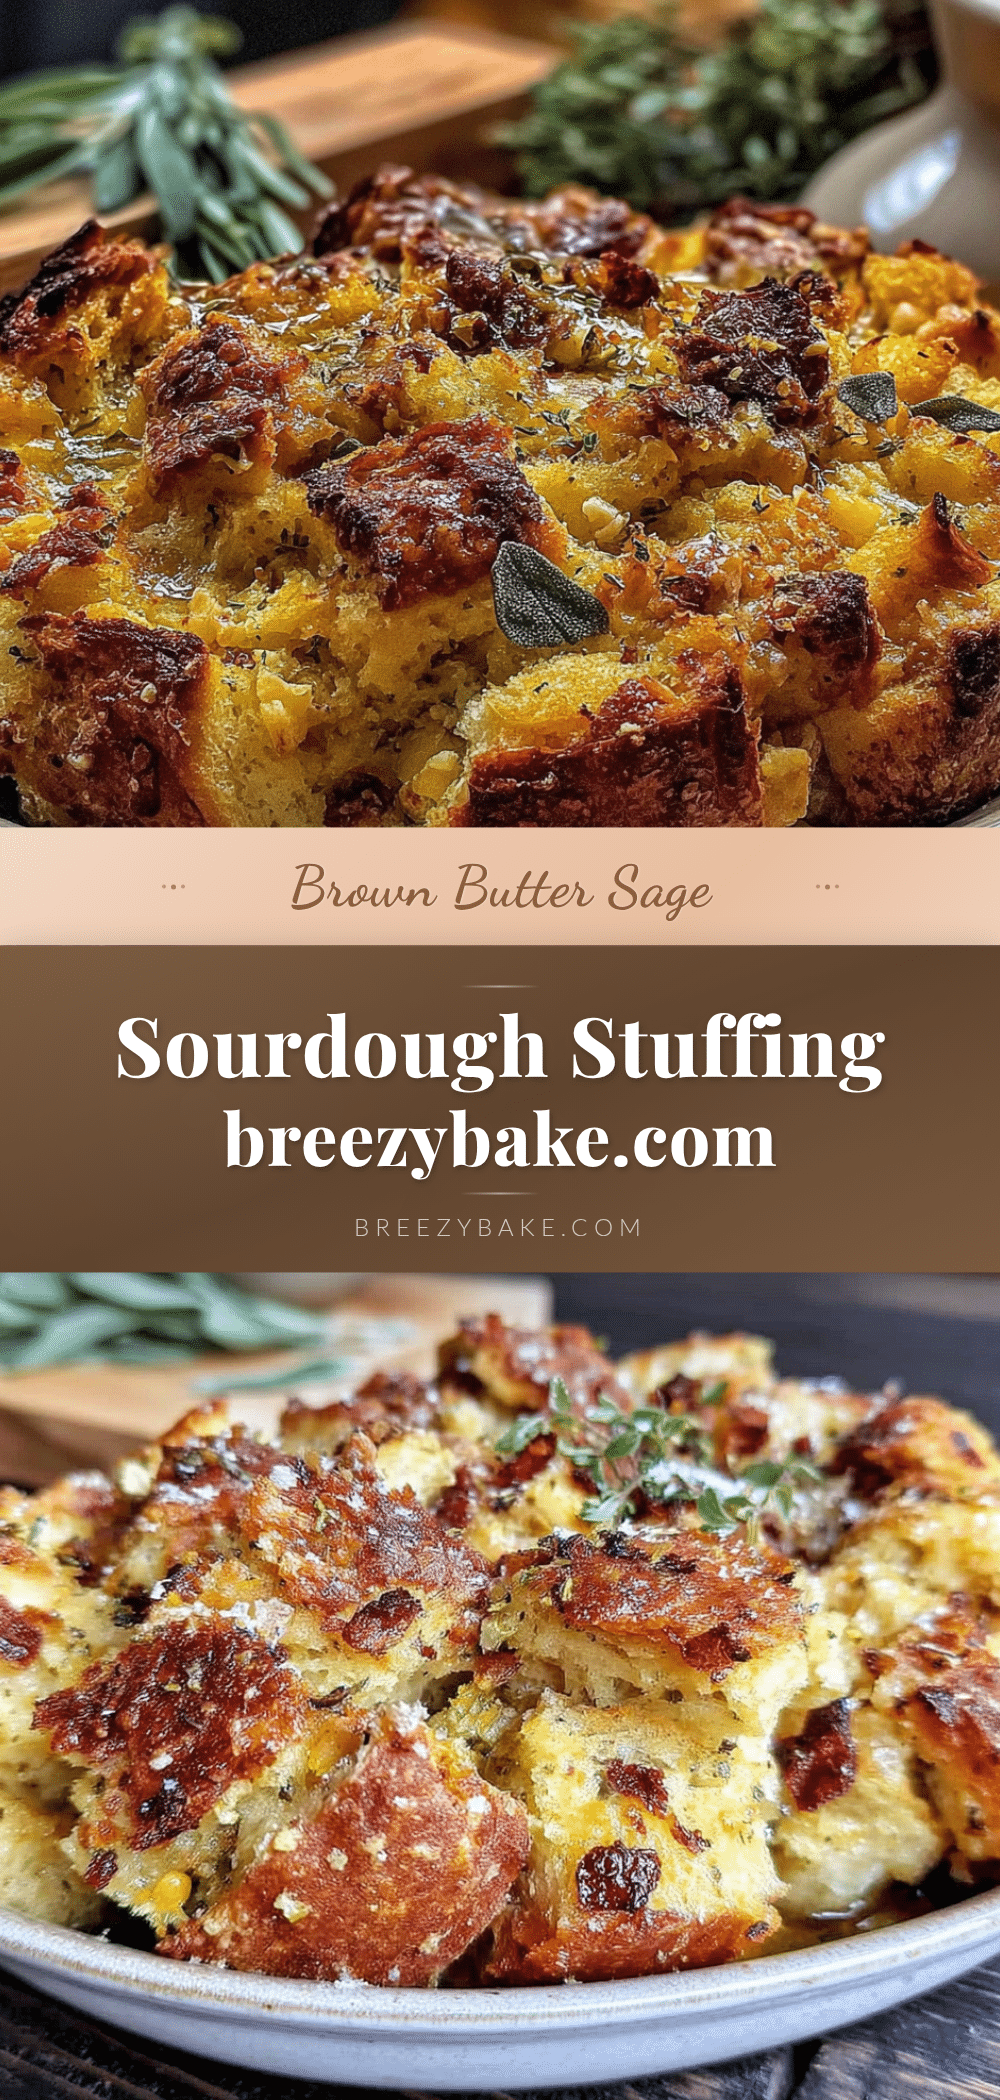
Best Brown Butter Sage Sourdough Stuffing Recipe

This brown butter sage sourdough stuffing features crispy edges, tender bread, and nutty, aromatic flavors. It’s a simple yet show-stopping Thanksgiving side made with sourdough, brown butter, fresh sage, and classic aromatics.
- Prep Time: 20 minutes
- Cook Time: 40 minutes
- Total Time: 1 hour 15 minutes
- Yield: 8 servings 1x
- Category: Side Dish
- Cuisine: American
Ingredients
- 1 large loaf sourdough bread (about 12 cups torn into 1-inch pieces)
- 1 cup (2 sticks) unsalted butter
- 1/4 cup loosely packed fresh sage leaves, roughly chopped
- 1 large yellow onion, diced
- 4 large celery stalks, diced
- 4 garlic cloves, minced
- 2 teaspoons fresh thyme leaves
- 1 tablespoon fresh rosemary, finely chopped
- 2 to 2 1/2 cups low-sodium chicken or vegetable stock, warmed
- 2 large eggs, lightly beaten
- 1 1/2 teaspoons kosher salt
- 1/2 teaspoon freshly cracked black pepper
Instructions
- Prep the bread: Tear sourdough into rough 1-inch pieces. If bread is fresh, spread on a baking sheet and toast at 300°F for 10 minutes. Let cool completely.
- Brown the butter: Place 1 cup butter in a large skillet over medium heat. Melt completely, then continue cooking, swirling occasionally, until milk solids turn deep amber and butter smells nutty (5-7 minutes). Do not walk away.
- Add the sage: Toss in chopped fresh sage; it will sizzle. Stir for about 30 seconds until fragrant and slightly crispy. Remove from heat immediately.
- Cook the aromatics: In the same skillet, add diced onion and celery. Cook over medium heat 6-8 minutes until softened. Add minced garlic, thyme, and rosemary; cook 1 more minute until fragrant.
- Combine: Transfer toasted bread cubes to a large mixing bowl. Pour brown butter-sage mixture and cooked vegetables over bread. Toss gently until evenly coated.
- Add liquid: In a small bowl, whisk together warmed stock and beaten eggs. Pour over bread mixture and toss gently. Bread should be moist but not swimming.
- Rest: Let stuffing sit for 10-15 minutes before baking to allow bread to absorb liquid evenly.
- Bake: Preheat oven to 375°F. Butter a 9×13-inch baking dish. Transfer stuffing to dish, spread evenly without pressing down. Bake uncovered 35-40 minutes until top is golden brown and crispy. Let rest 5 minutes before serving.
Notes
For extra crispy top, broil for the last 2-3 minutes. Watch closely to avoid burning. This stuffing can be assembled up to 24 hours ahead and refrigerated; add about 10 minutes to baking time. Leftovers keep in the refrigerator for up to 4 days and can be reheated in a skillet with a splash of stock.
Nutrition
- Serving Size: 1 cup
- Calories: 285
- Sugar: 2
- Sodium: 420
- Fat: 16
- Saturated Fat: 9
- Carbohydrates: 28
- Fiber: 2
- Protein: 7
Keywords: brown butter sage sourdough stuffing, Thanksgiving stuffing, sourdough stuffing, brown butter stuffing, sage stuffing, holiday side dish


