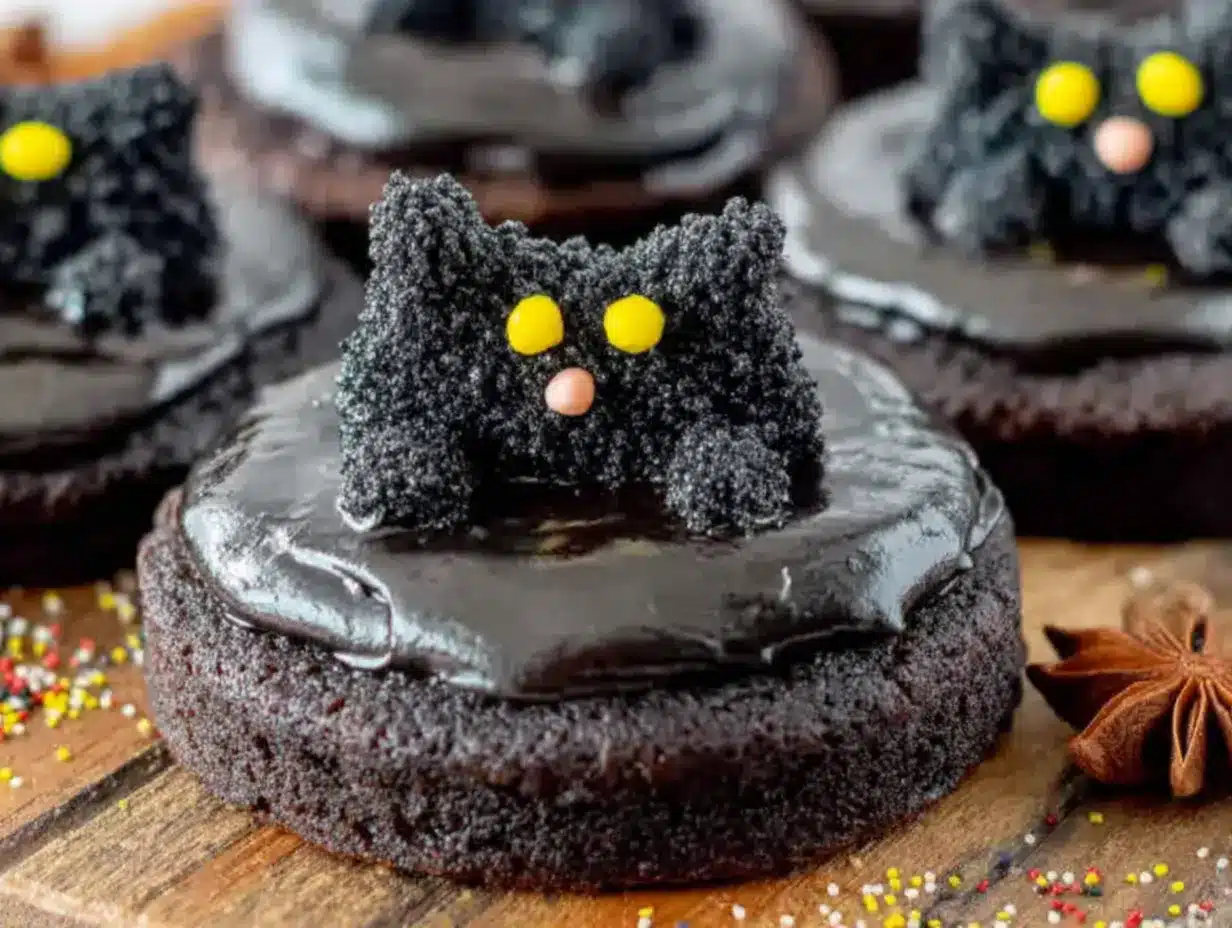
My niece didn’t even say thank you. She just stood there, cookie in hand, staring at it like I’d handed her a winning lottery ticket. Then she whispered, “Auntie, he looks like Binx.” For context, Binx is her black cat that she dresses in Halloween bow ties every October. And that’s when I knew these black cat sugar cookies were more than just a fun bake—they were a moment.
I had spent the better part of a Sunday afternoon testing royal icing consistencies, trying to get the perfect cat face that wasn’t too cartoonish or too creepy. The first batch looked like grumpy potatoes with ears. The second batch looked like raccoons. But the third batch? That one had personality. Those little cookies had whiskers that actually looked like they belonged on a mischievous feline, and I knew I had cracked the code.
Honestly, the entire kitchen smelled like butter and vanilla by the time I was done. My hands were stained with black gel food coloring for two days afterward. But watching that kid’s face light up? That was the win. These cookies aren’t just cute—they’re the kind of treat that makes Halloween feel special without requiring a pastry degree. If I can make them without losing my mind, so can you.
Why You’ll Love This Recipe
Let me tell you, I’ve tested a lot of sugar cookie recipes in my day. Some spread into shapeless blobs. Others tasted like sweet cardboard. This one hits that sweet spot—firm enough to hold a crisp cat silhouette but soft enough that you’ll sneak a second one when no one’s looking.
- Simple Ingredients: You probably have most of these in your pantry right now. No weird extracts or specialty flours required.
- No Spread Guarantee: These cookies hold their shape beautifully. Your black cats will look like black cats, not abstract blobs.
- Perfect for Halloween Parties: They’re the star of any spooky spread, from classroom treats to adult costume parties.
- Kid-Friendly Activity: Get the little ones involved with decorating. Even messy faces look adorable on these cookies.
- Make-Ahead Friendly: The dough freezes beautifully, and decorated cookies stay fresh for days.
What makes these different from every other sugar cookie out there? It’s the texture. I use a combination of butter and a tiny bit of cream cheese in the dough. It gives you that classic sugar cookie flavor but with a slightly softer bite that doesn’t crumble into a million pieces when you bite into it. Plus, the royal icing recipe I’m sharing hardens with a beautiful matte finish that looks professional without being fussy.
These cookies are the kind that make you pause after the first bite. They’re buttery, not too sweet, and sturdy enough to hold up to detailed decorating. Whether you’re making them for a Halloween bash or just because you love black cats (like me), this recipe delivers every single time.
What Ingredients You Will Need
This recipe relies on simple, pantry-friendly ingredients to create cookies that taste as good as they look. Here’s what you’ll need to gather before you start.
For the Sugar Cookie Dough
- Unsalted butter, 1 cup (2 sticks), softened to room temperature (I prefer using Land O’Lakes for consistent results)
- Cream cheese, 2 ounces, softened (full-fat works best for texture, but low-fat is fine in a pinch)
- Granulated sugar, 1 cup
- Large egg, 1, room temperature
- Vanilla extract, 1 teaspoon (use pure vanilla extract, not imitation, for the best flavor)
- Almond extract, ½ teaspoon (this is my secret ingredient—it adds a subtle nutty warmth that makes these cookies unforgettable)
- All-purpose flour, 2 ½ cups, spooned and leveled
- Baking powder, ½ teaspoon
- Salt, ¼ teaspoon
For the Royal Icing
- Powdered sugar, 3 cups, sifted (no lumps allowed here)
- Meringue powder, 2 tablespoons (I recommend Wilton brand for consistent drying)
- Warm water, 4 to 5 tablespoons
- Black gel food coloring, 1 teaspoon (gel is essential—liquid coloring will ruin the icing consistency)
- Orange gel food coloring, optional for pumpkin accents
- White gel food coloring, optional for eyes and whiskers
- Yellow gel food coloring, optional for cat eyes
Ingredient Tips & Substitutions
If you don’t have cream cheese, you can substitute with an extra 2 tablespoons of butter, but the texture will be slightly less tender. For a dairy-free version, use vegan butter and omit the cream cheese—just add an extra tablespoon of butter to compensate. The almond extract is optional but highly recommended. It elevates the flavor in a way that makes people ask, “What’s in these?”
When it comes to food coloring, don’t skimp. Cheap gel colors can be watery and weak. I’ve learned the hard way that you need a good-quality black gel to get that deep, true black without using half the bottle. Americolor and Wilton both work great.
Equipment Needed
- Cat-shaped cookie cutter, about 3 to 4 inches in size (I found mine on Amazon for $6)
- Stand mixer or hand mixer for creaming butter and sugar
- Rolling pin with thickness guides (or just use wooden dowels as guides)
- Parchment paper or silicone baking mats
- Baking sheets, at least two
- Cooling rack for even cooling
- Piping bags or squeeze bottles for icing
- Small round piping tips (size 2 or 3 works perfectly)
- Toothpicks for spreading icing and fixing mistakes
- Plastic wrap for chilling dough
If you don’t have a cat-shaped cutter, you can use any Halloween shape—ghosts, pumpkins, or bats all work with this same recipe. You can even freehand cut shapes with a knife if you’re feeling adventurous. I’ve done it. It’s not as clean, but the cookies taste just as good.
Preparation Method
Alright, let’s get baking. I’ll walk you through every step so you feel confident from start to finish.
Step 1: Make the Dough
In a large mixing bowl, beat the softened butter and cream cheese together on medium speed until smooth and creamy—about 2 minutes. Add the granulated sugar and beat until light and fluffy, another 2 to 3 minutes. Scrape down the sides of the bowl. Add the egg, vanilla extract, and almond extract, and beat until combined.
In a separate bowl, whisk together the flour, baking powder, and salt. Gradually add the dry ingredients to the wet mixture, mixing on low speed just until the dough comes together. Don’t overmix, or your cookies will be tough. The dough should be soft but not sticky.
Step 2: Chill the Dough
Divide the dough in half, shape each half into a flat disc, wrap tightly in plastic wrap, and refrigerate for at least 1 hour. This step is non-negotiable. Chilling prevents the cookies from spreading and makes the dough much easier to roll out. You can chill it overnight if you want to prep ahead.
Step 3: Roll and Cut
Preheat your oven to 350°F (175°C). Line your baking sheets with parchment paper or silicone mats. Lightly flour your work surface and rolling pin. Roll out one disc of dough to about ¼-inch thickness. If the dough starts sticking, dust with a little more flour.
Press your cat-shaped cutter firmly into the dough and lift straight up. Transfer the cut cookies to the prepared baking sheets, spacing them about 1 inch apart. Gather the scraps, re-roll, and cut again. Repeat with the second disc of dough.
Pro tip: If the dough gets too soft while you’re working, pop the baking sheet in the fridge for 10 minutes before baking. This helps maintain those sharp edges.
Step 4: Bake
Bake for 8 to 10 minutes, or until the edges are just barely golden. The centers should look set but not browned. Remove from the oven and let the cookies cool on the baking sheet for 5 minutes before transferring to a wire rack to cool completely. Do not ice warm cookies—the icing will slide right off.
Step 5: Make the Royal Icing
In a clean mixing bowl, combine the sifted powdered sugar and meringue powder. Add 4 tablespoons of warm water and beat on low speed until combined. Increase speed to medium-high and beat for 5 to 7 minutes, until the icing is glossy and holds stiff peaks. If it’s too thick, add water one teaspoon at a time. If it’s too thin, add more powdered sugar.
Divide the icing into separate bowls for coloring. Color the majority black, and set aside small portions for white (eyes), yellow (pupils), and orange (pumpkin details if you’re adding them).
Step 6: Decorate the Cats
Fill piping bags fitted with small round tips with your colored icings. Start by outlining each cookie with black icing, then flood the inside with a slightly thinner consistency of black icing. Use a toothpick to spread the icing into corners and pop any air bubbles. Let the base layer dry completely—at least 2 hours, or overnight if you’re patient.
Once the black base is dry, pipe on white circles for eyes, let them dry for 30 minutes, then add tiny yellow dots for pupils. Pipe little pink or white triangles for noses and thin lines for whiskers. If you’re feeling extra creative, add a tiny orange pumpkin next to one paw.
Cooking Tips & Techniques
I’ve made more batches of these than I care to count, and I’ve learned a few things the hard way. Let me save you some trouble.
Don’t skip the chill. I know it’s tempting to rush, but warm dough spreads into unrecognizable blobs. I once tried to speed things up and ended up with cookies that looked more like melted aliens than cats. Give the dough its full hour in the fridge.
Watch your oven temperature. Every oven runs differently. If yours runs hot, check the cookies at 7 minutes. If they’re browning too fast, reduce the temperature by 25 degrees. The goal is pale cookies with just a hint of gold on the edges.
Royal icing consistency is everything. For outlining, the icing should hold a stiff peak. For flooding, it should flow like honey and settle smooth within 10 seconds. To test, lift your spoon—the ribbon of icing that falls back should disappear into the bowl within 10 to 12 seconds. If it’s too thick, add water drop by drop. Too thin? Add more powdered sugar.
Work in batches. Don’t try to decorate all 30 cookies at once. Decorate 5 to 10 at a time, letting them dry before moving on to the next layer. This prevents smudging and keeps your sanity intact.
Use a scribe tool. A toothpick works fine, but a dedicated scribe tool with a fine point helps you maneuver icing into tight spots without tearing the surface.
Variations & Adaptations
One of the best things about this recipe is how adaptable it is. Here are a few ways to switch things up.
Gluten-Free Version: Substitute the all-purpose flour with a 1:1 gluten-free baking flour blend. I’ve tested this with King Arthur’s Measure for Measure flour, and it works beautifully. Just add an extra tablespoon of flour to the dough since gluten-free blends tend to absorb slightly less liquid.
Vegan Option: Use vegan butter and replace the egg with a flax egg (1 tablespoon ground flaxseed mixed with 3 tablespoons water, let sit for 5 minutes). Omit the cream cheese or use a vegan version. The texture will be slightly more crumbly, but the flavor is still fantastic.
Spooky Cat Variations: Instead of plain black cats, try making zombie cats with green icing and red eyes. Or make ghost cats by flooding the cookie with white icing and adding a subtle gray wash for dimension. I once made a batch of “vampire cats” with tiny red fangs—they were a hit at my Halloween party.
Flavor Twists: Add ½ teaspoon of cinnamon or pumpkin pie spice to the dough for a fall-inspired flavor. Or swap the almond extract for peppermint extract for a wintery twist—just be careful, peppermint is strong.
Serving & Storage Suggestions
These cookies are best served at room temperature. Arrange them on a platter with some spider webs made from string cheese or a few candy eyeballs scattered around for extra Halloween flair. They pair beautifully with a warm cup of apple cider or a spiced chai latte.
For storage, place the decorated cookies in a single layer in an airtight container. Separate layers with parchment paper to prevent the icing from sticking. They’ll stay fresh at room temperature for up to one week. Do not refrigerate—the icing can become tacky and the cookies can dry out.
You can freeze undecorated baked cookies for up to 3 months. Just wrap them tightly in plastic wrap and place in a freezer-safe bag. Thaw at room temperature before decorating. I often bake a double batch in October and decorate them throughout the month as Halloween parties pop up.
The flavors actually deepen after a day or two. The butter and vanilla meld together, and the royal icing softens slightly against the cookie. Honestly, day-old cookies might be even better than fresh ones.
Nutritional Information & Benefits
Let’s be real—these are sugar cookies, not health food. But here’s the estimated breakdown per cookie (based on 30 cookies):
- Calories: 145
- Fat: 7g
- Carbohydrates: 20g
- Sugar: 12g
- Protein: 2g
On the bright side, the cream cheese adds a small amount of protein and calcium. The almond extract provides a touch of vitamin E. And honestly, there’s something to be said for the mental health benefits of baking—the repetitive motions, the creativity, the joy of sharing something handmade. That counts for something, right?
If you’re watching your sugar intake, you can reduce the sugar in the cookie dough to ¾ cup without affecting the texture too much. The royal icing is harder to reduce, but you can use a thinner layer for fewer calories per bite.
Conclusion
These black cat Halloween sugar cookies are more than just a pretty face. They’re buttery, tender, and sturdy enough to hold up to detailed decorating without losing their charm. Whether you’re a seasoned cookie decorator or a total beginner, this recipe gives you everything you need to create something special.
I love that these cookies let me be a little whimsical. There’s something deeply satisfying about piping a tiny face onto a cookie and watching it come to life. And when you see someone’s face light up at the sight of a cute black cat cookie? That’s the good stuff.
So grab your rolling pin, put on a Halloween playlist, and get baking. And when you make these, I want to hear about it. Drop a comment below with your decorating creations, tag me in your photos, and tell me—did your cookies turn out as cute as Binx? I’m betting yes.
Frequently Asked Questions
Can I use store-bought sugar cookie dough instead?
You can, but the texture won’t be the same. Homemade dough holds its shape better and has a much better flavor. If you’re short on time, look for a refrigerated sugar cookie dough that’s firm enough to roll and cut.
How do I get the royal icing perfectly black?
Use gel food coloring, not liquid. Start with ½ teaspoon of black gel color and mix thoroughly. Let the icing sit for 5 minutes—the color deepens as it sits. If it’s not dark enough, add more gel a few drops at a time. You’ll likely need about 1 teaspoon total for a deep, true black.
My cookies spread in the oven. What went wrong?
This usually happens when the dough wasn’t chilled enough, or the butter was too soft when you mixed it. Make sure your butter is softened but still cool to the touch, and always chill the cut cookies on the baking sheet for 10 minutes before baking.
Can I freeze the decorated cookies?
I don’t recommend freezing decorated cookies because the icing can become tacky when thawed. However, you can freeze undecorated baked cookies for up to 3 months. Decorate them after they’ve thawed at room temperature.
How far in advance can I make these cookies?
You can make the dough up to 3 days ahead and keep it refrigerated. Baked undecorated cookies can be stored at room temperature for up to a week. Decorated cookies are best within 3 to 5 days for optimal texture and appearance.
Pin This Recipe!

Best Easy Black Cat Halloween Sugar Cookies Recipe

These buttery, tender black cat sugar cookies hold their shape perfectly and are decorated with a matte royal icing. They’re the star of any Halloween party and are surprisingly easy to make, even for beginners.
- Prep Time: 1 hour 30 minutes
- Cook Time: 10 minutes
- Total Time: 1 hour 40 minutes
- Yield: 30 servings 1x
- Category: Dessert
- Cuisine: American
Ingredients
- 1 cup (2 sticks) unsalted butter, softened
- 2 ounces cream cheese, softened
- 1 cup granulated sugar
- 1 large egg, room temperature
- 1 teaspoon pure vanilla extract
- ½ teaspoon almond extract
- 2 ½ cups all-purpose flour, spooned and leveled
- ½ teaspoon baking powder
- ¼ teaspoon salt
- 3 cups powdered sugar, sifted
- 2 tablespoons meringue powder
- 4 to 5 tablespoons warm water
- 1 teaspoon black gel food coloring
- Orange gel food coloring (optional)
- White gel food coloring (optional)
- Yellow gel food coloring (optional)
Instructions
- In a large mixing bowl, beat the softened butter and cream cheese together on medium speed until smooth and creamy, about 2 minutes. Add the granulated sugar and beat until light and fluffy, another 2 to 3 minutes. Scrape down the sides of the bowl. Add the egg, vanilla extract, and almond extract, and beat until combined.
- In a separate bowl, whisk together the flour, baking powder, and salt. Gradually add the dry ingredients to the wet mixture, mixing on low speed just until the dough comes together. Do not overmix.
- Divide the dough in half, shape each half into a flat disc, wrap tightly in plastic wrap, and refrigerate for at least 1 hour.
- Preheat oven to 350°F (175°C). Line baking sheets with parchment paper or silicone mats. Lightly flour your work surface and rolling pin. Roll out one disc of dough to about ¼-inch thickness.
- Press a cat-shaped cookie cutter firmly into the dough and lift straight up. Transfer cut cookies to prepared baking sheets, spacing them about 1 inch apart. Gather scraps, re-roll, and cut again. Repeat with the second disc of dough.
- Bake for 8 to 10 minutes, or until edges are just barely golden. Let cookies cool on the baking sheet for 5 minutes before transferring to a wire rack to cool completely.
- In a clean mixing bowl, combine sifted powdered sugar and meringue powder. Add 4 tablespoons of warm water and beat on low speed until combined. Increase speed to medium-high and beat for 5 to 7 minutes, until icing is glossy and holds stiff peaks. Adjust consistency as needed.
- Divide icing into separate bowls for coloring. Color the majority black, and set aside small portions for white, yellow, and orange.
- Fill piping bags fitted with small round tips with colored icings. Outline each cookie with black icing, then flood the inside with a slightly thinner consistency. Use a toothpick to spread icing and pop air bubbles. Let base layer dry completely (at least 2 hours).
- Once black base is dry, pipe on white circles for eyes, let dry 30 minutes, then add tiny yellow dots for pupils. Pipe small pink or white triangles for noses and thin lines for whiskers. Add optional orange pumpkin accents.
Notes
Chilling the dough is essential to prevent spreading. For best results, use gel food coloring, not liquid. Royal icing should be stiff for outlining and honey-like for flooding. Decorated cookies can be stored at room temperature for up to a week. Undecorated baked cookies can be frozen for up to 3 months.
Nutrition
- Serving Size: 1 cookie
- Calories: 145
- Sugar: 12
- Sodium: 60
- Fat: 7
- Saturated Fat: 4
- Carbohydrates: 20
- Protein: 2
Keywords: Halloween cookies, sugar cookies, black cat cookies, royal icing cookies, easy Halloween treats


