I was elbow-deep in soapy water last October, scrubbing a baking sheet that had seen better days, when the smell hit me. Not the lemon-scented dish soap, but something else — a faint, sweet whisper of vanilla and sugar that seemed to rise from the sponge itself. And suddenly I was seven years old, standing on a wobbly wooden stool in my Aunt Maggie’s tiny kitchen, watching her pipe ghost-shaped meringues onto a parchment-lined tray. Her knuckles were dusted with powdered sugar, and she was humming along to some oldies station on a crackly radio. I can still see the way her glasses fogged up when she opened the oven door. She passed away three years ago, and I haven’t made meringues since. But that smell — that ridiculous, phantom smell in my sink — it was like she was standing right there, telling me it was time to try again.
Honestly, I almost laughed out loud. Here I was, a grown woman with her own kitchen and a stack of Halloween party invitations, and I was being haunted by a baking memory. Maybe you’ve been there — when a random scent or sound pulls you right back to a specific moment you thought you’d forgotten. So I dried my hands, grabbed a fresh bag of sugar, and decided to recreate those spooky ghost meringue cookies for Halloween parties. Let me tell you, the first batch was a disaster. I over-whipped the egg whites, and they deflated into sad little puddles. But by the third try, I had it. Those perfect, pillowy little ghosts with their tiny chocolate chip eyes, floating on the baking sheet like they were about to drift away. It was messy, frustrating, and absolutely wonderful.
This recipe is my love letter to Aunt Maggie and to anyone who needs a show-stopping, ridiculously cute treat for their Halloween spread. They’re light, they’re crunchy, they melt in your mouth, and they’re surprisingly simple once you get the hang of it. I keep making them because they remind me that some things — like the perfect meringue, or the memory of someone you love — are worth the effort.
Why You’ll Love These Ghost Meringue Cookies
I’ve tested this recipe more times than I care to admit, and I can say with confidence: these are the best ghost meringue cookies you’ll make. Here’s why they work so well for Halloween parties.
- Quick & Easy: You only need about 20 minutes of active prep time, plus an hour in the oven. Perfect for busy Halloween week when you’re juggling costumes, decorations, and candy bowls.
- Simple Ingredients: Four ingredients. That’s it. Egg whites, sugar, vanilla, and chocolate chips. You probably have everything right now.
- Perfect for Halloween: These little ghosts are the star of any party table. They’re spooky without being scary, which means kids and adults both love them.
- Crowd-Pleaser: I brought a batch to my neighbor’s Halloween block party last year, and they disappeared in ten minutes. People kept asking for the recipe.
- Unbelievably Delicious: Light as air, sweet but not cloying, with that signature chewy center. It’s next-level comfort food in ghost form.
What makes this recipe different from others? It’s the technique. I learned the hard way that temperature and patience matter more than anything. I’ll show you exactly how to get stiff, glossy peaks that hold their shape, so your ghosts come out perfect every time. No weeping meringues, no flat blobs. Just pure, spooky perfection.
This recipe isn’t just good — it’s the kind that makes you close your eyes after the first bite. It’s Halloween nostalgia reimagined: healthier than a candy bar, faster than a complicated cake, but with the same soul-soothing satisfaction. Perfect for impressing guests without stress, or turning a simple party into something memorable.
What Ingredients You Will Need
This recipe uses simple, pantry-friendly ingredients to deliver that light, airy texture and sweet vanilla flavor. The magic is in the technique, not a long shopping list.
- 4 large egg whites, at room temperature (room temperature whips up fluffier — I leave mine on the counter for 30 minutes)
- 1 cup (200g) granulated sugar (I prefer C&H or Domino for consistent results; superfine sugar works great too)
- 1 teaspoon vanilla extract (pure vanilla extract, not imitation — it makes a real difference in flavor)
- ¼ teaspoon cream of tartar (this stabilizes the egg whites and helps them hold their shape; you can substitute with ½ teaspoon lemon juice)
- ¼ cup mini chocolate chips (for the ghost eyes — I use Ghirardelli mini chips because they’re small and don’t sink)
Ingredient Selection Tips: Fresh eggs are key here. Older egg whites actually whip up better because they’re less viscous, so if your eggs are a few days old, that’s perfect. Just make sure no yolk gets into the whites — even a tiny bit of fat will prevent them from whipping properly. I crack each egg into a separate small bowl first, then add the white to the mixing bowl. It’s saved me more than once.
Substitution Guidance: For a superfine sugar option, you can pulse granulated sugar in a food processor for 30 seconds. This dissolves faster into the egg whites. If you’re avoiding refined sugar, you can try organic cane sugar, though the texture might be slightly grainier. And if you don’t have cream of tartar, a splash of lemon juice or white vinegar works as a stabilizer — about ½ teaspoon.
Equipment Needed
You don’t need a fancy kitchen to make these ghost meringue cookies. Here’s what you’ll need:
- Electric mixer (stand mixer or hand mixer both work; I’ve used my trusty KitchenAid for years, but a hand mixer is actually easier to control for this recipe)
- Large mixing bowl (glass or metal — avoid plastic as it can hold onto grease)
- Baking sheet (I use a light-colored aluminum sheet; dark sheets can cause browning)
- Parchment paper (silicone baking mats work too, but parchment gives the meringues a better grip)
- Piping bag with a large round tip (or a zip-top bag with the corner snipped off — I’ve done both and honestly prefer the zip-top bag for less mess)
- Small spatula (for scraping down the bowl)
- Cooling rack (for letting the ghosts cool completely)
Budget-Friendly Options: If you don’t have a piping bag, a sturdy zip-top bag works perfectly. Just fill it, seal the top, and snip off about ½ inch from one corner. For the mixer, a whisk and some serious elbow grease will technically work, but I don’t recommend it — your arm will be sore before you get stiff peaks. A hand mixer is a worthwhile investment if you bake often.
Maintenance Tip: Make sure your bowl and whisk attachment are completely clean and grease-free. I wipe mine down with a little lemon juice on a paper towel before starting. Any trace of fat will sabotage your meringue.
Preparation Method
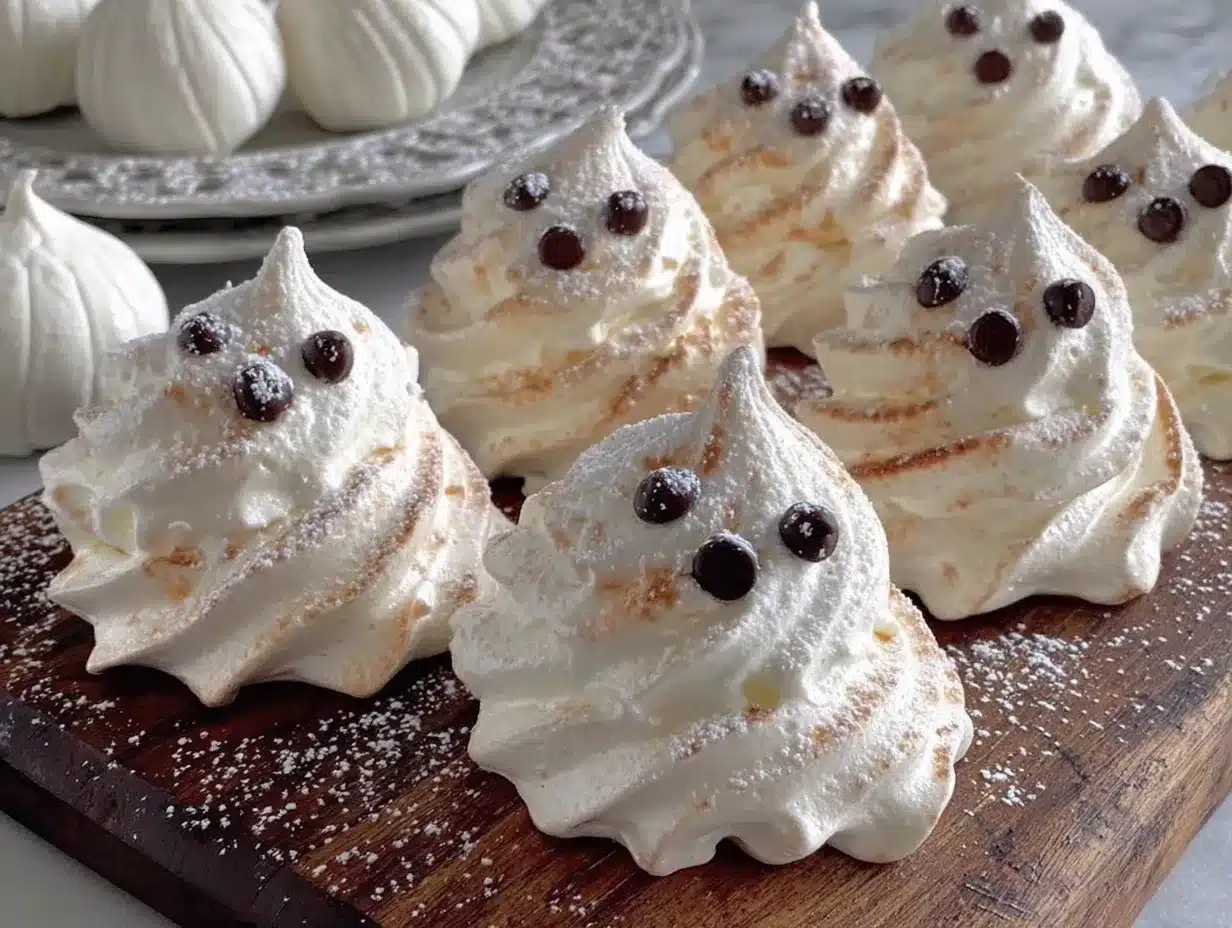
Let me walk you through this step by step. I’ve made every mistake in the book, so I’ll tell you exactly what to watch for.
- Preheat your oven to 200°F (93°C). Yes, this is low and slow. Line a large baking sheet with parchment paper and set aside.
- Separate your eggs carefully. Crack each egg and let the white fall into a small bowl, then transfer it to your large mixing bowl. This way, if a yolk breaks, you only lose one egg instead of the whole batch. I learned this the hard way — trust me on this one.
- Add the cream of tartar. Sprinkle it over the egg whites. This helps stabilize the foam and gives you those stiff, glossy peaks.
- Start whipping on medium speed. Beat the egg whites until they become frothy and start to hold soft peaks — about 2-3 minutes. You’ll see them turn from clear liquid to white foam.
- Gradually add the sugar. With the mixer running, add the sugar one tablespoon at a time. This is important — if you dump it all in at once, the meringue can collapse. Take your time, about 30 seconds between each addition.
- Add the vanilla. Once all the sugar is incorporated, add the vanilla extract and continue beating.
- Whip to stiff peaks. Increase the speed to high and beat for 5-7 minutes. You’re looking for glossy, stiff peaks that hold their shape when you lift the beater. The mixture should feel smooth, not gritty — rub a little between your fingers to check. If it feels grainy, keep beating for another minute.
- Test for doneness. Here’s my foolproof test: turn the bowl upside down. If the meringue stays put, you’re good. If it slides, keep whipping. This works — I promise.
- Transfer to piping bag. Spoon the meringue into your piping bag fitted with a large round tip. Work quickly — meringue can start to deflate if it sits too long.
- Pipe the ghosts. Hold the bag perpendicular to the baking sheet, about ½ inch above the surface. Pipe a round blob for the body, then pull straight up to create a little peak on top. Release pressure and pull away. Leave about 1 inch between each ghost — they don’t spread much, but you want air to circulate.
- Add the eyes. While the meringue is still wet, gently press two mini chocolate chips into each ghost for eyes. Don’t push too hard or you’ll deflate them.
- Bake for 60 minutes. Place the baking sheet in the preheated oven and bake for 60 minutes. Do not open the oven door during baking — the temperature change can cause cracking.
- Turn off the oven and let them rest. After 60 minutes, turn off the oven but leave the ghosts inside for another 30-60 minutes. This lets them dry out completely and develop that perfect crunchy exterior.
- Cool completely. Remove from the oven and let them cool on the baking sheet for 10 minutes, then transfer to a wire rack to cool completely. They should lift easily off the parchment.
Sensory Cues: The meringue should look like marshmallow fluff — white, glossy, and thick. When you pipe, you should see the ghost hold its shape without spreading. The finished cookies should be light and hollow when you pick them up, with a slight crackle when you bite into them.
Cooking Tips & Techniques
I’ve ruined more meringues than I care to count, so let me save you the trouble. Here are the things I wish someone had told me.
The Temperature Trap: Humidity is the enemy of meringue. Don’t make these on a rainy day — the sugar absorbs moisture from the air and your cookies will end up sticky and chewy instead of crisp. Pick a dry day, or run your air conditioner for a few hours before you start.
The Over-Whipping Problem: You can over-whip meringue. I did it once and ended up with a grainy, separated mess. The whites will start to look dry and curdled. If you see that, you’ve gone too far. Stop as soon as the peaks are stiff and glossy — that sweet spot is usually around 7 minutes of high-speed whipping.
The Sugar Dissolving Trick: If you’re worried about grainy meringue, you can warm your sugar in a 200°F oven for 5 minutes before adding it. The warmth helps it dissolve faster into the egg whites. I learned this from a pastry chef friend, and it’s a game-changer.
Timing and Multitasking: These cookies take over an hour to bake, but the active work is only about 20 minutes. I like to make the meringue while the oven preheats, then clean up while they bake. The resting time in the oven is perfect for setting up your Halloween decorations or wrapping party favors.
Consistency Tips: For perfectly uniform ghosts, use a cookie scoop to portion the meringue before piping. I use a #20 scoop (about 2 tablespoons) for medium-sized ghosts. And if your first few ghosts look wonky, don’t worry — you can scrape them back into the piping bag and try again. Meringue is forgiving that way.
Variations & Adaptations
Once you’ve mastered the basic ghost, the possibilities are endless. Here are some of my favorite variations.
Colorful Ghosts: Add a few drops of gel food coloring to the meringue before piping. Purple, green, or orange ghosts are perfect for Halloween. Just fold the color in gently with a spatula — don’t overmix or you’ll deflate the meringue.
Chocolate Ghosts: Swap 2 tablespoons of sugar for 2 tablespoons of unsweetened cocoa powder. Sift it in with the sugar to avoid lumps. These look like little chocolate ghosts and taste amazing.
Peppermint Ghosts: Add ½ teaspoon of peppermint extract instead of vanilla. The cool mint flavor is surprisingly perfect for Halloween, and the white meringue looks even more ghostly.
Vegan Option: You can use aquafaba (the liquid from a can of chickpeas) instead of egg whites. Use 3 tablespoons of aquafaba per egg white, and add an extra ¼ teaspoon of cream of tartar. The texture is slightly different — a bit softer — but still delicious.
Spooky Spider Variation: Instead of eyes, add a few chocolate curls on top to look like spider legs. Use a vegetable peeler to make chocolate curls from a chocolate bar, then gently press them into the top of each ghost before baking.
I once tried a lavender variation by adding dried culinary lavender buds to the sugar. The flavor was lovely, but the texture was a bit crunchy from the buds. If you try it, grind the lavender with the sugar in a food processor first. Learn from my mistakes!
Serving & Storage Suggestions
These ghost meringue cookies are best served at room temperature. They’re perfect on a Halloween dessert table alongside other spooky treats. I like to arrange them on a black platter or cake stand for maximum visual impact. A dusting of powdered sugar makes them look even more ghostly — like they just floated in from a haunted house.
Complementary Dishes: These pair beautifully with hot chocolate, coffee, or a warm apple cider. For a Halloween party, serve them with a bowl of fresh fruit and some chocolate-dipped pretzels for a balanced spread. They’re also lovely crumbled over ice cream for a spooky sundae.
Storage Instructions: Store the cooled ghosts in an airtight container at room temperature. They’ll stay fresh for up to 2 weeks — if they last that long. Do not refrigerate them, as the moisture will make them sticky. For longer storage, you can freeze them in a freezer-safe container for up to 3 months. Let them come to room temperature before serving.
Reheating: These don’t need reheating, but if they’ve softened slightly from humidity, you can crisp them up in a 200°F oven for 10 minutes. Let them cool completely before storing again.
Flavor Development: Interestingly, these cookies actually improve after a day or two. The flavors meld and the texture becomes perfectly crisp on the outside with that slight chewiness inside. I’ve made them up to a week before a party with great results.
Nutritional Information & Benefits
Per ghost (based on 24 cookies): approximately 45 calories, 0g fat, 10g carbohydrates, 1g protein, 9g sugar. These are a lighter treat compared to most Halloween candies and cookies.
Health Benefits: Egg whites are a great source of protein without the fat and cholesterol of the yolk. They’re also rich in selenium and B vitamins. The cream of tartar adds potassium. And since these are mostly sugar and egg whites, they’re naturally gluten-free and dairy-free.
Dietary Considerations: This recipe is naturally gluten-free, dairy-free, and nut-free (as long as your chocolate chips are nut-free). For a lower-sugar option, you can use a sugar substitute like monk fruit sweetener, though the texture will be slightly different. Always check your chocolate chip labels for potential allergens.
Personal Wellness Perspective: I love that these cookies feel indulgent without being heavy. They’re perfect for parties where you want something sweet but don’t want to overdo it. Plus, the process of making them is almost meditative — there’s something calming about watching the egg whites transform into glossy peaks.
Conclusion
These spooky ghost meringue cookies are everything you want in a Halloween treat: adorable, delicious, and surprisingly simple to make. They’re the kind of recipe that becomes a tradition — I’ve already had friends text me asking for the link after seeing photos from last year’s party.
Don’t be afraid to make them your own. Add different colors, try new flavors, or experiment with different face designs. The best part about homemade treats is that they’re uniquely yours. And honestly, even if your first batch looks a little wonky, they’ll still taste amazing. That’s the beauty of meringue.
I’d love to hear how your ghost meringues turn out. Drop a comment below with your favorite variation, or tag me in your photos on social media. Happy Halloween, and happy baking! May your ghosts be spooky, your peaks be stiff, and your kitchen smell like vanilla and memories.
Frequently Asked Questions
Can I make these ghost meringue cookies ahead of time?
Absolutely! These cookies actually keep beautifully. Store them in an airtight container at room temperature for up to 2 weeks. They’re perfect for making a week before your Halloween party.
Why did my meringue collapse?
This usually happens for one of three reasons: a bit of yolk got into the whites, the bowl wasn’t completely clean and grease-free, or the weather was too humid. Make sure everything is spotless and pick a dry day to bake.
Can I use a hand mixer instead of a stand mixer?
Yes! I actually prefer a hand mixer for this recipe because it gives me more control. It might take a minute or two longer to reach stiff peaks, but it works perfectly.
How do I know when the meringue is done whipping?
You’re looking for stiff, glossy peaks that hold their shape when you lift the beater. The mixture should feel smooth between your fingers, not gritty. My favorite test is turning the bowl upside down — if the meringue stays put, you’re good.
Can I freeze these ghost meringue cookies?
Yes! Freeze them in a single layer on a baking sheet, then transfer to a freezer-safe container. They’ll keep for up to 3 months. Let them come to room temperature before serving to avoid condensation.
Pin This Recipe!
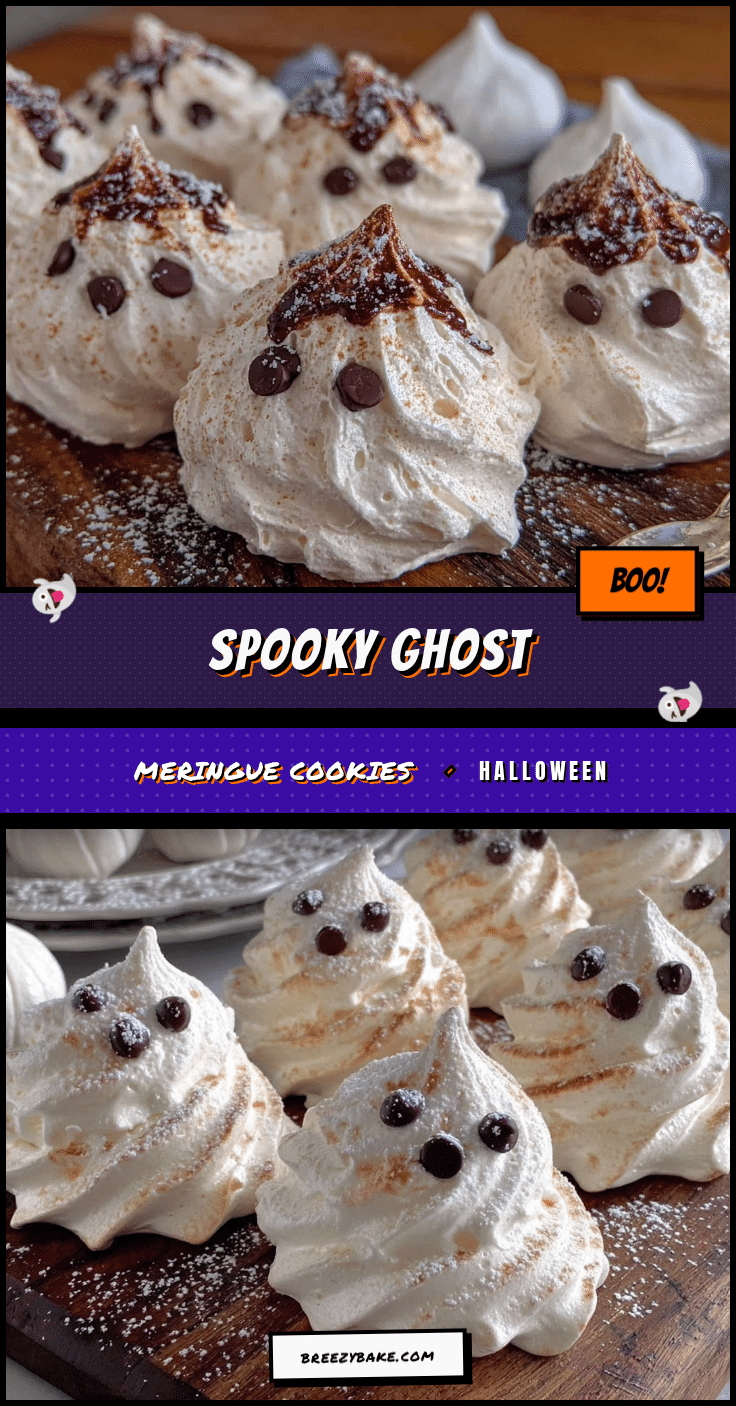
Best Easy Ghost Meringue Cookies for Halloween Parties
These spooky ghost meringue cookies are light, crunchy, and melt in your mouth. Made with just four simple ingredients, they’re the perfect show-stopping treat for any Halloween party.
- Prep Time: 20 minutes
- Cook Time: 60 minutes
- Total Time: 1 hour 20 minutes
- Yield: 24 servings 1x
- Category: Dessert
- Cuisine: American
Ingredients
- 4 large egg whites, at room temperature
- 1 cup (200g) granulated sugar
- 1 teaspoon vanilla extract
- ¼ teaspoon cream of tartar
- ¼ cup mini chocolate chips
Instructions
- Preheat your oven to 200°F (93°C). Line a large baking sheet with parchment paper and set aside.
- Separate your eggs carefully. Crack each egg and let the white fall into a small bowl, then transfer it to your large mixing bowl.
- Add the cream of tartar. Sprinkle it over the egg whites.
- Start whipping on medium speed. Beat the egg whites until they become frothy and start to hold soft peaks — about 2-3 minutes.
- Gradually add the sugar. With the mixer running, add the sugar one tablespoon at a time, about 30 seconds between each addition.
- Add the vanilla. Once all the sugar is incorporated, add the vanilla extract and continue beating.
- Whip to stiff peaks. Increase the speed to high and beat for 5-7 minutes. You’re looking for glossy, stiff peaks that hold their shape when you lift the beater.
- Test for doneness: turn the bowl upside down. If the meringue stays put, you’re good.
- Transfer to piping bag. Spoon the meringue into your piping bag fitted with a large round tip.
- Pipe the ghosts. Hold the bag perpendicular to the baking sheet, about ½ inch above the surface. Pipe a round blob for the body, then pull straight up to create a little peak on top. Leave about 1 inch between each ghost.
- Add the eyes. While the meringue is still wet, gently press two mini chocolate chips into each ghost for eyes.
- Bake for 60 minutes. Do not open the oven door during baking.
- Turn off the oven and let them rest for another 30-60 minutes.
- Cool completely. Remove from the oven and let them cool on the baking sheet for 10 minutes, then transfer to a wire rack to cool completely.
Notes
Make sure your bowl and whisk attachment are completely clean and grease-free. Humidity is the enemy of meringue; avoid making these on a rainy day. For perfectly uniform ghosts, use a cookie scoop to portion the meringue before piping. Store in an airtight container at room temperature for up to 2 weeks.
Nutrition
- Serving Size: 1 ghost
- Calories: 45
- Sugar: 9
- Sodium: 15
- Carbohydrates: 10
- Protein: 1
Keywords: ghost meringue cookies, Halloween cookies, meringue cookies, easy Halloween treats, spooky cookies


