There used to be a little diner off Route 9 in upstate New York called The Copper Kettle that made the most incredible green bean casserole. It wasn’t the soupy, sad version you’d find at potlucks—this one had a deep, savory creaminess and a pile of those crispy fried onions that practically audibly crunched. When they closed in 2018, I genuinely mourned that side dish. After twelve tries—some too watery, one where I burned the onions into bitter little nubs—I finally cracked it.
Honestly, this version is better than my memory of the original. And that’s saying something because I have a very specific food memory. I remember sitting at that sticky laminate counter, watching the cook spoon the casserole onto my plate, and thinking, “This is the best thing I’ve ever eaten.” Let me tell you, chasing that feeling in my own kitchen became a bit of an obsession. I mean, who spends a year perfecting green beans? Apparently, I do.
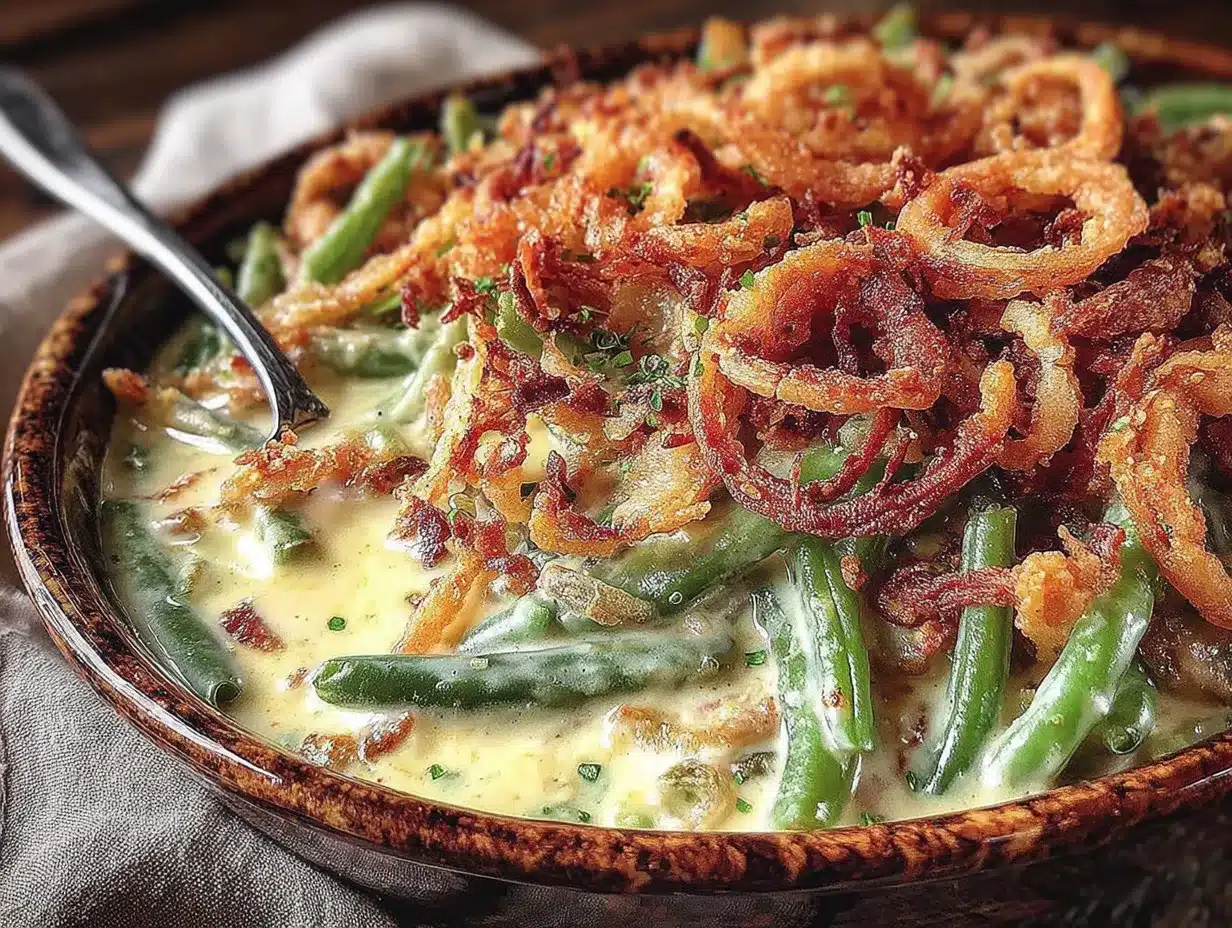
You know that feeling when you take a bite of something and it just hits every single note? The beans are tender but never mushy, the sauce is rich and coats every strand, and those onions on top—they stay shatteringly crisp. This is the dish that disappears first at every gathering. People hover near the serving dish. I’ve seen forks reach across the table for seconds before the turkey has even been carved. Maybe you’ve been there, watching your carefully planned spread get ignored while the green bean casserole vanishes. That’s the kind of recipe this is.
This is the one that stays with you because it feels like both a memory and something new. It’s familiar but better. It’s the side dish that steals the show, and honestly, that’s exactly what a host wants.
Why You’ll Love This Recipe
This isn’t just another green bean casserole. This is the one that makes people ask for the recipe before they’ve finished their plate. Let me break down why this version stands head and shoulders above the rest.
- Perfect for Hosting: This dish scales beautifully for a crowd. You can easily double or triple it without losing any of that magic. Prep it the night before, and just pop it in the oven when guests arrive. No stress, all impress.
- Simple Ingredients, Incredible Results: You won’t find any canned soup or frozen beans here—but you also won’t spend hours hunting for obscure ingredients. Everything is available at your regular grocery store. I promise.
- Make-Ahead Magic: This is a host’s best friend. Assemble the casserole completely, cover it, and refrigerate for up to 24 hours. Just add the crispy onions right before baking. It’s a game-changer for holiday hosting.
- Crowd-Pleaser Guaranteed: I’ve served this at Thanksgiving, Christmas, Easter, and random Tuesday potlucks. It gets devoured every single time. Kids love it, adults fight over the crispy edges, and even picky eaters go back for seconds.
- That Texture Combination: The creamy, savory sauce clinging to tender-crisp green beans, topped with a blanket of crunchy, golden fried onions. It’s textural perfection. Every bite has that satisfying crunch followed by creamy goodness.
What makes this recipe different from the rest? It’s the technique. Most versions use canned cream of mushroom soup, which gives that gloppy, one-note flavor. I use a from-scratch mushroom cream sauce that’s deeply savory, with a touch of nutmeg and white pepper that you can’t quite identify but you’ll miss if it’s not there. The fresh green beans are blanched to that perfect tender-crisp stage—never mushy. And the fried onions? We’re making them from scratch, which sounds fancy but is honestly easier than you think.
This is comfort food reimagined—richer, more flavorful, but with the same soul-soothing satisfaction that makes green bean casserole a holiday staple. It’s the dish that makes you close your eyes after the first bite and forget about the chaos of hosting for just a second.
What Ingredients You Will Need
Before we dive in, let me walk you through what you’ll need. I’ve tested these ingredients multiple times, and trust me, each one plays a crucial role. Don’t skip the good stuff.
For the Green Beans
- 2 pounds fresh green beans, ends trimmed (look for bright, crisp beans without any brown spots—I prefer Haricots Verts for their tenderness, but regular green beans work perfectly too)
- 1 tablespoon kosher salt (for the blanching water—this is non-negotiable, it seasons the beans from the inside out)
- Ice water bath (a large bowl filled with ice and cold water to stop the cooking)
For the Mushroom Cream Sauce
- 4 tablespoons unsalted butter (I use Kerrygold for its rich flavor—the quality really matters here)
- 12 ounces cremini mushrooms, thinly sliced (baby bellas work great; white mushrooms are fine too, but cremini give deeper flavor)
- 1 medium yellow onion, finely diced (about 1 cup)
- 4 cloves garlic, minced (fresh only—don’t even think about the jarred stuff)
- 1/4 cup all-purpose flour (this thickens the sauce; for gluten-free, use a 1:1 gluten-free flour blend)
- 2 cups whole milk (warm—cold milk can make the sauce lumpy; 2% works but the sauce won’t be as luscious)
- 1 cup heavy cream (this is what makes it feel luxurious; you can substitute half-and-half in a pinch)
- 1 teaspoon kosher salt, plus more to taste
- 1/2 teaspoon white pepper (black pepper works, but white pepper gives that subtle, slightly floral heat without the black specks)
- 1/4 teaspoon freshly grated nutmeg (please grate it fresh—it makes a world of difference)
- 1/2 cup grated Parmesan cheese (optional, but I add it for extra savory depth—use real Parmigiano-Reggiano, not the green can)
For the Crispy Fried Onions
- 2 large yellow onions, thinly sliced into rings (about 3 cups; Vidalia or sweet onions work beautifully too)
- 1 cup buttermilk (for soaking the onions—this tenderizes them and helps the coating stick; no buttermilk? Add 1 tablespoon lemon juice to regular milk and let it sit 5 minutes)
- 1 1/2 cups all-purpose flour
- 1 teaspoon kosher salt
- 1/2 teaspoon black pepper
- 1/2 teaspoon paprika (smoked paprika adds a lovely depth, but sweet works too)
- 1/4 teaspoon cayenne pepper (optional—gives a tiny kick that nobody will identify but everyone will love)
- 4 cups vegetable oil, for frying (use a neutral oil with a high smoke point like canola or peanut oil)
For the Topping
- 1 cup grated Gruyère cheese (optional but incredible—it melts beautifully and adds a nutty, slightly sweet flavor that pairs perfectly with the mushrooms)
- Additional crispy fried onions for garnish (because you can never have too many)
Ingredient Selection Tips: For the freshest green beans, look for beans that snap when you bend them. They should be bright green and firm. Avoid any that are limp, brown, or have visible blemishes. For the mushrooms, I prefer cremini over white button mushrooms because they have a deeper, earthier flavor that stands up to the creamy sauce. If you can find them, mix in a few shiitake mushrooms for an even more complex flavor profile.
Substitution Guidance: Need this to be dairy-free? Use a high-quality plant-based butter, unsweetened oat milk (it’s the creamiest), and a dairy-free cream alternative. The sauce won’t be quite as luxurious, but it’s still delicious. For a gluten-free version, use a 1:1 gluten-free flour blend for both the sauce and the onion coating. And if you’re short on time, you can use high-quality canned fried onions for the topping—just look for ones that are crispy and not stale.
Equipment Needed
You don’t need a professional kitchen to pull this off, but having the right tools makes everything smoother. Here’s what you’ll need.
- Large pot (at least 6 quarts for blanching the green beans)
- Large bowl for the ice water bath
- Large skillet or Dutch oven (I use my 5.5-quart Le Creuset for the sauce—it holds heat evenly and prevents scorching)
- 9×13-inch baking dish (a 3-quart dish works perfectly; glass or ceramic is best for even heating)
- Deep, heavy-bottomed pot for frying the onions (a 4-quart pot works well; a Dutch oven is ideal)
- Wire rack with a baking sheet underneath (for draining the fried onions—paper towels work but the rack keeps them crispier)
- Slotted spoon or spider strainer (for removing the onions from the hot oil)
- Chef’s knife and cutting board
- Measuring cups and spoons
- Whisk (for the sauce—a flat whisk works best to reach the corners of the pan)
- Instant-read thermometer (optional but recommended for the frying oil—I’ve ruined batches by guessing)
Budget-Friendly Alternatives: Don’t have a Dutch oven? A deep, heavy-bottomed stockpot works fine. No wire rack? Lay the fried onions on paper towels, but change them after the first batch to prevent sogginess. And if you don’t have a 9×13-inch dish, you can use two 8×8-inch dishes or even a large cast-iron skillet for a rustic look.
Maintenance Tip: After frying, let the oil cool completely, then strain it through a fine-mesh sieve into a jar. You can reuse it for another batch of fried onions or for savory cooking. Just store it in a cool, dark place and use it within a month.
Preparation Method
Alright, let’s get cooking. I’ve broken this down into clear steps so you can follow along without any confusion. Take your time—rushing leads to mistakes, and we want this to be perfect.
Step 1: Blanch the Green Beans
Fill your large pot with water and add 1 tablespoon of kosher salt. Bring it to a rolling boil over high heat. While that’s heating up, prepare your ice water bath—fill a large bowl with ice and cold water.
Add the trimmed green beans to the boiling water. Set a timer for exactly 3 minutes. Yes, three minutes. You want them tender but still bright green and snappy. After 3 minutes, immediately drain the beans and plunge them into the ice water bath. Let them sit for 2-3 minutes until completely cool. Drain well and pat dry with a clean kitchen towel. Set aside.
Pro tip: Don’t skip the ice bath. If you don’t stop the cooking, the beans will continue to soften and you’ll end up with mushy casserole. I learned this the hard way after making a sad, limp batch for a Friendsgiving.
Step 2: Make the Crispy Fried Onions
While the beans are cooling, let’s get those onions started. In a medium bowl, soak the thinly sliced onions in the buttermilk for at least 10 minutes. This tenderizes them and helps the flour coating stick.
In a separate shallow dish, whisk together the flour, salt, black pepper, paprika, and cayenne if using. Heat the vegetable oil in your deep pot to 350°F (175°C). Use your instant-read thermometer to check—if you don’t have one, drop a tiny piece of onion in; it should sizzle immediately.
Working in batches, lift the onions from the buttermilk, letting the excess drip off. Toss them in the seasoned flour, shaking off any excess. Carefully add them to the hot oil—don’t overcrowd the pot. Fry for 2-3 minutes, stirring occasionally, until deep golden brown and crispy. Use your slotted spoon to transfer them to the wire rack. Season immediately with a pinch of salt while they’re still hot. Repeat with the remaining onions.
Honest moment: My first attempt at these was a disaster. I crowded the pan, the temperature dropped, and I ended up with greasy, soggy onion clumps. Don’t be like me. Fry in small batches and let the oil come back to temperature between batches.
Step 3: Make the Mushroom Cream Sauce
In your large skillet or Dutch oven, melt the butter over medium heat. Add the sliced mushrooms and cook, stirring occasionally, for 6-8 minutes until they release their liquid and start to brown. You want them deeply golden, not just sweated. Add the diced onion and cook for another 4-5 minutes until softened and translucent. Add the minced garlic and cook for 30 seconds until fragrant.
Sprinkle the flour over the mushroom mixture and stir constantly for 1-2 minutes. This cooks out the raw flour taste. Slowly pour in the warm milk while whisking continuously to prevent lumps. Add the heavy cream, salt, white pepper, and nutmeg. Bring to a gentle simmer, then reduce the heat to low. Cook for 5-7 minutes, stirring occasionally, until the sauce has thickened enough to coat the back of a spoon.
If using Parmesan, stir it in now until melted. Taste and adjust seasoning—you might want a little more salt or a pinch more nutmeg. Remember, the flavors will mellow slightly as the casserole bakes, so season a touch more than you think you need.
Step 4: Assemble the Casserole
Preheat your oven to 375°F (190°C). Lightly grease your 9×13-inch baking dish with butter or nonstick spray.
Spread the blanched green beans evenly in the prepared dish. Pour the mushroom cream sauce over the top, using a spatula to make sure every bean is coated. Gently fold the beans and sauce together until well combined.
If using Gruyère, sprinkle it evenly over the top. Then scatter about two-thirds of your crispy fried onions over the casserole. Reserve the rest for the final garnish after baking.
Make-Ahead Note: At this point, you can cover the dish with foil and refrigerate for up to 24 hours. When you’re ready to bake, just add the onions and proceed. You may need to add 5-10 minutes to the baking time if it’s going in cold.
Step 5: Bake and Serve
Bake the casserole uncovered for 20-25 minutes, until the sauce is bubbly and the onions on top are deep golden brown. If you refrigerated it, bake for 25-30 minutes. The edges should be bubbling and slightly caramelized—that’s the good stuff.
Remove from the oven and let it rest for 5 minutes. This allows the sauce to set slightly so it doesn’t run all over the plate. Sprinkle the remaining crispy fried onions on top for that final crunch. Serve immediately while it’s hot and glorious.
Sensory cues: You’ll know it’s ready when you see the sauce bubbling around the edges, the onions are a deep amber color, and the kitchen smells like a combination of roasted mushrooms, caramelized onions, and pure comfort. Your guests will start wandering into the kitchen asking what’s for dinner.
Cooking Tips & Techniques
After making this casserole more times than I can count, I’ve collected some hard-won wisdom. Here are the tips that make the difference between good and unforgettable.
Don’t Overcook the Green Beans: The biggest mistake people make is over-blanching the beans. Three minutes is plenty. They’ll continue to cook in the oven, so you want them to start at that perfect tender-crisp stage. Mushy green beans are the enemy of a great casserole.
Use Warm Liquid for the Sauce: This is a game-changer. When you add cold milk to a hot roux, you’re asking for lumps. Warm the milk and cream in the microwave for 30-45 seconds before adding them. Your sauce will be silky smooth every time. I learned this after a particularly lumpy batch that I had to strain through a sieve.
Double-Fry the Onions for Extra Crunch: If you really want to impress, try double-frying your onions. Fry them once at 325°F for 2 minutes until just lightly golden. Let them cool completely, then fry again at 350°F for 1-2 minutes until deep golden. This creates an extra-crispy coating that stays crunchy even after being on top of the casserole.
Mind Your Timing: Here’s my hosting strategy: blanch the beans and make the sauce the day before. Assemble everything except the onions. On the day of your gathering, fry the onions, top the casserole, and bake. This way, you’re not juggling a dozen tasks while guests are arriving. The onions stay perfectly crispy because they’re freshly made.
Don’t Skip the Nutmeg: I know it seems like a small detail, but freshly grated nutmeg is the secret weapon in this sauce. It adds a warmth and depth that complements the mushrooms beautifully. Just a quarter teaspoon—don’t overdo it. It should whisper, not shout.
Toasted Breadcrumb Addition: For an extra layer of texture, mix 1/2 cup of panko breadcrumbs with 2 tablespoons of melted butter and sprinkle it over the onions before baking. It adds a buttery crunch that takes the casserole to another level. I do this when I’m really trying to show off.
Variations & Adaptations
One of the best things about this recipe is how adaptable it is. Here are some variations I’ve tried and loved.
Classic Holiday Version
Add 1 cup of cooked, crumbled bacon or pancetta to the sauce along with the mushrooms. The smoky, salty flavor pairs beautifully with the creamy sauce and green beans. I made this for Thanksgiving last year and it was the first dish to disappear.
Southern-Style Version
Swap the Parmesan in the sauce for sharp cheddar and add a pinch of smoked paprika to the onion coating. Top the casserole with extra cheddar before adding the onions. It gives the whole dish a smoky, cheesy depth that feels like Sunday supper.
Vegan Version
Use a high-quality plant-based butter and unsweetened oat milk for the sauce. Replace the heavy cream with full-fat coconut cream (the part that solidifies on top of the can). For the onions, use a flax egg soak instead of buttermilk—mix 1 tablespoon ground flaxseed with 3 tablespoons water and let it sit for 5 minutes. The coconut cream adds a subtle richness that works surprisingly well.
Keto/Low-Carb Version
Replace the flour in the sauce with 2 tablespoons of cream cheese and 1 tablespoon of xanthan gum. For the onions, use crushed pork rinds mixed with almond flour for the coating. It’s not the same as the original, but it scratches the itch when you’re watching your carbs.
Spicy Southwest Version
Add 1 can of drained roasted green chiles and 1 teaspoon of cumin to the sauce. Top with a mixture of fried onions and crushed tortilla chips. Serve with a dollop of sour cream and fresh cilantro. This is a fun twist that works great for casual gatherings.
Serving & Storage Suggestions
This casserole is a showstopper, so let’s make sure you serve it right.
Serving Temperature: Serve this casserole hot, straight from the oven. Let it rest for 5 minutes after baking so the sauce sets slightly, but don’t let it sit too long—the onions will start to soften. If you’re serving a crowd, keep it warm in a 200°F oven with the foil loosely tented over the top.
Presentation Tips for Hosting: For a beautiful presentation, transfer the casserole to a warmed serving dish and garnish with fresh thyme sprigs or chopped fresh parsley. The green herbs against the golden onions look stunning. If you’re feeling extra fancy, drizzle a little truffle oil over the top just before serving—it adds an earthy luxury that will have everyone asking what your secret is.
What to Serve Alongside: This casserole is a natural partner for roasted turkey, glazed ham, or a standing rib roast. It also pairs beautifully with mashed potatoes, roasted root vegetables, and a crisp green salad with a tangy vinaigrette to cut through the richness. For a vegetarian spread, serve it alongside a hearty mushroom wellington or a lentil loaf.
Storage Instructions: Leftovers can be stored in an airtight container in the refrigerator for up to 4 days. The onions will soften, but the flavor will still be fantastic. To reheat, place individual portions in a 350°F oven for 10-15 minutes, or microwave for 1-2 minutes. The oven method is better for maintaining texture.
Freezing Instructions: You can freeze the assembled casserole (without the onions) for up to 3 months. Wrap the dish tightly in plastic wrap, then foil. When you’re ready to bake, thaw overnight in the refrigerator, add the onions, and bake as directed. The sauce might be slightly thinner after freezing, so add an extra 5 minutes to the baking time.
Flavor Development: Here’s a secret—this casserole actually tastes better the next day. The flavors meld together overnight, and the sauce becomes even more savory and complex. If you can resist eating it all, save some for leftovers. It’s the best part of hosting.
Nutritional Information & Benefits
Let’s be real—this is a decadent side dish, not a health food. But that doesn’t mean it’s without its merits.
Estimated Nutritional Values (per serving, based on 8 servings):
- Calories: 385
- Total Fat: 24g
- Saturated Fat: 12g
- Cholesterol: 55mg
- Sodium: 680mg
- Total Carbohydrates: 32g
- Dietary Fiber: 4g
- Sugars: 8g
- Protein: 12g
Health Benefits: Green beans are a great source of vitamins A, C, and K, as well as fiber and folate. Mushrooms provide B vitamins, selenium, and immune-supporting compounds. And yes, onions have antioxidants and anti-inflammatory properties. So while this isn’t a light dish, it’s not empty calories either.
Dietary Considerations: This recipe contains dairy and gluten. For dairy-free, use the substitutions mentioned in the variations section. For gluten-free, use a 1:1 gluten-free flour blend. The casserole is naturally nut-free and egg-free (unless you use the egg wash for the onions).
Personal Wellness Perspective: I believe in balance. This casserole is a celebration dish—it’s meant for holidays, gatherings, and special occasions. I don’t worry about the calories when I’m sharing food with people I love. That said, I do use fresh ingredients and make it from scratch, which means I know exactly what’s going into it. No preservatives, no weird additives, just real food made with care.
Conclusion
This green bean casserole is more than just a side dish. It’s the one that brings people together, that sparks conversations, that makes everyone reach for seconds. It’s the recipe I turn to when I want to impress without stress, when I want to feed people something that feels like a hug on a plate.
After all those attempts at recreating The Copper Kettle’s version, I ended up with something that’s uniquely mine—and now it can be yours too. The creamy sauce, the tender beans, those impossibly crispy onions on top. It’s everything a great casserole should be.
I’d love to hear how this turns out for you. Did you add your own twist? Did your guests fight over the last bite? Drop a comment below and let me know. And if you’re looking for more crowd-pleasing sides for your next gathering, check out our garlic mashed potatoes or honey glazed carrots—they complete the perfect holiday spread.
Now go ahead and make this. Your dinner table is waiting for something special.
Frequently Asked Questions
Can I use frozen green beans instead of fresh?
You can, but I don’t recommend it. Frozen green beans have a much higher water content, which can make your casserole watery. If you’re in a pinch, thaw them completely and pat them very dry before using. The texture won’t be as good, but it’ll still be tasty.
How do I keep the fried onions crispy?
The key is to add them at the right time. If you’re making the casserole ahead, wait to add the onions until just before baking. And after frying, let them cool completely on a wire rack before storing in an airtight container at room temperature. They’ll stay crispy for up to 2 days.
Can I make this casserole gluten-free?
Absolutely. Use a 1:1 gluten-free flour blend for both the sauce and the onion coating. I’ve tested this with Bob’s Red Mill 1:1 Baking Flour and it works perfectly. Just make sure your gluten-free flour blend contains xanthan gum for the right texture.
How far ahead can I assemble this casserole?
You can assemble the entire casserole (without the fried onions) up to 24 hours in advance. Cover it tightly with foil and refrigerate. When you’re ready to bake, add the onions and bake for 25-30 minutes instead of 20-25. The sauce might need a little extra time to heat through.
Can I use canned fried onions instead of making them from scratch?
You can, and I won’t judge. The store-bought ones are perfectly fine in a pinch. But I promise you, the homemade version is on another level. They’re crunchier, more flavorful, and you can season them exactly how you like. If you’re short on time, look for the extra-crispy brand—they hold up better in the oven.
Pin This Recipe!
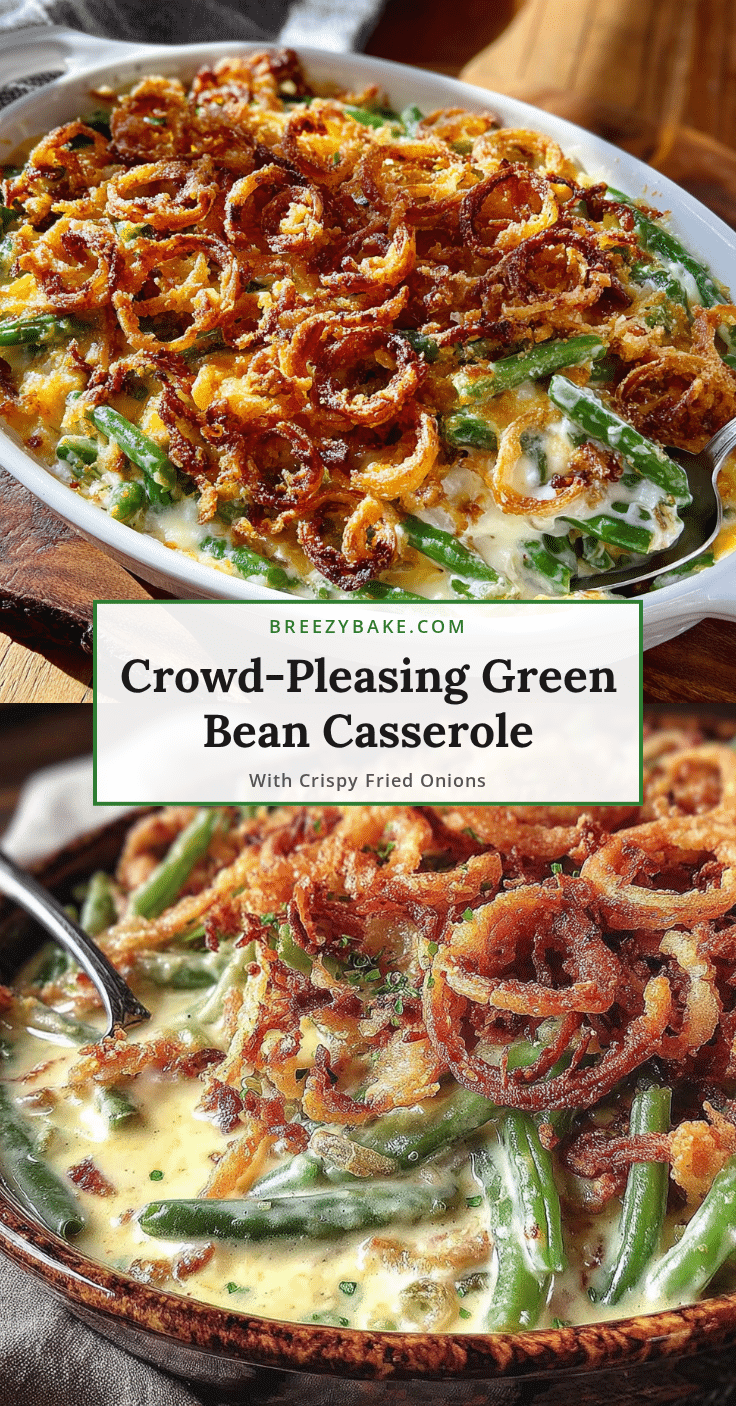
Best Easy Green Bean Casserole with Crispy Fried Onions

This green bean casserole features tender-crisp green beans in a rich, from-scratch mushroom cream sauce, topped with shatteringly crispy homemade fried onions. It’s the side dish that steals the show at any gathering.
- Prep Time: 30 minutes
- Cook Time: 35 minutes
- Total Time: 1 hour 5 minutes
- Yield: 8 servings 1x
- Category: Side Dish
- Cuisine: American
Ingredients
- 2 pounds fresh green beans, ends trimmed
- 1 tablespoon kosher salt (for blanching water)
- Ice water bath
- 4 tablespoons unsalted butter
- 12 ounces cremini mushrooms, thinly sliced
- 1 medium yellow onion, finely diced (about 1 cup)
- 4 cloves garlic, minced
- 1/4 cup all-purpose flour
- 2 cups whole milk, warm
- 1 cup heavy cream
- 1 teaspoon kosher salt, plus more to taste
- 1/2 teaspoon white pepper
- 1/4 teaspoon freshly grated nutmeg
- 1/2 cup grated Parmesan cheese (optional)
- 2 large yellow onions, thinly sliced into rings (about 3 cups)
- 1 cup buttermilk
- 1 1/2 cups all-purpose flour
- 1 teaspoon kosher salt
- 1/2 teaspoon black pepper
- 1/2 teaspoon paprika
- 1/4 teaspoon cayenne pepper (optional)
- 4 cups vegetable oil, for frying
- 1 cup grated Gruyère cheese (optional)
Instructions
- Fill a large pot with water and add 1 tablespoon kosher salt. Bring to a rolling boil. Prepare an ice water bath in a large bowl.
- Add trimmed green beans to boiling water and blanch for exactly 3 minutes. Drain immediately and plunge into ice water bath for 2-3 minutes until completely cool. Drain well and pat dry. Set aside.
- In a medium bowl, soak thinly sliced onions in buttermilk for at least 10 minutes.
- In a shallow dish, whisk together 1 1/2 cups flour, 1 teaspoon salt, 1/2 teaspoon black pepper, paprika, and cayenne (if using).
- Heat vegetable oil in a deep pot to 350°F (175°C). Working in batches, lift onions from buttermilk, letting excess drip off. Toss in seasoned flour, shaking off excess. Fry for 2-3 minutes until deep golden brown. Transfer to a wire rack and season immediately with salt. Repeat with remaining onions.
- In a large skillet or Dutch oven, melt butter over medium heat. Add sliced mushrooms and cook 6-8 minutes until golden brown. Add diced onion and cook 4-5 minutes until softened. Add garlic and cook 30 seconds until fragrant.
- Sprinkle 1/4 cup flour over mushroom mixture and stir constantly for 1-2 minutes. Slowly pour in warm milk while whisking continuously. Add heavy cream, 1 teaspoon salt, white pepper, and nutmeg. Bring to a gentle simmer, then reduce heat to low. Cook 5-7 minutes, stirring occasionally, until sauce thickens. Stir in Parmesan if using. Adjust seasoning.
- Preheat oven to 375°F (190°C). Lightly grease a 9×13-inch baking dish.
- Spread blanched green beans evenly in the dish. Pour mushroom cream sauce over the top and gently fold to coat all beans.
- If using Gruyère, sprinkle evenly over the top. Scatter about two-thirds of the crispy fried onions over the casserole.
- Bake uncovered for 20-25 minutes (25-30 minutes if refrigerated) until sauce is bubbly and onions are deep golden brown.
- Remove from oven and let rest for 5 minutes. Sprinkle remaining crispy fried onions on top. Serve immediately.
Notes
For make-ahead: Assemble casserole (without onions) up to 24 hours in advance, cover and refrigerate. Add onions just before baking. For extra crispy onions, double-fry: first at 325°F for 2 minutes, cool, then fry again at 350°F for 1-2 minutes. Don’t skip the nutmeg—it adds subtle depth. Leftovers keep refrigerated for up to 4 days.
Nutrition
- Serving Size: 1 serving
- Calories: 385
- Sugar: 8
- Sodium: 680
- Fat: 24
- Saturated Fat: 12
- Carbohydrates: 32
- Fiber: 4
- Protein: 12
Keywords: green bean casserole, crispy fried onions, holiday side dish, Thanksgiving, Christmas, from scratch, mushroom cream sauce


