My neighbor, a quiet woman named Carol who grew tomatoes that looked like they belonged in a magazine, handed me a box of Roma tomatoes one August afternoon. “I can’t keep up,” she said, and I thought she meant the harvest. What I didn’t know was that she meant the peeling. For years, I had watched my grandmother blanch, shock, and peel tomatoes for her sauce, a ritual I respected but secretly dreaded. The steam, the slippery skins, the way the tomatoes turned to mush before they even hit the pot. I told Carol I’d make sauce, but I’d be doing it my way. She looked at me like I’d just said I was going to bake a cake without flour. Honestly, I thought the no-peel method sounded like a shortcut that would leave you with stringy, bitter bits floating in your sauce. I was wrong. Dead wrong.
That first batch changed things. I simmered those unpeeled tomatoes with garlic and basil, ran them through a food mill, and ended up with a sauce so velvety and rich I couldn’t believe it came from the same fruit. Carol came over to taste it, and she didn’t say a word. She just took another spoonful. Then another. That was the moment I knew I’d never go back to peeling. This no-peel method isn’t a compromise—it’s a revelation. It saves you time, saves your sanity, and delivers a sauce that tastes like you spent all day in the kitchen, even if you spent most of it reading a book while the pot bubbled away. And honestly, isn’t that the kind of cooking we all need more of?
Why You’ll Love This Recipe
Let me tell you why this no-peel tomato sauce has become my go-to for canning season. I’ve tested this method over three summers now, tweaking the simmer time and the garlic ratio until it felt just right. It’s the kind of recipe that makes you wonder why anyone bothers with the old way.
- No Peeling Required: This is the whole point. You skip the blanching, the ice bath, and the fiddly skin removal. The food mill does all the work for you.
- Simple Ingredients: You only need tomatoes, garlic, onions, olive oil, basil, salt, and a little lemon juice for safe canning. No fancy store-bought purees or mystery additives.
- Perfect for Batch Cooking: When tomato season hits, you’ll be ready. This recipe scales up beautifully, so you can put up a dozen jars in one afternoon.
- Rich, Authentic Flavor: The skins actually add depth during the simmering process. You get a more complex, earthy tomato taste that you just don’t get from peeled sauce.
- Freezer-Friendly: If canning feels intimidating, you can freeze this sauce in bags or containers for easy winter meals.
What makes this recipe different from the rest? It’s the texture. Because you’re not breaking down the tomatoes by peeling them first, the sauce holds onto a certain rustic body that reminds me of the crushed tomatoes my Italian aunt used to make. It’s not watery. It’s not thin. It’s got that cling-to-the-pasta quality that makes you close your eyes after the first bite. Plus, using the food mill means you get a smooth sauce without any of the stringy bits you might worry about. This is comfort food reimagined—simpler, faster, but with the same soul-soothing satisfaction of a sauce that simmered all day.
What Ingredients You Will Need
This recipe uses simple, honest ingredients to deliver bold flavor without the fuss. Most of these are pantry staples during summer, and you can easily adjust quantities based on what your garden or farmer’s market gives you.
- Roma Tomatoes (10 pounds, or about 4.5 kg): These are your best bet for canning because they have fewer seeds and a meatier texture. You can use standard round tomatoes, but you’ll need to simmer them a bit longer to get the right thickness. Look for tomatoes that are fully ripe but still firm—no squishy spots.
- Yellow Onions (2 large, diced): They add a subtle sweetness that balances the acidity of the tomatoes. I prefer yellow onions over white or red for this recipe because they mellow out beautifully during the long simmer.
- Garlic Cloves (6 to 8, smashed): Fresh garlic is non-negotiable here. The pre-minced stuff in jars just doesn’t give you the same punch. I smash the cloves with the side of my knife to release their oils before adding them to the pot.
- Extra Virgin Olive Oil (¼ cup, or 60 ml): Use a good-quality oil here—it’s the backbone of the flavor. I like California Olive Ranch for a balanced, not-too-peppery taste.
- Fresh Basil Leaves (1 cup, packed): You can use dried basil in a pinch, but fresh basil stirred in at the end gives the sauce that bright, summery aroma. I grow my own on the windowsill just for this recipe.
- Kosher Salt (2 teaspoons, or to taste): Start with less and adjust at the end. Different tomatoes have different natural salt levels.
- Lemon Juice (2 tablespoons, or 30 ml, per quart jar): This is essential for safe water bath canning. It raises the acidity enough to prevent botulism. Use bottled lemon juice for consistent acidity levels—fresh lemon juice can vary.
- Optional: Red Pepper Flakes (½ teaspoon): If you like a little heat, add this with the onions. It won’t make the sauce spicy, just more interesting.
I recommend using Muir Glen canned tomatoes if you can’t get fresh ones, though fresh is always better for canning. For the olive oil, don’t use the expensive finishing stuff—a good cooking olive oil is perfect. If you’re watching your salt intake, you can reduce it, but remember that salt is also a preservative in canned goods.
Equipment Needed
You don’t need a professional kitchen to make this happen, but a few key tools will make your life a lot easier.
- Large Stockpot (at least 8 quarts, or 8 liters): You need a big pot to hold all those tomatoes and give them room to bubble without spilling over. My enameled cast iron Dutch oven works beautifully for this.
- Food Mill: This is the hero of the no-peel method. It separates the skins and seeds from the pulp, giving you a smooth sauce. I use a Oxo Good Grips food mill, and it’s worth every penny. If you don’t have one, you can use a fine-mesh sieve and a wooden spoon, but it’ll take longer.
- Canning Jars (6 to 8 quart-sized jars): Make sure they’re free of cracks and nicks. I reuse old spaghetti sauce jars sometimes, but proper Mason jars seal better.
- Water Bath Canner (or a large pot with a rack): You need something deep enough to cover the jars by at least an inch of water. A lobster pot works in a pinch.
- Jar Lifter: Trust me, you don’t want to try fishing hot jars out of boiling water with tongs. This tool is cheap and saves your fingers.
- Canning Funnel: This makes filling jars without spilling a breeze. It’s a small investment that pays off in less mess.
- Wooden Spoon: Use a long-handled one for stirring the sauce. Metal can react with the acid in tomatoes.
If you don’t have a food mill, you can try an immersion blender after the sauce has cooked, but you’ll still have seeds and some skin pieces. The food mill really is the way to go for that silky texture. I bought mine secondhand at a garage sale, and it’s still going strong after five years.
Preparation Method
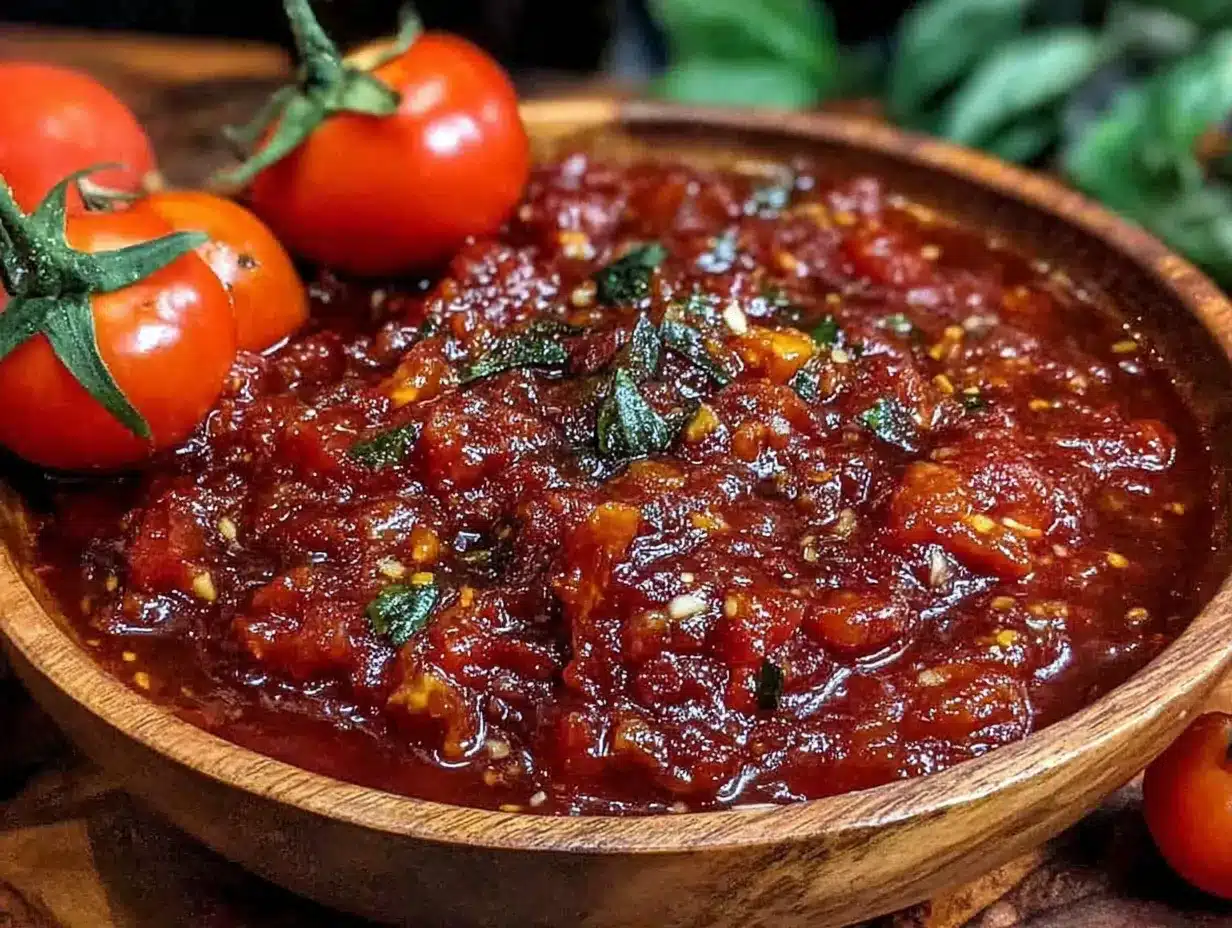
This method is straightforward, but the timing matters. Plan for about 2 to 3 hours from start to finish, including the canning process.
- Wash and Prep the Tomatoes: Rinse your tomatoes under cool water and remove any stems or bruised spots. Cut them into quarters—no need to be precise. You’re going to cook them down anyway.
- Start the Aromatics: In your large stockpot, heat the olive oil over medium heat. Add the diced onions and cook until they’re soft and translucent, about 5 to 7 minutes. Add the smashed garlic and cook for another minute until it smells fragrant. Don’t let the garlic brown—it’ll turn bitter.
- Add the Tomatoes: Dump all those quartered tomatoes into the pot. They’ll look like a mountain at first, but don’t worry. Stir everything together and bring it to a boil over high heat. Once it’s boiling, reduce the heat to medium-low and let it simmer. You’ll notice the tomatoes start breaking down after about 10 minutes.
- Simmer the Sauce: Let the sauce cook uncovered for 45 minutes to 1 hour. Stir it occasionally to prevent sticking on the bottom. You want the tomatoes to be completely soft and falling apart. The mixture will reduce by about a third. If you’re using a different type of tomato, you might need a little longer—just look for that mushy, broken-down consistency.
- Run Through the Food Mill: Set up your food mill over a large bowl or another pot. Ladle the cooked tomato mixture into the mill in batches. Turn the crank or press the handle, and watch the smooth sauce come out while the skins and seeds get pushed out the other end. This is the most satisfying part of the whole process, honestly. It takes about 10 minutes for a full batch.
- Return to the Pot: Pour the strained sauce back into your stockpot. Add the fresh basil leaves, salt, and red pepper flakes if you’re using them. Stir well and bring it to a gentle simmer. Taste it now and adjust the salt. Remember, the flavor will concentrate a bit more during canning.
- Prep Your Jars: While the sauce simmers, wash your jars, lids, and bands in hot soapy water. Rinse them well. Place the jars in your water bath canner or a large pot, cover them with water, and bring to a boil. Keep them hot until you’re ready to fill them. The lids should be simmered in a small pan of hot water (not boiling) to soften the seals.
- Add Lemon Juice: Just before filling each jar, add 2 tablespoons of bottled lemon juice to each quart jar. This step is non-negotiable for safe canning. The lemon juice raises the acidity to a safe level.
- Fill the Jars: Using your canning funnel, ladle the hot sauce into the hot jars, leaving ½ inch of headspace at the top. Run a clean, non-metallic spatula or a chopstick around the inside of each jar to release any air bubbles. Wipe the rims clean with a damp paper towel—any residue can prevent a proper seal.
- Seal and Process: Place the lids on the jars and screw on the bands until they’re fingertip-tight (don’t crank them down). Lower the jars into the boiling water bath canner. Make sure they’re covered by at least 1 inch of water. Bring the water back to a full boil, then start your timer. Process quart jars for 40 minutes, or 35 minutes for pint jars. Adjust for altitude if you’re above 1,000 feet.
- Cool and Check Seals: After the processing time, turn off the heat and let the jars sit in the water for 5 minutes. Then use your jar lifter to remove them and place them on a clean kitchen towel. Let them cool completely, undisturbed, for 12 to 24 hours. You’ll hear the satisfying “pop” as each jar seals. Press the center of each lid—if it doesn’t flex up and down, it’s sealed.
One thing I learned the hard way: don’t tighten the bands after processing. You might break the seal. Just leave them alone and let them do their thing.
Cooking Tips & Techniques
I’ve made plenty of mistakes with tomato sauce over the years, so let me save you some trouble.
The biggest mistake people make is rushing the simmer. I once tried to cut the cooking time in half because I was impatient, and the sauce ended up watery and thin. Those skins need time to release all their flavor and pectin into the sauce. Give it the full hour. Your patience will be rewarded with a sauce that coats the back of a spoon.
Another thing: don’t skip the food mill. I know it’s tempting to just use an immersion blender and call it a day, but the mill removes the seeds and skins completely. Blending them in just makes the sauce grainy and slightly bitter. I learned this the first year I made no-peel sauce, and I ended up straining it through a sieve anyway. Just use the mill from the start.
For timing, I like to start the onions and garlic while I’m still cutting the tomatoes. That way, the aromatics are ready by the time I’ve finished prepping. Multitasking in 10-minute bursts works well here. While the sauce simmers, I wash the jars and set up the canner. By the time the sauce is ready, everything else is ready too.
If you’re worried about the sauce being too acidic, add a pinch of sugar along with the salt. I don’t always do this, but if your tomatoes are particularly tart, a little sugar rounds out the flavor without making it sweet.
Variations & Adaptations
This recipe is a great base for all kinds of tweaks. Here are a few I’ve tried and loved.
- Herb-Infused Sauce: Add a few sprigs of fresh oregano, thyme, or rosemary to the pot while it simmers. Remove them before running the sauce through the food mill. It gives the sauce a more complex, almost Italian-import flavor.
- Roasted Tomato Version: For a deeper, smokier taste, roast the quartered tomatoes on a baking sheet at 400°F (200°C) for 30 minutes before adding them to the pot. This caramelizes the natural sugars and adds a whole new layer of flavor. Just be sure to scrape up any browned bits from the pan and add them to the pot.
- Spicy Arrabbiata Style: Double or triple the red pepper flakes, and add a chopped fresh chili like a serrano or jalapeño with the onions. This makes a fantastic sauce for pasta or as a pizza base.
- Low-Sodium Option: Skip the added salt entirely, or use just a pinch. The lemon juice and herbs will provide plenty of flavor. You can always add salt when you open the jar later.
- Vegetable-Packed Sauce: Sauté diced carrots, celery, and bell peppers with the onions for a more robust sauce. It’s a great way to sneak extra veggies into your family’s meals, and the carrots add natural sweetness.
I once tried a version with smoked paprika and a splash of balsamic vinegar. It was incredible on a crispy loaded bacon mac and cheese casserole I was experimenting with. The smoky sweetness cut through the richness perfectly.
Serving & Storage Suggestions
This sauce is incredibly versatile. Serve it hot over your favorite pasta—spaghetti, penne, or rigatoni all work beautifully. I love it on homemade pizza, stirred into soups, or used as a dipping sauce for crusty bread. It’s also fantastic in dishes like healthy chicken veggie skillet wraps where a little tomato flavor goes a long way.
For storage, canned jars will keep in a cool, dark pantry for up to 18 months. Once opened, refrigerate the sauce and use it within 5 to 7 days. If you prefer freezing, let the sauce cool completely, then pour it into freezer-safe bags or containers. Lay the bags flat in the freezer to save space. Frozen sauce is good for up to 6 months.
To reheat, simply thaw the frozen sauce in the refrigerator overnight, then warm it in a saucepan over medium-low heat. If it seems too thick, stir in a splash of pasta water or broth. The flavors actually deepen after a few weeks in the jar, so don’t be surprised if your sauce tastes even better in December than it did in August.
I like to serve this sauce with a sprinkle of fresh Parmesan and a side of garlic bread. It’s also wonderful over roasted vegetables or stirred into a healthy low-cal ranch chicken skillet for a quick weeknight dinner.
Nutritional Information & Benefits
This homemade tomato sauce is not just delicious—it’s good for you. Here’s an approximate breakdown per ½-cup serving (about 120 ml):
- Calories: 60
- Fat: 3.5 g (mostly from olive oil)
- Sodium: 200 mg (varies with added salt)
- Carbohydrates: 7 g
- Fiber: 2 g
- Sugar: 4 g (natural from tomatoes)
- Protein: 1.5 g
- Vitamin C: 15% of the Daily Value
- Vitamin A: 10% of the Daily Value
- Potassium: 8% of the Daily Value
Tomatoes are rich in lycopene, a powerful antioxidant that’s been linked to heart health and reduced inflammation. Cooking the tomatoes actually increases the lycopene content, making this sauce even more beneficial. The olive oil adds healthy monounsaturated fats, which help your body absorb the lycopene better. This sauce is naturally gluten-free, dairy-free, and vegan, so it fits a wide range of dietary needs. Just keep in mind that the lemon juice adds a small amount of acidity, which is fine for most people but something to note if you have acid reflux.
From a wellness perspective, I love that this sauce lets me control exactly what goes into it. No added sugars, no preservatives, no mysterious thickeners. It’s just real food, put up at its peak.
Conclusion
This no-peel tomato sauce has honestly become a late-summer tradition in my kitchen. It’s the recipe that made me look forward to tomato season instead of dreading the mountain of produce on my counter. The method is forgiving, the results are reliable, and the taste is something you just can’t get from a can from the store.
I hope you give it a try, whether you’re a seasoned canner or someone who’s never preserved anything before. Start with a small batch if you’re nervous—even just a few jars will give you a taste of summer in the middle of winter. And don’t be afraid to make it your own. Add more garlic, throw in some herbs, or keep it simple. That’s the beauty of a good base recipe.
If you make this sauce, I’d love to hear about it. Drop a comment below and tell me how you served it, or share a photo of your jars. And if you have a variation that worked particularly well, please share it—I’m always looking for new ideas. Happy canning, friends. You’ve got this.
Frequently Asked Questions
Can I use this recipe for canning if I don’t have a food mill?
Yes, but it’s more work. After simmering the tomatoes, press them through a fine-mesh sieve with a wooden spoon or rubber spatula. You’ll get a smooth sauce, but it takes longer and your arm might get tired. A food mill is really the better tool for the job.
Do I have to use bottled lemon juice, or can I use fresh lemons?
For safe canning, use bottled lemon juice. It has a standardized acidity level (usually 5% acidity), while fresh lemons can vary. Using bottled juice ensures your sauce is acidic enough to prevent bacterial growth. If you’re freezing the sauce, you can use fresh lemon juice without worry.
Why did my jars not seal properly?
Several things can cause a failed seal. The most common is a dirty jar rim—even a tiny bit of sauce can prevent the lid from adhering. Also, make sure your lids are new (don’t reuse them) and that they’re simmered in hot water before use. Finally, check that your jars aren’t overfilled; you need that ½ inch of headspace for the vacuum to form.
Can I double this recipe?
Absolutely. This recipe scales up easily. Just use a larger pot and adjust the simmering time slightly—a bigger batch might need an extra 15 to 20 minutes to reduce properly. Make sure you have enough jars and canning space before you start.
How long will the canned sauce last?
Properly canned and sealed jars will last 12 to 18 months in a cool, dark pantry. After that, the quality starts to decline, but the sauce will still be safe to eat as long as the seal is intact. Always check for signs of spoilage before using: bulging lids, off smells, or mold on the surface. When in doubt, throw it out.
Pin This Recipe!
Best Easy No-Peel Tomato Sauce for Canning

This no-peel tomato sauce skips the tedious blanching and peeling, using a food mill to create a velvety, rich sauce perfect for canning. It’s a time-saving revelation that delivers authentic, complex flavor without the fuss.
- Prep Time: 30 minutes
- Cook Time: 1 hour 30 minutes
- Total Time: 2 hours 30 minutes
- Yield: 6 to 8 quart jars 1x
- Category: Sauce
- Cuisine: Italian-American
Ingredients
- 10 pounds Roma tomatoes (about 4.5 kg)
- 2 large yellow onions, diced
- 6 to 8 garlic cloves, smashed
- ¼ cup extra virgin olive oil (60 ml)
- 1 cup fresh basil leaves, packed
- 2 teaspoons kosher salt (or to taste)
- 2 tablespoons bottled lemon juice per quart jar (30 ml)
- ½ teaspoon red pepper flakes (optional)
Instructions
- Wash and prep the tomatoes: rinse under cool water, remove stems and bruised spots, cut into quarters.
- In a large stockpot, heat olive oil over medium heat. Add diced onions and cook until soft and translucent, about 5 to 7 minutes. Add smashed garlic and cook for another minute until fragrant, without browning.
- Add quartered tomatoes to the pot. Stir and bring to a boil over high heat, then reduce heat to medium-low and simmer. Tomatoes will start breaking down after about 10 minutes.
- Simmer the sauce uncovered for 45 minutes to 1 hour, stirring occasionally, until tomatoes are completely soft and the mixture has reduced by about a third.
- Set up a food mill over a large bowl or pot. Ladle the cooked tomato mixture into the mill in batches and process until smooth, discarding skins and seeds.
- Return the strained sauce to the stockpot. Add fresh basil, salt, and red pepper flakes (if using). Stir and bring to a gentle simmer. Taste and adjust salt.
- While sauce simmers, wash jars, lids, and bands in hot soapy water. Rinse well. Place jars in a water bath canner or large pot, cover with water, and bring to a boil. Keep hot. Simmer lids in hot water (not boiling) to soften seals.
- Just before filling each jar, add 2 tablespoons of bottled lemon juice to each quart jar.
- Using a canning funnel, ladle hot sauce into hot jars, leaving ½ inch headspace. Run a non-metallic spatula or chopstick around the inside to release air bubbles. Wipe rims clean with a damp paper towel.
- Place lids on jars and screw on bands until fingertip-tight. Lower jars into boiling water bath canner, ensuring they are covered by at least 1 inch of water. Bring water back to a full boil, then process quart jars for 40 minutes (35 minutes for pint jars). Adjust for altitude if above 1,000 feet.
- After processing, turn off heat and let jars sit in water for 5 minutes. Remove with a jar lifter and place on a clean kitchen towel. Cool completely, undisturbed, for 12 to 24 hours. Check seals by pressing the center of each lid—if it doesn’t flex, it’s sealed.
Notes
Don’t skip the food mill—it removes skins and seeds for a smooth sauce. Use bottled lemon juice for consistent acidity in canning. Let jars cool undisturbed for 12-24 hours to ensure proper seals. For freezing, cool sauce completely and store in freezer-safe bags or containers for up to 6 months.
Nutrition
- Serving Size: ½ cup (120 ml)
- Calories: 60
- Sugar: 4
- Sodium: 200
- Fat: 3.5
- Saturated Fat: 0.5
- Carbohydrates: 7
- Fiber: 2
- Protein: 1.5
Keywords: no-peel tomato sauce, canning tomato sauce, easy tomato sauce, homemade tomato sauce, Roma tomato sauce, food mill tomato sauce, water bath canning


