I was sitting in the waiting room of my mechanic’s shop—a place I’d rather avoid, honestly—when the receptionist, a woman named Delores who looked like she hadn’t smiled since 1995, suddenly started talking about cheesecake. Not just any cheesecake. She was describing this pumpkin cheesecake with a gingersnap crust that her grandmother used to make for every Thanksgiving. I wasn’t expecting baking advice from a woman whose job it was to hand me keys to a loaner car, but there I was, listening to her explain exactly how to make it while someone’s check-engine light blinked on a monitor behind her. She had this way of talking about it—like the recipe was a secret she’d been holding onto for decades.
I scribbled her directions on the back of an oil change receipt. The measurements were vague (“a good handful of gingersnaps,” “enough cream cheese to make it feel right”), and I honestly thought I’d never get it to work. But that first bite—the spicy crunch of the crust against the silky, spiced pumpkin filling—made me forget all about my car troubles. Delores was right. This wasn’t just a dessert. It was a conversation starter, a holiday tradition waiting to happen, and honestly? The easiest cheesecake I’ve ever made. No water bath. No cracking stress. Just pure, creamy, fall-on-a-plate goodness.
Maybe you’ve been there—staring down a complicated dessert recipe with a list of steps longer than your grocery receipt. This isn’t that. This is the kind of recipe you make on a Tuesday night because you need a little comfort, or for a holiday dinner where you want to look like you spent hours in the kitchen. Spoiler: you won’t. And that’s the beauty of it.
Why You’ll Love This Recipe
Let me tell you, I’ve tested a lot of pumpkin cheesecakes. Some were too dense, some were too sweet, and a few just fell apart like a bad relationship. This one? It’s the Goldilocks of cheesecakes. It’s rich but not heavy, creamy but firm enough to slice cleanly, and the gingersnap crust adds this warm, molasses-y kick that plain graham crackers just can’t touch. I’ve made it for potlucks, Friendsgivings, and even a random Wednesday dinner, and it’s always the first dish to disappear.
- Quick & Easy: Comes together in about 15 minutes of active prep time. The oven does the rest. Perfect for busy weeknights or last-minute holiday cravings.
- Simple Ingredients: No fancy grocery trips needed. You likely have most of these pantry staples—gingersnaps, cream cheese, pumpkin puree—already in your kitchen.
- Perfect for Fall Gatherings: Great for Thanksgiving, Halloween parties, or cozy dinners when you want something that tastes impressive without the stress.
- Crowd-Pleaser: I’ve served this to kids who “don’t like pumpkin” and adults who claim they’re “not dessert people.” It gets rave reviews every single time.
- Unbelievably Delicious: The texture is next-level—silky, smooth, with that slight tang from the cream cheese balanced perfectly by the warm spices and sweet pumpkin.
What makes this recipe different from the rest? It’s the crust. The gingersnap crust isn’t just a supporting player—it’s a star. It adds a spicy, crunchy contrast to the creamy filling that makes every bite interesting. And the filling itself? It’s foolproof. No water bath, no worrying about cracks. I’ve streamlined the technique so you get a perfect cheesecake every time, even if you’ve never made one before. This recipe isn’t just good—it’s the kind that makes you close your eyes after the first bite.
What Ingredients You Will Need
This recipe uses simple, wholesome ingredients to deliver bold flavor and satisfying texture without the fuss. Most of these are pantry staples, especially if you do any fall baking. Here’s what you’ll need, broken down by component so you can shop and prep with ease.
For the Gingersnap Crust
- Gingersnap cookies – 2 cups (about 200g), finely crushed. I recommend Nabisco or Anna’s Ginger Thins for a consistent crunch. You want a fine, sandy texture, so a food processor works best.
- Unsalted butter – 5 tablespoons (70g), melted. Use salted butter if that’s all you have, just skip the added salt in the crust.
- Granulated sugar – 2 tablespoons (25g). Just a little to help the crust hold together and add sweetness.
- Pinch of salt – Only if using unsalted butter.
For the Pumpkin Cheesecake Filling
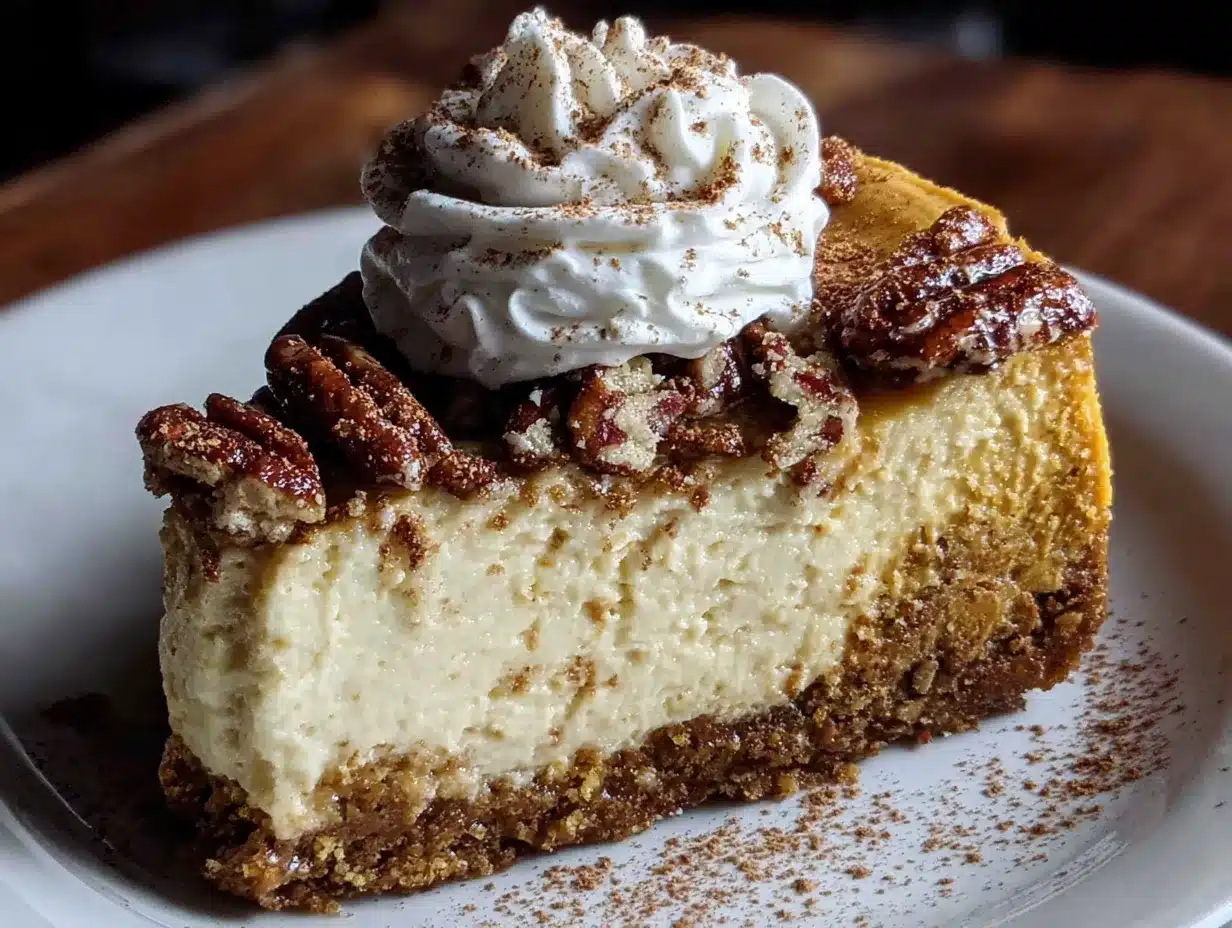
- Cream cheese – 24 ounces (680g), softened to room temperature. Full-fat is best for that rich, creamy texture. I’ve used Philadelphia brand for years and it never fails.
- Granulated sugar – 1 cup (200g). Just enough to sweeten without overpowering the pumpkin.
- Pumpkin puree – 1 can (15 ounces or 425g). Not pumpkin pie filling—just plain pumpkin puree. Libby’s is my go-to for consistent results.
- Sour cream – 1/2 cup (120g). Adds tanginess and helps keep the cheesecake silky. Full-fat is preferred, but low-fat works in a pinch.
- Large eggs – 3, at room temperature. This helps everything emulsify smoothly.
- Vanilla extract – 1 teaspoon. Pure vanilla extract is worth it here.
- Pumpkin pie spice – 2 teaspoons. You can use store-bought or make your own with cinnamon, nutmeg, ginger, and cloves.
- Cinnamon – 1 teaspoon. Adds warmth and depth.
- Salt – 1/4 teaspoon. Balances the sweetness.
For the Optional Topping
- Heavy cream – 1 cup (240ml). For homemade whipped cream.
- Powdered sugar – 2 tablespoons (15g). To sweeten the cream.
- Vanilla extract – 1/2 teaspoon.
- Crushed gingersnaps or caramel sauce – For garnish, if you’re feeling fancy.
Equipment Needed
You don’t need a professional bakery setup for this one. Here’s what I use every time I make this cheesecake:
- 9-inch springform pan – This is non-negotiable. The removable sides make it easy to release the cheesecake without destroying it. I’ve had my Wilton pan for years and it still works perfectly.
- Food processor – For crushing the gingersnaps into a fine crumb. If you don’t have one, put the cookies in a zip-top bag and crush them with a rolling pin. It’s a little arm workout, but it works.
- Electric mixer – A hand mixer or stand mixer works. You need to beat the cream cheese until it’s smooth, and doing that by hand is a recipe for sore arms.
- Large mixing bowls – One for the crust, one for the filling.
- Measuring cups and spoons – Accuracy matters, especially for the spices.
- Rubber spatula – For scraping down the bowl and smoothing the filling.
- Roasting pan or large baking dish – For the water bath. Even though I said no water bath, I actually use a modified version—I place a pan of hot water on the lower oven rack to create steam. It prevents cracking without the hassle.
Preparation Method
Alright, let’s get to it. I’ve broken this down into clear steps so you can follow along without any guesswork. Trust me, if I can make this while half-watching a football game, you can too.
Step 1: Prep the Crust
Preheat your oven to 350°F (175°C). In your food processor, pulse the gingersnap cookies until they’re fine crumbs. You should have about 2 cups. Pour them into a medium bowl, then add the melted butter, sugar, and a pinch of salt if you’re using unsalted butter. Stir with a fork until the mixture looks like wet sand and holds together when you squeeze it. Press this mixture firmly into the bottom of your springform pan. I use the bottom of a measuring cup to really pack it down. Bake for 10 minutes, then set it aside to cool. Your kitchen is going to smell amazing right about now.
Step 2: Make the Filling
In a large bowl, beat the softened cream cheese with your electric mixer on medium speed until it’s smooth and creamy—about 2 minutes. Scrape down the sides of the bowl with your spatula. Add the sugar and beat for another minute until it’s light and fluffy. Now add the pumpkin puree, sour cream, and vanilla extract. Beat on low until everything is combined. Don’t overmix—you don’t want to incorporate too much air, which can cause cracks later.
Add the eggs one at a time, beating on low after each addition just until the yolk disappears. Finally, sprinkle in the pumpkin pie spice, cinnamon, and salt. Give it one last gentle mix until everything is uniform. The batter should be smooth, thick, and a gorgeous orange color. Take a moment to appreciate it—you’ve done the hard part.
Step 3: Assemble and Bake
Wrap the outside of your springform pan with a double layer of aluminum foil. This prevents any water from seeping in during baking. Pour the filling over the cooled crust and spread it into an even layer with your spatula. Give the pan a gentle tap on the counter to release any air bubbles.
Place the springform pan in a large roasting pan. Pour hot water into the roasting pan until it reaches about halfway up the sides of the springform pan. This creates a steamy environment that helps the cheesecake bake evenly. Bake at 350°F (175°C) for 50-60 minutes. The edges should be set and slightly puffed, but the center should still jiggle slightly when you shake the pan. That’s normal—it will firm up as it cools.
Step 4: Cool and Chill
Turn off the oven and crack the door open. Let the cheesecake sit in the oven for one hour. This gradual cooling prevents the top from cracking. After an hour, remove the cheesecake from the water bath and let it cool completely on a wire rack—about another hour. Then cover it loosely with plastic wrap and refrigerate for at least 4 hours, but overnight is best. I know the wait is torture, but it’s worth it. The flavors meld together and the texture becomes perfectly creamy.
Cooking Tips & Techniques
I’ve made this cheesecake more times than I can count, and I’ve learned a few things the hard way. Here are my best tips to save you some trouble.
Room temperature ingredients are key. Cold cream cheese will give you a lumpy batter. Let it sit on the counter for about 30 minutes before you start. Same goes for the eggs. It makes a huge difference in the smoothness of your filling.
Don’t overmix the batter. I know it’s tempting to keep beating until it’s perfectly smooth, but too much air creates bubbles that can cause cracks. Mix just until everything is combined. A few small lumps are fine—they’ll bake out.
The water bath trick. I mentioned this earlier, but it’s worth repeating. You don’t have to submerge the pan in water. Just place a pan of hot water on the lower rack of your oven. The steam keeps the cheesecake moist and prevents cracking. I learned this after my first cheesecake looked like the Grand Canyon.
Let it cool slowly. That one-hour rest in the turned-off oven is your best friend. Sudden temperature changes are what cause those ugly cracks. Be patient—your cheesecake will thank you.
Slice with a hot knife. For clean slices, run your knife under hot water, wipe it dry, then slice. Repeat between each cut. It makes the slices look bakery-perfect.
Variations & Adaptations
One of the things I love about this recipe is how flexible it is. Here are a few ways to make it your own.
Gluten-Free Version: Use gluten-free gingersnap cookies. There are some great brands out there now, and the crust works exactly the same way. No other changes needed.
Dairy-Free Adaptation: Substitute the cream cheese with a high-quality dairy-free version like Kite Hill or Miyoko’s. Use coconut cream instead of sour cream, and a plant-based butter for the crust. The texture will be slightly different, but still delicious.
Spice It Up: If you like a little heat, add 1/4 teaspoon of cayenne pepper to the filling. It sounds weird, but it pairs beautifully with the pumpkin and ginger. I tried this on a whim last year and now it’s my secret weapon.
No-Bake Version: For a no-bake option, skip the eggs and add 1/4 cup of cornstarch to the filling. Pour it into the pre-baked crust and refrigerate for at least 6 hours. It won’t be as firm as the baked version, but it’s perfect for hot days when you don’t want to turn on the oven.
Mini Cheesecakes: Use a muffin tin with liners instead of a springform pan. Press the crust into the bottom of each liner, fill with batter, and bake for 18-20 minutes. Perfect for parties or portion control.
Serving & Storage Suggestions
This cheesecake is wonderful on its own, but a few extras can make it even better. Serve it chilled, straight from the fridge. The texture is at its best when it’s cold. Top each slice with a dollop of fresh whipped cream, a drizzle of caramel sauce, and a sprinkle of crushed gingersnaps for crunch. It also pairs beautifully with a cup of hot coffee or a glass of cold milk.
For storage, keep the cheesecake covered in the refrigerator for up to 5 days. The flavors actually deepen after a day or two, so leftovers are a treat. To freeze, wrap the whole cheesecake (or individual slices) tightly in plastic wrap, then in aluminum foil. Freeze for up to 3 months. Thaw overnight in the refrigerator before serving. I’ve done this for holiday prep, and it works like a charm.
One note: the crust can get a little soft after a few days. If that bothers you, toast some extra gingersnap crumbs and sprinkle them on top just before serving. It brings back that initial crunch.
Nutritional Information & Benefits
Let’s be real—this is a dessert, not a health food. But it does have some redeeming qualities. Pumpkin is packed with vitamin A, fiber, and antioxidants. It’s great for your immune system and eye health. The cream cheese provides calcium and protein, while the eggs add a dose of B vitamins. The gingersnaps offer a little iron and magnesium from the molasses.
Here’s an approximate breakdown per slice (based on 12 servings):
- Calories: 380
- Fat: 24g
- Saturated Fat: 14g
- Carbohydrates: 36g
- Sugar: 24g
- Protein: 7g
- Fiber: 2g
For a lighter option, you can use reduced-fat cream cheese and skip the whipped cream topping. But honestly? I say enjoy the real thing in moderation. Life’s too short for sad desserts.
Conclusion
I still think about Delores every time I make this cheesecake. That unexpected moment in the mechanic’s shop turned into one of my most-loved recipes, and I hope it becomes one of yours too. This pumpkin cheesecake with gingersnap crust is everything I want in a fall dessert—easy, impressive, and deeply satisfying. It’s the kind of recipe you’ll pull out for every holiday gathering, and the kind your friends will ask for again and again.
Don’t be afraid to make it your own. Add extra spice, swap the crust, or top it with whatever you have on hand. The best recipes are the ones that evolve with you. So go ahead, preheat that oven, and give it a try. I’d love to hear how it turns out—drop a comment below and let me know if you added your own twist. Happy baking!
Frequently Asked Questions
Can I use fresh pumpkin instead of canned?
Yes, but you’ll need to roast and puree the pumpkin first, then drain off any excess liquid. Canned pumpkin is more consistent and has less water content, which is why I prefer it for cheesecake. If you use fresh, be prepared for a slightly softer texture.
Why did my cheesecake crack?
Cracks usually happen from overmixing the batter, sudden temperature changes, or overbaking. Using the water bath method and letting the cheesecake cool slowly in the oven should prevent most cracks. If it does crack, don’t worry—cover it with whipped cream and no one will know.
Can I make this cheesecake ahead of time?
Absolutely! In fact, it’s better made a day ahead. The flavors meld together and the texture becomes creamier. Just keep it covered in the refrigerator and add the toppings just before serving.
How do I know when the cheesecake is done?
The edges should be set and slightly puffed, but the center should still jiggle when you gently shake the pan. It will firm up as it cools. If the center is completely firm, it’s overbaked. Trust the jiggle!
Can I use a different crust?
Sure! Graham crackers, shortbread cookies, or even vanilla wafers work well. Just keep the butter and sugar ratios the same. The gingersnap crust is my favorite for the spicy kick, but feel free to experiment.
Pin This Recipe!
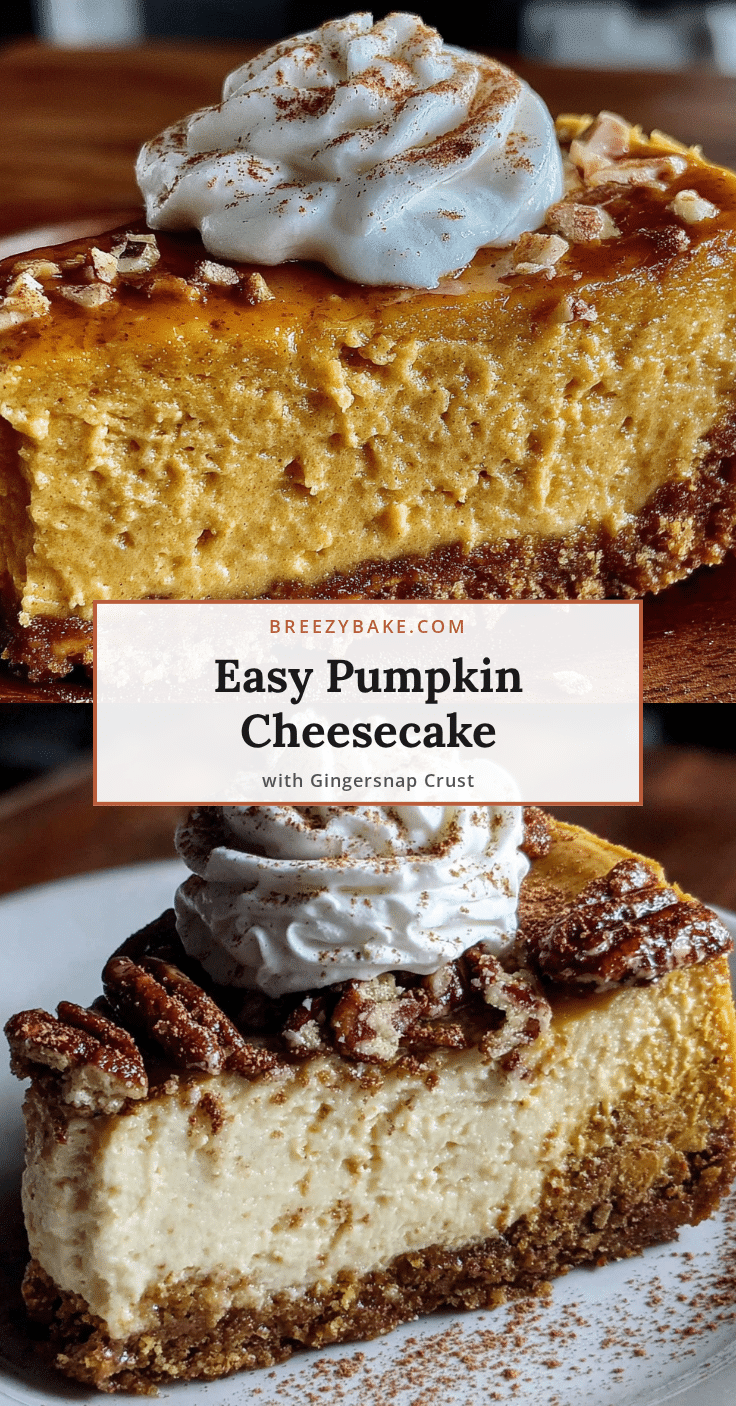
Best Easy Pumpkin Cheesecake with Gingersnap Crust
This pumpkin cheesecake with a gingersnap crust is rich, creamy, and foolproof—no water bath needed. It’s the perfect easy dessert for fall gatherings, with a spicy crunch that makes every bite unforgettable.
- Prep Time: 15 minutes
- Cook Time: 55 minutes
- Total Time: 6 hours 10 minutes (includes cooling and chilling)
- Yield: 12 servings 1x
- Category: Dessert
- Cuisine: American
Ingredients
- 2 cups (200g) finely crushed gingersnap cookies
- 5 tablespoons (70g) unsalted butter, melted
- 2 tablespoons (25g) granulated sugar
- Pinch of salt (if using unsalted butter)
- 24 ounces (680g) cream cheese, softened to room temperature
- 1 cup (200g) granulated sugar
- 1 can (15 ounces or 425g) pumpkin puree (not pumpkin pie filling)
- 1/2 cup (120g) sour cream
- 3 large eggs, at room temperature
- 1 teaspoon vanilla extract
- 2 teaspoons pumpkin pie spice
- 1 teaspoon cinnamon
- 1/4 teaspoon salt
- 1 cup (240ml) heavy cream (for optional topping)
- 2 tablespoons (15g) powdered sugar (for optional topping)
- 1/2 teaspoon vanilla extract (for optional topping)
- Crushed gingersnaps or caramel sauce for garnish (optional)
Instructions
- Preheat oven to 350°F (175°C). In a food processor, pulse gingersnap cookies into fine crumbs. Combine crumbs with melted butter, 2 tablespoons sugar, and a pinch of salt (if using unsalted butter). Press firmly into the bottom of a 9-inch springform pan. Bake for 10 minutes, then set aside to cool.
- In a large bowl, beat softened cream cheese with an electric mixer on medium speed until smooth and creamy, about 2 minutes. Scrape down sides. Add 1 cup sugar and beat for another minute until light and fluffy.
- Add pumpkin puree, sour cream, and vanilla extract. Beat on low until combined. Add eggs one at a time, beating on low after each addition just until yolk disappears. Sprinkle in pumpkin pie spice, cinnamon, and salt; mix gently until uniform.
- Wrap the outside of the springform pan with a double layer of aluminum foil. Pour filling over cooled crust and spread evenly. Tap pan gently on counter to release air bubbles.
- Place springform pan in a large roasting pan. Pour hot water into roasting pan until it reaches halfway up the sides of the springform pan. Bake at 350°F (175°C) for 50-60 minutes, until edges are set and center jiggles slightly.
- Turn off oven and crack door open. Let cheesecake sit in oven for 1 hour. Remove from water bath and cool completely on a wire rack (about 1 hour). Cover loosely with plastic wrap and refrigerate for at least 4 hours, preferably overnight.
- For optional topping: Beat heavy cream, powdered sugar, and vanilla extract until stiff peaks form. Serve cheesecake chilled, topped with whipped cream and crushed gingersnaps or caramel sauce if desired.
Notes
Room temperature ingredients are key for a smooth batter. Don’t overmix to avoid cracks. Use a water bath (pan of hot water on lower rack) to prevent cracking. Let cheesecake cool slowly in the oven for best results. For clean slices, use a hot knife. Can be made ahead and stored in refrigerator for up to 5 days or frozen for up to 3 months.
Nutrition
- Serving Size: 1 slice
- Calories: 380
- Sugar: 24
- Fat: 24
- Saturated Fat: 14
- Carbohydrates: 36
- Fiber: 2
- Protein: 7
Keywords: pumpkin cheesecake, gingersnap crust, easy cheesecake, fall dessert, Thanksgiving dessert, no water bath cheesecake


