My husband had claimed to hate cheesecake for eleven years. Eleven years! He’d make a face at the bakery counter, wave it away at holiday parties, and once even told my mother-in-law that he’d “rather have a slice of pie, thanks” when she’d spent all afternoon on a cherry-topped one. I just shrugged and made other desserts. It wasn’t a fight worth having.
Then last Christmas Eve, I pulled this eggnog cheesecake with gingersnap crust out of the fridge, still wobbling slightly in the center, and set it on the counter to come to room temperature. I turned around to grab the whipped cream, and when I turned back, there he was. Standing over the cake plate with a fork in his hand, a guilty look on his face, and a big bite missing from the edge. “I was just… testing it,” he mumbled, crumbs on his chin. “To make sure it was safe.”
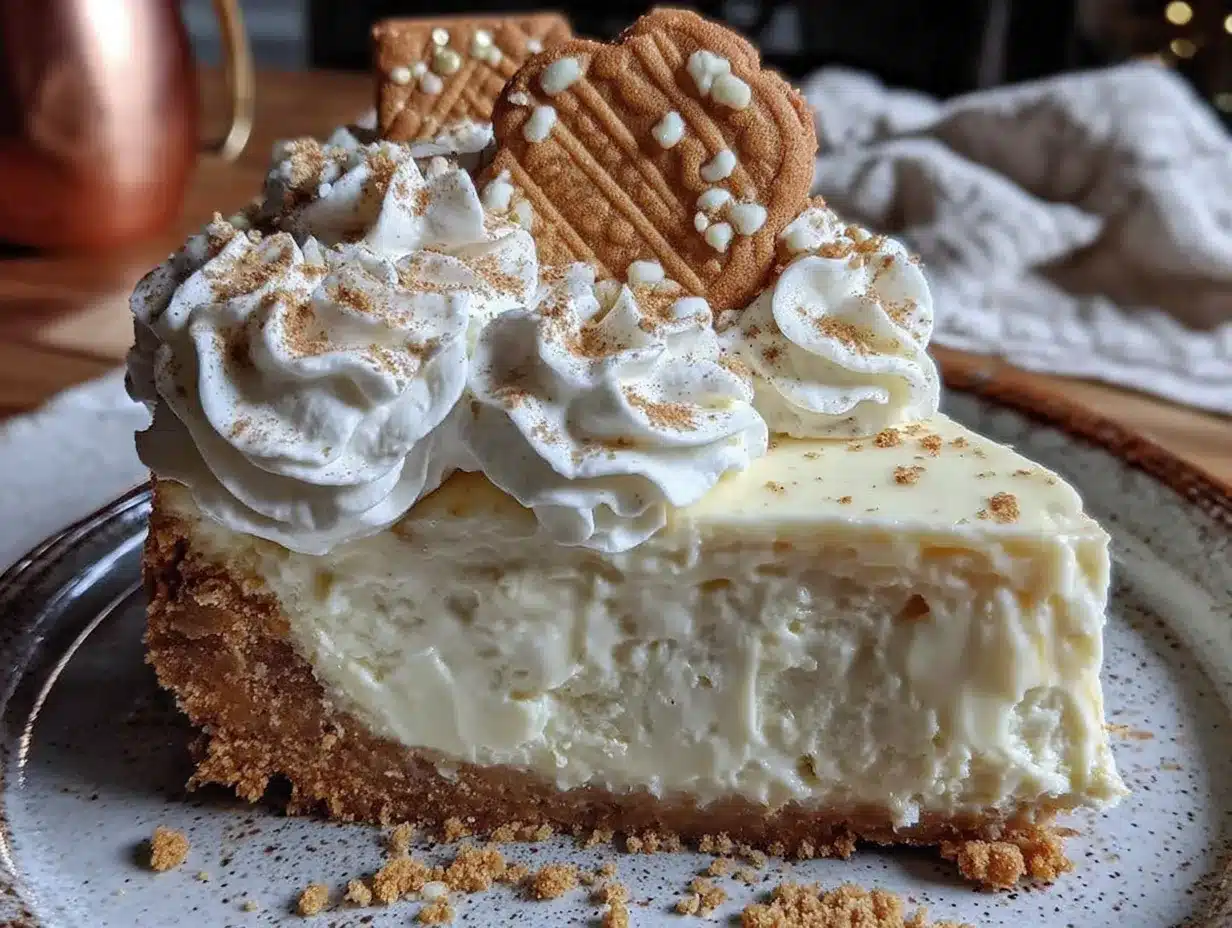
I mean, honestly. That moment was better than any compliment he could have given me with words. The thing is, this isn’t your typical dense, heavy cheesecake. The eggnog makes it surprisingly light, almost airy, with this subtle warmth from the nutmeg that just feels like Christmas in a slice. And that gingersnap crust? It’s the perfect spicy, crunchy contrast to the creamy filling. It’s the kind of dessert that makes people who “don’t like” things suddenly change their minds without even realizing it.
Maybe you’ve got a picky eater or two in your house, someone who turns their nose up at certain holiday classics. I get it. But this recipe has a way of winning people over quietly. It’s not flashy or complicated. It’s just really, really good. And honestly, catching someone in the act of sneaking a bite before dinner? That’s the best kind of holiday magic.
Why You’ll Love This Recipe
Let me tell you why this eggnog cheesecake has become my go-to holiday dessert, and why I think it’ll become yours too.
- Easy Holiday Showstopper: This looks like you spent hours fussing, but the actual hands-on time is about 20 minutes. The oven does most of the work. It’s perfect for when you’re already juggling a million holiday tasks.
- Budget-Friendly Ingredients: No fancy extracts or expensive imported cheeses here. Eggs, cream cheese, a carton of eggnog, and a box of gingersnaps. Most of these are probably already in your fridge or pantry.
- Make-Ahead Magic: This cheesecake actually gets better after a day or two in the fridge. You can make it up to three days before your holiday gathering. One less thing to worry about on the big day!
- Picky-Eater Approved: I’ve served this to people who swear they hate cheesecake, people who think eggnog is “too thick,” and kids who usually only want cookies. It disappears every single time. The texture is so creamy and light that it wins over skeptics.
- Perfect for Holiday Gatherings: Whether it’s Christmas dinner, a New Year’s Eve party, or just a cozy family movie night, this cake feels special without being fussy. It feeds a crowd beautifully.
What makes this recipe different from the rest? It’s the balance. So many eggnog cheesecakes are either too dense or too eggnog-forward, like drinking the stuff straight from the carton. This one uses a smart trick—a little cornstarch in the filling—to keep it silky without cracking. And the gingersnap crust isn’t just a supporting player; it brings its own spicy personality that makes every bite interesting. This isn’t just another holiday recipe. It’s the one that’ll get asked for year after year.
What Ingredients You Will Need
This recipe uses simple, honest ingredients to create something that tastes far more luxurious than it has any right to. Most of these are pantry staples during the holiday season, which makes this an easy last-minute dessert to pull together.
For the Gingersnap Crust
- 2 cups (about 200g) gingersnap cookie crumbs – You can crush them yourself by pulsing them in a food processor or by sealing them in a zip-top bag and going at them with a rolling pin. I prefer the store-bought boxes of gingersnaps from the cookie aisle; they’re affordable and have that perfect spicy kick.
- 5 tablespoons (70g) unsalted butter, melted – This binds the crumbs together. Salted butter works in a pinch, just skip the added salt in the crust.
- 2 tablespoons (25g) granulated sugar – Just a little extra sweetness to round out the spicy gingersnaps.
- Pinch of salt – Only if your butter is unsalted. It balances the sweetness.
For the Eggnog Cheesecake Filling
- 32 ounces (910g) cream cheese, softened to room temperature – This is four standard blocks. Let them sit on the counter for at least an hour; cold cream cheese leads to a lumpy filling. I like Philadelphia brand for consistent results.
- 1 cup (200g) granulated sugar – Just enough to sweeten without overpowering the eggnog flavor.
- 3 tablespoons (24g) cornstarch – This is my secret weapon. It helps stabilize the filling so it sets up creamy and smooth without cracking on top.
- 4 large eggs, room temperature – Cold eggs will seize up the batter. If you forgot to set them out, place them in a bowl of warm water for 5 minutes.
- 2 large egg yolks, room temperature – The extra yolks add richness and that velvety texture.
- 1 ½ cups (360ml) good-quality eggnog – Use the real stuff, not the light or low-fat version. The full-fat eggnog gives the best flavor and texture. I’ve used store-brand and name-brand; both work fine.
- 1 teaspoon vanilla extract – Pure vanilla, not imitation, if you can swing it.
- 1 teaspoon freshly grated nutmeg, plus more for garnish – Pre-ground nutmeg works, but freshly grated is a game-changer. That warm, aromatic flavor just can’t be beat.
- ½ teaspoon ground cinnamon – It adds a gentle warmth that complements the eggnog beautifully.
For the Whipped Cream Topping (Optional but Recommended)
- 1 cup (240ml) heavy whipping cream – Make sure it’s cold.
- 2 tablespoons (15g) powdered sugar – It dissolves more easily than granulated.
- ½ teaspoon vanilla extract
- Pinch of nutmeg for dusting
Equipment Needed
You don’t need a fancy pastry kitchen for this one. Here’s what you’ll need:
- 9-inch springform pan – The removable sides are essential for getting the cheesecake out in one piece. If you don’t have one, you can use a deep-dish pie plate, but you won’t get those clean slices.
- Electric hand mixer or stand mixer – You can mix by hand, but your arm will get tired, and you risk over-mixing. I prefer my hand mixer for this; it’s easier to control.
- Large mixing bowls – One for the crust, one for the filling.
- Food processor or zip-top bag and rolling pin – For crushing the gingersnaps.
- Measuring cups and spoons
- Rubber spatula – For scraping down the bowl.
- Large roasting pan – For the water bath. A disposable aluminum one works great.
- Aluminum foil – To wrap the springform pan so water doesn’t leak in.
- Cooling rack
If you don’t have a springform pan, honestly, you can find them for around $10 at most grocery stores or online. It’s a worthwhile investment for any baker. I’ve had my basic one for years, and it still works perfectly.
Preparation Method
Take your time with these steps. Cheesecake is forgiving, but it rewards patience.
- Preheat and Prep: Preheat your oven to 325°F (160°C). Place a large pot of water on the stove to boil for your water bath later. Wrap the outside of your springform pan with two layers of heavy-duty aluminum foil, making sure it comes up the sides. This keeps water from seeping into your crust.
- Make the Crust: In a medium bowl, combine the gingersnap crumbs, melted butter, sugar, and salt. Stir with a fork until every crumb is moistened. It should look like wet sand. Press the mixture firmly into the bottom of your prepared springform pan. Use the bottom of a measuring cup to really pack it down. Bake for 10 minutes, then set aside to cool while you make the filling. Don’t skip this step—a pre-baked crust stays crunchy.
- Start the Filling: In a large bowl, beat the softened cream cheese with an electric mixer on medium speed until smooth and creamy, about 2 minutes. Scrape down the sides and the bottom of the bowl with your spatula. Lumps here will stay lumps forever.
- Add Sugar and Cornstarch: Add the sugar and cornstarch and beat on medium speed until combined, about 1 minute. Scrape the bowl again. The mixture should look fluffy and smooth.
- Add Eggs One at a Time: Crack your eggs into a small bowl first (just in case you get a shell). Add them one at a time, beating on low speed after each addition just until the yolk disappears. Over-beating at this stage incorporates too much air, which can cause cracks. After all eggs and yolks are in, scrape the bowl one more time.
- Add the Wet Ingredients: With the mixer on low, slowly pour in the eggnog and vanilla extract. Mix just until combined. The batter will look thin and soupy—don’t panic, that’s normal. Fold in the freshly grated nutmeg and cinnamon with your spatula.
- Assemble and Bake: Pour the filling over the cooled crust. It will be very liquid. Place the wrapped springform pan into your large roasting pan. Carefully pour the boiling water into the roasting pan until it reaches about halfway up the sides of the springform pan. This water bath keeps the cheesecake moist and prevents cracking.
- Bake Low and Slow: Bake at 325°F (160°C) for 55-65 minutes. The edges should look set and slightly puffed, but the center should still jiggle like Jell-O when you gently shake the pan. A slight wobble in the very center is perfect. Over-baking leads to a dry, cracked cheesecake.
- Cool Gradually: Turn off the oven, crack the door open, and let the cheesecake sit in the warm oven for 1 hour. This gentle cooling prevents the dreaded crack. After an hour, remove the pan from the water bath, take off the foil, and let it cool completely on a wire rack, about another hour.
- Chill Overnight: Once cool, cover the pan with plastic wrap and refrigerate for at least 6 hours, but overnight is truly best. The cheesecake needs this time to set up fully. Patience, my friend. It’s worth it.
- Serve: When ready to serve, run a thin knife around the edge of the pan, then release the springform latch. Slice with a sharp knife, wiping it clean between cuts for those picture-perfect pieces. Top with whipped cream and a dusting of fresh nutmeg.
Cooking Tips & Techniques
I’ve made this cheesecake more times than I can count, and I’ve learned a few things the hard way. Let me save you the trouble.
Room temperature ingredients are non-negotiable. I know, I know, it’s annoying to plan ahead. But cold cream cheese and cold eggs will give you a lumpy, curdled-looking batter that never bakes up smooth. Set everything out an hour before you start. Set a timer if you have to.
Don’t over-mix the batter. This was my biggest mistake early on. I thought more mixing meant a smoother texture. Nope. Over-mixing incorporates too much air, which creates bubbles that rise to the surface and cause cracks. Mix on low speed, and stop as soon as everything is combined.
The water bath is your friend. I tried skipping it once because I was in a hurry. The cheesecake cracked right down the middle, and the edges were dry. The steam from the water bath creates a humid environment that helps the cheesecake cook evenly and stay creamy. Don’t skip it. And make sure your foil wrap is tight—I learned that lesson when I pulled a soggy crust out of the pan.
Let it cool slowly. That hour in the turned-off oven with the door cracked? That’s not just fussy baking advice. It prevents the sudden temperature change that causes cracks. Trust the process.
Use freshly grated nutmeg if you can. I know it’s a tiny extra step, but the difference is huge. Pre-ground nutmeg loses its volatile oils quickly and tastes flat. A whole nutmeg lasts forever and a microplane grates it in seconds. The aroma alone is worth it.
Variations & Adaptations
One of the best things about this recipe is how flexible it is. Here are a few ways to make it your own.
Boozy Eggnog Cheesecake: For an adults-only version, replace ¼ cup of the eggnog with dark rum or bourbon. Add it with the vanilla extract. The alcohol bakes off, leaving behind a warm, spiced flavor that’s absolutely lovely. Just don’t tell the kids.
Gluten-Free Version: Use gluten-free gingersnap cookies for the crust. Most major brands offer a gluten-free option now, or you can make your own with gluten-free flour and spices. The filling is naturally gluten-free, so this is an easy swap.
Pumpkin Spice Twist: In the fall, I sometimes swap out ½ cup of the eggnog for canned pumpkin puree. Add an extra teaspoon of pumpkin pie spice, and you’ve got a hybrid dessert that tastes like both holidays in one. It’s a fun way to bridge Thanksgiving and Christmas.
Individual Mini Cheesecakes: Press the crust into a muffin tin lined with paper liners, fill with batter, and bake for about 18-22 minutes. They’re perfect for parties where everyone wants their own little dessert. No slicing required!
Chocolate-Dipped Crust: After the cheesecake is fully chilled and set, melt some semi-sweet chocolate and drizzle it over the edges of the crust. Let it set in the fridge for 10 minutes. It adds a beautiful, fancy touch that makes it look like it came from a bakery.
I tried the boozy version last New Year’s Eve, and honestly, it might be my new favorite. The rum adds this subtle warmth that makes every bite taste like a cozy fireside chat. Just saying.
Serving & Storage Suggestions
This cheesecake is best served chilled, straight from the fridge. Let it sit at room temperature for about 10-15 minutes before slicing for the cleanest cuts. A warm knife (run it under hot water and dry it off) also helps you get those perfect, Instagram-worthy slices.
For presentation, I like to top each slice with a generous dollop of lightly sweetened whipped cream and a sprinkle of freshly grated nutmeg. A few candied cranberries or a sprig of fresh rosemary on the side makes it look extra festive without any extra work.
This cheesecake pairs beautifully with a cup of strong black coffee or a mug of spiced hot cider. For a dessert spread, serve it alongside gingerbread cookies or a simple fruit compote. The tartness of cranberries or cherries cuts through the richness perfectly.
Storage: Cover the cheesecake tightly with plastic wrap or store it in an airtight container in the refrigerator. It will keep well for up to 5 days. In fact, the flavor actually improves after a day or two as the spices meld together.
Freezing: This cheesecake freezes beautifully. Once it’s fully chilled and set, wrap the entire pan (or individual slices) in a layer of plastic wrap, then a layer of aluminum foil. Freeze for up to 3 months. To thaw, transfer it to the refrigerator overnight. Do not thaw at room temperature, or it will get watery.
Reheating: Honestly, I prefer this cheesecake cold. But if you like it slightly warm, you can microwave individual slices for about 10-15 seconds. It won’t be the same texture, but some people love it that way.
Nutritional Information & Benefits
Let’s be real—this is a holiday dessert, not a health food. But knowing what’s in it helps you enjoy it mindfully.
Per slice (based on 12 servings):
- Calories: ~420
- Fat: 28g
- Carbohydrates: 36g
- Protein: 9g
- Sugar: 24g
Eggnog itself is a surprisingly good source of protein and calcium, thanks to the milk and eggs. The cream cheese adds more protein and a good dose of vitamin A. The nutmeg and cinnamon aren’t just for flavor—they have anti-inflammatory properties and can aid digestion.
This recipe contains dairy, eggs, and gluten (from the gingersnaps). If you’re making the gluten-free version, it’s suitable for those with celiac disease or gluten sensitivity. It’s not low-fat or low-sugar, but it’s a treat meant for special occasions. I always say, enjoy the slice, savor every bite, and don’t feel guilty about it. That’s what the holidays are for.
Conclusion
This eggnog cheesecake with gingersnap crust has become my most-requested holiday dessert, and I think I finally understand why. It’s not just the creamy texture or the warm, spicy flavor. It’s the way it brings people together—the skeptics who take that first hesitant bite, the kids who ask for seconds, the friends who text you for the recipe the next day.
I love that it’s forgiving enough for a beginner baker but impressive enough for a holiday table. I love that I can make it days ahead and cross one more thing off my to-do list. But mostly, I love that it’s the kind of recipe that creates little moments—like catching my husband with a forkful before dinner was even served.
I hope you’ll try it for your next holiday gathering. Make it your own. Add a little extra nutmeg if that’s your thing. Serve it with a big scoop of whipped cream. And if someone in your house swears they don’t like cheesecake? Well, just set it out and see what happens. You might catch them in the act, too.
I’d love to hear how it turns out for you! Drop a comment below and let me know if your family loved it, or share your own twist on the recipe. Happy baking, and happy holidays!
Frequently Asked Questions
Can I use low-fat eggnog or cream cheese?
I don’t recommend it. Low-fat versions have a higher water content, which can make the cheesecake runny and prevent it from setting properly. Full-fat ingredients give you that creamy, luxurious texture that makes this dessert special.
Why did my cheesecake crack on top?
Cracks usually happen from over-baking, over-mixing, or cooling too quickly. Make sure you take the cheesecake out when the center still jiggles slightly, and let it cool gradually in the turned-off oven. A water bath also helps prevent cracks.
Can I make this cheesecake without a water bath?
You can, but I wouldn’t. The water bath creates steam that keeps the cheesecake moist and helps it bake evenly. Without it, you’re much more likely to end up with a dry, cracked cheesecake. It’s worth the extra few minutes of setup.
How do I know when the cheesecake is done baking?
The edges should look set and slightly puffed, but the center should still wobble when you gently shake the pan. A 2-3 inch area in the very middle should jiggle like Jell-O. It will continue to set as it cools.
Can I use store-bought graham crackers instead of gingersnaps?
Absolutely. If you can’t find gingersnaps or prefer a milder flavor, graham crackers work perfectly. Just add an extra teaspoon of ground ginger and a pinch of cinnamon to the crust to keep that holiday spice profile.
Pin This Recipe!
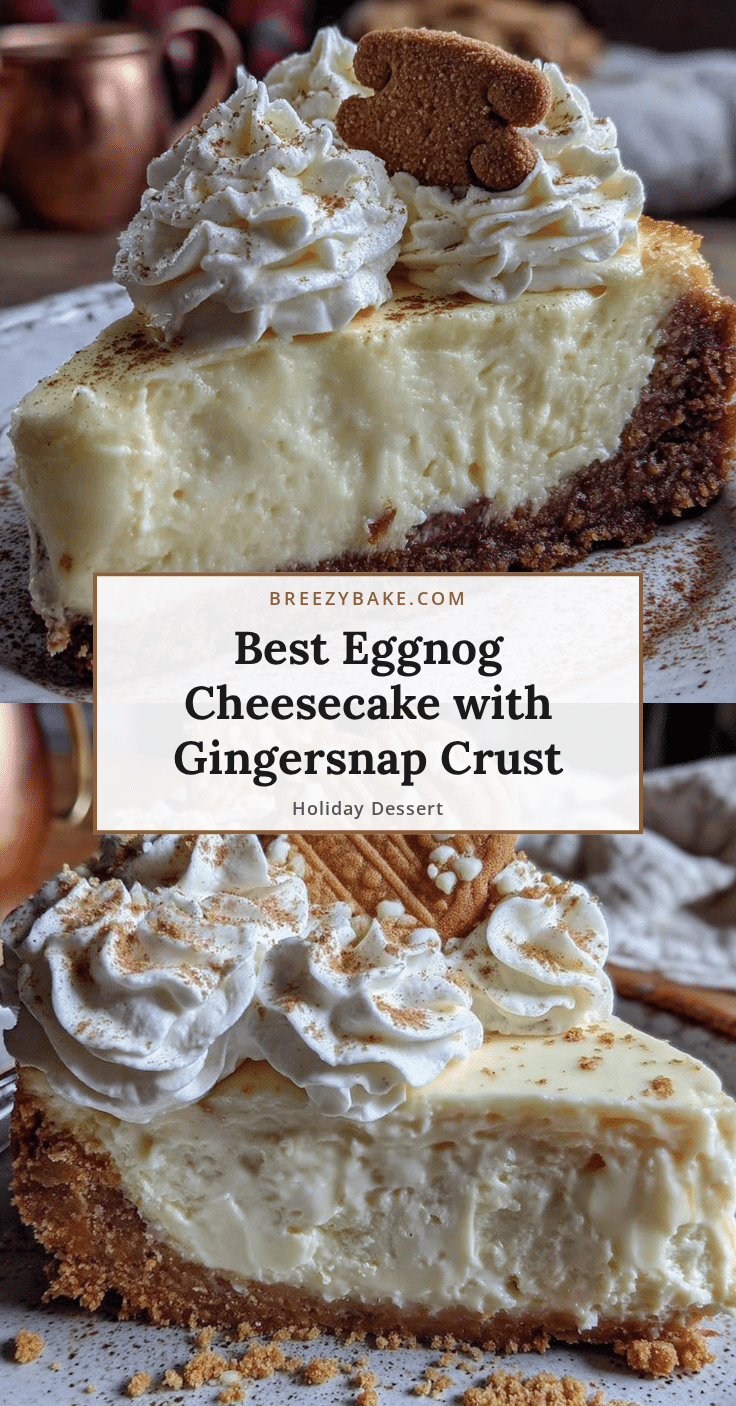
Best Eggnog Cheesecake with Gingersnap Crust – Easy Holiday Dessert
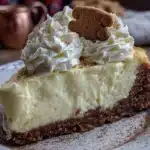
This creamy, light eggnog cheesecake with a spicy gingersnap crust is the perfect holiday dessert. It’s surprisingly easy to make, budget-friendly, and a guaranteed crowd-pleaser that will win over even the biggest cheesecake skeptics.
- Prep Time: 20 minutes
- Cook Time: 55-65 minutes
- Total Time: 1 hour 20 minutes (plus cooling and chilling time)
- Yield: 12 servings 1x
- Category: Dessert
- Cuisine: American
Ingredients
- 2 cups (about 200g) gingersnap cookie crumbs
- 5 tablespoons (70g) unsalted butter, melted
- 2 tablespoons (25g) granulated sugar
- Pinch of salt (if using unsalted butter)
- 32 ounces (910g) cream cheese, softened to room temperature
- 1 cup (200g) granulated sugar
- 3 tablespoons (24g) cornstarch
- 4 large eggs, room temperature
- 2 large egg yolks, room temperature
- 1 ½ cups (360ml) good-quality eggnog
- 1 teaspoon vanilla extract
- 1 teaspoon freshly grated nutmeg, plus more for garnish
- ½ teaspoon ground cinnamon
- 1 cup (240ml) heavy whipping cream
- 2 tablespoons (15g) powdered sugar
- ½ teaspoon vanilla extract
- Pinch of nutmeg for dusting
Instructions
- Preheat your oven to 325°F (160°C). Place a large pot of water on the stove to boil for your water bath later. Wrap the outside of your springform pan with two layers of heavy-duty aluminum foil, making sure it comes up the sides.
- In a medium bowl, combine the gingersnap crumbs, melted butter, sugar, and salt. Stir with a fork until every crumb is moistened. Press the mixture firmly into the bottom of your prepared springform pan. Bake for 10 minutes, then set aside to cool.
- In a large bowl, beat the softened cream cheese with an electric mixer on medium speed until smooth and creamy, about 2 minutes. Scrape down the sides and the bottom of the bowl.
- Add the sugar and cornstarch and beat on medium speed until combined, about 1 minute. Scrape the bowl again.
- Crack your eggs into a small bowl first. Add them one at a time, beating on low speed after each addition just until the yolk disappears. After all eggs and yolks are in, scrape the bowl one more time.
- With the mixer on low, slowly pour in the eggnog and vanilla extract. Mix just until combined. Fold in the freshly grated nutmeg and cinnamon with your spatula.
- Pour the filling over the cooled crust. Place the wrapped springform pan into your large roasting pan. Carefully pour the boiling water into the roasting pan until it reaches about halfway up the sides of the springform pan.
- Bake at 325°F (160°C) for 55-65 minutes. The edges should look set and slightly puffed, but the center should still jiggle like Jell-O when you gently shake the pan.
- Turn off the oven, crack the door open, and let the cheesecake sit in the warm oven for 1 hour. After an hour, remove the pan from the water bath, take off the foil, and let it cool completely on a wire rack, about another hour.
- Once cool, cover the pan with plastic wrap and refrigerate for at least 6 hours, but overnight is best.
- When ready to serve, run a thin knife around the edge of the pan, then release the springform latch. Slice with a sharp knife, wiping it clean between cuts. Top with whipped cream and a dusting of fresh nutmeg.
Notes
Room temperature ingredients are non-negotiable. Don’t over-mix the batter. The water bath is essential for preventing cracks. Let the cheesecake cool slowly in the turned-off oven. Use freshly grated nutmeg if possible. For a boozy version, replace ¼ cup of eggnog with dark rum or bourbon. For a gluten-free version, use gluten-free gingersnap cookies. The cheesecake can be made up to 3 days ahead and freezes well for up to 3 months.
Nutrition
- Serving Size: 1 slice
- Calories: 420
- Sugar: 24
- Sodium: 320
- Fat: 28
- Saturated Fat: 16
- Carbohydrates: 36
- Fiber: 1
- Protein: 9
Keywords: eggnog cheesecake, gingersnap crust, holiday dessert, Christmas cheesecake, easy cheesecake recipe