I figured a Halloween charcuterie board would be mostly about arranging store-bought snacks in a cute way. It took about ten minutes of staring at a pile of cheese, crackers, and candy corn for that assumption to fall apart completely. The problem wasn’t the ingredients themselves—it was the lack of a plan. I had visions of a perfectly spooky spread, but my first attempt looked like a toddler had sneezed snack mix across a wooden board. Honestly, it was a mess. The cheese was sweating, the candy corn had rolled into the cheddar, and the whole thing felt more chaotic than curated.
Then I stopped trying to be perfect and started thinking about what actually makes a board fun. It’s not just about food. It’s about the little surprises, the pops of color, the weird joy of eating a ghost-shaped cheese cube next to a sweet, waxy candy corn. That’s when this Halloween charcuterie board with candy corn accents really came together. I stopped forcing it and started playing. I used the candy corn not just as a sweet element, but as a visual anchor—those little orange, yellow, and white triangles became my guide for the whole layout. It sounds silly, but letting a piece of candy dictate the design made everything click. This board isn’t about being fancy. It’s about being festive, a little bit silly, and totally delicious. And honestly? That’s the kind of Halloween energy I can get behind.
Why You’ll Love This Halloween Charcuterie Board
This isn’t your average cheese plate. It’s a full-on Halloween experience that comes together faster than you’d think. Here’s why this one always wins the night:
- Quick & Easy: You can assemble this entire board in under 20 minutes. No cooking, no baking, just smart arranging. Perfect for when you’re also trying to tape up fake spiderwebs and answer the door for the first wave of trick-or-treaters.
- Simple Ingredients: Everything comes from the regular grocery store. No specialty cheese shops or online orders for weird black crackers. You probably already have half of this stuff in your pantry.
- Perfect for Parties & Movie Nights: Whether you’re hosting a costume party, having a quiet night with Hocus Pocus, or just need something for the kids to graze on before the sugar rush, this board fits the bill.
- Crowd-Pleaser: I have yet to see a board like this one survive more than 30 minutes. Kids go for the candy corn and cookies. Adults hover around the cheese and salami. Everyone wins.
- Unbelievably Festive: The candy corn accents aren’t just decoration. They tie the whole color scheme together and add that nostalgic, slightly controversial sweetness that makes Halloween feel like Halloween.
What makes this recipe different from the rest? It’s the balance. Most Halloween boards either go full junk food or try too hard to be gourmet. This one hits that sweet spot where you get sharp cheddar, spicy salami, salty pretzels, and sweet candy corn all in one bite if you want to. It’s comfort food reimagined for a spooky night—faster than a full meal, but with the same soul-soothing satisfaction. Perfect for impressing guests without stress, or turning a simple snack into something memorable.
What Ingredients You Will Need
This recipe uses simple, crowd-friendly ingredients to deliver bold flavor and satisfying texture without the fuss. Most of these are pantry staples or easy to find in the seasonal aisle. I’ve grouped them by their role on the board to make shopping and arranging easier.
For the Savory Base
- Sharp cheddar cheese, cut into cubes (I recommend Cabot or Tillamook for that sharp, crumbly texture that stands up to sweet candy)
- Gouda or smoked gouda, sliced into wedges (adds a creamy, smoky richness that balances the sugar)
- Salami or prosciutto, thinly sliced (fold into little ribbons or rosettes for visual appeal)
- Pepperoni slices (for a spicy, kid-friendly option—use the larger slices for mini “pizza bites”)
- Assorted crackers (I like a mix of buttery rounds, whole wheat squares, and little pretzel crisps for texture variety)
- Pretzel sticks (great for dipping and adding height to the board)
- Olives, green or black, pitted (adds a briny pop that cuts through the richness)
- Pickles, mini dill or cornichons (optional, but the acidity is a game-changer)
For the Sweet & Spooky Elements
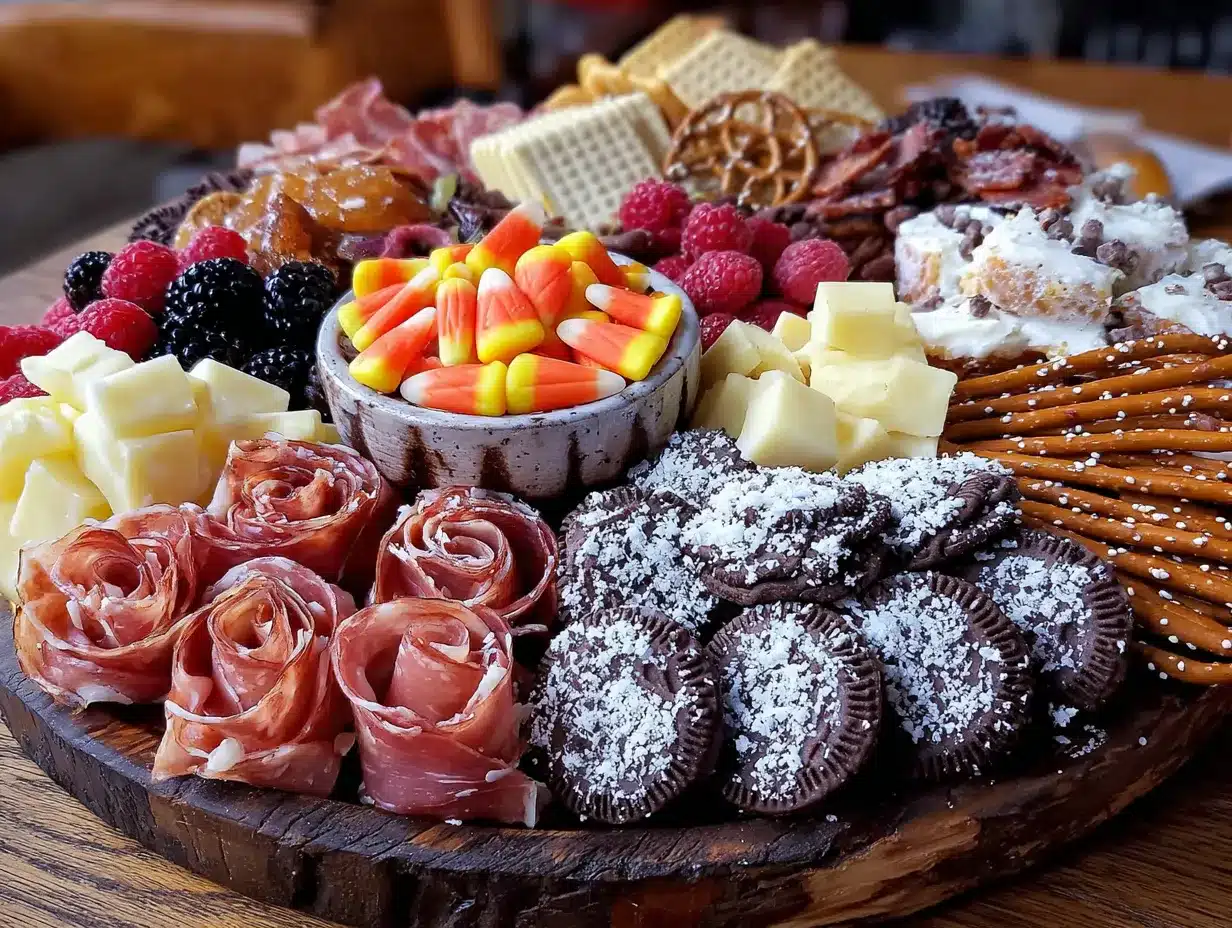
- Candy corn (the star of the show—use both regular and any seasonal shapes like pumpkins or mummies)
- Chocolate-covered pretzels (sweet and salty, plus they look like little logs or witch fingers)
- Chocolate cookies, like Oreos or chocolate sandwich cookies (break a few in half to create a “crumbled dirt” look)
- Marshmallows, plain or pumpkin-shaped (for a fluffy, cloud-like contrast)
- Dried apricots or figs (adds a chewy, natural sweetness that pairs beautifully with cheddar)
- Red and green grapes, small clusters (looks like eyeballs if you arrange them right—just a fun visual trick)
For Decoration & Dipping
- Pumpkin-shaped cheese spread or a small bowl of honey (for drizzling over gouda or crackers)
- Black and orange sprinkles (for dusting over the board for extra color pop)
- Fresh rosemary sprigs (optional, but they look like little spooky trees and add a nice green contrast)
For substitution guidance: use dairy-free cheese if needed, swap candy corn for candy pumpkins or harvest mix, and replace salami with turkey pepperoni for a lighter option. The beauty of a charcuterie board is its flexibility.
Equipment Needed
You don’t need much to pull this off, which is part of the charm. Here’s what I use:
- A large wooden board or serving platter (I use a 16×20 inch acacia wood board, but a large baking sheet or cutting board works fine too)
- Small bowls or ramekins (for the candy corn, olives, honey, or any loose items that might roll away)
- A sharp knife and cutting board (for slicing cheese and arranging salami)
- Cheese knife or spreader (if you’re using a soft cheese spread)
- Tongs or small spoons (for serving, though fingers are totally acceptable for a board like this)
- Parchment paper (optional, for lining the board if you want an easy cleanup)
If you don’t have a fancy wooden board, don’t sweat it. A white ceramic platter actually makes the orange and black colors pop even more. I learned that the hard way after my first board looked dull on a dark cutting board.
Preparation Method
Let’s build this board step by step. The key is to start with the largest items and fill in the gaps. Trust me on this—it saves you from having to rearrange everything halfway through.
- Set out your board and small bowls. Place 3-4 small ramekins around the board where you want the candy corn, olives, and honey to go. This creates natural anchors for the rest of the layout. (Around 2 minutes)
- Fill the bowls. Pour the candy corn into one bowl, olives into another, and honey into a third. For the candy corn, I like to mix in a few candy pumpkins just for variety. Set these aside for a moment. (1 minute)
- Place the cheeses. Arrange the cheddar cubes in a small pile on one side of the board and the gouda wedges on the opposite side. Don’t spread them out too much—clustering creates visual weight. Leave a little space between each cheese type so they don’t get mixed up. (2 minutes)
- Add the meats. Fold the salami slices into little rosettes by folding each slice in half, then in half again, and tucking the edges under. Place these next to the gouda. Lay the pepperoni slices in a small stack or fan them out like playing cards. (3 minutes)
- Layer in the crackers. Arrange the crackers in small clusters around the cheeses and meats. Don’t line them up like soldiers—stagger them. I like to put buttery rounds near the cheddar and whole wheat squares near the salami. (2 minutes)
- Add the pretzel sticks. Stick a few pretzel sticks upright into the cheese cubes or lay them in a criss-cross pattern near the center of the board. They add height and a nice salty crunch. (1 minute)
- Scatter the sweet stuff. Place the chocolate-covered pretzels, chocolate cookies (broken into halves), and marshmallows in the empty spaces. Don’t overthink this—just drop them in clusters. The cookies look great crumbled over the board like edible dirt. (2 minutes)
- Add the fruit. Tuck small clusters of grapes and a few dried apricots around the board. The grapes add moisture and a fresh pop of color. If you have red and green grapes, mix them together for a “monster eyeball” effect. (2 minutes)
- Finish with the candy corn accents. Now the fun part. Take a handful of candy corn and sprinkle it lightly over the board—not just in the bowl, but scattered around the cheese and crackers. The bright orange and yellow will tie everything together visually. I also like to place a few candy corns right on top of the cheese cubes for a playful touch. (1 minute)
- Garnish and serve. Add a few rosemary sprigs around the edges for color. If you have black and orange sprinkles, give the board a light dusting. Serve immediately or cover with plastic wrap and refrigerate for up to 2 hours before serving. (1 minute)
Sensory cue: At the end, step back and look at your board. It should look abundant but not chaotic. The candy corn should be the brightest pop of color, drawing the eye around the whole board. If it looks a little messy, that’s okay—it’s Halloween.
Cooking Tips & Techniques
I’ve made this board about a dozen times now, and I’ve definitely learned a few things the hard way. Here’s what I wish someone had told me:
- Don’t refrigerate the board too long. Cheese sweats when it’s cold and then warms up, and that moisture can make crackers soggy. Assemble the board no more than 2 hours ahead, and keep it covered loosely with plastic wrap in the fridge. Take it out 20 minutes before serving to let the cheese come to room temperature.
- Use the candy corn as a color guide. I used to just dump the candy corn in one bowl and call it done. Now I scatter a few pieces around the board, especially near the darker foods like chocolate cookies and olives. That pop of orange and yellow keeps the board from looking too brown and boring.
- Balance textures. If you have too many soft things (cheese, marshmallows, grapes), the board feels mushy. Make sure you have plenty of crunchy elements like pretzels, crackers, and chocolate-covered pretzels. The contrast makes every bite interesting.
- Don’t overcrowd. I know it’s tempting to fill every inch, but leave a little bit of board showing. It looks more intentional and less like a snack explosion. Think of the board as a canvas, not a storage container.
- Let the kids help. This is a great recipe to get little hands involved. Let them place the candy corn or arrange the marshmallows. It’s low-stakes and they’ll feel proud of the final result.
Variations & Adaptations
One of the best things about a charcuterie board is how easy it is to adapt. Here are a few ways to make this your own:
- Spooky Sweet Board: Swap out all the savory elements for more sweets. Use chocolate bars, gummy worms, candy pumpkins, and marshmallow ghosts. Add a bowl of caramel dip for the pretzels and fruit.
- Healthy-ish Version: Replace the salami and cheddar with turkey slices, low-fat cheese, and hummus. Use apple slices and celery sticks instead of crackers. Keep the candy corn but use it sparingly as a garnish rather than a main event.
- Gluten-Free Option: Use gluten-free crackers, pretzels, and cookies. Most candy corn is naturally gluten-free, but always check the label. The rest of the ingredients (cheese, meat, fruit) are naturally gluten-free.
- Vegan Adaptation: Use vegan cheese slices, plant-based pepperoni, and dairy-free chocolate. Replace honey with agave or maple syrup. Load up on fruits, nuts, and vegan crackers.
- Mini Individual Boards: Instead of one big board, make small individual boards for each guest. Use small cutting boards or even paper plates. This is great for parties where people are mingling and don’t want to hover around one table.
Personally, I’ve tried the “all-sweet” version for a Halloween movie night with my niece, and it was a huge hit. We used rainbow spiral marshmallow pops as the centerpiece, and it looked like a candy shop exploded on the board. So fun.
Serving & Storage Suggestions
This board is best served at room temperature, so pull it out of the fridge about 20 minutes before you’re ready to eat. Arrange it on a coffee table or kitchen island where people can gather around and graze. I like to set out small plates and napkins, but honestly, most people just grab and go.
For storage, if you have leftovers (which is rare in my house), separate the components. Store the cheese in an airtight container, the meats in a zip-top bag, and the crackers and candy in separate bags. Don’t store them together—the crackers will get soft from the cheese moisture, and the candy corn will absorb any weird smells. The board itself can be wiped clean with a damp cloth.
Reheating isn’t really a thing for this board, but if you have leftover chocolate-covered pretzels or cookies, they’re fine at room temperature for a few days. The cheese can be used in sandwiches or melted into a crispy bacon mac and cheese casserole the next day—trust me, that’s a winning move.
Flavors actually develop nicely over time, especially the cheese and salami. If you’re making this a day ahead, assemble everything except the crackers and candy corn. Add those right before serving to keep them crunchy and fresh.
Nutritional Information & Benefits
This is a treat board, so let’s be real—it’s not health food. But it does offer some surprising benefits. The cheese provides calcium and protein, the salami adds iron and B vitamins, and the fruit gives you a little fiber and natural sugar. The candy corn is pure nostalgia and sugar, but a few pieces won’t derail your whole day.
Here’s an estimated breakdown for a standard serving (about 1/6 of the board):
- Calories: 350-450
- Protein: 12-15g
- Fat: 20-25g
- Carbohydrates: 35-45g
- Sugar: 18-22g (mostly from candy corn and fruit)
- Sodium: 600-800mg (from cheese and cured meats)
If you’re watching your sugar intake, go easy on the candy corn and add more fruit and nuts. For a lower-sodium option, use low-sodium cheese and turkey slices instead of salami. This board is naturally gluten-free depending on your cracker choice, and you can easily make it dairy-free with vegan cheese swaps. It’s a flexible, forgiving recipe that works for almost any dietary need.
Conclusion
This Halloween charcuterie board with candy corn accents is the kind of recipe that makes you look like a party-planning genius without actually doing much work. It’s festive, forgiving, and full of those little details that make Halloween feel special. The candy corn isn’t just decoration—it’s the thread that ties the whole board together, from the sharp cheddar to the salty pretzels to the sweet marshmallows.
I love this board because it reminds me that Halloween doesn’t have to be complicated. A few good ingredients, a little bit of creativity, and a handful of candy corn can turn a simple snack into something memorable. Whether you’re hosting a big party or just want to surprise your family on October 31st, this board delivers.
So go ahead—grab a board, raid your pantry, and let the candy corn guide you. I’d love to hear how yours turns out! Leave a comment below with your favorite variations, or tag me in your photos. And if you’re looking for another fun holiday board, check out our sweet creamy pink dessert board for Galentine’s Day. Happy Halloween, and happy snacking!
Frequently Asked Questions
Can I make this Halloween charcuterie board ahead of time?
Yes, but with one caveat. Assemble everything except the crackers and candy corn up to 24 hours in advance. Cover the board tightly with plastic wrap and refrigerate. Add the crackers and candy corn just before serving to keep them crunchy. The cheese and meats will actually taste better after resting overnight.
What can I use instead of candy corn?
If you’re not a candy corn fan (I know, controversial), try candy pumpkins, autumn mix, or even orange and yellow M&Ms. You want something that adds that bright orange and yellow pop of color. Dried apricots or mango slices also work for a more natural option.
How do I keep the board from looking messy?
The secret is to start with the large items (cheese, bowls) and work your way down to the small items (candy corn, sprinkles). Leave a little bit of board showing between clusters. If things start to look chaotic, step back, take a breath, and just rearrange a few pieces. It doesn’t have to be perfect—it’s Halloween, after all.
Can I use this board for a non-Halloween party?
Absolutely. Just swap the candy corn for a different themed candy or seasonal fruit. For a fall party, use candy pumpkins and apple slices. For a winter party, use peppermint bark and dried cranberries. The structure of the board works for any occasion.
How many people does this board serve?
This board as written serves about 6-8 people as a snack or appetizer. If you’re using it as a main meal for a light dinner, it serves 4-5. For a large party, double the ingredients and use two boards or one very large platter. You can also pair it with a crispy chicken wing bites for a more filling spread.
Pin This Recipe!
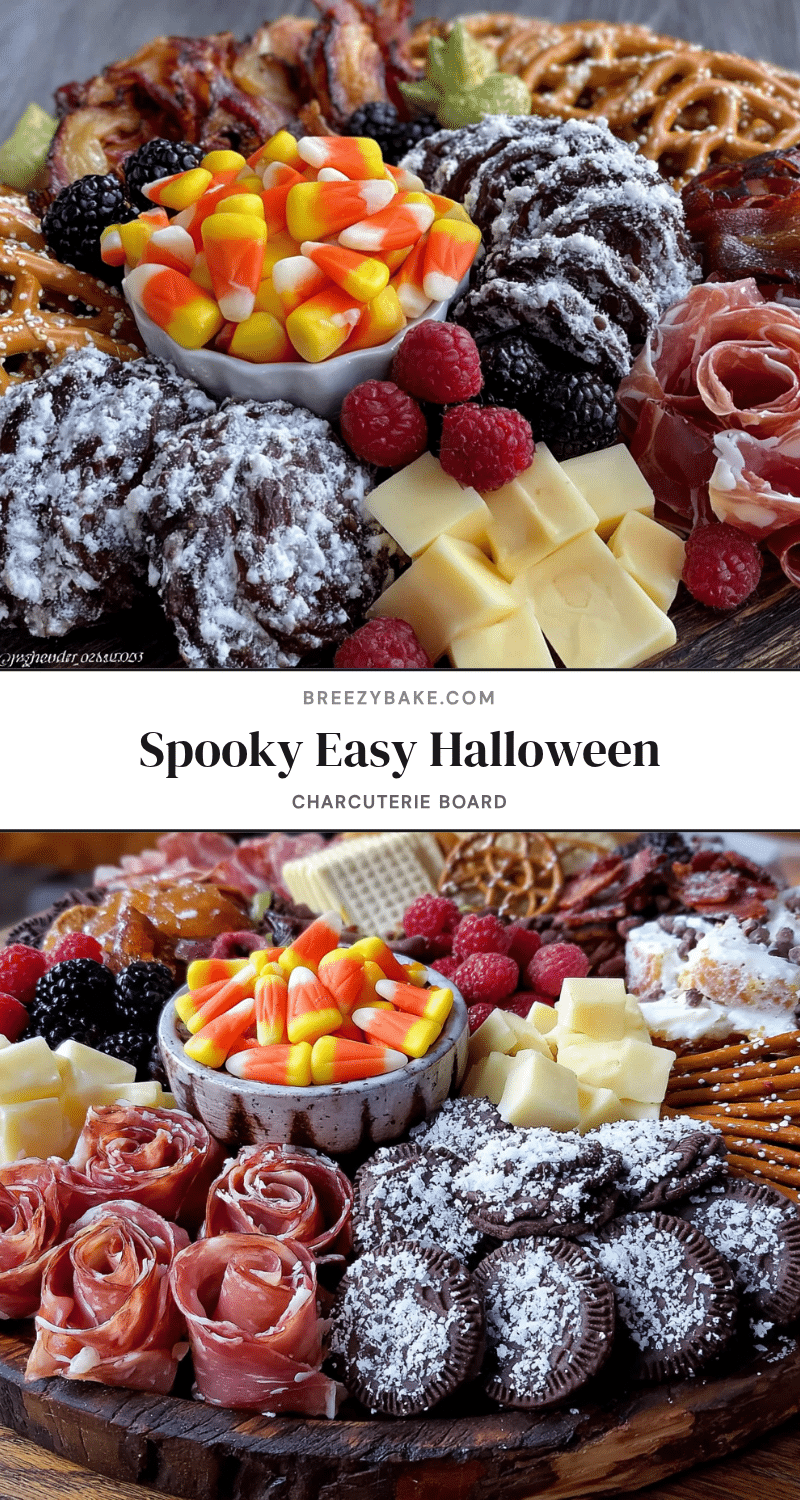
Best Halloween Charcuterie Board with Easy Candy Corn Accents
A festive and easy Halloween charcuterie board featuring sharp cheddar, spicy salami, salty pretzels, and sweet candy corn accents. Perfect for parties, movie nights, or a fun family snack.
- Prep Time: 20 minutes
- Cook Time: 0 minutes
- Total Time: 20 minutes
- Yield: 6-8 servings
- Category: Appetizer
- Cuisine: American
Ingredients
- Sharp cheddar cheese, cut into cubes
- Gouda or smoked gouda, sliced into wedges
- Salami or prosciutto, thinly sliced
- Pepperoni slices
- Assorted crackers (buttery rounds, whole wheat squares, pretzel crisps)
- Pretzel sticks
- Olives, green or black, pitted
- Pickles, mini dill or cornichons (optional)
- Candy corn (regular and seasonal shapes like pumpkins or mummies)
- Chocolate-covered pretzels
- Chocolate cookies (like Oreos)
- Marshmallows, plain or pumpkin-shaped
- Dried apricots or figs
- Red and green grapes, small clusters
- Pumpkin-shaped cheese spread or honey
- Black and orange sprinkles
- Fresh rosemary sprigs (optional)
Instructions
- Set out your board and small bowls. Place 3-4 small ramekins around the board for candy corn, olives, and honey.
- Fill the bowls with candy corn, olives, and honey. Mix in a few candy pumpkins for variety.
- Arrange cheddar cubes in a small pile on one side of the board and gouda wedges on the opposite side. Leave space between cheese types.
- Fold salami slices into rosettes and place next to the gouda. Fan out pepperoni slices like playing cards.
- Arrange crackers in small clusters around cheeses and meats, staggering them for visual interest.
- Stick pretzel sticks upright into cheese cubes or lay them in a criss-cross pattern near the center.
- Scatter chocolate-covered pretzels, broken chocolate cookies, and marshmallows in empty spaces.
- Tuck small clusters of grapes and dried apricots around the board.
- Sprinkle candy corn lightly over the board, including on top of cheese cubes for a playful touch.
- Garnish with rosemary sprigs and a light dusting of black and orange sprinkles. Serve immediately or refrigerate for up to 2 hours.
Notes
Assemble no more than 2 hours ahead. Keep covered in fridge, but take out 20 minutes before serving. Use candy corn as a color guide to brighten the board. Balance textures with crunchy elements. Leave some board visible to avoid a cluttered look.
Nutrition
- Serving Size: 1/6 of the board
- Calories: 350450
- Sugar: 1822
- Sodium: 600800
- Fat: 2025
- Saturated Fat: 1012
- Carbohydrates: 3545
- Fiber: 23
- Protein: 1215
Keywords: Halloween charcuterie board, candy corn, Halloween snack, cheese board, party appetizer, spooky board, easy Halloween recipe


