I was folding laundry last Thursday—a damp, gray afternoon that felt like it would never end—when the faint scent of cocoa powder drifted from somewhere. Not from my kitchen, obviously. I wasn’t baking. But there it was, that dusty, slightly bitter smell, and suddenly I was seven years old, standing on a wobbly stool in my Aunt Rose’s narrow kitchen in Queens. She was pulling three separate bowls from the mixer, each holding a different colored batter—pale vanilla, rich chocolate, blushing strawberry. I remember thinking she was some kind of wizard. Three cakes in one? For a kid who thought a box mix was fancy, it was pure magic.
Aunt Rose wasn’t around much after that year. She moved south, and the postcards stopped coming. But that cake—that ridiculous, towering, three-flavor spectacle—stuck with me like a song you can’t shake. I tried to recreate it a dozen times over the years. First attempt? A dry, crumbly mess that looked like a geology project. Second try? The strawberry layer turned into a sad, soggy pink pancake. Honestly, I almost gave up. But then I thought about that wobbly stool and her flour-dusted apron, and I knew I had to get it right.
This Guest-Favorite Neapolitan Layer Cake is the result of those trials. It’s the cake I bring to every potluck, every birthday, every dinner party where I want to hear someone say, “Wait, all three flavors are in one cake?” It’s a showstopper, let me tell you, but it’s also forgiving. Maybe you’ve been there—standing in the baking aisle, promising yourself this time will be different. This time, the layers will be even, the frosting will be smooth, and the flavors will actually taste like something. I’ve been there too. And this recipe is the one that finally worked.
The best part? It’s not just a trick. Each layer is genuinely delicious on its own—moist vanilla, deep dark chocolate, and a strawberry layer that tastes like summer. Together, they create something that feels both nostalgic and brand new. It’s the cake that makes people stop mid-conversation and ask for the recipe. And honestly, that’s why I keep making it. Not for the compliments (though they’re nice), but because every time I slice into that first piece, I’m seven years old again, and Aunt Rose is still there, winking at me from across the counter.
Why You’ll Love This Recipe
Let’s be honest—baking a layer cake can feel like a commitment. You’re measuring, sifting, waiting for butter to soften, and praying your layers don’t dome like a muffin. But this Neapolitan Layer Cake is different. It’s designed to impress without the stress, which is exactly what you need when you’re hosting a crowd.
- Three Flavors, One Cake: Vanilla, chocolate, and strawberry all in one beautiful slice. It’s like a bakery display case on a plate, but you made it yourself.
- Perfect for Dinner Parties: This cake screams “special occasion.” Serve it at a birthday, a holiday gathering, or a Sunday dinner where you want to look like you spent all day in the kitchen (even if you didn’t).
- Simple Ingredients: No weird extracts or hard-to-find specialty flours. You probably have most of this in your pantry right now.
- Crowd-Pleaser Guaranteed: Kids love the strawberry layer. Adults fight over the chocolate. Everyone agrees on the vanilla. It’s the diplomatic solution to dessert.
- Make-Ahead Friendly: You can bake the layers a day ahead, wrap them well, and frost them the day of. That means less stress when guests are knocking on your door.
I’ve tested this recipe more times than I care to admit. I’ve tried different ratios of butter to oil, swapped fresh strawberries for freeze-dried, and even experimented with a cream cheese frosting variation (which was good, but not as good as this buttercream). What I landed on is the sweet spot—a cake that’s moist, flavorful, and structurally sound enough to stack without toppling over. It’s the kind of cake that makes you close your eyes after the first bite, not because it’s fancy, but because it tastes like something you’ve been missing.
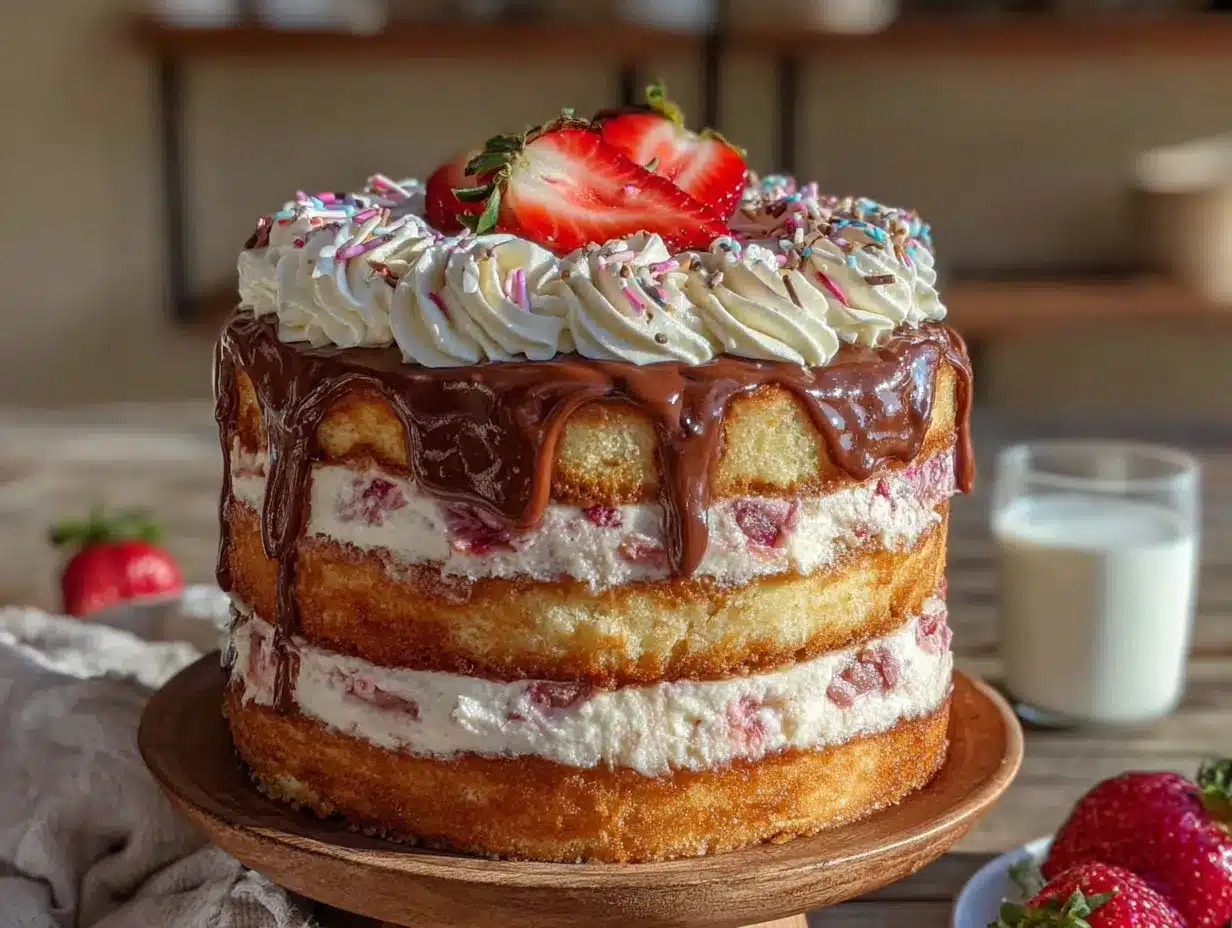
And here’s the thing: it’s not just about the taste. It’s about the moment you set this cake on the table and watch people’s faces light up. The stripes of pink, brown, and white are so striking that someone will inevitably say, “Wait, did you make that?” Yes. Yes, you did. And you didn’t even break a sweat.
What Ingredients You Will Need
This recipe uses simple, wholesome ingredients to deliver bold flavor and satisfying texture without the fuss. Most of these are pantry staples, which means you can probably make this cake on a whim—provided you have a box of strawberries hiding in your freezer.
For the Vanilla Layer
- 1 ½ cups (188g) all-purpose flour: Spoon and level for accuracy. Too much flour makes a dry cake.
- 1 cup (200g) granulated sugar: Adds sweetness and helps with browning.
- ½ cup (113g) unsalted butter, softened: I use Kerrygold for its rich flavor, but any good-quality butter works.
- 2 large eggs, room temperature: Cold eggs seize the batter. Let them sit out for 30 minutes.
- ½ cup (120ml) whole milk: Whole milk gives a tender crumb. You can use 2%, but avoid skim.
- 1 ½ teaspoons baking powder: Make sure it’s fresh—test it by dropping a pinch in hot water; it should bubble.
- ½ teaspoon salt: Balances the sweetness.
- 1 teaspoon vanilla extract: Pure vanilla, not imitation. Trust me on this.
For the Chocolate Layer
- 1 ¼ cups (156g) all-purpose flour: Same spoon-and-level method.
- 1 cup (200g) granulated sugar: Keeps things consistent across layers.
- ½ cup (113g) unsalted butter, softened: I recommend letting it sit out overnight for best texture.
- 2 large eggs, room temperature: If you forget to set them out, place them in warm water for 5 minutes.
- ½ cup (120ml) buttermilk: The acid in buttermilk makes the chocolate layer extra tender. No buttermilk? Add 1 tablespoon lemon juice to regular milk and let it sit for 5 minutes.
- ⅓ cup (40g) unsweetened cocoa powder: I prefer Dutch-processed for a deeper, darker chocolate flavor. Ghirardelli is my go-to.
- 1 teaspoon baking soda: Reacts with the buttermilk for lift.
- ½ teaspoon salt: Don’t skip it—chocolate needs salt to shine.
For the Strawberry Layer
- 1 ½ cups (188g) all-purpose flour: The base for this pink beauty.
- 1 cup (200g) granulated sugar: You know the drill.
- ½ cup (113g) unsalted butter, softened: Yes, three sticks total for the whole cake. It’s a celebration.
- 2 large eggs, room temperature: I know, I know. But consistency matters.
- ½ cup (120ml) whole milk: Keeps it moist.
- ½ cup (75g) freeze-dried strawberries, ground into powder: This is the secret to real strawberry flavor. Fresh strawberries add too much moisture and make the cake gummy. I buy the freeze-dried ones at Trader Joe’s or on Amazon.
- 1 ½ teaspoons baking powder: Fresh and active.
- ½ teaspoon salt: You’re a pro now.
- Red or pink gel food coloring (optional): For that picture-perfect pink. I use Americolor Soft Pink, but it’s totally optional.
For the Vanilla Buttercream Frosting
- 1 ½ cups (340g) unsalted butter, softened: Yes, more butter. This is not a diet cake.
- 5 cups (625g) powdered sugar: Sifted to avoid lumps.
- ¼ cup (60ml) heavy cream: Makes the frosting silky and spreadable.
- 2 teaspoons vanilla extract: Pure, please.
- Pinch of salt: Cuts the sweetness.
For Garnish (Optional but Fun)
- Chocolate shavings: Use a vegetable peeler on a chocolate bar.
- Fresh strawberries: Halved or whole, for that “I’m fancy” look.
- Sprinkles: Because sprinkles make everything better.
Equipment Needed
You don’t need a professional bakery setup for this cake, but having the right tools makes the process smoother. Here’s what you’ll need:
- Three 8-inch round cake pans: I prefer light-colored aluminum pans for even baking. Dark pans absorb more heat and can over-brown the edges. If you only have two pans, bake the layers in batches—just let the batter sit at room temperature while the first batch bakes.
- Stand mixer or hand mixer: A stand mixer makes creaming butter and sugar a breeze, but a hand mixer works just fine. You’ll just need a little more elbow grease for the frosting.
- Parchment paper: Cut circles to line the bottom of your pans. This is non-negotiable if you want your cakes to release cleanly.
- Cooling racks: Wire racks allow air to circulate around the cakes, preventing soggy bottoms.
- Offset spatula: For smooth, even frosting layers. A butter knife works in a pinch, but an offset spatula is worth the $8 investment.
- Cake turntable (optional): If you frost cakes regularly, this is a game-changer. For a one-time bake, just rotate the cake plate by hand.
- Kitchen scale: I know measuring cups are standard in the US, but a scale is more accurate. If you have one, use it for the flour.
I bought my first offset spatula at a dollar store, and honestly, it lasted longer than the fancy one I later got as a gift. So don’t feel pressured to spend a lot. A basic set of tools, a little patience, and you’re golden.
Preparation Method
Let’s get baking. This recipe takes about 45 minutes of active prep and 25-30 minutes of baking time. Plan for about 2 hours total, including cooling. Trust me, the payoff is worth every minute.
Step 1: Prep Your Pans and Oven
Preheat your oven to 350°F (175°C). Grease three 8-inch round cake pans with butter or non-stick spray. Cut parchment paper circles to fit the bottoms and place them in the pans. Grease the parchment too. Then dust the pans with a little flour, tapping out the excess. This double-layer protection ensures your cakes release without sticking.
Step 2: Make the Vanilla Layer
In a medium bowl, whisk together the flour, baking powder, and salt. Set aside. In a large bowl (or the bowl of your stand mixer), beat the softened butter and sugar together on medium speed until light and fluffy—about 3 minutes. Scrape down the sides. Add the eggs one at a time, beating well after each addition. Stir in the vanilla extract.
With the mixer on low, add the flour mixture in three additions, alternating with the milk. Start and end with the flour. Mix just until combined—overmixing makes the cake tough. Pour the batter into one of the prepared pans and spread it evenly. Bake for 22-25 minutes, or until a toothpick inserted in the center comes out clean. Let it cool in the pan for 10 minutes, then turn it out onto a wire rack to cool completely.
Step 3: Make the Chocolate Layer
In a medium bowl, whisk together the flour, cocoa powder, baking soda, and salt. Set aside. In a large bowl, beat the butter and sugar until light and fluffy—again, about 3 minutes. Add the eggs one at a time, beating well. The batter will look a little thick at this point, and that’s normal.
With the mixer on low, add the flour mixture in three additions, alternating with the buttermilk. The batter will be thick and luscious. Pour it into the second prepared pan and spread evenly. Bake for 22-25 minutes. Cool in the pan for 10 minutes, then transfer to a wire rack.
Step 4: Make the Strawberry Layer
In a medium bowl, whisk together the flour, ground freeze-dried strawberries, baking powder, and salt. The strawberry powder will look like pink dust—it smells amazing. In a large bowl, beat the butter and sugar until fluffy. Add the eggs one at a time, then stir in the vanilla.
With the mixer on low, add the flour mixture in three additions, alternating with the milk. If you’re using food coloring, add it now and mix until you reach your desired shade. I usually add about 6 drops of Soft Pink for a subtle, natural-looking pink. Pour the batter into the third prepared pan and bake for 22-25 minutes. Cool as directed.
Step 5: Make the Buttercream Frosting
While the cakes are cooling, make the frosting. In a large bowl, beat the softened butter on medium speed until smooth and creamy—about 2 minutes. Gradually add the powdered sugar, one cup at a time, beating on low speed to avoid a sugar cloud. Once all the sugar is incorporated, add the heavy cream, vanilla extract, and salt. Beat on medium-high speed for 3-4 minutes until the frosting is light, fluffy, and spreadable. If it’s too thick, add another tablespoon of cream. If it’s too thin, add a little more powdered sugar.
Step 6: Assemble the Cake
Once the cakes are completely cool (this is crucial—warm cakes will melt your frosting), place the vanilla layer on your cake plate or turntable. Use a serrated knife to level the top if it domed during baking. Spread about 1 cup of frosting evenly over the top. Place the chocolate layer on top, level it if needed, and spread another cup of frosting. Finally, place the strawberry layer on top, level it, and apply a thin crumb coat—a thin layer of frosting that traps any loose crumbs. Refrigerate for 20 minutes to set the crumb coat.
After the crumb coat is set, apply the remaining frosting to the top and sides of the cake. Use your offset spatula to smooth it out. Don’t stress about perfection—a rustic, swoopy look is charming. Garnish with chocolate shavings, fresh strawberries, or sprinkles if desired.
Cooking Tips & Techniques
I’ve made this cake more times than I can count, and I’ve learned a few things the hard way. Here are my best tips for success:
- Room temperature ingredients are non-negotiable. Cold butter doesn’t cream properly, and cold eggs can cause the batter to curdle. Set everything out 30-60 minutes before you start baking. If you forget, place the eggs in a bowl of warm water for 5 minutes and microwave the milk for 10 seconds.
- Don’t overmix the batter. Once you add the flour, mix just until you don’t see any more streaks. Overmixing develops gluten, which makes the cake tough and dense. A few lumps are fine—they’ll bake out.
- Use freeze-dried strawberries, not fresh. I learned this the hard way. Fresh strawberries release too much moisture during baking, turning your beautiful pink layer into a soggy, dense mess. Freeze-dried strawberries grind into a powder that infuses the cake with intense strawberry flavor without the liquid.
- Level your cakes. Even if you think they’re flat, use a serrated knife to slice off any dome. A level cake stacks evenly and looks professional. Save the scraps for snacking or make cake pops.
- Chill the cake before slicing. After frosting, refrigerate the cake for at least 30 minutes before cutting. This sets the frosting and makes clean slices much easier. Use a sharp, serrated knife and wipe it clean between cuts.
One of my biggest failures? I once tried to rush the cooling process and placed a warm cake layer directly on the frosting. The frosting melted, the cake slid off the plate, and I ended up with a sad, lopsided mess on my kitchen floor. So yeah, patience is key. Let those cakes cool completely.
Variations & Adaptations
This cake is incredibly versatile. Here are a few ways to make it your own:
- Gluten-Free Version: Substitute the all-purpose flour with a 1:1 gluten-free baking flour blend. I’ve used Bob’s Red Mill with great results. Just make sure your blend contains xanthan gum for structure.
- Dairy-Free Option: Use vegan butter and a plant-based milk like oat or almond milk. For the buttermilk in the chocolate layer, add 1 tablespoon of lemon juice to ½ cup of oat milk and let it sit for 5 minutes. The frosting works well with vegan butter, too.
- Different Frosting Flavors: Instead of vanilla buttercream, try a chocolate buttercream for the whole cake, or a strawberry cream cheese frosting. For the strawberry frosting, add ¼ cup of ground freeze-dried strawberries to the buttercream.
- Berry Swap: Not a strawberry fan? Use freeze-dried raspberries or blueberries instead. The method is exactly the same—just grind them into a powder and add to the flour mixture.
- Cupcake Version: This batter makes about 24 cupcakes. Bake for 18-20 minutes at 350°F (175°C). Frost each cupcake with a swirl of buttercream and top with a fresh berry.
I once made a lemon-blueberry version by swapping the strawberry powder for freeze-dried blueberries and adding lemon zest to the vanilla layer. It was a hit at a summer barbecue. Don’t be afraid to experiment—this recipe is forgiving enough to handle a little creativity.
Serving & Storage Suggestions
This cake is best served at room temperature, which allows the buttercream to soften slightly and the flavors to shine. If you’ve refrigerated it, let it sit on the counter for about 30 minutes before slicing. Pair it with a scoop of vanilla ice cream or a dollop of whipped cream for extra indulgence.
For a dinner party, I like to serve this cake with a simple berry compote on the side. Just simmer 1 cup of mixed berries with 2 tablespoons of sugar and a squeeze of lemon juice until thickened. It adds a bright, tart contrast to the sweet cake.
Storage: Store the cake in an airtight container in the refrigerator for up to 5 days. The flavors actually meld together beautifully after a day or two, so it’s a great make-ahead dessert. To freeze, wrap the unfrosted cake layers individually in plastic wrap and then foil. They’ll keep for up to 3 months. Thaw at room temperature before frosting. Frosted cake can also be frozen, but the texture of the frosting may change slightly.
Reheating: If you prefer your cake slightly warm, microwave individual slices for 10-15 seconds. It’s especially good with the chocolate layer—the cocoa flavor deepens when warmed.
One thing I love about this cake is how the flavors develop overnight. The strawberry layer becomes more fragrant, the chocolate gets richer, and the vanilla acts as a perfect bridge. So if you can, make it a day ahead. Your future self will thank you.
Nutritional Information & Benefits
Let’s be real—this is a celebratory cake, not a health food. But that doesn’t mean it’s without merit. Here’s a rough estimate per slice (based on 12 servings):
- Calories: Approximately 520
- Fat: 28g
- Saturated Fat: 17g
- Carbohydrates: 67g
- Sugar: 50g
- Protein: 5g
- Fiber: 1g
The strawberries in the pink layer provide a small amount of vitamin C and antioxidants, while the cocoa powder in the chocolate layer contains flavonoids that support heart health. The butter and eggs offer fat-soluble vitamins A, D, and E. Of course, this is a dessert meant for special occasions—enjoy it in moderation and savor every bite.
If you’re looking for a lighter option, you can reduce the sugar by ¼ cup in each layer (though the texture may be slightly less tender) or use a lighter frosting like a stabilized whipped cream. But honestly, sometimes you just need the real thing. And this cake delivers.
Conclusion
This Neapolitan Layer Cake is more than just a recipe—it’s a conversation starter, a memory maker, and a guaranteed crowd-pleaser. Whether you’re hosting a birthday party, a holiday dinner, or a casual get-together with friends, this cake delivers on every level. The three layers are distinct yet harmonious, the frosting is silky and sweet, and the presentation is nothing short of stunning.
I love this recipe because it reminds me that baking doesn’t have to be complicated to be impressive. Yes, there are three separate batters, but each one is simple and straightforward. The result is a cake that looks like it came from a fancy bakery but tastes like it was made with love—because it was.
So go ahead, give it a try. Customize the flavors, play with the frosting, and make it your own. And when you set that cake on the table and watch everyone’s eyes light up, send me a message. I want to hear about your version. Share your photos, your tweaks, your happy accidents. Because that’s what cooking is about—sharing something good with the people you love.
Happy baking, friend. You’ve got this.
Frequently Asked Questions
Can I use a box cake mix for this Neapolitan cake?
You can, but the texture and flavor won’t be the same. A box mix will work in a pinch, especially if you doctor it up with extra butter, eggs, and milk. But for the best results, I recommend making the layers from scratch. The strawberry layer, in particular, benefits from the freeze-dried strawberry powder, which you won’t get from a mix.
How do I prevent my cake layers from sticking to the pan?
Line the bottoms of your pans with parchment paper circles. Grease the pans and the parchment thoroughly, then dust with flour. This double-layer method is foolproof. If you’re still worried, use a non-stick baking spray that contains flour, like Baker’s Joy.
Can I make this cake in advance?
Absolutely. You can bake the cake layers up to 2 days ahead, wrap them tightly in plastic wrap, and store them at room temperature. You can also freeze the unfrosted layers for up to 3 months. Frost the cake the day you plan to serve it for the freshest taste and texture.
My strawberry layer turned out dense and gummy. What went wrong?
Most likely, you used fresh or frozen strawberries instead of freeze-dried. Fresh strawberries contain too much water, which makes the cake dense and soggy. Stick with freeze-dried strawberries ground into a fine powder. Also, make sure you’re not overmixing the batter—that can also lead to a dense texture.
How do I get clean, even slices?
Chill the cake in the refrigerator for at least 30 minutes before slicing. Use a long, sharp serrated knife and wipe it clean between each cut. For perfectly even slices, measure and mark the cake with toothpicks before cutting. A little patience goes a long way!
Pin This Recipe!
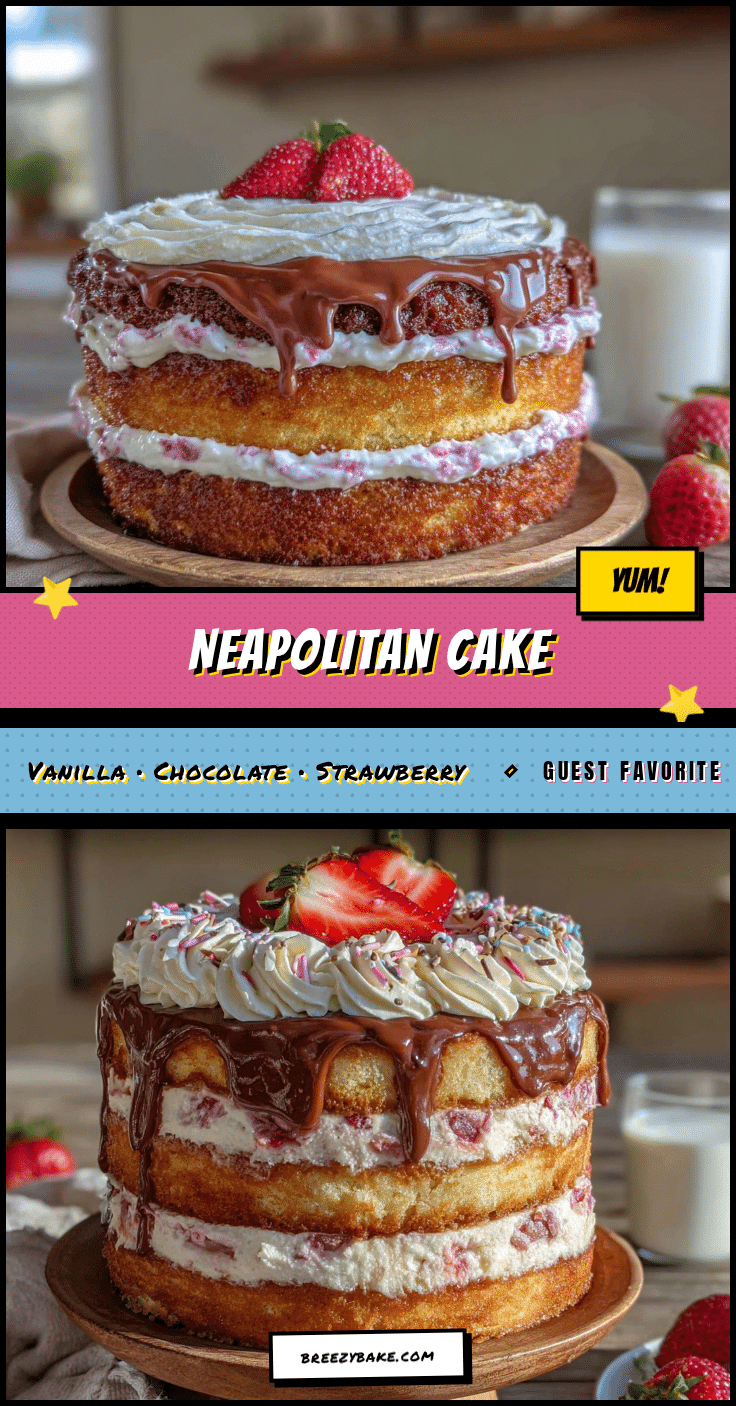
Best Neapolitan Layer Cake Recipe: Easy 3-Flavor Showstopper
A stunning three-layer cake featuring vanilla, chocolate, and strawberry flavors, all in one beautiful slice. This crowd-pleasing dessert is perfect for special occasions and is surprisingly simple to make with easy-to-find ingredients.
- Prep Time: 45 minutes
- Cook Time: 25 minutes
- Total Time: 2 hours
- Yield: 12 servings
- Category: Dessert
- Cuisine: American
Ingredients
- For the Vanilla Layer: 1 ½ cups (188g) all-purpose flour
- For the Vanilla Layer: 1 cup (200g) granulated sugar
- For the Vanilla Layer: ½ cup (113g) unsalted butter, softened
- For the Vanilla Layer: 2 large eggs, room temperature
- For the Vanilla Layer: ½ cup (120ml) whole milk
- For the Vanilla Layer: 1 ½ teaspoons baking powder
- For the Vanilla Layer: ½ teaspoon salt
- For the Vanilla Layer: 1 teaspoon vanilla extract
- For the Chocolate Layer: 1 ¼ cups (156g) all-purpose flour
- For the Chocolate Layer: 1 cup (200g) granulated sugar
- For the Chocolate Layer: ½ cup (113g) unsalted butter, softened
- For the Chocolate Layer: 2 large eggs, room temperature
- For the Chocolate Layer: ½ cup (120ml) buttermilk
- For the Chocolate Layer: ⅓ cup (40g) unsweetened cocoa powder
- For the Chocolate Layer: 1 teaspoon baking soda
- For the Chocolate Layer: ½ teaspoon salt
- For the Strawberry Layer: 1 ½ cups (188g) all-purpose flour
- For the Strawberry Layer: 1 cup (200g) granulated sugar
- For the Strawberry Layer: ½ cup (113g) unsalted butter, softened
- For the Strawberry Layer: 2 large eggs, room temperature
- For the Strawberry Layer: ½ cup (120ml) whole milk
- For the Strawberry Layer: ½ cup (75g) freeze-dried strawberries, ground into powder
- For the Strawberry Layer: 1 ½ teaspoons baking powder
- For the Strawberry Layer: ½ teaspoon salt
- For the Strawberry Layer: Red or pink gel food coloring (optional)
- For the Vanilla Buttercream Frosting: 1 ½ cups (340g) unsalted butter, softened
- For the Vanilla Buttercream Frosting: 5 cups (625g) powdered sugar, sifted
- For the Vanilla Buttercream Frosting: ¼ cup (60ml) heavy cream
- For the Vanilla Buttercream Frosting: 2 teaspoons vanilla extract
- For the Vanilla Buttercream Frosting: Pinch of salt
- For Garnish (Optional): Chocolate shavings
- For Garnish (Optional): Fresh strawberries
- For Garnish (Optional): Sprinkles
Instructions
- Preheat oven to 350°F (175°C). Grease three 8-inch round cake pans, line bottoms with parchment paper, grease parchment, and dust with flour.
- Make the vanilla layer: Whisk together flour, baking powder, and salt. Beat butter and sugar until light and fluffy. Add eggs one at a time, then vanilla. Add flour mixture in three additions alternating with milk, mixing just until combined. Pour into one prepared pan and bake 22-25 minutes until a toothpick comes out clean. Cool in pan 10 minutes, then transfer to wire rack.
- Make the chocolate layer: Whisk together flour, cocoa powder, baking soda, and salt. Beat butter and sugar until fluffy. Add eggs one at a time. Add flour mixture in three additions alternating with buttermilk. Pour into second pan and bake 22-25 minutes. Cool as directed.
- Make the strawberry layer: Whisk together flour, ground freeze-dried strawberries, baking powder, and salt. Beat butter and sugar until fluffy. Add eggs one at a time, then vanilla. Add flour mixture in three additions alternating with milk. Add food coloring if desired. Pour into third pan and bake 22-25 minutes. Cool as directed.
- Make the buttercream: Beat softened butter until smooth. Gradually add powdered sugar, then heavy cream, vanilla, and salt. Beat on medium-high until light and fluffy.
- Assemble the cake: Level cake layers if domed. Place vanilla layer on plate, spread 1 cup frosting. Top with chocolate layer, spread 1 cup frosting. Top with strawberry layer. Apply thin crumb coat, refrigerate 20 minutes. Frost top and sides with remaining frosting. Garnish as desired.
Notes
Room temperature ingredients are crucial. Use freeze-dried strawberries, not fresh, for the strawberry layer. Level cakes for even stacking. Chill cake before slicing for clean cuts. Can be made ahead: bake layers up to 2 days ahead or freeze unfrosted for up to 3 months.
Nutrition
- Serving Size: 1 slice
- Calories: 520
- Sugar: 50
- Fat: 28
- Saturated Fat: 17
- Carbohydrates: 67
- Fiber: 1
- Protein: 5
Keywords: Neapolitan cake, layer cake, vanilla cake, chocolate cake, strawberry cake, birthday cake, celebration cake, three-flavor cake


