I was standing in line at the hardware store on a Tuesday afternoon, holding a new showerhead and feeling sorry for myself after a long day, when the plumber in front of me turned around and started talking about cookies. Not pipes, not the weather—cookies. He was a big guy with flour dusted on his work boots, and he told me his wife had perfected a recipe that made exactly six cookies, no more, no less. “Six cookies,” he said, “is the exact number you need before you start making bad decisions.” I laughed, but honestly, I couldn’t stop thinking about it. A small batch. No giant mixing bowls, no leftover dough staring at you from the fridge for a week, no temptation to eat fifteen cookies in one sitting. Just six perfect, thick, chewy chocolate chip cookies. He scribbled the method on the back of a receipt, and I tucked it into my pocket like it was gold. I wasn’t expecting baking advice from a plumber at the hardware store, but there I was, gripping a showerhead, listening to him describe exactly how to make the best small-batch cookies of my life. That night, I tried it. And let me tell you—I haven’t made a full batch since. Maybe you’ve been there, too, staring down a recipe that serves four dozen and wondering why you can’t just have a few without the rest of the dough haunting you. This is the answer.
Why You’ll Love This Recipe
These are not your average chocolate chip cookies. I’ve tested this recipe at least a dozen times, tweaking the flour ratio, the chill time, the butter temperature, until I got it exactly right. Here is why this version stands out from every other cookie recipe you’ve tried:
- Perfectly Sized : Makes exactly 6 large cookies. No waste, no overspending on ingredients, no dough languishing in the fridge.
- Thick and Chewy : The texture is incredible—soft in the center with slightly crisp edges. It is the kind of cookie that bends without breaking.
- Simple Pantry Ingredients : You likely have everything already. No weird flours or specialty extracts required.
- Quick to Make : From start to warm cookie in your hand, it takes about 25 minutes plus a short chill.
- Perfect for Cravings : Ideal for a quiet night in, a small gathering, or when you just want a couple of cookies without the commitment of a full batch.
What makes these cookies different is the technique. Instead of just creaming butter and sugar together, you brown the butter first. It sounds fancy, but it’s dead simple and adds this nutty, caramel-like depth that makes the cookies taste like they came from a bakery. I’ve had friends tell me these are the best cookies they’ve ever eaten—and they didn’t even know I browned the butter until I told them. This is comfort food reimagined: faster, smaller, but with the same soul-soothing satisfaction. It is the kind of cookie that makes you close your eyes after the first bite.
What Ingredients You Will Need
This recipe uses simple, wholesome ingredients to deliver bold flavor and satisfying texture without any fuss. Most of these are pantry staples, which is exactly what you want when a cookie craving hits.
- Unsalted butter , 5 tablespoons (70g) — Use unsalted so you control the salt level. I prefer Kerrygold for its rich flavor, but any good-quality butter works.
- Dark brown sugar , ½ cup packed (100g) — This is key for chewiness. The molasses in brown sugar keeps the cookies soft and adds depth. Light brown sugar works too, but dark gives a more intense flavor.
- Granulated sugar , 2 tablespoons (25g) — Just a little to help with spreading and crisp edges.
- Large egg yolk , 1 — The yolk adds richness and tenderness. Save the white for omelets or smoothies.
- Vanilla extract , 1 teaspoon — Pure vanilla makes a difference. Imitation works in a pinch, but use real if you have it.
- All-purpose flour , ½ cup plus 2 tablespoons (80g) — Spoon and level it gently. Too much flour makes cookies cakey.
- Baking soda , ¼ teaspoon — Helps with spread and lift.
- Salt , ¼ teaspoon — Balances sweetness. I use fine sea salt.
- Semi-sweet chocolate chips , ½ cup (90g) — Use good-quality chips. Ghirardelli or Guittard hold their shape and taste rich. You can also chop a chocolate bar for bigger pools of chocolate.
- Flaky sea salt , for sprinkling (optional but highly recommended) — A pinch on top before baking makes the flavors sing.
Ingredient Tips : If you only have salted butter, reduce the added salt to ⅛ teaspoon. For a dairy-free version, use vegan butter sticks—but avoid margarine spreads, as they have too much water. The brown sugar is non-negotiable here; it is what gives these cookies their signature chew.
Equipment Needed
You don’t need a lot of fancy tools for this recipe, which is part of its charm. Here is what you’ll need:
- Small skillet or saucepan — For browning the butter. A light-colored pan helps you see the color change.
- Mixing bowls — One medium, one small. I use glass or stainless steel.
- Whisk — For combining the wet ingredients and flour.
- Rubber spatula — For folding everything together without overmixing.
- Baking sheet — A half-sheet pan works perfectly. Line it with parchment paper or a silicone baking mat.
- Cookie scoop or spoon — A 3-tablespoon scoop makes uniform cookies. If you don’t have one, use a regular spoon and your hands.
- Cooling rack — Helps cookies cool evenly without soggy bottoms.
I’ve made these cookies with a cheap baking sheet and a fork, and they still came out great. The only thing I would not skip is the parchment paper—it prevents sticking and makes cleanup a breeze. If you bake often, invest in a good silicone mat; it is worth every penny.
Preparation Method
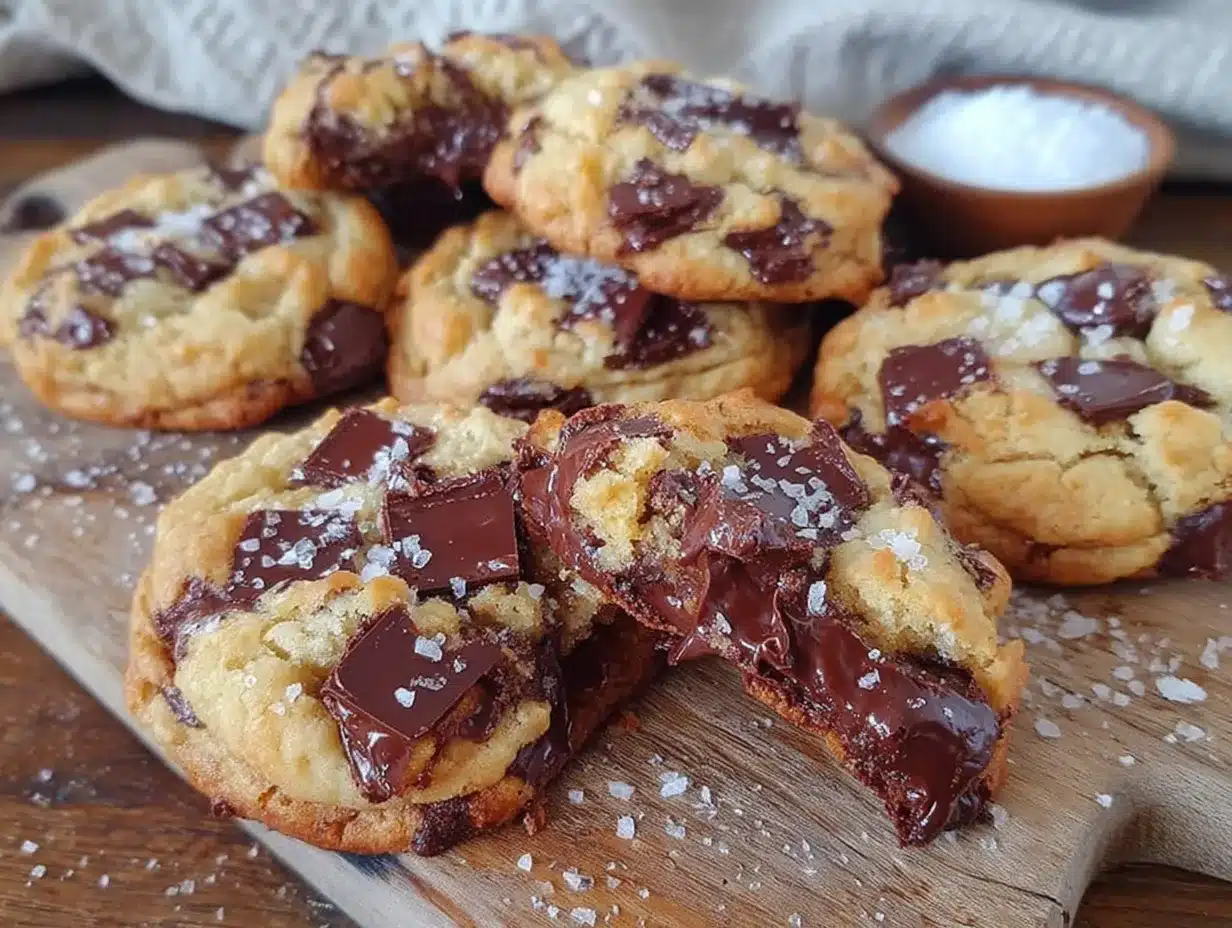
Follow these steps carefully, and you will have thick, chewy cookies every single time. I’ve included my personal notes and troubleshooting tips so you can avoid the mistakes I made along the way.
- Brown the butter. Place the 5 tablespoons of butter in a small skillet or saucepan over medium heat. Stir constantly with a rubber spatula or whisk. The butter will melt, then foam, then start to turn golden. Keep stirring until you see brown specks forming at the bottom and the butter smells nutty—this takes about 5 to 7 minutes. Immediately pour the browned butter into a medium mixing bowl to stop it from burning. Let it cool for 5 minutes. Do not skip the stirring; burnt butter is bitter and ruins the cookies.
- Mix the sugars. Add the packed dark brown sugar and granulated sugar to the warm browned butter. Whisk vigorously until the mixture looks like wet sand and is well combined. It should be smooth and shiny. This step helps dissolve the sugar for a chewier texture.
- Add the egg yolk and vanilla. Drop in the egg yolk and pour in the vanilla extract. Whisk again until the mixture is thick, pale, and slightly lighter in color. It might look a little separated at first, but keep whisking until it comes together. If the mixture looks greasy, you may have added the egg while the butter was too hot—let it cool a bit more next time.
- Combine the dry ingredients. In a small bowl, whisk together the all-purpose flour, baking soda, and salt. Make sure there are no clumps. Spoon and level your flour; scooping directly from the bag packs it down and makes cookies dry.
- Fold in the dry ingredients. Add the flour mixture to the wet mixture. Use a rubber spatula to fold gently until just combined. A few streaks of flour are okay—do not overmix, or the cookies will be tough. The dough will be thick and slightly sticky.
- Add the chocolate chips. Fold in the semi-sweet chocolate chips until evenly distributed. Reserve a few chips to press onto the tops of the dough balls later for a prettier look.
- Chill the dough. Cover the bowl with plastic wrap and refrigerate for at least 30 minutes. This step is crucial. Chilling solidifies the butter, prevents the cookies from spreading too much, and deepens the flavor. I once skipped this and ended up with flat, greasy cookies. Do not skip it.
- Preheat the oven. About 10 minutes before you are ready to bake, preheat your oven to 350°F (175°C). Line a baking sheet with parchment paper.
- Shape the cookies. Use a 3-tablespoon cookie scoop or a spoon to portion the dough into 6 equal balls. Place them on the prepared baking sheet, spacing them about 3 inches apart. Press a few reserved chocolate chips onto the tops of each ball. For extra height, tear each dough ball in half and press the torn sides together before placing on the sheet—this creates craggy tops.
- Bake. Bake for 10 to 12 minutes, or until the edges are golden brown and the centers look slightly puffed and underdone. They will continue to bake on the hot sheet. For softer cookies, bake for 10 minutes; for slightly crisper edges, go to 12 minutes.
- Cool. Let the cookies cool on the baking sheet for 5 minutes. Sprinkle with flaky sea salt if using. Then transfer to a cooling rack to cool completely—or eat one warm, which I fully support.
Cooking Tips & Techniques
I have made a lot of mistakes with cookies over the years, and I want you to learn from them. Here are my best tips for perfect results every time:
Brown butter is your secret weapon. It adds a nutty, toffee-like flavor that regular creamed butter cannot match. Do not rush this step. Stir constantly and watch for the color change. The moment you see brown specks, take it off the heat. I once walked away for thirty seconds and ended up with black butter that smelled like burnt popcorn. Not good.
Chill the dough, no exceptions. This is the number one mistake people make with small-batch cookies. Without chilling, the butter is too soft, and the cookies spread into thin, greasy discs. Thirty minutes is the minimum. If you have time, an hour is even better. The dough also keeps in the fridge for up to 3 days, so you can bake a couple of cookies whenever you want.
Use a cookie scoop for even sizing. Uniform dough balls bake evenly. If some are bigger than others, you will end up with burnt edges and raw centers. A 3-tablespoon scoop is ideal for this recipe. If you do not have one, wet your hands slightly to shape the dough without sticking.
Do not overbake. The cookies will look slightly underdone when you pull them out. That is exactly what you want. They continue to set as they cool on the hot baking sheet. Overbaked cookies are dry and crumbly. Trust the process—your nose will tell you when they are ready. The kitchen will smell like brown butter and caramel.
Multitask wisely. While the dough chills, clean up your dishes and preheat the oven. That way, when the 30 minutes are up, you are ready to go. I like to set a timer for the chill time so I do not forget and leave it in there for two hours.
Variations & Adaptations
This recipe is a fantastic base for all kinds of twists. Here are some variations I have tried and loved:
Double Chocolate Chip. Replace 1 tablespoon of flour with 1 tablespoon of unsweetened cocoa powder. Use white chocolate chips or milk chocolate chips instead of semi-sweet. The result is a rich, dark cookie that feels extra indulgent.
Nutty Brown Butter. Toast ¼ cup of chopped pecans or walnuts in a dry skillet over medium heat until fragrant, about 3 minutes. Fold them into the dough along with the chocolate chips. The crunch is lovely against the soft cookie.
Sea Salt and Dark Chocolate. Use dark chocolate chunks (70% cacao) instead of chips, and sprinkle generously with flaky sea salt right after baking. The salty-sweet combo is addictive. This is my personal favorite variation.
Gluten-Free Option. Substitute the all-purpose flour with a 1:1 gluten-free baking flour blend that contains xanthan gum. Cup4Cup works well here. Do not overmix, and chill the dough for a full hour for best texture.
Vegan Adaptation. Use vegan butter sticks (like Earth Balance) and replace the egg yolk with 1 tablespoon of aquafaba (the liquid from a can of chickpeas). The texture will be slightly less chewy but still very good. Chill the dough for at least an hour.
I once made a batch with chopped dried cherries and white chocolate chips, and it was a total accident—I grabbed the wrong bag from the pantry. Honestly, it was delicious. Do not be afraid to experiment.
Serving & Storage Suggestions
These cookies are best served warm, when the chocolate is still melty and the edges are crisp. Let them cool for about 5 minutes on the baking sheet, then transfer to a plate. A glass of cold milk is the classic pairing, but they are also wonderful with a cup of black coffee or a hot mug of tea.
For a fun presentation, stack the cookies on a small wooden board or a pretty plate. Sprinkle a little extra flaky salt on top just before serving. If you are feeling fancy, serve them alongside a scoop of vanilla ice cream for an impromptu dessert.
Storage: Store leftover cookies in an airtight container at room temperature for up to 3 days. They will soften slightly over time, which is not a bad thing. To refresh them, pop one in a 300°F oven for 3 minutes. Do not microwave—it makes them rubbery.
Freezing: You can freeze the baked cookies for up to 2 months. Wrap each one individually in plastic wrap, then place in a freezer bag. Thaw at room temperature for 15 minutes, or reheat directly from frozen in a 300°F oven for 5 minutes. The dough balls also freeze beautifully. Scoop them onto a parchment-lined sheet, freeze until solid, then transfer to a freezer bag. Bake from frozen, adding 2 minutes to the baking time.
Honestly, these cookies never last long enough in my house to worry about storage. But if you have more willpower than me, the freezer method is a lifesaver.
Nutritional Information & Benefits
Here is the estimated nutritional breakdown for one cookie (based on 6 cookies total):
| Nutrient | Amount per Cookie |
|---|---|
| Calories | 285 |
| Total Fat | 16g |
| Saturated Fat | 10g |
| Carbohydrates | 34g |
| Sugar | 24g |
| Protein | 3g |
| Sodium | 185mg |
| Fiber | 1g |
These values are estimates and will vary based on the specific brands you use. While these are definitely a treat, they are made with real, whole ingredients. The brown butter adds a richness that lets you use less sugar overall compared to many cookie recipes. Dark brown sugar contains molasses, which provides small amounts of minerals like calcium and potassium. Dark chocolate chips are rich in antioxidants, especially if you choose a higher cacao percentage.
From a wellness perspective, I love that this recipe is portion-controlled. You get exactly six cookies—no more, no less. It satisfies the craving without leaving you with a giant batch that tempts you all week. That is a win in my book.
Conclusion
These small-batch thick and chewy chocolate chip cookies are proof that you do not need a huge recipe to get incredible results. The brown butter adds a depth of flavor that makes them taste like they came from a fancy bakery, but they come together in under an hour with simple ingredients you probably already have. Whether you are baking for yourself, a partner, or a small gathering, these cookies deliver every single time.
I love that this recipe lets me enjoy fresh, warm cookies without the guilt of a giant batch sitting around. It is the perfect solution for those moments when you just want a little something sweet. Try them as written, then play around with the variations—I would love to hear how they turn out for you. Leave a comment below and let me know which version you tried, or tag me in your photos if you share them online. Happy baking, friend. You deserve a perfect cookie.
Frequently Asked Questions
Can I use salted butter instead of unsalted?
Yes, but reduce the added salt in the recipe to ⅛ teaspoon. Salted butter has varying amounts of salt, so it is safer to use unsalted for consistent results.
Why did my cookies spread too much?
This usually happens if the dough was not chilled long enough, or if the butter was too warm when you mixed it. Make sure to chill the dough for at least 30 minutes, and let the browned butter cool for 5 minutes before adding the sugars.
Can I double this recipe?
Absolutely. Simply double all the ingredients. The baking time may increase by 1 to 2 minutes, so keep an eye on the edges. You will get 12 cookies instead of 6.
How do I know when the cookies are done baking?
The edges should be golden brown, and the centers should look slightly puffed and underdone. They will continue to bake on the hot sheet as they cool. If you insert a toothpick into the center, it should come out with a few moist crumbs, not wet batter.
Can I make the dough ahead of time?
Yes! The dough can be refrigerated for up to 3 days in an airtight container. You can also freeze the dough balls for up to 2 months. Bake from frozen, adding 2 minutes to the baking time.
Pin This Recipe!
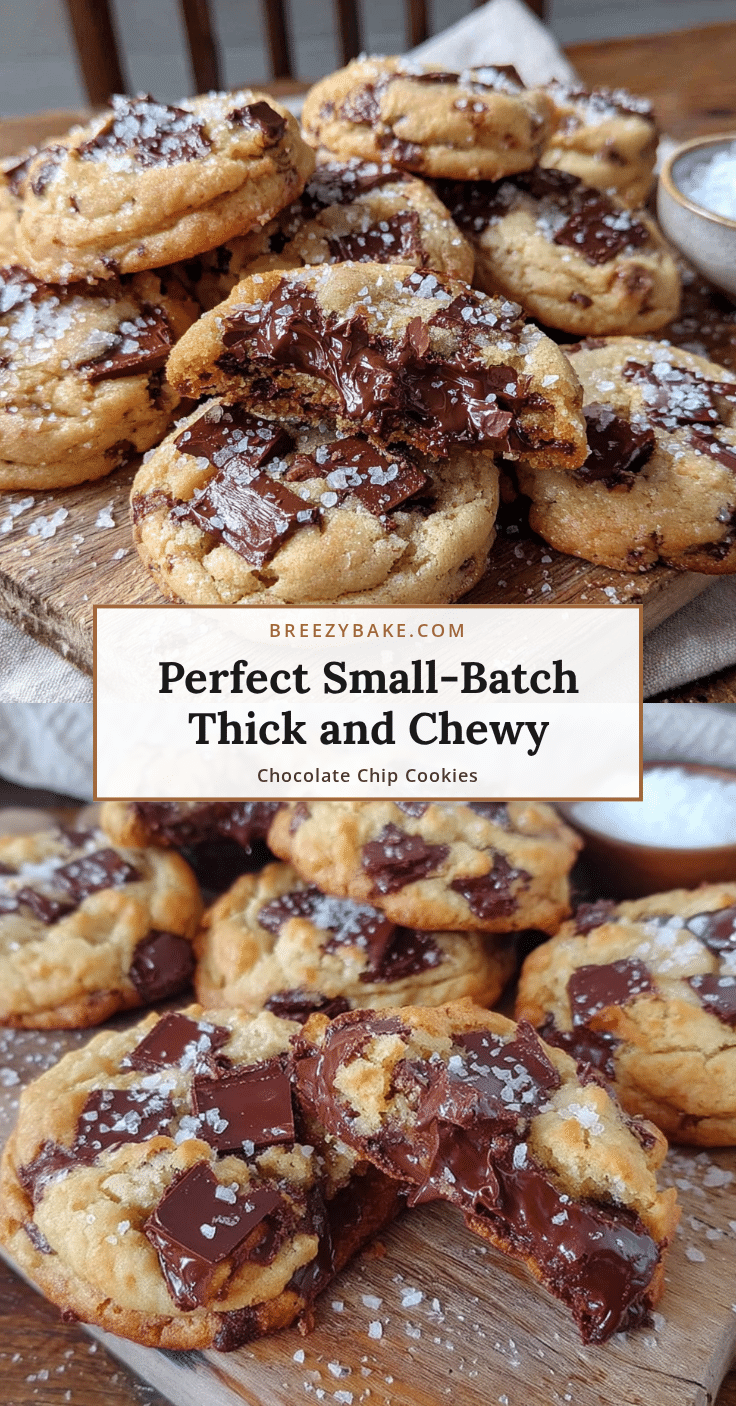
Best Small-Batch Thick & Chewy Chocolate Chip Cookies
These small-batch thick and chewy chocolate chip cookies are proof that you do not need a huge recipe to get incredible results. The brown butter adds a depth of flavor that makes them taste like they came from a fancy bakery, but they come together in under an hour with simple ingredients you probably already have.
- Prep Time: 15 minutes
- Cook Time: 12 minutes
- Total Time: 57 minutes
- Yield: 6 cookies 1x
- Category: Dessert
- Cuisine: American
Ingredients
- 5 tablespoons (70g) unsalted butter
- ½ cup packed (100g) dark brown sugar
- 2 tablespoons (25g) granulated sugar
- 1 large egg yolk
- 1 teaspoon vanilla extract
- ½ cup plus 2 tablespoons (80g) all-purpose flour
- ¼ teaspoon baking soda
- ¼ teaspoon fine sea salt
- ½ cup (90g) semi-sweet chocolate chips
- Flaky sea salt for sprinkling (optional)
Instructions
- Brown the butter: Place 5 tablespoons of butter in a small skillet or saucepan over medium heat. Stir constantly until the butter melts, foams, and turns golden with brown specks, about 5 to 7 minutes. Immediately pour into a medium mixing bowl to stop cooking. Let cool for 5 minutes.
- Mix the sugars: Add packed dark brown sugar and granulated sugar to the warm browned butter. Whisk vigorously until the mixture looks like wet sand and is smooth and shiny.
- Add the egg yolk and vanilla: Drop in the egg yolk and pour in the vanilla extract. Whisk until the mixture is thick, pale, and slightly lighter in color.
- Combine the dry ingredients: In a small bowl, whisk together the all-purpose flour, baking soda, and salt until no clumps remain.
- Fold in the dry ingredients: Add the flour mixture to the wet mixture. Use a rubber spatula to fold gently until just combined. A few streaks of flour are okay; do not overmix.
- Add the chocolate chips: Fold in the semi-sweet chocolate chips until evenly distributed. Reserve a few chips to press onto the tops of the dough balls later.
- Chill the dough: Cover the bowl with plastic wrap and refrigerate for at least 30 minutes.
- Preheat the oven: About 10 minutes before baking, preheat oven to 350°F (175°C). Line a baking sheet with parchment paper.
- Shape the cookies: Use a 3-tablespoon cookie scoop or spoon to portion the dough into 6 equal balls. Place them on the prepared baking sheet, spacing about 3 inches apart. Press a few reserved chocolate chips onto the tops of each ball.
- Bake: Bake for 10 to 12 minutes, until edges are golden brown and centers look slightly puffed and underdone.
- Cool: Let cookies cool on the baking sheet for 5 minutes. Sprinkle with flaky sea salt if using. Transfer to a cooling rack to cool completely.
Notes
Chilling the dough is crucial to prevent spreading. Do not overbake; cookies will continue to set on the hot sheet. For extra height, tear each dough ball in half and press the torn sides together before placing on the sheet.
Nutrition
- Serving Size: 1 cookie
- Calories: 285
- Sugar: 24
- Sodium: 185
- Fat: 16
- Saturated Fat: 10
- Carbohydrates: 34
- Fiber: 1
- Protein: 3
Keywords: small-batch cookies, thick and chewy cookies, chocolate chip cookies, brown butter cookies, easy cookie recipe


