I had claimed to hate pan de muerto for years. A solid decade, maybe more. Then last October, I found my husband standing at the kitchen counter at 11 p.m., pulling apart a piece I had made “just to test the recipe” for the blog, with orange blossom glaze dripping down his chin and this look on his face like he had just discovered something secret. “This is the best thing you’ve ever made,” he said, mouth still full. And I just stood there, spatula in hand, watching him prove me wrong without even trying.
Look, I have nothing against Day of the Dead bread in theory. It’s a gorgeous tradition, right? Those little bone-shaped decorations on top, the sesame seeds, the whole cultural significance. I respect all of that. But every version I had tried before was dry. Dense. Kind of a letdown, honestly. You know that feeling when something looks incredible but tastes like a mouthful of disappointment? That was my pan de muerto experience, over and over. I had given up on it completely.
Then my neighbor Marta — the one who grows rosemary in her driveway and never measures anything — mentioned her grandmother’s recipe over the fence one Saturday. She said the secret was orange blossom water and a little bit of patience. I was skeptical. But I scribbled down her notes on a torn envelope, and a week later, I found myself elbow-deep in dough on a rainy Tuesday afternoon. The kitchen smelled like flowers and butter, and I thought, okay, maybe there’s something here.
The glaze was an accident, honestly. I had leftover orange blossom syrup from another project and just started drizzling. My kids came running in from the other room asking what smelled so good. That’s when I knew I had stumbled onto something real. This recipe stayed with me because it changed my mind about a bread I had written off completely. And if it can do that for me — a certified pan de muerto skeptic — imagine what it will do for your family.
Why You’ll Love This Recipe
This Classic Pan de Muerto with Orange Blossom Glaze isn’t just another holiday bread. It’s the version that finally works for real families on real budgets. I tested this recipe seven times before I got it right, and every single failure taught me something I’m sharing with you here. No gatekeeping, just good bread.
- Budget-Friendly Ingredients: You probably already have flour, sugar, butter, and eggs in your kitchen. The only specialty item is orange blossom water, and a bottle costs under $5 and lasts for months. No expensive extracts or imported ingredients required.
- Feeds a Crowd Without Breaking the Bank: One batch makes two generous loaves. That’s enough for your whole ofrenda, plus breakfast the next morning, plus a piece to share with a neighbor. For about $4 worth of ingredients.
- Picky Eater Approved: My youngest refuses anything with “weird texture” and she ate three pieces in one sitting. The orange blossom glaze is sweet but not overwhelming, and the bread itself is soft enough that even the texture-sensitive kids don’t complain.
- Leftovers That Actually Reheat Well: Day-old pan de muerto turns into the most incredible French toast you’ve ever had. Or just warm it for 15 seconds in the microwave and it’s almost as good as fresh. That never happens with bakery bread.
- No Fancy Equipment Needed: You don’t need a stand mixer. You don’t need a proofing basket. Your hands, a bowl, and a baking sheet are all you really need. I’ve made this on a countertop with a wooden spoon and it turned out beautiful.
What makes this recipe different from every other pan de muerto recipe out there is the technique. Most recipes rush the first proof or skip the orange blossom entirely. I spent weeks figuring out the exact hydration ratio that gives you a soft, pillowy crumb without making the dough impossible to handle. The glaze is thin enough to soak in but thick enough to leave a visible sheen. It’s not just bread with sugar on top — it’s bread that tastes like someone cared about every detail.
This is the kind of recipe that makes you close your eyes after the first bite. It’s comfort food reimagined — faster than you’d expect, cheaper than bakery versions, but with the same soul-soothing satisfaction that makes Day of the Dead traditions so special. Perfect for impressing your family without stress, or turning a simple Tuesday into something memorable.
What Ingredients You Will Need
This recipe uses simple, honest ingredients to create a bread that tastes anything but simple. Most of these are pantry staples, and the few specialty items are worth every penny for the flavor they bring.
For the Dough
- 4 cups (500g) all-purpose flour — I prefer Gold Medal or King Arthur for consistent results. Avoid bread flour here; it makes the crumb too chewy for this style of bread.
- 1/2 cup (100g) granulated sugar — Regular white sugar works perfectly. The dough needs this much sweetness to balance the floral notes.
- 1 teaspoon salt — Fine sea salt dissolves better than kosher salt in yeast doughs.
- 1 packet (2 1/4 teaspoons) active dry yeast — I use Fleischmann’s or Red Star. Instant yeast also works if that’s what you have; just skip the blooming step and mix it directly with the flour.
- 1/2 cup (120ml) warm milk — Whole milk adds richness, but 2% works fine. Warm it to about 110°F — warm but not hot to the touch.
- 1/4 cup (60ml) warm water — Same temperature as the milk. Tap water is fine if it’s not heavily chlorinated.
- 1/3 cup (75g) unsalted butter, softened — Let it sit out for at least an hour. Cold butter won’t incorporate properly and will affect the rise.
- 3 large eggs, room temperature — This matters more than you think. Cold eggs will shock the yeast and make the dough stiff. Leave them on the counter for 30 minutes.
- 2 teaspoons orange blossom water — This is the heart of the flavor. Look for it in the international aisle or a Latin grocery store. Cortas brand is reliable and affordable.
- 1 teaspoon vanilla extract — Pure vanilla is nice, but imitation works fine in baked goods.
- Zest of 1 orange — Use a microplane if you have one. Avoid the white pith; it adds bitterness.
For the Orange Blossom Glaze
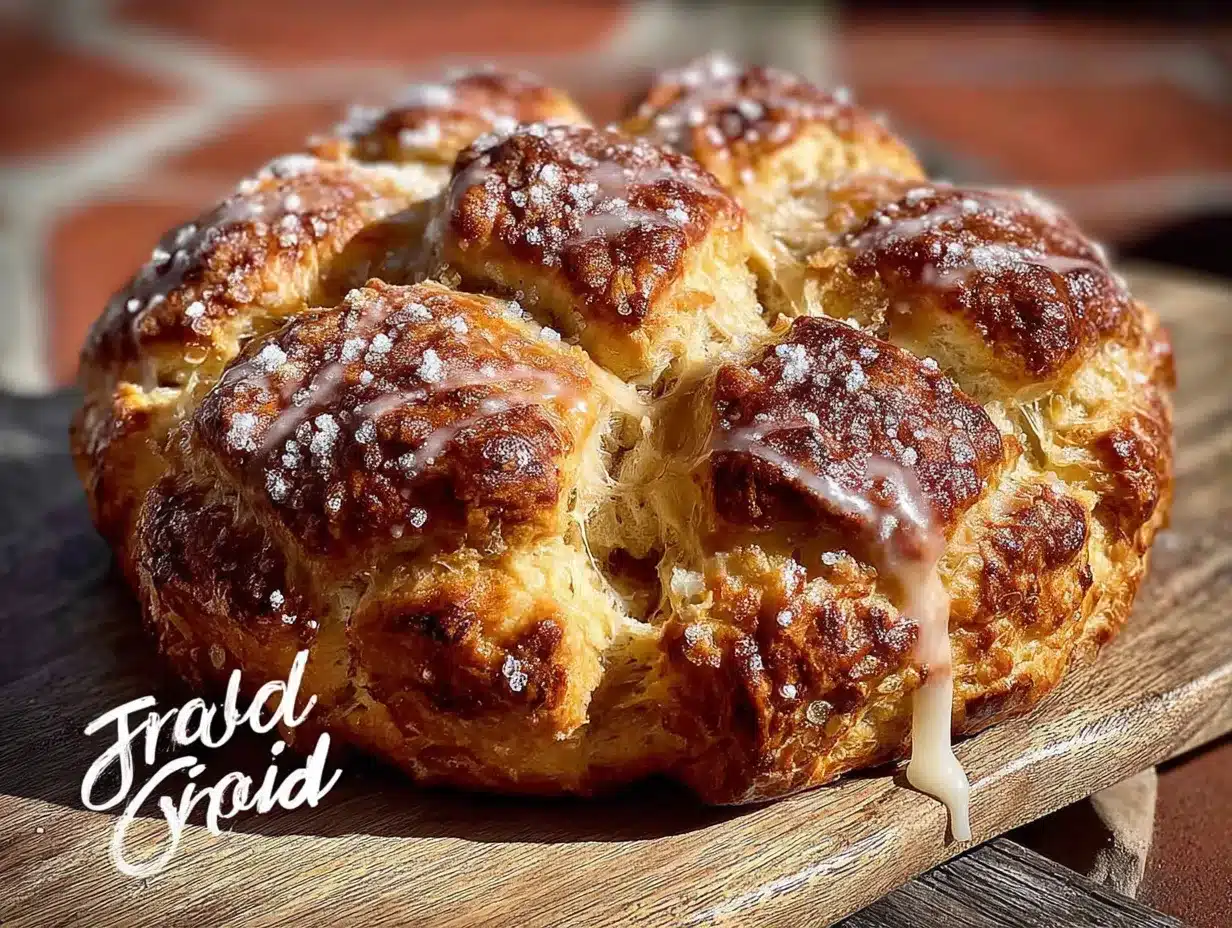
- 1 cup (120g) powdered sugar — Sift it if it’s lumpy. Nobody wants lumpy glaze.
- 2 tablespoons orange blossom water — Yes, more. Trust me on this.
- 1 tablespoon fresh orange juice — From that orange you zested earlier.
- 1 tablespoon melted butter — Adds richness and helps the glaze set without getting rock hard.
For Decoration
- 2 tablespoons granulated sugar — For sprinkling on top after glazing.
- Optional: 1 tablespoon sesame seeds — Traditional but totally optional. My kids prefer it without.
Ingredient selection tip: If you can’t find orange blossom water, don’t substitute orange extract. They are completely different flavors. Order it online or make the recipe without it — the bread will still be good, just less aromatic. For the butter, I recommend using unsalted so you control the salt level. If all you have is salted, reduce the added salt to 1/2 teaspoon.
Equipment Needed
You don’t need a fancy kitchen to make this bread. Here’s what you’ll actually use:
- Large mixing bowl — Glass or ceramic is ideal because it holds warmth better than metal. I use a plain Pyrex bowl that cost me $8.
- Wooden spoon or dough whisk — A regular spoon works fine. You don’t need a stand mixer, though it does make kneading easier if you have one.
- Measuring cups and spoons — For accuracy. Baking is science, not guesswork.
- Kitchen scale (optional but recommended) — Flour measurement by weight is way more reliable than scooping. If you don’t have one, fluff your flour with a spoon before scooping.
- Baking sheet — A half-sheet pan works perfectly. Line it with parchment paper for easy cleanup.
- Plastic wrap or a clean kitchen towel — For covering the dough while it rises.
- Pastry brush — For applying the glaze. A silicone brush is easier to clean than natural bristles.
- Cooling rack — Essential for letting the glaze set without getting soggy on the bottom.
Budget-friendly tip: If you don’t have a cooling rack, use the inverted rack from your toaster oven, or just let the bread cool on a cutting board and flip it every few minutes to prevent condensation. I’ve done both in a pinch and it works fine.
Preparation Method
Take your time with this one. The dough needs patience, but it rewards you generously.
- Bloom the yeast (5 minutes): In a small bowl, combine the warm milk, warm water, and 1 tablespoon of the sugar. Sprinkle the yeast on top and let it sit for 5 minutes until foamy. If it doesn’t foam, your yeast might be dead or your liquid was too hot. Start over if needed — it’s worth the extra few minutes.
- Mix the dry ingredients (2 minutes): In your large mixing bowl, whisk together the flour, remaining sugar, and salt. Make a well in the center.
- Combine the wet ingredients (3 minutes): In a separate bowl, whisk together the eggs, orange blossom water, vanilla extract, and orange zest. Pour this mixture and the bloomed yeast into the well in the flour. Add the softened butter.
- Form the dough (5 minutes): Mix everything together with your wooden spoon until it forms a shaggy, sticky mass. It will look messy and that’s normal. Don’t be tempted to add more flour yet.
- Knead the dough (10-12 minutes by hand, 6-8 minutes with a stand mixer): Turn the dough out onto a lightly floured surface. Knead by pushing the dough away from you with the heel of your hand, folding it back over, and repeating. The dough will be sticky at first — resist the urge to add too much flour. It should become smooth, soft, and slightly tacky by the end. If using a stand mixer with the dough hook, knead on medium-low speed until the dough pulls away from the sides of the bowl.
- First rise (1.5 to 2 hours): Shape the dough into a smooth ball. Place it in a lightly greased bowl, turning once to coat the surface. Cover tightly with plastic wrap and let it rise in a warm, draft-free spot until doubled in size. A good test: poke the dough gently with a finger. If the indentation stays, it’s ready. If it springs back immediately, give it more time.
- Shape the loaves (10 minutes): Punch down the dough gently to release the air. Turn it out onto a lightly floured surface. Divide the dough into two equal pieces. Set aside a small piece from each (about the size of a golf ball) for the bone decorations. Shape each main piece into a round loaf by tucking the edges underneath. Place them on your parchment-lined baking sheet, spaced at least 4 inches apart.
- Make the bone decorations (5 minutes): Roll the reserved dough pieces into ropes about 6 inches long. Cut each rope into 4 equal pieces. Roll each piece into a thin rope about 3 inches long. These are your “bones.” Place two ropes on each loaf to form an X shape across the top. Add a small round ball of dough in the center where the ropes cross. This represents the skull.
- Second rise (45 minutes to 1 hour): Cover the shaped loaves loosely with plastic wrap or a clean towel. Let them rise until puffy and nearly doubled. They should look soft and pillowy, not tight.
- Preheat and bake (25-30 minutes): About 20 minutes before the second rise finishes, preheat your oven to 350°F (175°C). Brush the loaves gently with an egg wash (1 egg beaten with 1 tablespoon water) if you want a shiny crust. Bake for 25-30 minutes, rotating the pan halfway through. The bread should be deep golden brown on top and sound hollow when tapped on the bottom. Internal temperature should reach 190°F if you have a thermometer.
- Make the glaze (5 minutes): While the bread bakes, whisk together the powdered sugar, orange blossom water, orange juice, and melted butter until smooth. It should be thin enough to drizzle but thick enough to coat the back of a spoon.
- Glaze and finish (5 minutes): Let the bread cool on the baking sheet for 5 minutes, then transfer to a cooling rack. While still warm — but not hot — brush or drizzle the glaze generously over the tops. Sprinkle with granulated sugar immediately while the glaze is still wet. Let the glaze set for at least 15 minutes before serving.
Sensory cue: When the bread is done, your kitchen should smell like a cross between a bakery and an orange grove in bloom. The glaze should look glossy but not runny — it will soak into the warm bread slightly, which is exactly what you want.
Cooking Tips & Techniques
I learned most of these the hard way, so you don’t have to.
Don’t skip the orange blossom water. I made a batch without it once because I ran out, thinking vanilla would be a fine substitute. It wasn’t. The bread was good, but it didn’t have that distinctive floral aroma that makes pan de muerto special. If you can’t find orange blossom water, make a different bread and come back to this one when you have it.
Temperature matters more than you think. The first time I made this, my kitchen was cold (about 62°F) and the dough took over 3 hours to rise. I was convinced I had killed the yeast. Nope — just cold. If your house is chilly, put the dough in your oven with the light on (not the heat) or on top of the refrigerator where it’s warmer. A proofing box is nice but completely unnecessary.
Wet hands are your friend. When shaping sticky dough, lightly wet your hands with water instead of flouring them. You’ll add less extra flour to the dough, which keeps it soft and tender. This was a game-changer for me after years of adding too much flour and ending up with tough bread.
The glaze timing is crucial. If you glaze the bread when it’s too hot, the glaze will run right off and pool on the pan. Too cold, and it will sit on top like a hard shell instead of soaking in slightly. Aim for warm to the touch — about 10 minutes out of the oven. The bread should still feel warm but not hot in the center.
One mistake I made repeatedly: Over-kneading the dough because I thought “more kneading = better bread.” Not true for enriched doughs like this one. The butter and eggs make the dough soft, and over-kneading can make it tough. Stop when the dough is smooth and elastic, not when your arms give out.
Variations & Adaptations
This recipe is forgiving enough to adapt to different needs and preferences.
Dairy-Free Version: Substitute the butter with vegan butter (I use Earth Balance) and the milk with oat milk or almond milk. The texture will be slightly less rich but still very good. Use a non-dairy milk that has some fat content; skim almond milk makes the dough a bit lean.
Gluten-Free Adaptation: I won’t lie — this is tricky with gluten-free flour. If you need gluten-free, use a 1:1 gluten-free baking flour blend that contains xanthan gum. Add an extra tablespoon of orange blossom water to help with moisture. The texture won’t be identical to the wheat version, but it will still be delicious. I’ve had good results with King Arthur’s Measure for Measure flour.
Less Sweet Version: Reduce the sugar in the dough to 1/3 cup and skip the granulated sugar sprinkle on top. The glaze still adds sweetness, but you can also reduce the powdered sugar to 3/4 cup. This version is great if you plan to use the bread for French toast later.
Chocolate Twist: Add 1/4 cup cocoa powder to the flour mixture and increase the sugar to 2/3 cup. The chocolate and orange blossom combination is surprisingly good. My neighbor tried this version and now makes it every year instead of the traditional recipe.
Filled Version: After the first rise, flatten each piece of dough into a disc, place a tablespoon of dulce de leche or cajeta in the center, and seal the edges before shaping into rounds. The filling will caramelize slightly during baking and create pockets of gooey sweetness. This is my personal favorite variation.
Serving & Storage Suggestions
Pan de Muerto is best served the day it’s made, but it keeps better than you’d expect.
Serving Temperature: Serve at room temperature or slightly warm. If it’s been sitting for a few hours, pop it in a 300°F oven for 5 minutes to revive the crust. The glaze will get slightly melty again, which is lovely. Pair it with a cup of coffee, hot chocolate, or atole for the full experience.
Presentation Ideas: Arrange the bread on a beautiful plate or wooden board near your ofrenda if you’re celebrating Day of the Dead. Sprinkle extra orange zest and a few dried marigold petals around the plate for a stunning visual. For everyday serving, just slice it into wedges and let people grab pieces.
Storage: Store leftover bread in an airtight container at room temperature for up to 3 days. Do not refrigerate — the bread will go stale much faster in the fridge. If your kitchen is very humid, wrap the bread in paper towels before sealing in a container to absorb excess moisture.
Freezer Instructions: This bread freezes beautifully. Wrap the completely cooled, unglazed loaves tightly in plastic wrap, then in aluminum foil. Freeze for up to 3 months. To serve, thaw at room temperature, then warm in a 300°F oven for 10 minutes before glazing. The glaze is best applied fresh.
Reheating: For individual slices, 15 seconds in the microwave is perfect. For a whole loaf, wrap in foil and warm in a 300°F oven for 10-12 minutes. The flavors actually improve after a day — the orange blossom aroma becomes more pronounced as the bread rests.
Leftover Ideas: Stale pan de muerto makes incredible bread pudding. Cube the bread, soak in a custard of eggs, milk, sugar, and a splash of orange blossom water, and bake at 350°F for 30 minutes. It’s like a second dessert from the same batch of bread.
Nutritional Information & Benefits
Let’s be honest — this is a treat, not a health food. But there’s something to be said for the simple pleasure of homemade bread made with real ingredients.
Estimated per serving (1/8 of a loaf):
- Calories: 285
- Fat: 9g
- Carbohydrates: 45g
- Protein: 6g
- Fiber: 1g
- Sugar: 22g (including glaze)
Ingredient Benefits: The orange zest provides a small amount of vitamin C and antioxidants. The eggs add high-quality protein and choline, which supports brain health. Butter contains fat-soluble vitamins A, D, E, and K, though in small amounts per serving. The orange blossom water has been used in traditional medicine for its calming properties — whether that’s real or placebo, the aroma certainly helps create a sense of comfort and ritual.
Dietary Considerations: This recipe contains gluten, dairy, and eggs. It is nut-free and soy-free as written. For a dairy-free version, see the variations section above. The bread is relatively low in fiber, so pair it with fruit or a vegetable-heavy meal for balance.
My personal perspective: I don’t believe in labeling food as “good” or “bad.” This bread is a celebration bread, meant to be enjoyed with people you love. One slice won’t derail anyone’s health goals, and the act of making bread from scratch — the kneading, the rising, the aroma filling your kitchen — has its own mental health benefits that don’t show up on any nutrition label.
Conclusion
This Classic Pan de Muerto with Orange Blossom Glaze changed my mind about a bread I had written off completely. It’s soft, fragrant, and surprisingly simple to make once you understand a few key techniques. The orange blossom glaze turns something ordinary into something special — the kind of bread that makes people stop mid-conversation and say, “Wow, what is that?”
I hope you make this recipe your own. Add a little extra zest if you like things bright. Skip the sesame seeds if that’s not your thing. Double the glaze if you’re feeling generous (I won’t judge). The beauty of homemade bread is that it bends to your preferences without complaint.
If you make this, I’d love to hear how it turned out. Did your family love it? Did you try one of the variations? Drop a comment below or tag me in your photos — I genuinely get excited seeing other people’s bread turn out beautiful. And if something didn’t go quite right, tell me that too. I’ve messed up this recipe more times than I can count, and every failure taught me something worth sharing.
Go ahead. Make the bread. Your kitchen is about to smell incredible.
Frequently Asked Questions
Can I make Pan de Muerto ahead of time?
Absolutely. You can make the dough through the first rise, punch it down, wrap it tightly, and refrigerate it for up to 24 hours. The next day, let it come to room temperature for about an hour before shaping and proceeding with the second rise. The cold fermentation actually develops more flavor.
My dough is too sticky — what should I do?
Enriched doughs like this one are naturally stickier than lean bread doughs. Before adding more flour, try wetting your hands with water and kneading for another 2-3 minutes. Often the dough just needs more time to develop gluten and become less sticky. If it’s still unmanageable after that, add flour one tablespoon at a time, but go slowly.
Can I use orange extract instead of orange blossom water?
I wouldn’t. Orange extract and orange blossom water are completely different products with different flavor profiles. Orange blossom water is floral and delicate; orange extract is concentrated and can taste artificial. If you can’t find orange blossom water, you’re better off making a vanilla glaze or using fresh orange juice and zest for the flavor.
Why did my bread come out dense and heavy?
This usually happens for one of three reasons: the dough didn’t rise enough during the first proof, too much flour was added during kneading, or the yeast was old or killed by hot liquid. Make sure your liquid is warm (around 110°F), not hot. And trust the rising time — a cold kitchen can easily double the proofing time.
How do I get the bone decorations to stay on top?
Press them gently into the surface of the dough after the second rise, just before baking. If they still fall off during baking, your dough might be too dry or the decorations weren’t attached firmly enough. A tiny dab of water under each piece helps them stick. Also make sure the dough underneath isn’t too floury where you’re attaching them.
Pin This Recipe!
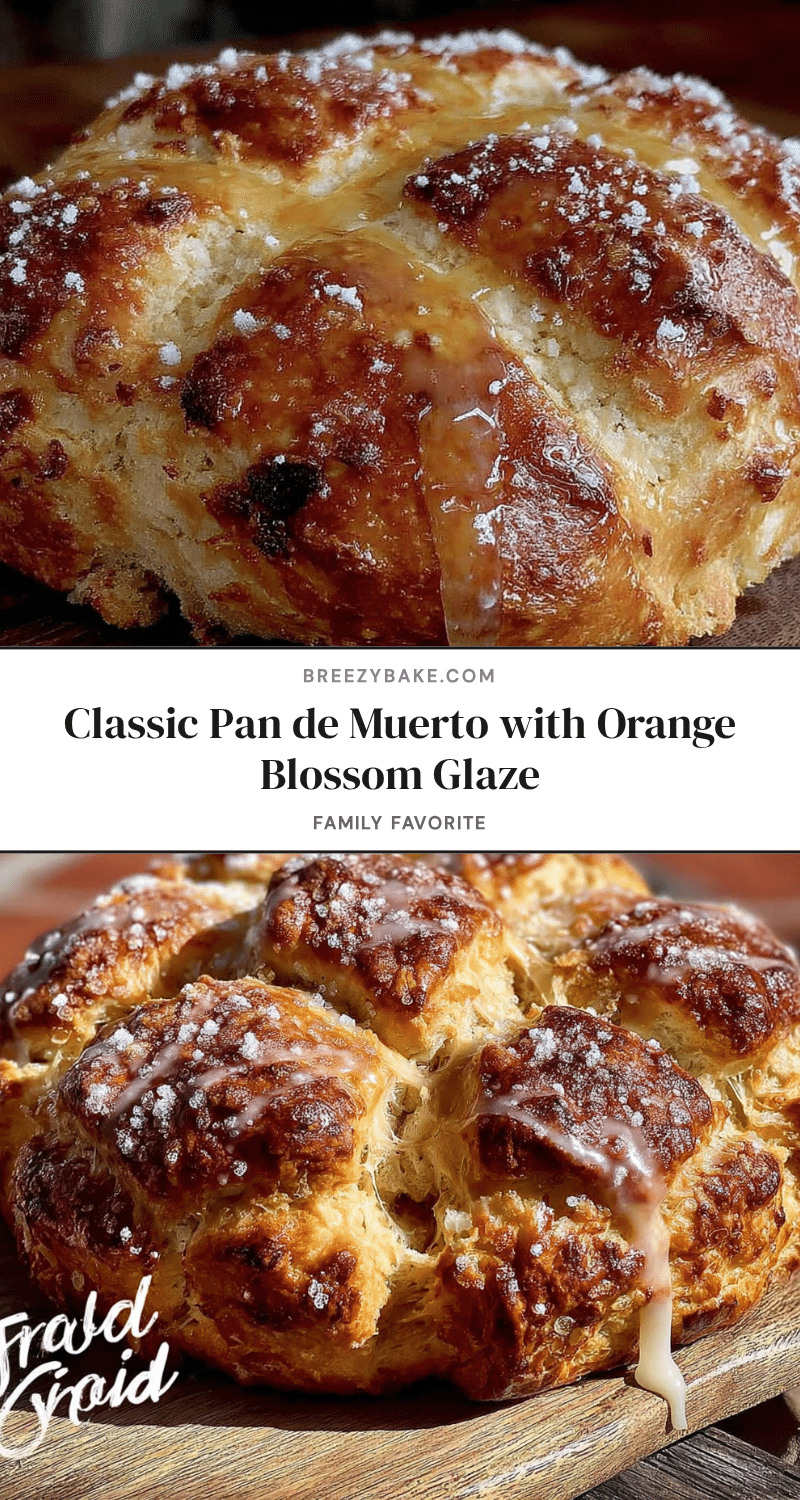
Classic Pan de Muerto with Orange Blossom Glaze – Best Family Favorite
This soft, fragrant Day of the Dead bread with a sweet orange blossom glaze is a family favorite that even skeptics will love. Made with simple ingredients and no fancy equipment, it’s perfect for celebrations or a cozy treat.
- Prep Time: 30 minutes
- Cook Time: 30 minutes
- Total Time: 3 hours 30 minutes
- Yield: 16 servings 1x
- Category: Bread
- Cuisine: Mexican
Ingredients
- 4 cups (500g) all-purpose flour
- 1/2 cup (100g) granulated sugar
- 1 teaspoon salt
- 1 packet (2 1/4 teaspoons) active dry yeast
- 1/2 cup (120ml) warm milk
- 1/4 cup (60ml) warm water
- 1/3 cup (75g) unsalted butter, softened
- 3 large eggs, room temperature
- 2 teaspoons orange blossom water
- 1 teaspoon vanilla extract
- Zest of 1 orange
- 1 cup (120g) powdered sugar
- 2 tablespoons orange blossom water
- 1 tablespoon fresh orange juice
- 1 tablespoon melted butter
- 2 tablespoons granulated sugar
- Optional: 1 tablespoon sesame seeds
Instructions
- Bloom the yeast: In a small bowl, combine warm milk, warm water, and 1 tablespoon of the sugar. Sprinkle yeast on top and let sit for 5 minutes until foamy.
- Mix dry ingredients: In a large bowl, whisk together flour, remaining sugar, and salt. Make a well in the center.
- Combine wet ingredients: In a separate bowl, whisk together eggs, orange blossom water, vanilla extract, and orange zest. Pour this mixture and the bloomed yeast into the well. Add softened butter.
- Form the dough: Mix with a wooden spoon until a shaggy, sticky mass forms.
- Knead the dough: Turn out onto a lightly floured surface and knead for 10-12 minutes (or 6-8 minutes with a stand mixer) until smooth and slightly tacky.
- First rise: Shape into a ball, place in a greased bowl, cover, and let rise in a warm spot for 1.5 to 2 hours until doubled.
- Shape the loaves: Punch down dough, divide into two equal pieces. Set aside a small piece from each for decorations. Shape each main piece into a round loaf and place on a parchment-lined baking sheet.
- Make bone decorations: Roll reserved dough into ropes, cut into pieces, and shape into thin ropes. Place two ropes on each loaf to form an X, add a small ball in the center.
- Second rise: Cover loaves and let rise for 45 minutes to 1 hour until puffy.
- Preheat and bake: Preheat oven to 350°F (175°C). Brush loaves with egg wash if desired. Bake for 25-30 minutes, rotating halfway, until deep golden brown and hollow-sounding when tapped.
- Make the glaze: Whisk together powdered sugar, orange blossom water, orange juice, and melted butter until smooth.
- Glaze and finish: Let bread cool for 5 minutes, then transfer to a rack. While still warm, brush or drizzle with glaze and sprinkle with granulated sugar. Let set for 15 minutes before serving.
Notes
Don’t skip the orange blossom water; it’s essential for the authentic flavor. Temperature matters: a cold kitchen can double rising time. Wet hands are better than floured hands for shaping sticky dough. Glaze when bread is warm, not hot or cold. Over-kneading can make the dough tough; stop when smooth and elastic.
Nutrition
- Serving Size: 1/8 of a loaf
- Calories: 285
- Sugar: 22
- Sodium: 200
- Fat: 9
- Saturated Fat: 5
- Carbohydrates: 45
- Fiber: 1
- Protein: 6
Keywords: pan de muerto, day of the dead bread, orange blossom glaze, mexican bread, holiday bread, family recipe


