My neighbor asked why I couldn’t just brown the butter first, then mix it into the batter cold. I started to explain why that wouldn’t work—something about the fat solidifying and creating lumps. Then I stopped. Honestly, I had no real reason except that I’d never done it that way before.
So I tried it. On a rainy Tuesday afternoon, with the windows fogged up and the house smelling like fall, I browned a whole stick of butter until it smelled nutty and rich. I let it cool just enough to stop sizzling, then poured it straight into the pumpkin mixture. And you know what? It worked perfectly. Better than perfectly, actually. The cold butter method I’d been using for years? Let’s just say I felt a little silly for being so stubborn about it.
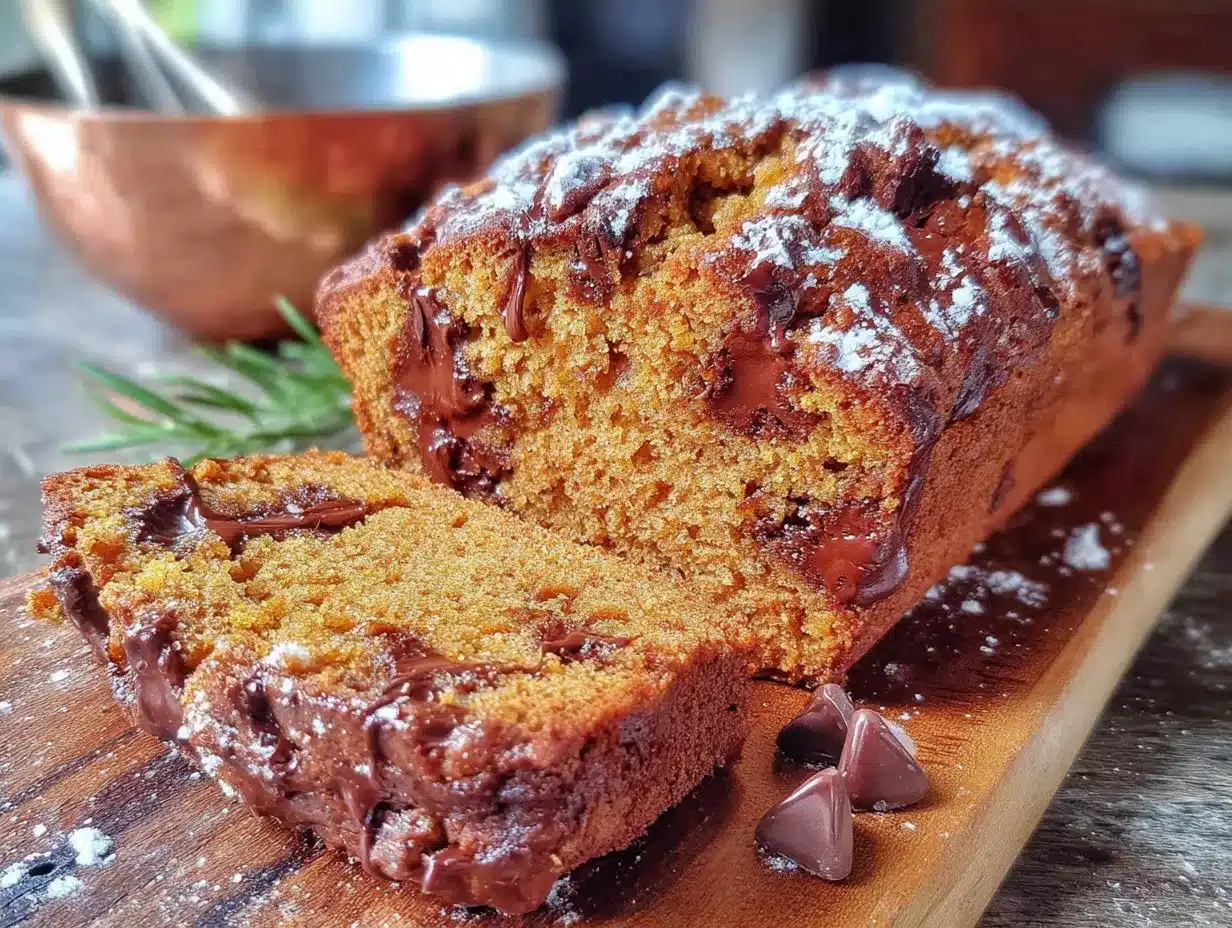
That loaf turned into this recipe—Cozy Brown Butter Pumpkin Chocolate Chip Bread. It’s the kind of bread that makes your kitchen feel like a warm hug on a cold day. I mean, the smell alone is enough to make you forget whatever went wrong earlier. The brown butter adds this deep, almost caramel-like flavor that regular melted butter just can’t touch. And the chocolate chips? They melt into little pockets of gooey goodness throughout the tender, spiced crumb.
I’ve made this bread at least a dozen times since that rainy Tuesday. Each time, I get a little better at the brown butter part (burnt it once—don’t ask). But every single loaf has disappeared within hours. My neighbor, the one who suggested the method? She got the first slice. She just smiled and said, “Told you.”
Maybe you’ve been there—stuck in your cooking ways, convinced your method is the only way. This recipe is proof that sometimes the best discoveries come from letting someone else take the lead. And honestly? It tastes even better knowing I was wrong.
Why You’ll Love This Recipe
This isn’t just another pumpkin bread recipe. I’ve tested this one in my own kitchen through multiple batches, tweaking the brown butter timing, the chocolate ratio, and the spice blend until everything clicked. Here’s why this one stands out:
- Quick & Easy: From start to oven in about 15 minutes. No stand mixer needed, no complicated techniques. Just one bowl, a whisk, and a skillet for the brown butter.
- Simple Ingredients: You probably already have most of these in your pantry—flour, sugar, eggs, pumpkin puree, chocolate chips. The only “special” ingredient is butter, and you’re browning it anyway.
- Perfect for Cozy Evenings: This bread was made for cold weather, rainy afternoons, or any day that needs a little warming up. It’s the kind of treat you bake when you want the house to smell amazing.
- Crowd-Pleaser: I’ve brought this to potlucks, family gatherings, and casual coffee dates. It disappears fast. Kids love the chocolate chips, adults love the sophisticated brown butter flavor.
- Unbelievably Delicious: The brown butter adds a nutty depth that regular butter just can’t match. Combined with warm pumpkin spices and melty chocolate, every bite is pure comfort.
What makes this recipe different from the rest? It’s the brown butter technique, plain and simple. Most pumpkin breads use melted butter or oil, which is fine—but brown butter takes it to another level. The toasty, caramelized notes complement the pumpkin and spices in a way that feels intentional and special. Plus, the chocolate chips aren’t an afterthought—they’re folded in generously so every slice gets at least a few melty pockets.
This recipe isn’t just good—it’s the kind that makes you close your eyes after the first bite. It’s comfort food reimagined: faster to make than traditional pumpkin bread, but with the same soul-soothing satisfaction. Perfect for impressing guests without stress, or turning a simple Tuesday evening into something memorable.
Ingredients You Will Need
This recipe uses simple, wholesome ingredients that come together to create something truly special. Most of these are pantry staples, which makes this bread perfect for spontaneous baking cravings.
For the Brown Butter
- Unsalted butter, ½ cup (1 stick / 113g) — I prefer using unsalted so I can control the salt level. Kerrygold or any European-style butter works beautifully here because of its higher fat content.
For the Pumpkin Bread Batter
- All-purpose flour, 1 ¾ cups (220g) — Spoon and level for accuracy. Too much flour makes the bread dense.
- Baking soda, 1 teaspoon — Helps the bread rise and gives it a tender crumb.
- Baking powder, ½ teaspoon — Adds extra lift.
- Salt, ½ teaspoon — Balances the sweetness and enhances the spices.
- Ground cinnamon, 1 ½ teaspoons — The backbone of the spice blend.
- Ground nutmeg, ½ teaspoon — Freshly grated if you have it, but pre-ground works fine.
- Ground ginger, ½ teaspoon — Adds warmth without being overpowering.
- Ground cloves, ¼ teaspoon — Just a pinch for depth.
- Granulated sugar, ¾ cup (150g) — Provides sweetness and helps create a tender crumb.
- Light brown sugar, ½ cup (100g), packed — Adds moisture and a subtle molasses flavor that pairs perfectly with the brown butter.
- Pumpkin puree, 1 cup (225g) — Not pumpkin pie filling! Make sure it’s 100% pure pumpkin. Libby’s is my go-to brand for consistent texture.
- Large eggs, 2, room temperature — Room temperature eggs incorporate more evenly into the batter.
- Vanilla extract, 1 teaspoon — Pure vanilla extract makes a noticeable difference over imitation.
- Milk, ¼ cup (60ml) — Whole milk adds richness, but 2% or even oat milk works fine.
- Semi-sweet chocolate chips, 1 cup (175g) — I use Ghirardelli for their consistent quality and meltability. You can also chop a dark chocolate bar for irregular chunks.
Ingredient Selection Tips
For the best results, use fresh spices—they lose potency over time. If your baking soda or powder is more than six months old, test it by dropping a bit in vinegar (for soda) or hot water (for powder). It should fizz vigorously. For the pumpkin puree, look for cans without added spices or sweeteners. I’ve tried fresh pumpkin puree before, and honestly, canned is more consistent and saves time.
Substitution Guidance
If you’re out of brown sugar, use all granulated sugar and add a tablespoon of molasses. For a dairy-free version, substitute the butter with vegan butter (like Miyoko’s) and use oat milk. Gluten-free? Swap the all-purpose flour with a 1:1 gluten-free baking blend that contains xanthan gum. The texture will be slightly more tender, but still delicious.
Equipment Needed
- 9×5-inch loaf pan — Standard size works best. Glass, metal, or ceramic all work, but metal gives the most even browning.
- Small skillet or saucepan — For browning the butter. A light-colored pan helps you see the color change.
- Large mixing bowl — For the dry ingredients.
- Medium mixing bowl — For the wet ingredients.
- Whisk — For combining everything smoothly.
- Rubber spatula — For folding in the chocolate chips and scraping the bowl clean.
- Parchment paper — Lining the pan makes removal effortless. If you don’t have it, grease the pan thoroughly with butter or non-stick spray.
- Cooling rack — Lets the bread cool evenly so the bottom doesn’t get soggy.
I’ve used both metal and glass loaf pans for this recipe. The metal pan gives a slightly crisper crust, while glass takes a few minutes longer to bake. Either works—just adjust your bake time accordingly. If you don’t have a cooling rack, you can use the grates from your oven (just make sure they’re clean).
Preparation Method
- Preheat and prepare the pan: Preheat your oven to 350°F (175°C). Line a 9×5-inch loaf pan with parchment paper, leaving some overhang on the long sides for easy lifting. Lightly grease the exposed ends.
- Brown the butter: Place the ½ cup (113g) of unsalted butter in a small skillet or saucepan over medium heat. Let it melt completely, then continue cooking, swirling the pan occasionally. You’ll hear it sizzle and pop—that’s the water evaporating. After 3-5 minutes, the butter will turn a golden amber color and smell nutty. Watch closely—it can go from perfect to burnt in seconds. Once you see brown specks forming at the bottom and the color is a rich amber, remove it from the heat immediately. Pour it into a heatproof bowl to stop the cooking. Let it cool for 5 minutes—it should still be liquid but not hot enough to cook the eggs.
- Mix the dry ingredients: In a large bowl, whisk together the flour, baking soda, baking powder, salt, cinnamon, nutmeg, ginger, and cloves. Make sure there are no lumps—especially with the baking soda, which can clump.
- Mix the wet ingredients: In a medium bowl, whisk together the granulated sugar, brown sugar, pumpkin puree, eggs, vanilla extract, and milk until smooth. The mixture should be thick and glossy. Slowly stream in the cooled brown butter while whisking constantly. The batter will look slightly separated at first—keep whisking until it comes together. It should be smooth and uniform.
- Combine wet and dry: Pour the wet ingredients into the dry ingredients. Use a rubber spatula to fold them together gently. Stir just until no streaks of flour remain—about 10-12 strokes. A few small lumps are okay. Overmixing will make the bread tough.
- Fold in the chocolate chips: Reserve about 2 tablespoons of chocolate chips for the top. Gently fold the remaining chocolate chips into the batter. The batter will be thick and slightly sticky—that’s normal.
- Fill the pan: Pour the batter into the prepared loaf pan and spread it evenly. Sprinkle the reserved chocolate chips on top for a pretty presentation. Tap the pan gently on the counter a few times to release any air bubbles.
- Bake: Bake for 50-60 minutes, or until a toothpick inserted into the center comes out clean or with just a few moist crumbs. If the top is browning too quickly after 40 minutes, tent loosely with aluminum foil. Every oven runs differently—mine takes exactly 55 minutes. Start checking at 50 minutes to be safe.
- Cool: Let the bread cool in the pan for 10 minutes. Then use the parchment overhang to lift it out onto a cooling rack. Let it cool completely before slicing—about 1 hour. I know it’s tempting to cut into it warm, but the structure needs time to set. Warm slices tend to crumble.
- Serve: Slice with a serrated knife for clean cuts. Serve warm or at room temperature. If you want to heat individual slices, pop them in the microwave for 10-15 seconds or toast them lightly.
Cooking Tips & Techniques
Brown butter can be tricky the first time. I’ve definitely burned a batch or two—the butter goes from perfect to acrid in about 30 seconds. Here’s what I’ve learned: use a light-colored pan so you can see the color change. Swirl constantly once it starts foaming. And trust your nose—when you smell that nutty, toasty aroma, it’s ready. If you’re nervous, err on the side of taking it off the heat a little early. You can always let it darken further in the residual heat of the pan.
Another common mistake is overmixing the batter. I know it’s tempting to keep stirring until it’s perfectly smooth, but that develops the gluten and makes the bread dense and rubbery. Stop mixing as soon as the flour disappears. A few streaks are totally fine—they’ll bake out.
For consistent results, make sure your eggs and milk are at room temperature. Cold ingredients can cause the brown butter to solidify into little flecks throughout the batter. If you forget to take them out ahead of time, place the eggs in a bowl of warm water for 5 minutes and microwave the milk for 10 seconds.
Timing-wise, I like to brown the butter first, then measure out the dry ingredients while it cools. This way, the butter has time to come down to the right temperature without me having to wait around. Multitasking is your friend here.
If you’re baking for a special occasion, try toasting the loaf slices lightly and spreading them with salted butter. It sounds indulgent, but the contrast between the warm, buttery bread and the melty chocolate chips is absolutely worth it.
Variations & Adaptations
1. Dairy-Free Version
Substitute the butter with a high-quality vegan butter like Miyoko’s or Earth Balance. Use oat milk or almond milk instead of regular milk. The texture will be slightly less tender, but the flavor is still fantastic. I’ve made this for a friend with dairy sensitivity, and she couldn’t tell the difference.
2. Gluten-Free Version
Swap the all-purpose flour with a 1:1 gluten-free baking blend that contains xanthan gum (I like Bob’s Red Mill). Add an extra tablespoon of milk to compensate for the drier texture. The bread will be a bit more crumbly, but it’s still delicious. Let it cool completely before slicing for the best results.
3. Spiced-Up Version
Add ½ teaspoon of cardamom or allspice to the spice blend for a more complex flavor profile. You can also swap the semi-sweet chocolate chips for white chocolate chips or butterscotch chips. I tried it with white chocolate once, and the combination of brown butter and white chocolate was surprisingly good—like a fancy pumpkin cookie in bread form.
4. Nutty Version
Fold in ½ cup of toasted pecans or walnuts along with the chocolate chips. Toast them in a dry skillet over medium heat for 3-4 minutes until fragrant. The crunch adds a nice contrast to the soft bread.
5. Lower Sugar Version
Reduce the granulated sugar to ½ cup and the brown sugar to ¼ cup. The bread will be less sweet but still flavorful. You can also use a sugar substitute like monk fruit sweetener, but the texture may be slightly different.
Serving & Storage Suggestions
This bread is best served warm or at room temperature. For an extra treat, slice it and toast it lightly in a toaster or under the broiler for 1-2 minutes. Spread with salted butter or cream cheese for a decadent breakfast or snack.
It pairs beautifully with a hot cup of coffee, chai tea, or a glass of cold milk. For a dessert-style presentation, serve it with a dollop of whipped cream and a drizzle of caramel sauce. I’ve also been known to eat a slice for breakfast with a side of scrambled eggs—it’s that versatile.
Storage Instructions:
- Room Temperature: Wrap the cooled bread tightly in plastic wrap or store in an airtight container at room temperature for up to 3 days. The flavors actually deepen after a day.
- Refrigerator: For longer storage, wrap and refrigerate for up to 5 days. The bread will be slightly denser cold, but it warms up beautifully.
- Freezer: Wrap the whole loaf or individual slices tightly in plastic wrap, then foil, and freeze for up to 3 months. Thaw at room temperature or reheat slices directly in the toaster.
Reheating Tips:
- Microwave: 10-15 seconds per slice for a warm, soft texture.
- Toaster: Toast on a medium setting for a slightly crispy exterior.
- Oven: Wrap in foil and warm at 300°F (150°C) for 10 minutes.
The flavors in this bread actually improve after a day or two as the spices meld together. I often make it a day ahead of serving for the best taste. Just wait to slice until you’re ready to serve.
Nutritional Information & Benefits
Per slice (based on 10 slices):
- Calories: 320
- Fat: 16g
- Saturated Fat: 9g
- Carbohydrates: 42g
- Fiber: 2g
- Sugar: 26g
- Protein: 5g
- Sodium: 220mg
This bread offers some surprising nutritional benefits thanks to the pumpkin. Pumpkin is rich in vitamin A (beta-carotene), which supports eye health and immune function. It’s also a good source of fiber, which aids digestion. The eggs provide high-quality protein, and the dark chocolate chips add antioxidants (especially if you use 70% or higher cocoa content).
Dietary considerations: This recipe contains wheat, dairy, and eggs. For gluten-free and dairy-free options, see the variations section above. It’s nut-free as written, making it safe for school lunches or gatherings where allergies are a concern.
I personally love that this bread feels indulgent but has a hidden health boost from the pumpkin. It’s the kind of treat that satisfies a sweet craving without leaving you feeling heavy or guilty. Just remember—it’s still a dessert bread, so enjoy it in moderation!
Frequently Asked Questions
Can I use pumpkin pie filling instead of pumpkin puree?
No, don’t use pumpkin pie filling—it’s pre-sweetened and spiced, which will throw off the sugar and spice balance in this recipe. Stick with 100% pure pumpkin puree for the best results.
Why did my brown butter burn?
Brown butter can go from perfect to burnt very quickly. The key is to watch for the color change and smell. Once it turns amber and smells nutty, remove it from the heat immediately. Pouring it into a cool bowl also stops the cooking process.
Can I make this into muffins instead of a loaf?
Absolutely! Divide the batter among a 12-cup muffin tin lined with paper liners. Bake at 350°F (175°C) for 18-22 minutes, or until a toothpick comes out clean. You’ll get about 12-14 muffins. The baking time will be shorter, so start checking at 18 minutes.
How do I know when the bread is done baking?
Insert a toothpick or skewer into the center of the loaf. If it comes out clean or with just a few moist crumbs (not wet batter), it’s done. The top should be golden brown and spring back when lightly pressed. If the top is browning too quickly, tent with foil.
Can I freeze this bread?
Yes, this bread freezes beautifully. Wrap the cooled loaf (or individual slices) tightly in plastic wrap, then foil, and freeze for up to 3 months. Thaw at room temperature or reheat slices directly in the toaster. It’s a great make-ahead option for holiday gatherings.
Conclusion
This Cozy Brown Butter Pumpkin Chocolate Chip Bread is more than just a recipe—it’s a little moment of warmth in a busy world. The nutty brown butter, the tender pumpkin crumb, the melty chocolate pockets—every bite feels intentional and comforting. It’s the kind of bread that makes you slow down, pour a cup of coffee, and actually enjoy the moment.
I hope you give this recipe a try, whether it’s for a cozy weekend morning, a holiday brunch, or just because you need something warm and delicious in your life. Don’t be afraid to make it your own—swap in different chips, add nuts, or experiment with the spice blend. The best recipes are the ones that evolve with you.
If you make this bread, I’d love to hear about it. Leave a comment below, share a photo on Pinterest, or tag me on social media. Your feedback and adaptations inspire me to keep experimenting in the kitchen. And if you loved it, please share the recipe with someone who could use a little comfort today. Happy baking!
Pin This Recipe!
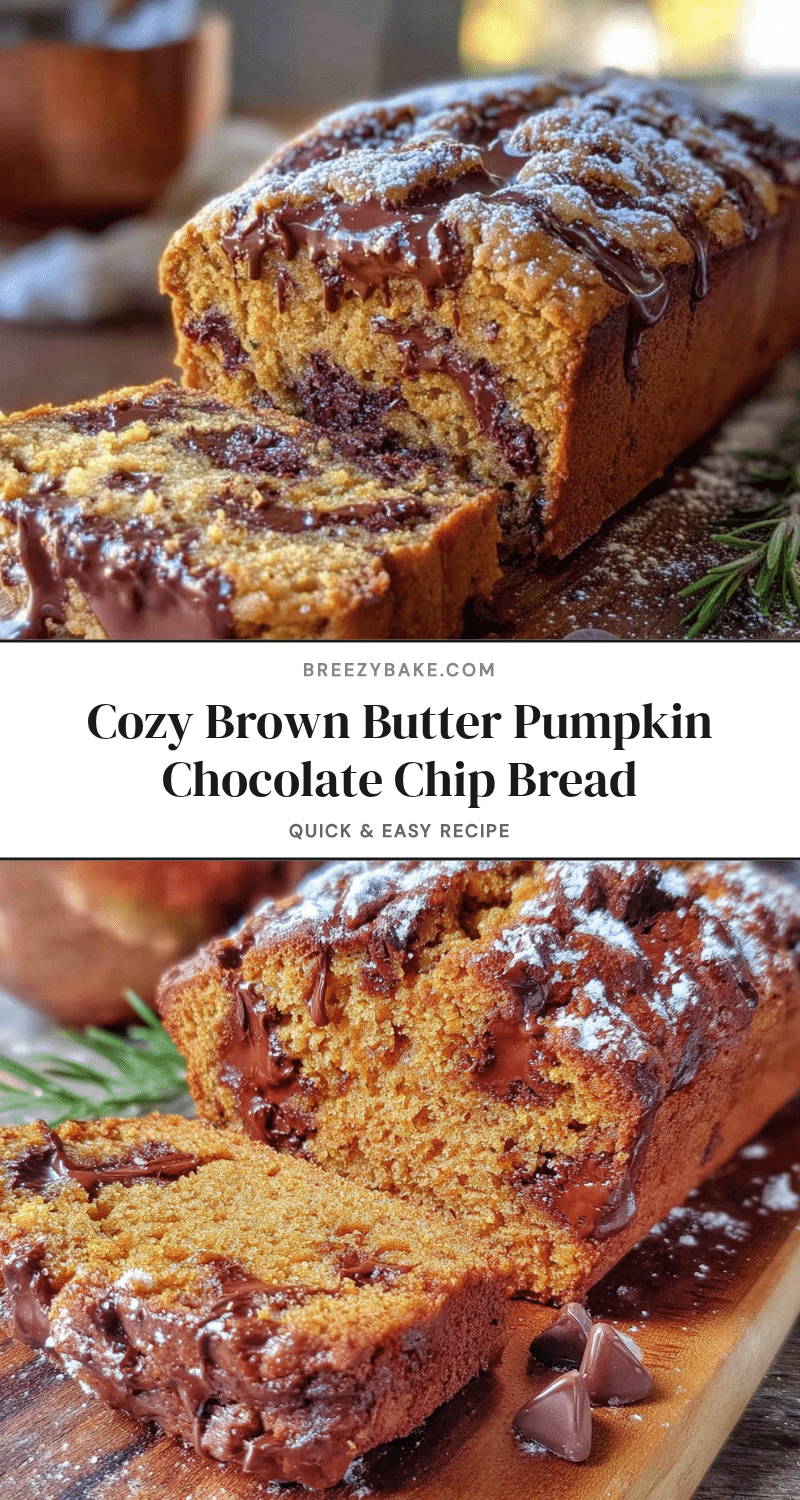
Cozy Brown Butter Pumpkin Chocolate Chip Bread
This pumpkin bread features nutty brown butter, warm spices, and melty chocolate chips for a comforting treat that’s quick and easy to make.
- Prep Time: 15 minutes
- Cook Time: 55 minutes
- Total Time: 1 hour 10 minutes
- Yield: 10 servings 1x
- Category: Dessert
- Cuisine: American
Ingredients
- ½ cup (1 stick / 113g) unsalted butter
- 1 ¾ cups (220g) all-purpose flour
- 1 teaspoon baking soda
- ½ teaspoon baking powder
- ½ teaspoon salt
- 1 ½ teaspoons ground cinnamon
- ½ teaspoon ground nutmeg
- ½ teaspoon ground ginger
- ¼ teaspoon ground cloves
- ¾ cup (150g) granulated sugar
- ½ cup (100g) packed light brown sugar
- 1 cup (225g) pumpkin puree (not pumpkin pie filling)
- 2 large eggs, room temperature
- 1 teaspoon vanilla extract
- ¼ cup (60ml) milk (whole milk preferred)
- 1 cup (175g) semi-sweet chocolate chips
Instructions
- Preheat oven to 350°F (175°C). Line a 9×5-inch loaf pan with parchment paper, leaving overhang on the long sides. Lightly grease exposed ends.
- Brown the butter: Place ½ cup (113g) unsalted butter in a small skillet or saucepan over medium heat. Melt completely, then continue cooking, swirling occasionally, until golden amber and nutty (3-5 minutes). Remove from heat immediately and pour into a heatproof bowl. Let cool for 5 minutes.
- In a large bowl, whisk together flour, baking soda, baking powder, salt, cinnamon, nutmeg, ginger, and cloves.
- In a medium bowl, whisk together granulated sugar, brown sugar, pumpkin puree, eggs, vanilla extract, and milk until smooth. Slowly stream in cooled brown butter while whisking constantly until smooth and uniform.
- Pour wet ingredients into dry ingredients. Fold gently with a rubber spatula until just combined (10-12 strokes). Do not overmix.
- Reserve 2 tablespoons of chocolate chips for topping. Gently fold remaining chocolate chips into batter.
- Pour batter into prepared loaf pan and spread evenly. Sprinkle reserved chocolate chips on top. Tap pan gently on counter to release air bubbles.
- Bake for 50-60 minutes, until a toothpick inserted in center comes out clean or with a few moist crumbs. If top browns too quickly after 40 minutes, tent loosely with foil.
- Cool in pan for 10 minutes, then lift out onto a cooling rack using parchment overhang. Cool completely (about 1 hour) before slicing.
- Slice with a serrated knife. Serve warm or at room temperature.
Notes
Brown butter can burn quickly; use a light-colored pan and watch for amber color and nutty aroma. For best results, use room temperature eggs and milk to prevent butter from solidifying. Overmixing batter leads to dense bread. Let bread cool completely before slicing for clean cuts.
Nutrition
- Serving Size: 1 slice
- Calories: 320
- Sugar: 26
- Sodium: 220
- Fat: 16
- Saturated Fat: 9
- Carbohydrates: 42
- Fiber: 2
- Protein: 5
Keywords: pumpkin bread, brown butter, chocolate chip, fall recipe, easy pumpkin bread, cozy bread


