I figured a hot cocoa bar would be a simple project—just some cocoa packets, a few toppings, and maybe a jar of store-bought marshmallows. It took about one lukewarm cup of sad, clumpy cocoa from a packet for that assumption to fall apart completely. The cocoa was thin, the marshmallows dissolved into a weird slick on top, and honestly, the whole setup felt more like a concession stand than the cozy, generous experience I had in my head.
So I scrapped the plan. I went back to the stove, pulled out a real saucepan, and made a proper batch of rich, creamy hot cocoa from scratch. And then—because why stop there—I decided to make the marshmallows, too. I’d always been intimidated by homemade marshmallows. They seemed like a science project, something that required a candy thermometer and a degree in patience. But the first time I watched that glossy, vanilla-scented mixture fluff up in my stand mixer, I knew I had crossed over. It was messy, a little sticky, and absolutely worth it.
This cozy hot cocoa bar with homemade marshmallows is the result of that kitchen experiment. It’s not about perfection or having a Pinterest-perfect spread. It’s about the quiet joy of making something from scratch, of offering people a warm mug and the time to customize it exactly how they like. The marshmallows are soft and pillowy, nothing like the bagged kind, and the cocoa is the kind of rich that makes you slow down. This is the recipe that finally made me stop trying to shortcut the cozy.
Why You’ll Love This Recipe
This isn’t just another hot cocoa recipe. It’s a complete experience built around real, from-scratch components that actually deliver on flavor and comfort. Here is why this one stands out:
- From-Scratch Satisfaction: You make the cocoa base and the marshmallows yourself. It sounds fancy, but it’s surprisingly simple and the taste difference is night and day.
- Customizable for Everyone: Set out a few bowls of toppings and let everyone build their perfect mug. It’s naturally adaptable for different diets and preferences.
- Perfect for Gathering: Whether it’s a quiet night in, a holiday party, or a dessert board for a celebration, this bar invites people to linger and chat.
- Better Than Store-Bought: The homemade marshmallows are a total game-changer. They are soft, fluffy, and melt into the cocoa in the most luxurious way.
- Stress-Free Setup: Most of the work is done ahead of time. The marshmallows need to set, and the cocoa base can be made in advance, leaving you free to enjoy the party.
This recipe is the kind that makes people close their eyes after the first sip. It’s comfort food reimagined—richer, more personal, and with the same soul-soothing satisfaction that only a warm mug on a cold day can bring.
What Ingredients You Will Need
This recipe uses simple, high-quality ingredients to build deep, rich flavor without any complicated steps. Here is what you will need for the cocoa base and the homemade marshmallows.
For the Homemade Hot Cocoa Base
- Whole milk, 4 cups (960 ml): This gives the cocoa a creamy, luxurious texture. You can use 2% or a plant-based milk like oat milk, but the richness will be slightly less.
- Heavy cream, 1 cup (240 ml): Adds extra body and a silky mouthfeel. Don’t skip this—it’s what makes the cocoa taste like it came from a fancy café.
- Granulated sugar, 1/4 cup (50 g): Just enough to balance the bitterness of the cocoa powder.
- Unsweetened cocoa powder, 1/4 cup (30 g): Use a high-quality brand like Guittard or Valrhona for the best chocolate flavor. Dutch-processed cocoa will give a smoother, less acidic taste.
- Dark chocolate, 2 oz (60 g), finely chopped: This is my secret ingredient. A good semi-sweet or bittersweet bar (around 60-70% cacao) melts in and adds a deep, complex chocolate note.
- Vanilla extract, 1 teaspoon: Enhances the chocolate flavor and adds warmth.
- Pinch of sea salt: Balances the sweetness and brings out the chocolate’s depth.
For the Homemade Marshmallows
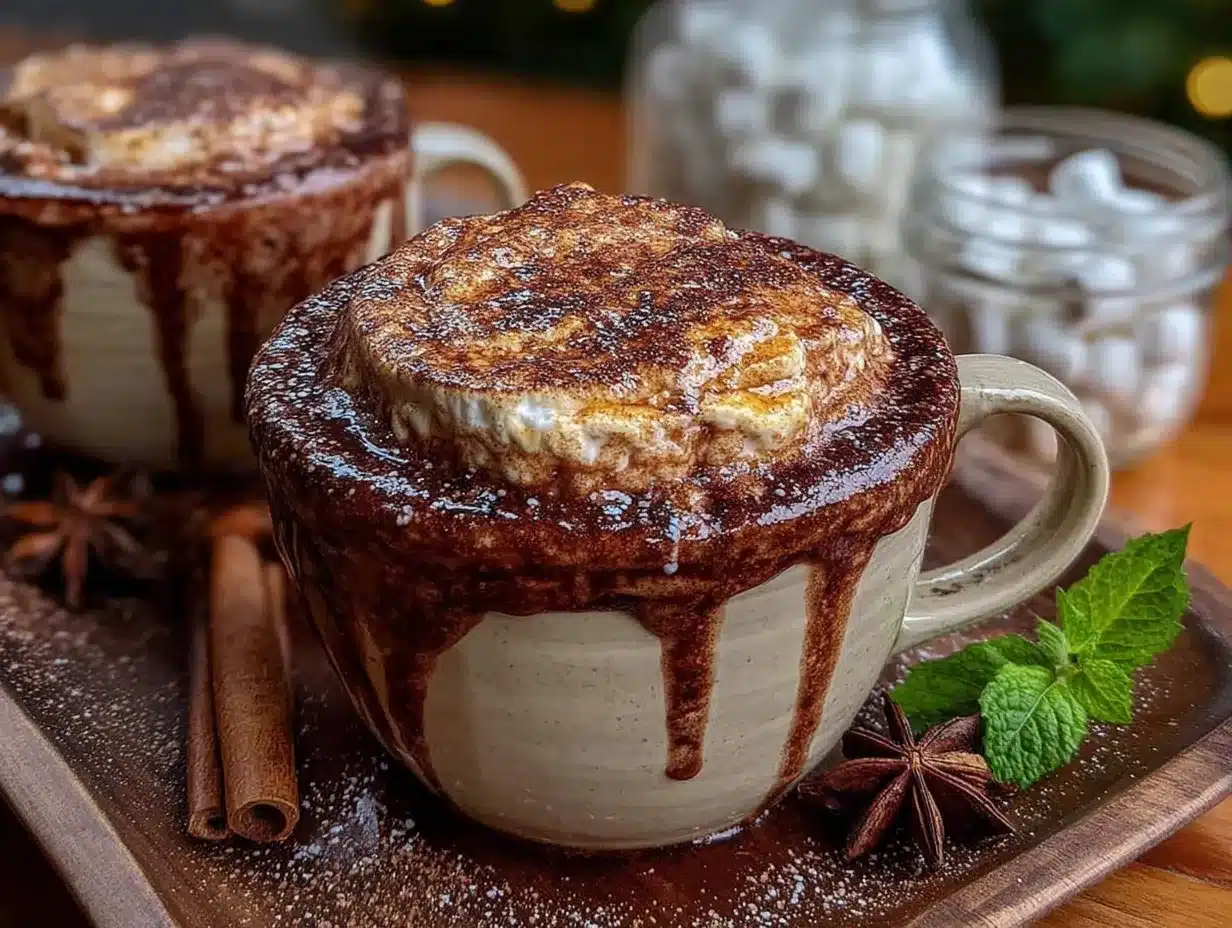
- Granulated sugar, 1 1/2 cups (300 g): The structural base of the marshmallow.
- Light corn syrup, 3/4 cup (180 ml): Prevents the sugar from crystallizing and gives the marshmallows their signature chewiness.
- Cold water, 1/2 cup (120 ml), divided: Used to dissolve the gelatin and the sugar syrup.
- Unflavored gelatin, 3 packets (about 21 g): The key to that soft, bouncy texture. I use Knox brand.
- Vanilla extract, 1 tablespoon: Pure vanilla makes a difference here.
- Pinch of salt: Balances the sweetness.
- Powdered sugar, for dusting: Prevents sticking and adds a light sweetness to the outside.
For the Toppings Bar (Optional but Highly Recommended)
- Whipped cream
- Chocolate shavings or curls
- Crushed peppermint candies
- Cinnamon sticks
- Caramel sauce
- Mini chocolate chips
- Crushed graham crackers
Equipment Needed
You don’t need a ton of fancy gear for this recipe, but a few key tools will make the process much smoother. Here is what I use:
- Large saucepan: For making the hot cocoa base. A heavy-bottomed one is best to prevent scorching.
- Stand mixer or hand mixer: A stand mixer with a whisk attachment is ideal for whipping the marshmallow mixture for 10-12 minutes. A hand mixer will work, but it takes longer and your arm will get a workout.
- Candy thermometer: Highly recommended for the marshmallow syrup. You need to cook it to exactly 240°F (115°C) for the right texture. A digital one is easiest to read.
- 8×8 inch baking pan: For setting the marshmallows. Line it with parchment paper for easy removal.
- Spatula: A heatproof silicone spatula is perfect for scraping down the bowl and spreading the marshmallow mixture.
- Fine-mesh sieve: For dusting the powdered sugar and cocoa powder evenly over the marshmallows.
If you don’t have a candy thermometer, you can use the cold water test, but a thermometer takes the guesswork out. A budget-friendly option is an instant-read thermometer, which works just as well.
Preparation Method
Step 1: Make the Homemade Marshmallows (Day Before or Morning Of)
These need at least 4 hours to set, so I like to make them the day before. First, line an 8×8 inch baking pan with parchment paper, letting it hang over the edges. Dust the paper generously with powdered sugar and set it aside.
In the bowl of your stand mixer, pour in 1/2 cup (120 ml) of cold water and sprinkle the 3 packets of gelatin over the top. Let it sit for 5-10 minutes to bloom—it will become thick and solid-looking. That’s exactly what you want.
While the gelatin blooms, combine the granulated sugar, corn syrup, and the remaining 1/4 cup (60 ml) of cold water in a medium saucepan. Stir gently with a spatula until the sugar is mostly dissolved. Place the pan over medium-high heat and bring it to a boil. Once it’s boiling, clip on your candy thermometer and stop stirring. Let it cook until the syrup reaches 240°F (115°C). This takes about 8-10 minutes.
Once the syrup hits 240°F, remove it from the heat immediately. Turn your stand mixer to low speed (with the whisk attachment) and slowly pour the hot syrup in a thin, steady stream down the side of the bowl into the bloomed gelatin. Be careful—the syrup is extremely hot. Once all the syrup is in, increase the speed to medium-high and let it whip for about 10-12 minutes. The mixture will become thick, glossy, and bright white. It will roughly triple in volume. During the last minute, add the vanilla extract and pinch of salt.
Working quickly, scrape the marshmallow mixture into the prepared pan using a lightly oiled spatula. Spread it into an even layer. It’s sticky, so don’t overwork it. Dust the top with more powdered sugar. Let it sit uncovered at room temperature for at least 4 hours, or overnight.
Step 2: Cut the Marshmallows
Once set, turn the marshmallows out onto a cutting board dusted with powdered sugar. Peel off the parchment paper. Using a large knife or a pizza cutter dusted with powdered sugar, cut the marshmallows into 1-inch squares. Toss the cut marshmallows in a bowl with a little more powdered sugar to keep them from sticking together. Store them in an airtight container at room temperature for up to two weeks—if they last that long.
Step 3: Make the Rich Hot Cocoa Base
In a large saucepan over medium heat, whisk together the whole milk and heavy cream. Heat until it’s steaming but not boiling—you want it hot, not scalded. In a separate small bowl, whisk together the granulated sugar and cocoa powder until no lumps remain. Whisk this dry mixture into the warm milk until fully dissolved.
Add the finely chopped dark chocolate and continue whisking until it’s completely melted and the mixture is smooth. Stir in the vanilla extract and a pinch of sea salt. Taste it—you might want a little more sugar or a dash more salt. Keep the cocoa warm over very low heat, stirring occasionally, until you’re ready to serve.
Step 4: Assemble Your Cozy Hot Cocoa Bar
Pour the warm hot cocoa into a large carafe or a slow cooker set to warm. Arrange small bowls or jars with your chosen toppings—whipped cream, chocolate shavings, crushed peppermint, caramel sauce, cinnamon sticks, and of course, a generous pile of your homemade marshmallows. Set out mugs and spoons, and let everyone build their own perfect cup.
Cooking Tips & Techniques
I’ve made this recipe more times than I can count, and I’ve learned a few things the hard way. Here are my best tips:
- Don’t rush the marshmallow syrup. Getting it to exactly 240°F (115°C) is crucial. If you undercook it, the marshmallows won’t set properly and will be gooey. If you overcook them, they’ll be tough. A reliable candy thermometer is your best friend here.
- Oil your tools. The marshmallow mixture is incredibly sticky. Lightly oil your spatula and the inside of your pan (even over the parchment) to make spreading and cutting much easier.
- Use room temperature eggs for the cocoa? Actually, you don’t need eggs at all in this recipe, which is a common misconception. This cocoa is all about the dairy and chocolate.
- Keep the cocoa warm without scorching. A slow cooker on the “warm” setting is perfect for holding the cocoa for a few hours. If you’re using a saucepan, keep the heat very low and stir occasionally.
- Cut marshmallows with a wet or dusted knife. Dip your knife in hot water and dry it off, or dust it with powdered sugar between cuts. This prevents the marshmallow from sticking and tearing.
I once tried to rush the marshmallow whipping step and ended up with a flat, dense mess. Patience is the secret ingredient here. Let the mixer do its work, and you’ll be rewarded with the fluffiest marshmallows you’ve ever had.
Variations & Adaptations
One of the best things about this hot cocoa bar is how easy it is to change up. Here are a few ways I’ve adapted it:
- Spiked Hot Cocoa: For an adult version, set out small bottles of peppermint schnapps, bourbon, or Irish cream liqueur. A splash in the mug takes it to a whole new level of cozy.
- Dairy-Free Version: Use full-fat oat milk or canned coconut milk instead of whole milk and heavy cream. The texture will still be rich and creamy. Just be sure your dark chocolate is dairy-free.
- Flavored Marshmallows: Add a teaspoon of peppermint extract instead of vanilla for mint marshmallows, or stir in a few drops of rose water for a floral twist. You can even fold in mini chocolate chips after whipping, just before pouring into the pan.
- Mexican Hot Chocolate: Add a teaspoon of ground cinnamon, a pinch of cayenne pepper, and a dash of nutmeg to the cocoa base. It’s warm and spicy and pairs beautifully with the sweet marshmallows.
- White Hot Cocoa: Swap the cocoa powder and dark chocolate for 8 ounces of good-quality white chocolate, chopped. The process is the same, and the result is a sweet, creamy, vanilla-forward drink.
My personal favorite variation is the peppermint version. I add a drop of peppermint extract to the marshmallows and set out crushed candy canes as a topping. It feels so festive and is always a hit at holiday gatherings.
Serving & Storage Suggestions
Serve the hot cocoa piping hot in your coziest mugs. Let everyone start with a base of cocoa, then add a homemade marshmallow (or two or three), a dollop of whipped cream, and any other toppings they desire. The marshmallows will slowly melt into the hot liquid, creating a creamy, sweet top layer that’s pure bliss.
This setup pairs wonderfully with a plate of cookies or a mini dessert platter for a full spread. For a fun twist, you could also serve it alongside some chocolate-dipped strawberry coconut bars for a contrast in textures.
Storage: The homemade marshmallows will keep in an airtight container at room temperature for up to 2 weeks. Do not refrigerate them—they will get sticky and hard. The hot cocoa base can be made up to 2 days in advance. Let it cool completely, then store it in a covered container in the refrigerator. Reheat it gently on the stovetop or in a slow cooker, whisking until smooth. The flavors actually meld and deepen overnight, so it tastes even better the next day.
Nutritional Information & Benefits
This is definitely a treat, but it’s made with real ingredients that offer some surprising benefits. Here is an approximate breakdown per serving (1 mug of cocoa with 1 marshmallow and no additional toppings):
- Calories: ~320
- Fat: 18g
- Carbohydrates: 38g
- Protein: 7g
- Sugar: 30g
Health Highlights: Dark chocolate is rich in antioxidants called flavonoids, which can support heart health. The milk and cream provide calcium and protein. While the marshmallows are mostly sugar, making them from scratch means no artificial preservatives or high-fructose corn syrup. For a lower-sugar option, you can use a sugar-free sweetener in the cocoa base, though I find the real deal is worth it for a special occasion. This recipe is naturally vegetarian, but not vegan or dairy-free as written.
I see this as a mindful indulgence. It’s not an everyday drink, but when you do have it, it’s made with love and real food. That feels better than any packet mix ever could.
Conclusion
This cozy hot cocoa bar with homemade marshmallows is more than a recipe—it’s a small, deliberate act of comfort. It’s for the nights when you need to slow down, for the gatherings where you want people to feel truly welcome, and for the simple joy of making something beautiful from scratch. The marshmallows are surprisingly easy, the cocoa is deeply satisfying, and the whole setup invites creativity and connection.
I encourage you to make it your own. Swap in your favorite toppings, try a flavored marshmallow, or set it out for a holiday brunch alongside some heart-shaped waffle treats. The best part is watching everyone’s face light up when they take that first sip.
I’d love to hear how your hot cocoa bar turns out! Drop a comment below with your favorite topping combination, or tag me in your photos. Now go make yourself a mug—you deserve it.
Frequently Asked Questions
Can I use store-bought marshmallows instead of making them?
Absolutely, you can. The homemade ones are a showstopper, but if you’re short on time, good-quality store-bought marshmallows work just fine. Look for ones that are fresh and soft.
How do I keep the hot cocoa warm for a party?
A slow cooker set to the “warm” setting is perfect for this. Pour the prepared cocoa into the slow cooker and it will stay at a perfect serving temperature for 2-3 hours. Stir it occasionally to prevent a skin from forming.
Can I make the marshmallows vegan?
Traditional marshmallows rely on gelatin, which is not vegan. You can try using a vegan gelatin substitute like agar-agar, but the texture will be different—firmer and less fluffy. There are also some good store-bought vegan marshmallows available now.
Why did my homemade marshmallows turn out sticky?
Sticky marshmallows are usually a sign of humidity or not enough powdered sugar coating. Make sure you dust the pan and the cut marshmallows generously. If you live in a humid climate, store them in an airtight container with a silica gel packet (food-safe) to absorb excess moisture.
Can I add coffee to the hot cocoa?
Yes! A shot of espresso or a teaspoon of instant coffee granules stirred into the cocoa base deepens the chocolate flavor without making it taste like coffee. It’s a classic trick for a richer, more complex drink.
Pin This Recipe!
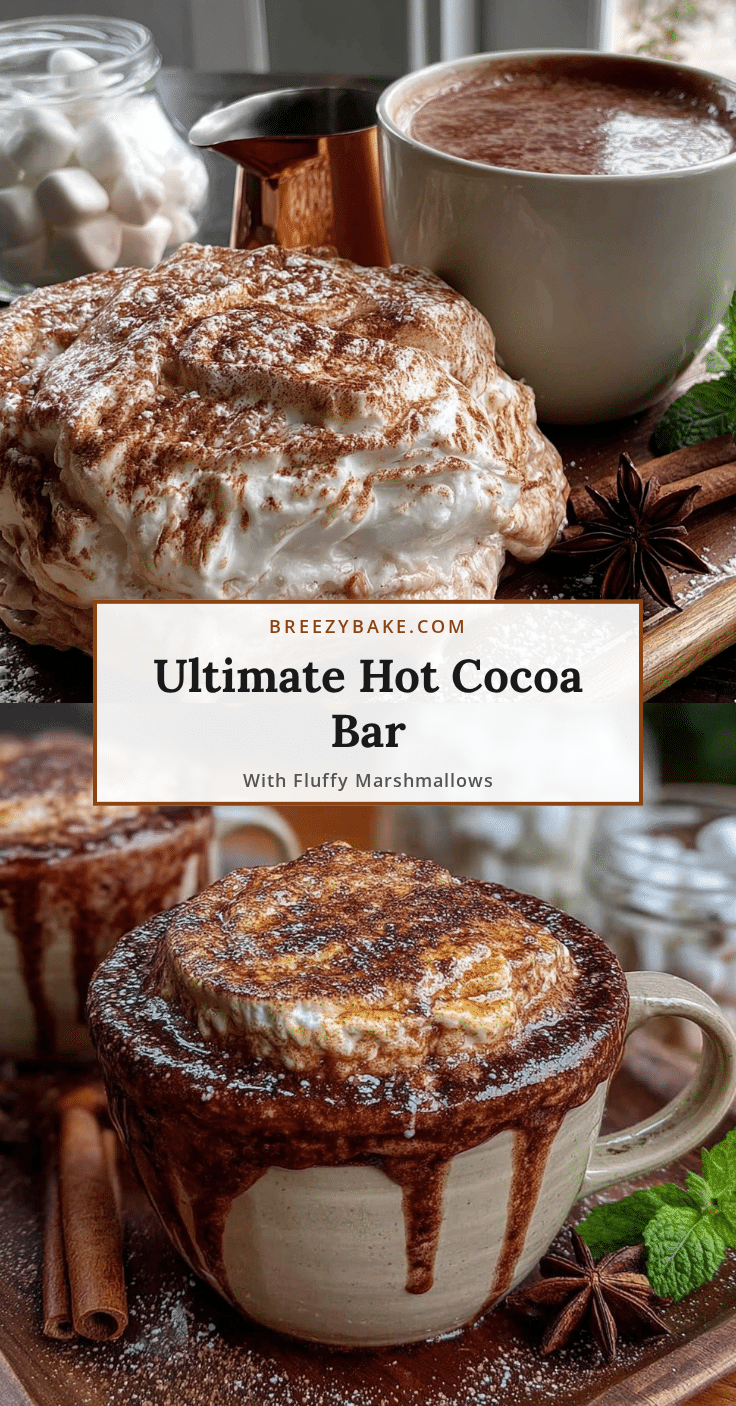
Cozy Hot Cocoa Bar with Easy Homemade Marshmallows
A rich, creamy hot cocoa from scratch paired with soft, pillowy homemade marshmallows. This complete hot cocoa bar setup invites everyone to customize their perfect mug with a variety of toppings, making it the ultimate cozy gathering experience.
- Prep Time: 30 minutes
- Cook Time: 20 minutes
- Total Time: 4 hours 50 minutes (includes setting time for marshmallows)
- Yield: 8 servings
- Category: Beverage
- Cuisine: American
Ingredients
- Whole milk, 4 cups (960 ml)
- Heavy cream, 1 cup (240 ml)
- Granulated sugar, 1/4 cup (50 g)
- Unsweetened cocoa powder, 1/4 cup (30 g)
- Dark chocolate, 2 oz (60 g), finely chopped
- Vanilla extract, 1 teaspoon
- Pinch of sea salt
- Granulated sugar, 1 1/2 cups (300 g)
- Light corn syrup, 3/4 cup (180 ml)
- Cold water, 1/2 cup (120 ml), divided
- Unflavored gelatin, 3 packets (about 21 g)
- Vanilla extract, 1 tablespoon
- Pinch of salt
- Powdered sugar, for dusting
- Whipped cream (optional)
- Chocolate shavings or curls (optional)
- Crushed peppermint candies (optional)
- Cinnamon sticks (optional)
- Caramel sauce (optional)
- Mini chocolate chips (optional)
- Crushed graham crackers (optional)
Instructions
- Make the Homemade Marshmallows (Day Before or Morning Of): Line an 8×8 inch baking pan with parchment paper, letting it hang over the edges. Dust the paper generously with powdered sugar and set aside.
- In the bowl of a stand mixer, pour in 1/2 cup (120 ml) of cold water and sprinkle the 3 packets of gelatin over the top. Let it sit for 5-10 minutes to bloom.
- While the gelatin blooms, combine the granulated sugar, corn syrup, and the remaining 1/4 cup (60 ml) of cold water in a medium saucepan. Stir gently until the sugar is mostly dissolved. Place over medium-high heat and bring to a boil. Once boiling, clip on a candy thermometer and stop stirring. Cook until the syrup reaches 240°F (115°C), about 8-10 minutes.
- Remove the syrup from heat immediately. Turn the stand mixer to low speed (with whisk attachment) and slowly pour the hot syrup in a thin, steady stream down the side of the bowl into the bloomed gelatin. Once all syrup is added, increase speed to medium-high and whip for 10-12 minutes until thick, glossy, and bright white. During the last minute, add the vanilla extract and pinch of salt.
- Working quickly, scrape the marshmallow mixture into the prepared pan using a lightly oiled spatula. Spread into an even layer. Dust the top with more powdered sugar. Let sit uncovered at room temperature for at least 4 hours or overnight.
- Cut the Marshmallows: Once set, turn the marshmallows out onto a cutting board dusted with powdered sugar. Peel off the parchment. Using a large knife or pizza cutter dusted with powdered sugar, cut into 1-inch squares. Toss in a bowl with more powdered sugar to prevent sticking. Store in an airtight container at room temperature for up to 2 weeks.
- Make the Rich Hot Cocoa Base: In a large saucepan over medium heat, whisk together the whole milk and heavy cream. Heat until steaming but not boiling. In a separate small bowl, whisk together the granulated sugar and cocoa powder until no lumps remain. Whisk this dry mixture into the warm milk until fully dissolved.
- Add the finely chopped dark chocolate and continue whisking until completely melted and smooth. Stir in the vanilla extract and a pinch of sea salt. Taste and adjust sweetness or salt as desired. Keep warm over very low heat, stirring occasionally, until ready to serve.
- Assemble Your Cozy Hot Cocoa Bar: Pour the warm hot cocoa into a large carafe or a slow cooker set to warm. Arrange small bowls or jars with your chosen toppings—whipped cream, chocolate shavings, crushed peppermint, caramel sauce, cinnamon sticks, and a generous pile of homemade marshmallows. Set out mugs and spoons, and let everyone build their own perfect cup.
Notes
The marshmallows need at least 4 hours to set, so make them the day before or morning of. Use a reliable candy thermometer for the marshmallow syrup to ensure proper texture. Oil your spatula and pan to prevent sticking. The hot cocoa base can be made up to 2 days in advance and stored in the refrigerator; reheat gently. For a dairy-free version, use full-fat oat milk or canned coconut milk and dairy-free dark chocolate. For an adult version, set out peppermint schnapps, bourbon, or Irish cream liqueur.
Nutrition
- Serving Size: 1 mug of cocoa with
- Calories: 320
- Sugar: 30
- Sodium: 150
- Fat: 18
- Saturated Fat: 11
- Carbohydrates: 38
- Fiber: 2
- Protein: 7
Keywords: hot cocoa, homemade marshmallows, hot cocoa bar, winter drink, cozy drink, from scratch, holiday drink, chocolate, marshmallow


