“So you’re telling me I have to eat breakfast before I even know what day it is?” My sister texted me this last October, and honestly—she had a point. Mornings were chaos in her house with two kids under five, a dog that needed walking, and a job that started at 7:30 AM sharp. I sent back a photo of a muffin tin full of these little golden-orange oatmeal cups fresh out of the oven. She called me immediately. “What are those? I need those.” And honestly? That was the moment I realized these cozy pumpkin baked oatmeal cups weren’t just my personal meal prep secret anymore. They were about to become hers too.
I’d been testing baked oatmeal recipes for months—trying to find that sweet spot between “this is basically a muffin” and “this is just sad wet oats.” The pumpkin version came together almost by accident one rainy Sunday when I had half a can of pumpkin puree left over from making soup. I threw it into my standard oatmeal cup base, added some warming spices, and crossed my fingers. The smell coming from my kitchen was ridiculous. Like autumn had decided to move in permanently. When I bit into one warm from the tin, the edges slightly crispy and the center soft and tender, I knew I’d stumbled onto something special.
These aren’t complicated. They’re not fancy. But they are the kind of breakfast that makes you feel like you’ve got your life together even when you absolutely don’t. And that’s worth more than any complicated brunch recipe I’ve ever made.
Why You’ll Love This Recipe
Let me tell you why these little cups have become my most-requested meal prep recipe. I’ve tested this version at least a dozen times—tweaking the oat-to-liquid ratio, playing with baking times, even trying different mix-ins—and what I’m sharing with you today is the version that works every single time.
- Meal Prep Dream : Make them once on Sunday, and you’ve got breakfast sorted for the whole week. Grab one (or two) on your way out the door and you’re good to go.
- Simple Pantry Ingredients : Canned pumpkin, oats, eggs, milk, and basic spices. Nothing weird. Nothing you have to hunt down at a specialty store.
- Naturally Sweet & Satisfying : These have just enough maple syrup to feel like a treat without sending you into a sugar crash by 10 AM. The pumpkin and spices do the heavy lifting flavor-wise.
- Kid-Approved & Adult-Friendly : My niece literally calls these “pumpkin muffins” and has no idea they’re actually oatmeal. The texture is that good.
- Freezer-Friendly : Make a double batch and freeze half. You’ll thank yourself on those mornings when you can’t even find matching socks.
What sets this recipe apart from other baked oatmeal cups? It’s the texture. Most baked oatmeal turns into a dense, almost gluey situation. But these cups stay light and tender because of the pumpkin’s natural moisture and the way the eggs create structure without making things rubbery. I’ve tried versions with applesauce instead of pumpkin, with Greek yogurt, with mashed banana—and nothing hits quite like this pumpkin version. It’s the one I keep coming back to.
This recipe is for those mornings when you want something warm and cozy but don’t have time to actually cook. It’s for the meal prepper who wants variety without extra effort. And honestly? It’s for anyone who loves fall flavors and wants to enjoy them all year round without turning on the oven every single morning.
What Ingredients You Will Need
This recipe uses simple, wholesome ingredients that work together to create something truly special. Here’s what you’ll need and why each one matters.
- Rolled oats (old-fashioned oats) : 2 cups (180g). Not quick oats! Rolled oats give you that chewy, satisfying texture that holds up during baking. Quick oats turn mushy. Steel-cut oats won’t cook through properly. Trust me on this one.
- Canned pumpkin puree : 1 cup (240g). Make sure you’re getting pure pumpkin puree, not pumpkin pie filling. The pie filling has added sugar and spices that will throw off the balance. I usually go with Libby’s—it’s consistent and widely available.
- Large eggs : 2, at room temperature. Eggs are what give these cups structure and help them hold their shape. Cold eggs can seize up the coconut oil, so let them sit out for 15 minutes first.
- Milk : 1 cup (240ml). Any milk works here—whole milk, 2%, almond milk, oat milk. I’ve used all of them with great results. Just avoid anything too thick like canned coconut milk, which can make the cups heavy.
- Maple syrup : 1/3 cup (80ml). Real maple syrup, not pancake syrup. The flavor is cleaner and less cloying. If you’re out, honey works as a substitute, but the maple-pumpkin combo is honestly perfection.
- Coconut oil : 3 tablespoons, melted. Or any neutral oil like avocado or grapeseed. Butter also works if you’re not dairy-free. This keeps the cups moist and adds a subtle richness.
- Pumpkin pie spice : 2 teaspoons. You can use store-bought or make your own with 1 teaspoon cinnamon, 1/2 teaspoon ginger, 1/4 teaspoon nutmeg, and 1/4 teaspoon cloves. I always make my own because I like controlling the cinnamon-to-ginger ratio.
- Vanilla extract : 1 teaspoon. Pure vanilla, not imitation if you can swing it. It rounds out all those warm spices beautifully.
- Baking powder : 1 1/2 teaspoons. This is what gives the cups a little lift so they’re not dense and flat.
- Salt : 1/2 teaspoon. Don’t skip this! Salt makes all the flavors pop and balances the sweetness.
- Optional mix-ins : 1/2 cup chopped pecans or walnuts, 1/3 cup chocolate chips, 1/4 cup dried cranberries. I usually add pecans because the crunch is amazing against the soft oatmeal texture.
Equipment Needed
You don’t need a fancy kitchen to make these cozy pumpkin baked oatmeal cups. Here’s what you’ll actually use:
- Standard 12-cup muffin tin : This is non-negotiable. You need the muffin tin to create those perfect grab-and-go portions.
- Muffin liners : Paper or silicone. I prefer parchment paper liners because nothing sticks to them. Silicone ones work too but can be a bit flimsy with the wet batter.
- Large mixing bowl : For combining your wet ingredients.
- Medium mixing bowl : For mixing your dry ingredients separately.
- Whisk : For smoothing out the pumpkin and eggs.
- Rubber spatula : For folding everything together without overmixing.
- Measuring cups and spoons : Accurate measurements matter here, especially for the oats and pumpkin.
- Cookie scoop or ice cream scoop : Not essential, but it makes filling the muffin cups so much cleaner and more consistent.
- Cooling rack : Lets the cups cool evenly so they don’t get soggy on the bottom.
If you don’t have a cookie scoop, just use two spoons—one to scoop, one to scrape. Works fine. And if you’re using silicone muffin cups instead of a metal tin, you might need to add 3-5 minutes to the baking time since silicone insulates a bit more.
Preparation Method
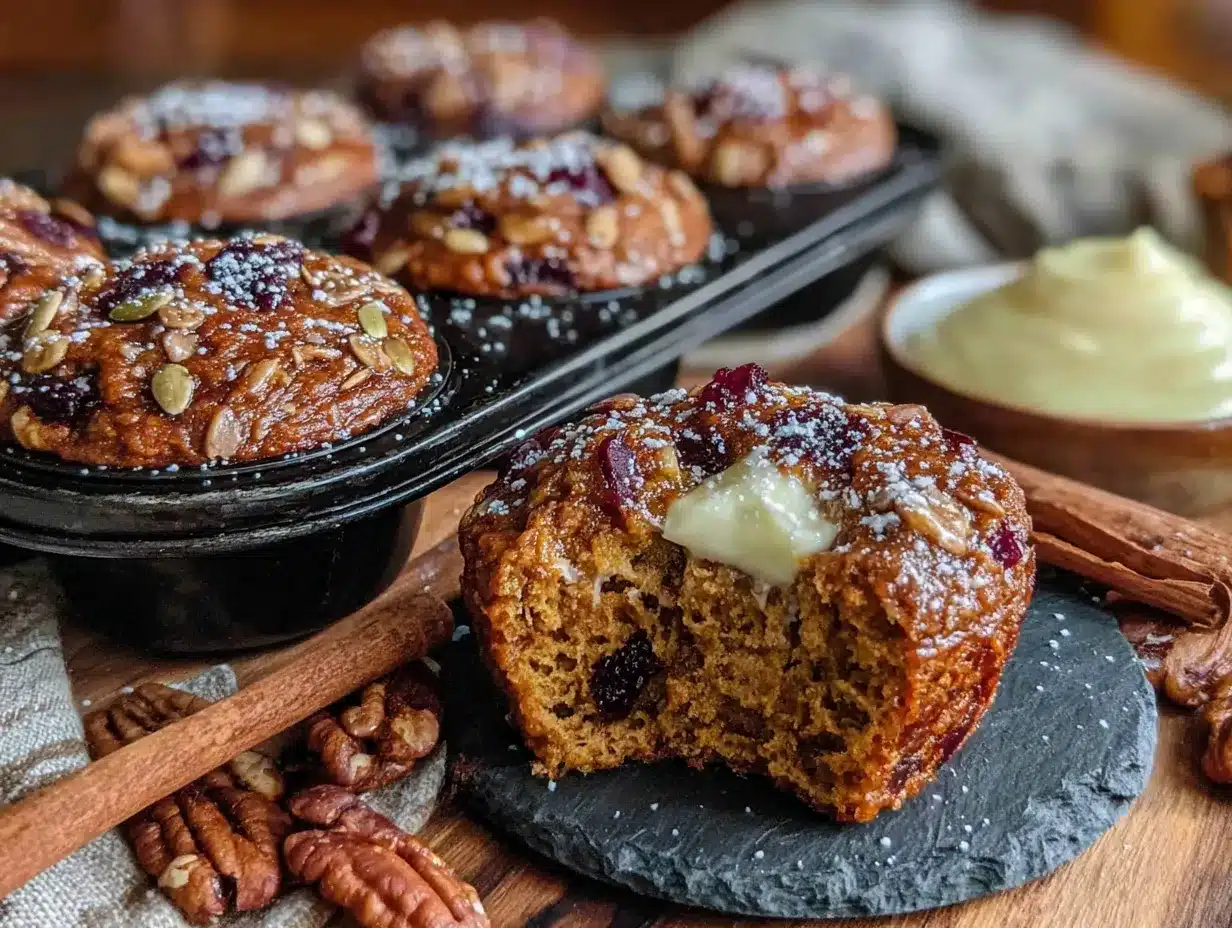
Alright, let’s get cooking. This is the part where I walk you through everything so you can nail these on your first try.
- Preheat your oven to 375°F (190°C). Line your 12-cup muffin tin with paper liners. I’ve found that spraying the liners with a little cooking spray helps the cups release perfectly, even with paper liners. Do this now while the oven heats up.
- Mix the dry ingredients. In your medium bowl, whisk together the rolled oats, baking powder, pumpkin pie spice, and salt. Make sure the baking powder is evenly distributed—you don’t want one cup to get all the lift while another falls flat. Set this aside.
- Whisk the wet ingredients. In your large bowl, crack the eggs and whisk them until they’re frothy and uniform in color. Add the pumpkin puree, milk, maple syrup, melted coconut oil, and vanilla extract. Whisk until everything is completely combined. The mixture should be a beautiful, uniform orange—no streaks of egg white or oil floating on top.
- Combine wet and dry. Pour the dry ingredients into the wet mixture. Use your rubber spatula to fold everything together gently. Stir just until you don’t see any more dry oats—overmixing can make the cups tough. The batter will look looser than you might expect, but that’s okay. The oats will absorb the liquid as they bake.
- Fold in your mix-ins. If you’re using pecans, chocolate chips, or dried cranberries, fold them in now with just a few gentle strokes. Don’t go crazy stirring—you want them distributed, not crushed.
- Fill the muffin cups. Use your cookie scoop or two spoons to divide the batter evenly among the 12 muffin cups. Fill each cup almost to the top—the oatmeal cups don’t rise much, so you want them full. I usually aim for about 1/3 cup of batter per cup. The batter will be slightly thick but spoonable.
- Bake for 18-22 minutes. Place the muffin tin on the middle rack of your oven. Bake until the tops are set and golden brown around the edges. A toothpick inserted into the center of a cup should come out mostly clean—a few moist crumbs are fine, but you don’t want raw batter. The cups should feel firm to the touch but still give slightly when pressed.
- Cool in the pan for 5 minutes. This is crucial! Letting them sit in the hot pan allows them to finish setting up. If you try to take them out immediately, they might fall apart. After 5 minutes, transfer the cups to a cooling rack. Let them cool completely if you’re storing them, or enjoy one warm right away (I always do—quality control, you know).
Pro tip : If your cups come out a little too soft in the center, don’t panic. They’ll firm up as they cool. If they’re still too soft after cooling completely, pop them back in the oven at 350°F for 3-4 minutes. Every oven runs a little differently, and the first batch is always a learning experience.
Cooking Tips & Techniques
I’ve made these cozy pumpkin baked oatmeal cups more times than I can count, and I’ve learned a few things the hard way. Let me save you some trouble.
Don’t overmix the batter. I know I said this already, but it’s worth repeating. Overmixing develops the gluten in the oats (yes, oats have a little gluten) and makes the cups dense and rubbery. Stir just until everything comes together—a few small lumps are totally fine.
Room temperature ingredients matter. Cold eggs and cold milk can make the melted coconut oil seize up and form little hard bits in your batter. Let your eggs and milk sit on the counter for 15-20 minutes before you start. Your batter will come together more smoothly and bake more evenly.
Watch your baking time closely. The first time I made these, I pulled them out at 18 minutes and they were perfect. The next time, my oven was running a little cool and they needed 22 minutes. Start checking at 16 minutes if your oven runs hot. The edges should be golden and the tops should spring back when lightly touched.
Let them cool completely before storing. I know it’s tempting to throw them in a container while they’re still warm, but that traps steam and makes the bottoms soggy. Patience pays off here. Let them cool fully on a wire rack—about 30 minutes—before transferring to an airtight container.
Line your muffin tin properly. I’ve made the mistake of using cheap paper liners that stuck to the oatmeal cups like glue. Spend the extra dollar on good quality parchment liners, or use silicone ones lightly sprayed with oil. Your future self will thank you when every cup releases perfectly.
Variations & Adaptations
One of the best things about this recipe is how flexible it is. Here are some ways I’ve adapted it over the years:
Vegan version : Replace the eggs with flax eggs (2 tablespoons ground flaxseed mixed with 6 tablespoons water, let sit for 5 minutes). Use plant-based milk and swap the maple syrup for agave if you prefer. The texture will be slightly less sturdy, but still delicious.
Gluten-free option : Use certified gluten-free rolled oats. That’s literally it. Oats are naturally gluten-free, but they’re often processed in facilities that handle wheat, so look for the certified label if you’re sensitive.
Protein boost : Add 2 scoops (about 1/3 cup) of vanilla or unflavored protein powder. Reduce the oats by 1/4 cup to compensate. You might need to add an extra tablespoon or two of milk to keep the batter from getting too thick. This version is my go-to after a morning workout.
Apple pumpkin combo : Swap half the pumpkin for unsweetened applesauce. You’ll get a milder pumpkin flavor and a slightly sweeter, fruitier note. Add an extra 1/4 teaspoon of cinnamon to compensate.
Chocolate lover’s version : Fold in 1/2 cup dark chocolate chips and skip the nuts. The warm chocolate + pumpkin + spice combo is absolutely decadent. My sister actually prefers this version over the original, which I pretend to be offended by.
Lower sugar option : Reduce the maple syrup to 1/4 cup. Add 1 mashed very ripe banana for natural sweetness. The banana flavor will be noticeable, but it pairs beautifully with the pumpkin and spices.
Serving & Storage Suggestions
These cozy pumpkin baked oatmeal cups are incredibly versatile when it comes to serving. Here’s how I like to enjoy them:
Warm or room temperature : They’re delicious either way. If you’re meal prepping, grab one from the fridge and microwave it for 20-30 seconds. It’ll smell like fall all over again. Top with a drizzle of maple syrup, a spoonful of Greek yogurt, or a pat of butter if you’re feeling indulgent.
With a hot drink : These pair perfectly with coffee, tea, or a warm latte. The spices in the oatmeal cups complement cinnamon coffee or chai tea beautifully. It’s basically a cozy morning in a cup (or two).
As a snack : Don’t limit these to breakfast! They’re great as an afternoon pick-me-up or a pre-workout snack. The oats provide steady energy, and the protein from the eggs keeps you full.
Storage : Store the cooled cups in an airtight container in the refrigerator for up to 5 days. Place a paper towel at the bottom of the container to absorb any excess moisture, and another on top. Change the paper towel after 2 days if you notice condensation.
Freezing : These freeze beautifully! Place the completely cooled cups in a single layer on a baking sheet and freeze for 1 hour. Then transfer them to a freezer-safe bag or container. They’ll keep for up to 3 months. To thaw, leave one in the fridge overnight or microwave directly from frozen for 45-60 seconds.
Flavor development : Honestly, these taste even better on day two. The spices have time to meld and mellow, and the texture evens out. So if you’re meal prepping, you’re actually setting yourself up for the best possible eating experience.
Nutritional Information & Benefits
Here’s a rough estimate for one oatmeal cup (based on the recipe as written, without mix-ins):
- Calories : ~185
- Protein : 6g
- Carbohydrates : 28g
- Fiber : 4g
- Sugar : 9g (naturally occurring + maple syrup)
- Fat : 6g
- Iron : 8% DV
- Vitamin A : 80% DV (hello, pumpkin!)
These cups are packed with fiber from the oats and pumpkin, which keeps you full and supports healthy digestion. Pumpkin is also loaded with vitamin A for eye health and immune function. The eggs provide high-quality protein, and the coconut oil offers healthy fats that help keep you satisfied until lunch.
If you’re watching your sugar intake, you can easily reduce the maple syrup without sacrificing too much flavor—the pumpkin and spices are naturally sweet. For a lower-carb option, swap the oats for a mix of almond flour and unsweetened coconut flakes, though the texture will be quite different.
Potential allergens: Contains eggs, gluten from oats (unless certified gluten-free), and tree nuts if you add pecans or walnuts. Dairy-free as written if using plant-based milk and coconut oil.
Conclusion
These cozy pumpkin baked oatmeal cups have saved my mornings more times than I can count. They’re the kind of recipe that makes you feel like you’ve got your act together, even when the rest of your life is chaos. One batch on Sunday, and you’ve got breakfast sorted for the whole week. No thinking, no decision-making, no standing in front of the fridge wondering what to eat.
I love that this recipe is forgiving enough for beginners but satisfying enough for experienced cooks. You can dress them up with toppings, keep them simple, or experiment with mix-ins. They’re your blank canvas—just with a warm, spicy, pumpkin-flavored base.
If you give these a try, I’d love to know how they turn out. Leave a comment below and tell me what mix-ins you used, or tag me in your photos if you share them online. Did you add chocolate chips? Pecans? Did your kids eat them without complaint? I want to hear it all.
And if you’re looking for more meal prep breakfast ideas, check out these healthy chicken veggie breakfast bake cups for a savory option, or these rainbow breakfast biscuit pops if you’re feeding a crowd that loves fun, colorful food. Happy baking, friends!
Frequently Asked Questions
Can I use quick oats instead of rolled oats?
I really don’t recommend it. Quick oats are cut smaller and more processed, so they absorb liquid faster and turn mushy during baking. Your cups will lose that nice chewy texture and end up more like oatmeal paste. Stick with rolled oats for the best results.
Why did my oatmeal cups turn out dry?
A few possible reasons: you overbaked them, you used too many oats, or your pumpkin puree was thicker than usual. Next time, check your oven temperature with an oven thermometer (they’re cheap and worth it) and pull the cups out when a toothpick comes out with just a few moist crumbs. Also, make sure you’re measuring your pumpkin correctly—pack it into the measuring cup, don’t scoop loosely.
Can I make these without eggs?
Yes! Use flax eggs as I mentioned in the variations section. The texture will be a bit softer and less structured, but they’ll still hold together. You can also try using 1/2 cup unsweetened applesauce in place of the eggs, though you might need to reduce the milk slightly to compensate for the extra moisture.
How do I keep the cups from sticking to the liners?
This used to drive me crazy! The solution is twofold: use good quality parchment paper liners (not the cheap paper ones), and lightly spray the liners with cooking spray before filling them. Let the cups cool completely before peeling off the liners—warm oatmeal cups are more fragile and tend to stick more.
Can I double this recipe?
Absolutely! This recipe doubles beautifully. Use two muffin tins and rotate them halfway through baking (swap the top rack and bottom rack). You might need to add 2-3 extra minutes to the baking time since the oven has to work harder with two tins inside. The frozen cups are perfect for busy weeks when you don’t have time to bake.
Pin This Recipe!
Cozy Pumpkin Baked Oatmeal Cups: Easy Meal Prep Recipe

These cozy pumpkin baked oatmeal cups are the perfect meal prep breakfast—easy to make, naturally sweetened, and freezer-friendly. They’re kid-approved and adult-friendly, with a tender texture that sets them apart from other baked oatmeal recipes.
- Prep Time: 15 minutes
- Cook Time: 20 minutes
- Total Time: 35 minutes
- Yield: 12 servings 1x
- Category: Breakfast
- Cuisine: American
Ingredients
- 2 cups (180g) rolled oats (old-fashioned oats)
- 1 cup (240g) canned pumpkin puree (not pumpkin pie filling)
- 2 large eggs, at room temperature
- 1 cup (240ml) milk (any kind)
- 1/3 cup (80ml) maple syrup
- 3 tablespoons melted coconut oil (or neutral oil/butter)
- 2 teaspoons pumpkin pie spice (or homemade: 1 tsp cinnamon, 1/2 tsp ginger, 1/4 tsp nutmeg, 1/4 tsp cloves)
- 1 teaspoon vanilla extract
- 1 1/2 teaspoons baking powder
- 1/2 teaspoon salt
- Optional mix-ins: 1/2 cup chopped pecans or walnuts, 1/3 cup chocolate chips, 1/4 cup dried cranberries
Instructions
- Preheat your oven to 375°F (190°C). Line a 12-cup muffin tin with paper liners and lightly spray the liners with cooking spray.
- In a medium bowl, whisk together the rolled oats, baking powder, pumpkin pie spice, and salt until evenly combined. Set aside.
- In a large bowl, whisk the eggs until frothy. Add the pumpkin puree, milk, maple syrup, melted coconut oil, and vanilla extract. Whisk until completely combined and uniform in color.
- Pour the dry ingredients into the wet mixture. Use a rubber spatula to fold gently until just combined—do not overmix. The batter will be looser than expected.
- If using mix-ins, fold them in with a few gentle strokes.
- Divide the batter evenly among the 12 muffin cups, filling each almost to the top (about 1/3 cup per cup).
- Bake on the middle rack for 18-22 minutes, until the tops are set and golden brown around the edges. A toothpick inserted in the center should come out mostly clean.
- Cool in the pan for 5 minutes, then transfer to a cooling rack. Cool completely before storing.
Notes
Don’t overmix the batter to avoid dense cups. Use room temperature ingredients to prevent coconut oil from seizing. Let cups cool completely before storing to avoid sogginess. For best results, use good quality parchment paper liners and spray them lightly with cooking spray. These cups taste even better on day two as the spices meld.
Nutrition
- Serving Size: 1 oatmeal cup
- Calories: 185
- Sugar: 9
- Sodium: 150
- Fat: 6
- Saturated Fat: 3
- Carbohydrates: 28
- Fiber: 4
- Protein: 6
Keywords: pumpkin baked oatmeal cups, meal prep breakfast, healthy breakfast, fall breakfast, oatmeal cups, pumpkin oatmeal, freezer-friendly breakfast


