I figured a thermos lunch meant resigning yourself to sad, lukewarm leftovers that taste nothing like they did the night before. It took about three weeks of my daughter coming home with half-eaten, congealed soup for that assumption to fall apart completely. I needed something that would actually hold up—stay creamy, stay hot, and honestly, stay appetizing—after four hours in a stainless steel capsule.
This creamy thermos-ready cheesy broccoli rice bowl came out of a very specific, slightly desperate Tuesday night. I had leftover rice, a bag of broccoli florets that were starting to look sad, and a block of cheddar that needed using. I threw it all in a skillet with some cream cheese and milk, crossed my fingers, and packed it the next morning. When she came home and said, “Can you make that again tomorrow?” I knew I’d stumbled onto something real.
The trick, I learned through trial and error (and a few tragically watery batches), is getting the sauce thick enough so it doesn’t separate. You want it rich and clingy, the kind of cheese sauce that coats every grain of rice and tucks into every little floret crevice. It’s comfort food you can eat with a spoon at your desk, on a school lunch break, or honestly, straight from the thermos in your car. No judgment here.
Why You’ll Love This Recipe
I’ve tested this recipe more times than I care to count, tweaking the liquid ratio and cheese blend until it was bulletproof. Here is why this one actually works for real life:
- Quick & Easy : From fridge to thermos in under 30 minutes. Seriously, it’s faster than deciding what to order for delivery.
- Simple Ingredients : You probably have most of this in your kitchen right now. No fancy cheese aisle deep dives required.
- Perfect for Meal Prep : This is the ultimate make-ahead lunch. It reheats beautifully and actually gets better as the flavors meld overnight.
- Crowd-Pleaser : Kids love the cheesy goodness, and adults appreciate the broccoli sneaking in there. Everyone wins.
- Unbelievably Creamy : The combination of cream cheese and sharp cheddar creates a sauce that stays luscious even after hours in a thermos. No sad, dry rice situation here.
What makes this recipe different from all the other broccoli rice casseroles out there? It’s the technique. I blend a small portion of the cooked broccoli into the cheese sauce base, which adds body and a subtle vegetal sweetness without making it look like baby food. It’s a little trick I picked up from a restaurant cookbook years ago, and it works like a charm.
This isn’t just another lunch idea. It’s the kind of meal that makes you look forward to noon. It’s warm, it’s satisfying, and it feels like a hug in a thermos. Honestly, it has saved me from countless sad desk salads and overpriced cafeteria soup.
What Ingredients You Will Need
This recipe uses simple, wholesome ingredients to deliver that signature creamy texture and bold cheesy flavor. Most of these are pantry staples, which makes this perfect for those weeks when you haven’t been to the store in a while.
- 1 cup (200g) long-grain white rice, uncooked – I prefer basmati or jasmine for their fluffy texture, but any white rice works. Brown rice will need a longer cooking time and more liquid.
- 2 cups (480ml) water or low-sodium chicken broth – Broth adds a subtle savory depth, but water is perfectly fine. I use broth when I have it on hand.
- 2 tablespoons (28g) unsalted butter – Adds richness and helps sauté the aromatics. You can use salted butter, just reduce the added salt later.
- 1 small yellow onion, finely diced (about 1/2 cup) – Provides a savory backbone. Shallots work in a pinch.
- 2 cloves garlic, minced – Because garlic makes everything better. Use fresh, not the jarred stuff, for the best flavor.
- 3 cups (about 250g) fresh broccoli florets, chopped into small bite-sized pieces – Fresh broccoli holds its texture better than frozen here. If using frozen, thaw and pat it very dry first, or it will water down the sauce.
- 1/2 cup (120ml) whole milk – Whole milk creates the creamiest sauce. 2% works, but avoid skim—it can make the sauce taste thin.
- 4 ounces (113g) cream cheese, softened and cut into cubes – This is the secret to the ultra-creamy, thermos-friendly texture. It prevents the sauce from breaking.
- 1 1/2 cups (170g) sharp cheddar cheese, freshly shredded – Pre-shredded cheese has anti-caking agents that prevent smooth melting. Shredding your own block makes a massive difference in texture. I recommend Tillamook or Kerrygold for best flavor.
- 1/2 teaspoon salt – Adjust to taste, especially if using salted butter or broth.
- 1/4 teaspoon black pepper – Freshly ground is best.
- 1/4 teaspoon smoked paprika (optional) – Adds a warm, subtle smokiness that complements the cheese beautifully.
- Pinch of nutmeg (optional) – A classic trick for cheese sauces. It sounds weird, but it brightens the whole dish.
Substitution Guidance: For a gluten-free option, this recipe is naturally gluten-free as written. For a dairy-free version, use a high-quality plant-based butter, unsweetened oat milk, and dairy-free cream cheese and cheddar shreds. The texture will be slightly different, but still delicious. You can swap the broccoli with cauliflower or chopped asparagus depending on the season.
Equipment Needed
You don’t need a fancy kitchen to pull this off. Here is what you will actually use:
- Medium saucepan with a tight-fitting lid – For cooking the rice. A heavy-bottomed pot prevents scorching.
- Large skillet or sauté pan – A 10- or 12-inch pan gives you enough room to cook everything evenly.
- Cutting board and sharp chef’s knife – For dicing the onion and chopping broccoli into uniform pieces.
- Wooden spoon or silicone spatula – For stirring the sauce without scratching your pan.
- Box grater – For shredding that block of cheddar. It takes two extra minutes and makes all the difference.
- Measuring cups and spoons – Standard set for accuracy.
- Thermos or insulated food jar – A wide-mouth thermos works best for this. I use a 16-ounce Stanley thermos and it keeps everything hot for hours. Pre-heat it with boiling water for 5 minutes before filling for best results.
Budget-Friendly Tip: If you don’t own a thermos, a good insulated mason jar jar or even a well-wrapped bowl in a lunch bag with an ice pack (for cold lunches) works. But honestly, a good thermos is a game-changer for hot lunches. I found mine at a thrift store for three bucks.
Preparation Method

Let’s get cooking. This comes together in one pot (plus the rice cooker or saucepan), which means less cleanup. My favorite kind of cooking.
- Cook the rice: In a medium saucepan, combine the 1 cup of rice and 2 cups of water or broth. Bring to a boil over high heat. Once boiling, reduce the heat to low, cover, and simmer for 15-18 minutes, or until the liquid is absorbed and the rice is tender. Remove from heat and let it sit, covered, for 5 minutes. Fluff with a fork. You want about 3 cups of cooked rice. (Pro tip: make extra rice the night before and this step takes zero time.)
- Sauté the aromatics: While the rice cooks, melt the 2 tablespoons of butter in a large skillet over medium heat. Add the diced onion and cook for 3-4 minutes, stirring occasionally, until it becomes translucent and soft. It should smell sweet, not burnt. Add the minced garlic and cook for another 30 seconds until fragrant. Do not let the garlic brown, or it will turn bitter.
- Cook the broccoli: Add the chopped broccoli florets to the skillet. Sauté for 4-5 minutes, stirring frequently, until the broccoli is bright green and just tender-crisp. You want it to have a little bite left, since it will continue cooking in the sauce. If you prefer softer broccoli, add 2 tablespoons of water and cover the pan for 2 minutes to steam it.
- Build the cheese sauce: Reduce the heat to low. Pour the 1/2 cup of milk into the skillet with the broccoli and onions. Add the cubed cream cheese. Stir continuously with your wooden spoon until the cream cheese is completely melted and the mixture is smooth. This takes about 2 minutes. Don’t rush this step—lumpy cream cheese means a lumpy sauce.
- Melt the cheddar: Add the shredded sharp cheddar cheese to the skillet, one handful at a time, stirring constantly until each addition is fully melted before adding the next. This gradual process ensures a silky, emulsified sauce. Once all the cheese is incorporated, the sauce should be thick, glossy, and coat the back of a spoon. Season with the salt, pepper, smoked paprika, and nutmeg if using. Taste and adjust seasoning—you might want a pinch more salt depending on your cheese.
- Combine everything: Add the cooked, fluffed rice to the skillet with the cheese sauce and broccoli. Stir gently but thoroughly until every grain of rice is coated in that creamy, cheesy goodness. The mixture will look quite thick and rich—that is exactly what you want. It should be almost like a very loose risotto.
- Cool slightly and pack: Let the rice bowl cool for about 5 minutes in the skillet. This allows the sauce to set up a little, which prevents it from becoming too watery inside the thermos. While it cools, prep your thermos by filling it with boiling water, letting it sit for 5 minutes, then dumping the water out. Pack the hot rice mixture into the pre-warmed thermos, filling it as full as possible to minimize air space. Seal tightly.
Sensory Cue: At step 5, your sauce should look like a thick, molten cheese fondue. It should smell deeply of sharp cheddar with a hint of garlic and onion. The broccoli should be a vibrant green against the golden sauce. If the sauce looks greasy or separated, you may have added the cheese too quickly or the heat was too high. Don’t panic—just stir in a splash of cold milk and whisk vigorously.
Cooking Tips & Techniques
I have made this recipe more times than I can count, and I’ve definitely made my share of mistakes. Here is what I’ve learned so you don’t have to learn the hard way.
The Biggest Mistake: Using pre-shredded cheese. I know, I know, it’s convenient. But those anti-caking coatings (usually potato starch or cellulose) prevent the cheese from melting smoothly. Your sauce will end up grainy instead of silky. Take the two minutes to shred a block of cheddar. Your future self will thank you.
Thermos Strategy: Never skip pre-heating your thermos. This is non-negotiable. A cold thermos will suck the heat right out of your lunch, and you’ll end up with lukewarm rice by noon. Fill it with boiling water while you’re cooking, and it will be piping hot and ready when you are. I also recommend filling the thermos to the very top—less air means it stays hot longer.
Timing and Multitasking: Start your rice first since it takes the longest. While it’s simmering, chop your onion and broccoli. By the time the rice is done, your skillet work will be finished too. The whole process flows really smoothly if you prep your ingredients before you turn on the stove. I’ve tried doing it the other way, and I always end up burning the garlic.
Consistency Check: If your sauce seems too thick after adding the rice, stir in a splash of warm milk or broth. If it seems too thin, let it simmer uncovered for another minute or two to reduce. The perfect texture is like a thick, creamy porridge—it should hold its shape slightly on a spoon but still be luscious.
One Personal Failure: I once tried to make this with leftover steamed broccoli that I had refrigerated overnight. It turned into a watery, sad mess. Freshly cooked (or properly thawed and dried) broccoli is key. Steaming releases a lot of water, and that water ends up in your sauce. Learn from my soggy mistakes.
Variations & Adaptations
This recipe is endlessly adaptable. Here are some of my favorite ways to change it up:
- Add Protein: Stir in 1 cup of shredded rotisserie chicken, leftover diced ham, or cooked crumbled sausage right before adding the rice. It turns this into a complete, protein-packed meal. I’ve done this for my husband’s lunch and he raves about it.
- Make It Spicy: Add 1/4 teaspoon of red pepper flakes along with the garlic, or stir in a diced jalapeño with the onion. A dash of hot sauce right before serving is also fantastic. The heat cuts through the richness beautifully.
- Vegetable Swap: Not a broccoli fan? Substitute chopped cauliflower, asparagus tips, or even frozen peas (add them in the last minute of cooking). I’ve made a version with roasted red peppers and spinach that was surprisingly amazing.
- Different Cheese Blend: Swap half the cheddar for Gruyère, Monterey Jack, or smoked Gouda. Each cheese brings a different personality to the dish. Smoked Gouda adds a wonderful bacon-like depth without any meat.
- Grain Swap: Use cooked quinoa, farro, or even cauliflower rice for a lower-carb option. If using cauliflower rice, squeeze out as much moisture as possible before adding it to the sauce. I’ve done this for a lighter version and it’s still incredibly satisfying.
I personally love adding a handful of crispy bacon bits on top right before packing the thermos. It adds a salty crunch that contrasts perfectly with the creamy rice. It’s a small touch that feels indulgent without much extra work.
Serving & Storage Suggestions
This creamy thermos-ready cheesy broccoli rice bowl is designed to be eaten hot, straight from a thermos. But here is how to handle it for different situations:
Serving Temperature: Serve piping hot. If you are eating it at home, let it rest for 2 minutes after cooking to let the flavors meld. It’s also delicious at room temperature, though the sauce thickens as it cools.
Presentation: For a sit-down meal, serve it in a shallow bowl with a sprinkle of extra shredded cheddar and a crack of black pepper on top. A side of crusty bread for dipping is never a bad idea. For thermos packing, just fill it up and go.
Complementary Dishes: This rice bowl pairs beautifully with a simple side salad dressed with lemon vinaigrette to cut through the richness. It also works great alongside some healthy low-cal ranch chicken skillet for a complete meal. For a lighter option, serve it with roasted vegetables.
Storage Instructions: Store any leftovers in an airtight container in the refrigerator for up to 4 days. The flavors actually deepen overnight as the cheese and broccoli meld together. The texture will thicken considerably when cold—this is normal.
Reheating Methods: To reheat, add a splash of milk or water and microwave in 30-second bursts, stirring between each, until hot. You can also reheat it in a skillet over medium-low heat with a tablespoon of water, stirring frequently. Do not reheat it in the thermos—that is a one-way ticket to a burnt bottom and a ruined lunch.
Freezer Instructions: This freezes surprisingly well! Portion it into freezer-safe containers and freeze for up to 3 months. Thaw overnight in the refrigerator before reheating. The texture might be slightly softer after freezing, but the flavor remains excellent. I often double the batch and freeze half for emergency lunches.
Nutritional Information & Benefits
Here is an approximate nutritional breakdown per serving (based on 4 servings):
- Calories: ~420 kcal
- Protein: 18g
- Fat: 22g
- Carbohydrates: 42g
- Fiber: 4g
- Calcium: 35% of the Daily Value
- Vitamin C: 90% of the Daily Value
Health Benefits: Broccoli is a powerhouse of vitamin C, vitamin K, and fiber, supporting immune function and digestive health. The calcium from the cheese and milk is excellent for bone health. The protein from the dairy helps keep you full and satisfied throughout the afternoon. This is comfort food that actually works for you.
Dietary Considerations: This recipe is naturally vegetarian and gluten-free. For a lower-calorie version, use reduced-fat cheese and low-fat milk. For a dairy-free option, use plant-based alternatives as mentioned in the ingredient section. It’s also relatively low in added sugars, making it a smart choice for balanced eating.
Allergen Note: This recipe contains dairy (milk, cheese, cream cheese). It is free from nuts, soy, and eggs, but always check your specific ingredient brands for cross-contamination if you have severe allergies.
I personally love that this meal feels indulgent but is packed with real, whole ingredients. It’s the kind of lunch that doesn’t leave you crashing an hour later. You feel satisfied, not stuffed.
Conclusion
This creamy thermos-ready cheesy broccoli rice bowl has honestly become a staple in my weekly meal prep rotation. It’s the kind of recipe that proves you don’t have to sacrifice flavor for convenience. You get a warm, comforting, restaurant-quality lunch without the drive-through or the microwave drama.
I love how forgiving this recipe is. You can swap the cheese, change the vegetable, add protein—it adapts to whatever you have in your fridge. That is real cooking, and it is so much more fun than following a rigid set of rules. The first time you open that thermos at work and smell that cheesy, garlicky aroma, you will understand why I keep coming back to it.
Give it a try, and don’t be afraid to make it your own. Maybe add a pinch of cayenne, or a handful of crispy onions on top. I would love to hear how it turns out for you! Drop a comment below and let me know your favorite twist. And if you are looking for another easy, satisfying meal idea, check out this healthy chicken veggie skillet wraps recipe for another quick lunch option. Happy cooking, friends!
Frequently Asked Questions
Can I use frozen broccoli instead of fresh?
Yes, you can use frozen broccoli, but you need to thaw it completely and pat it very dry with paper towels before adding it to the skillet. Frozen broccoli holds more water, which can make your sauce thin and watery. I recommend fresh for the best texture, but frozen works in a pinch.
How do I keep the rice from getting mushy in the thermos?
The key is to slightly undercook the rice by a minute or two and to let the finished dish cool for about 5 minutes before packing. This allows the sauce to thicken and prevents excess steam from making the rice soggy. Also, pre-heating your thermos helps maintain the right temperature without condensation.
Can I make this recipe vegan?
Absolutely! Use a high-quality plant-based butter, unsweetened oat milk or cashew milk, dairy-free cream cheese, and your favorite vegan cheddar shreds. The texture will be slightly different—less stretchy—but still creamy and delicious. I’ve made it with Miyoko’s brand and it turned out great.
How long does this stay hot in a thermos?
When properly pre-heated and filled to the top, this will stay piping hot for 4-5 hours. After that, it will still be warm but not steaming. For best results, use a high-quality thermos and avoid opening it until you are ready to eat. I’ve tested this with a Stanley thermos and it’s still perfectly warm at lunchtime.
Can I add other vegetables to this recipe?
Definitely! Diced bell peppers, mushrooms, or zucchini all work well. Just sauté them along with the broccoli, adjusting cooking times as needed for each vegetable. Mushrooms might need a few extra minutes to release their moisture. This is a great way to use up whatever vegetables you have in your crisper drawer.
Pin This Recipe!
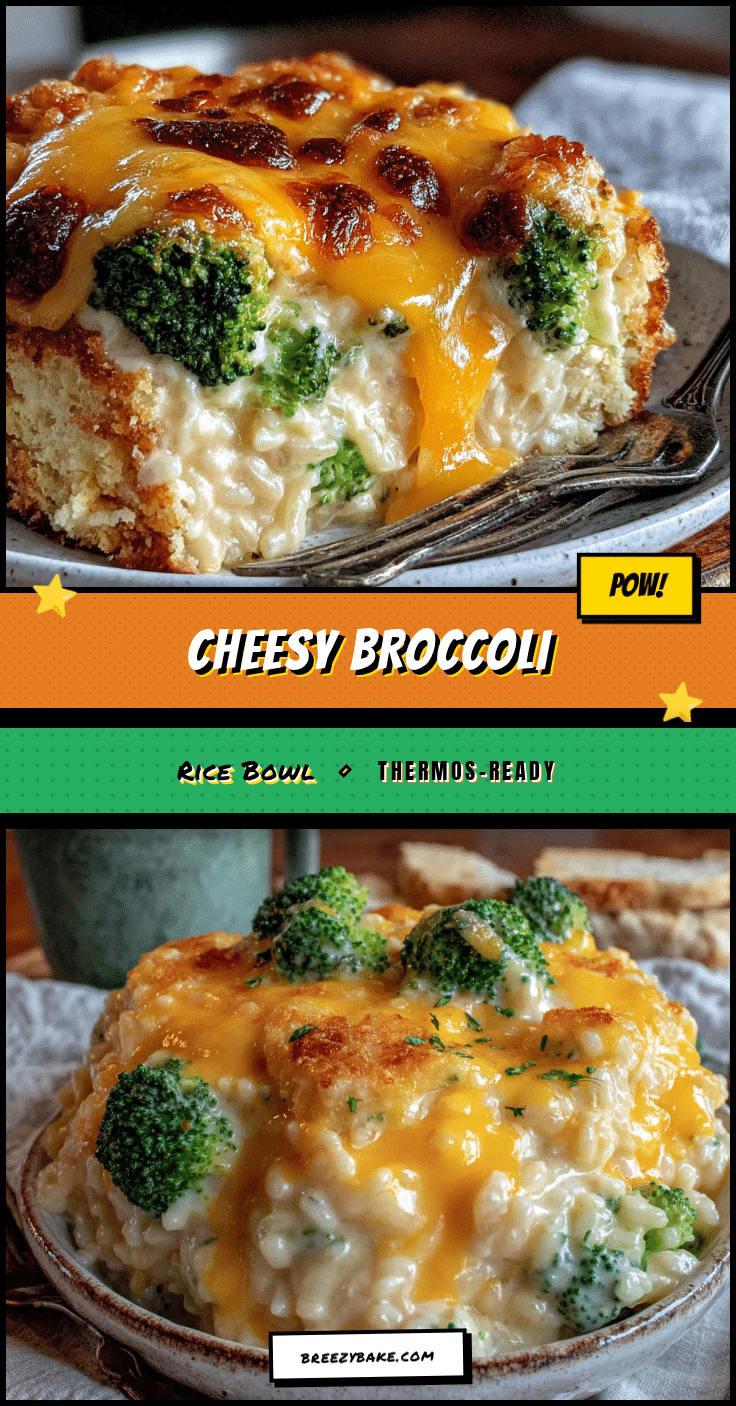
Creamy Cheesy Broccoli Rice Bowl: Easy Thermos Lunch

This creamy thermos-ready cheesy broccoli rice bowl is the ultimate make-ahead lunch. It’s warm, satisfying, and stays luscious even after hours in a thermos, making it perfect for work, school, or on-the-go meals.
- Prep Time: 10 minutes
- Cook Time: 20 minutes
- Total Time: 30 minutes
- Yield: 4 servings 1x
- Category: Main Course
- Cuisine: American
Ingredients
- 1 cup (200g) long-grain white rice, uncooked
- 2 cups (480ml) water or low-sodium chicken broth
- 2 tablespoons (28g) unsalted butter
- 1 small yellow onion, finely diced (about 1/2 cup)
- 2 cloves garlic, minced
- 3 cups (about 250g) fresh broccoli florets, chopped into small bite-sized pieces
- 1/2 cup (120ml) whole milk
- 4 ounces (113g) cream cheese, softened and cut into cubes
- 1 1/2 cups (170g) sharp cheddar cheese, freshly shredded
- 1/2 teaspoon salt
- 1/4 teaspoon black pepper
- 1/4 teaspoon smoked paprika (optional)
- Pinch of nutmeg (optional)
Instructions
- Cook the rice: In a medium saucepan, combine the 1 cup of rice and 2 cups of water or broth. Bring to a boil over high heat. Once boiling, reduce the heat to low, cover, and simmer for 15-18 minutes, or until the liquid is absorbed and the rice is tender. Remove from heat and let it sit, covered, for 5 minutes. Fluff with a fork. You want about 3 cups of cooked rice.
- Sauté the aromatics: While the rice cooks, melt the 2 tablespoons of butter in a large skillet over medium heat. Add the diced onion and cook for 3-4 minutes, stirring occasionally, until it becomes translucent and soft. Add the minced garlic and cook for another 30 seconds until fragrant.
- Cook the broccoli: Add the chopped broccoli florets to the skillet. Sauté for 4-5 minutes, stirring frequently, until the broccoli is bright green and just tender-crisp. If you prefer softer broccoli, add 2 tablespoons of water and cover the pan for 2 minutes to steam it.
- Build the cheese sauce: Reduce the heat to low. Pour the 1/2 cup of milk into the skillet with the broccoli and onions. Add the cubed cream cheese. Stir continuously until the cream cheese is completely melted and the mixture is smooth, about 2 minutes.
- Melt the cheddar: Add the shredded sharp cheddar cheese to the skillet, one handful at a time, stirring constantly until each addition is fully melted before adding the next. Season with the salt, pepper, smoked paprika, and nutmeg if using. Taste and adjust seasoning.
- Combine everything: Add the cooked, fluffed rice to the skillet with the cheese sauce and broccoli. Stir gently but thoroughly until every grain of rice is coated.
- Cool slightly and pack: Let the rice bowl cool for about 5 minutes in the skillet. While it cools, prep your thermos by filling it with boiling water, letting it sit for 5 minutes, then dumping the water out. Pack the hot rice mixture into the pre-warmed thermos, filling it as full as possible to minimize air space. Seal tightly.
Notes
For best results, pre-heat your thermos with boiling water for 5 minutes before filling. Use freshly shredded cheddar cheese for a smooth sauce. If the sauce seems too thick after adding rice, stir in a splash of warm milk or broth. Leftovers can be stored in an airtight container in the refrigerator for up to 4 days.
Nutrition
- Serving Size: 1 serving (about 1.5
- Calories: 420
- Sugar: 4
- Sodium: 580
- Fat: 22
- Saturated Fat: 13
- Carbohydrates: 42
- Fiber: 4
- Protein: 18
Keywords: creamy cheesy broccoli rice bowl, thermos lunch, easy lunch recipe, meal prep, broccoli rice casserole, cheesy rice, vegetarian lunch


