My sister-in-law, Jen, wasn’t trying to impress anyone. I’d stopped by to borrow a garden rake on a random Tuesday afternoon, and the smell that hit me before I even got through the back door was… well, it was butter and garlic, but not in a heavy way. It was clean and savory, and it pulled me right into the kitchen.
There she was, standing over a pot of boiling water, completely nonchalant. She had a head of cauliflower on the cutting board and a bunch of chives from her garden in a little cup of water. “Oh, this?” she said when I asked what she was making. “It’s just a side dish. I’m trying to eat a little lighter this week.” She shrugged like it was nothing.
But let me tell you, that “nothing” side dish was a revelation. She mashed that cauliflower with a little butter, some cream cheese, and a sprinkle of salt, and topped it with a flurry of fresh chives. I stood there in her kitchen, eating a spoonful right out of the bowl, and I honestly couldn’t believe it wasn’t mashed potatoes. It was creamy, it was flavorful, and it didn’t leave me feeling like I needed a nap afterward.
I asked for the recipe, and she just laughed and said, “There’s no recipe. I just winged it.” That’s the thing about the best recipes, isn’t it? They come from someone who isn’t even trying to be a chef. They come from a Tuesday afternoon and a need for something simple and good. This Creamy Healthy Cauliflower Mash with Chives is that recipe for me now. Maybe you’ve been looking for a way to enjoy a comforting side dish without the guilt—this is it.
Why You’ll Love This Recipe
This isn’t just another cauliflower mash that tastes watery and sad. I’ve tested this version in my own kitchen more times than I can count, tweaking the ratios until it was just right. It has all the creamy, buttery satisfaction of mashed potatoes but with a fraction of the carbs and calories. Here’s why it’s become a staple in my home:
- Quick & Easy: From start to finish, this dish comes together in under 30 minutes. It’s perfect for a busy weeknight when you want something healthy but don’t have hours to spend in the kitchen.
- Simple Ingredients: You only need a handful of pantry staples. No fancy grocery trips required—just cauliflower, a few dairy items, and fresh chives.
- Perfect for Meal Prep: This mash keeps beautifully in the fridge and reheats like a dream. Make a big batch on Sunday and enjoy it all week long.
- Crowd-Pleaser: I’ve served this to die-hard potato fans, and they’ve all gone back for seconds. It’s that good.
- Unbelievably Delicious: The secret is in the texture. By steaming the cauliflower instead of boiling it, you avoid that soggy, waterlogged mess. The result is a fluffy, creamy mash that honestly rivals the real thing.
What makes this recipe different from the rest? It’s the technique. Most recipes tell you to boil the cauliflower, which dilutes the flavor. Steaming it keeps all that natural sweetness intact. Plus, a little cream cheese adds a tangy richness that makes you forget you’re eating vegetables. This isn’t just a healthy alternative—it’s genuinely the best version of cauliflower mash I’ve ever had.
What Ingredients You Will Need
This recipe uses simple, wholesome ingredients to deliver bold flavor and satisfying texture without the fuss. Most of these are probably already in your fridge or pantry.
- 1 large head of cauliflower (about 2 to 2.5 pounds), cut into florets. Look for a firm, white head with no brown spots. The fresher the cauliflower, the sweeter the mash.
- 2 tablespoons unsalted butter (adds richness). I prefer Kerrygold for its creamy, grass-fed flavor, but any good butter will work.
- 2 ounces cream cheese, softened (use full-fat for the creamiest texture, but low-fat works in a pinch). This is the secret ingredient that gives the mash its velvety mouthfeel.
- 1/4 cup milk (whole milk or 2% is best; you can use unsweetened almond milk or oat milk for a dairy-free option).
- 1/4 cup sour cream or plain Greek yogurt (Greek yogurt adds a nice tang and extra protein).
- 1 clove garlic, minced (or 1/2 teaspoon garlic powder if you’re in a rush).
- Salt and freshly ground black pepper to taste. Don’t be shy with the salt—it makes the cauliflower flavor pop.
- 3 tablespoons fresh chives, finely chopped, plus more for garnish. If you don’t have fresh, you can use 1 tablespoon dried chives, but fresh really makes a difference here.
Ingredient Tips: For the best texture, make sure your cauliflower is cut into even-sized florets so they cook evenly. I recommend using a good-quality cream cheese like Philadelphia for the smoothest results. If you’re avoiding dairy, you can swap the butter for vegan butter, the cream cheese for a vegan cream cheese alternative, and the milk for unsweetened cashew milk. The mash will still be creamy, just with a slightly different flavor profile.
Equipment Needed
You don’t need a lot of fancy gadgets to make this recipe, which is part of its charm. Here’s what you’ll need:
- A large pot with a steamer basket: This is key. Steaming the cauliflower instead of boiling it prevents it from becoming waterlogged. If you don’t have a steamer basket, you can use a metal colander that fits inside your pot.
- A food processor or high-powered blender: This gives you the smoothest, creamiest texture. I’ve used both my Cuisinart food processor and my Vitamix, and both work beautifully. A potato masher will work in a pinch, but the texture will be more rustic and chunky.
- A sharp chef’s knife: For cutting the cauliflower into uniform florets. A dull knife will just crush the vegetable.
- A rubber spatula: For scraping every last bit of that creamy mash out of the food processor. Trust me, you don’t want to waste any.
- A fine-mesh strainer: Optional, but useful if you want to squeeze out any excess moisture from the steamed cauliflower for an even thicker mash.
I remember the first time I made this, I didn’t have a steamer basket. I used a metal colander balanced over a pot of boiling water, and it worked just fine. Don’t let a missing tool stop you from trying this recipe!
Preparation Method
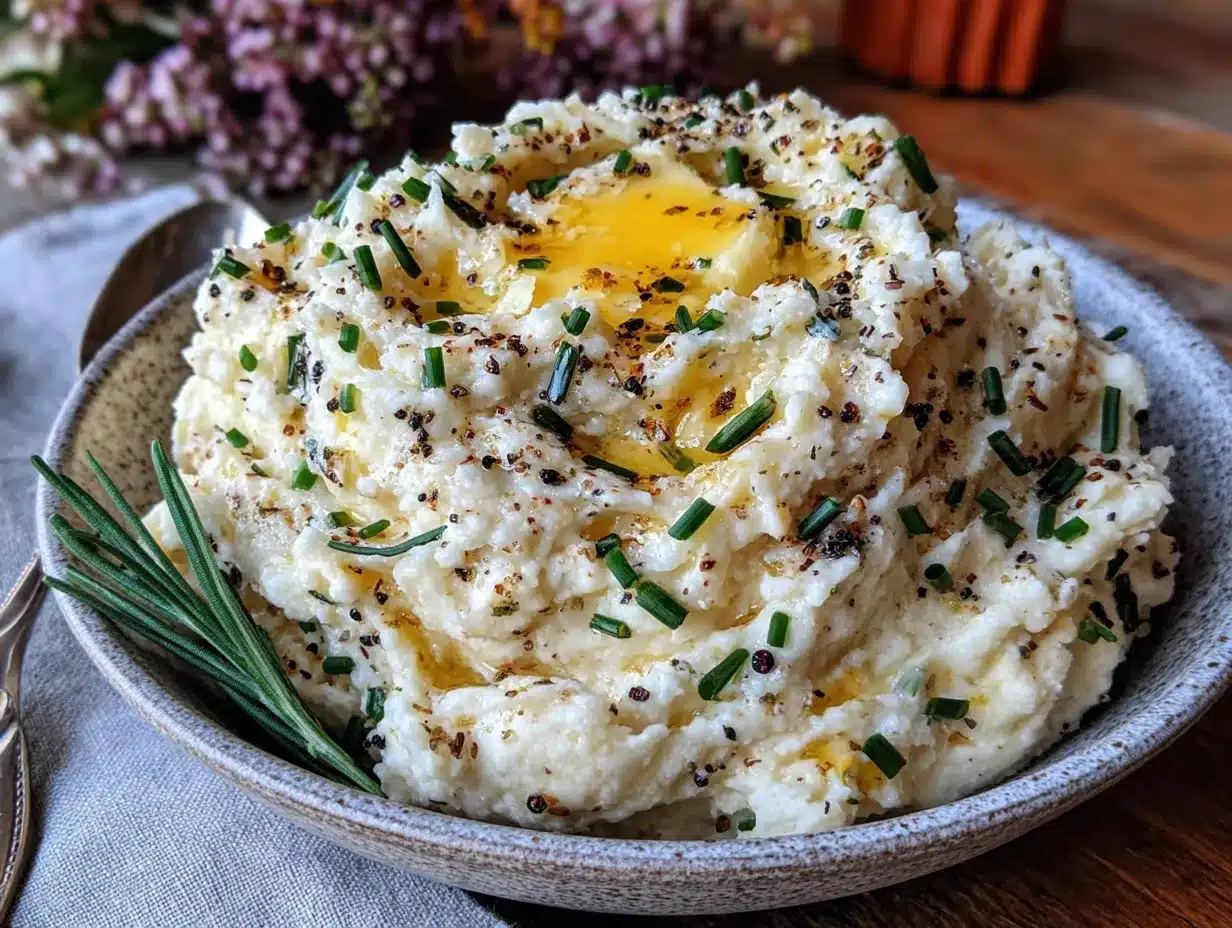
Follow these steps carefully, and you’ll have the creamiest cauliflower mash of your life. I’ve included all the little tricks I’ve learned along the way.
- Prepare the cauliflower: Wash the head of cauliflower and remove the green leaves and the tough core. Cut it into uniform florets, about 1 to 2 inches in size. This ensures even cooking. Don’t throw away the stems—they’re just as tender and flavorful as the florets once cooked.
- Steam the cauliflower: Fill a large pot with about an inch of water and bring it to a boil. Place the cauliflower florets in a steamer basket, cover the pot, and steam for 10 to 12 minutes. You’ll know it’s done when a fork easily pierces the thickest part of a floret. The cauliflower should be very tender but not falling apart. Sensory cue: It should smell sweet and nutty, not sulfurous. If it starts to smell like old cabbage, you’ve overcooked it.
- Dry the cauliflower: This is the most important step. Carefully transfer the steamed cauliflower to a clean kitchen towel or a few layers of paper towels. Let it sit for 2 to 3 minutes to steam off any excess moisture. You can even gently press another towel on top to absorb the water. Removing this extra liquid is what prevents a watery mash. I learned this the hard way after making a sad, soupy mess my first time.
- Combine the ingredients: In the bowl of your food processor, add the dried cauliflower florets, the softened butter, cream cheese, milk, sour cream (or Greek yogurt), and minced garlic. Season with a generous pinch of salt and a few cracks of black pepper.
- Blend until smooth: Process the mixture for about 30 to 45 seconds, scraping down the sides of the bowl halfway through with your rubber spatula. The mash should be completely smooth and velvety. If it looks too thick, you can add another tablespoon of milk and pulse again. If it looks too thin, you probably didn’t dry the cauliflower enough—add another tablespoon of cream cheese to thicken it up.
- Fold in the chives: Transfer the mash to a serving bowl and gently fold in the chopped fresh chives with a spatula. Reserve a small pinch for garnish on top. The chives add a mild oniony freshness that cuts through the richness.
- Taste and adjust: Give it a final taste and adjust the salt and pepper. This is your last chance to get it perfect. I always find it needs a little more salt than I expect.
- Serve immediately: Spoon the mash into a warm serving dish, top with the reserved chives, and a small pat of butter if you’re feeling indulgent. Serve hot.
Troubleshooting Tip: If your mash turns out a little gluey, you may have over-processed it in the food processor. Next time, pulse it instead of running it continuously. A little bit of texture is actually nice!
Cooking Tips & Techniques
Over the years, I’ve made this recipe dozens of times, and I’ve definitely had my share of failures. Here’s what I’ve learned so you don’t have to make the same mistakes.
The Drying Step is Non-Negotiable: I cannot stress this enough. Cauliflower is basically a sponge for water. If you skip the drying step, you’ll end up with a thin, watery mash that tastes like nothing. I once forgot to do this when I was in a hurry, and the result was so disappointing I had to toss the whole batch and start over. Take the extra two minutes.
Don’t Overcook the Cauliflower: Steam it until it’s just fork-tender. If you let it go too long, it will start to break down and absorb even more water, which leads to that gluey, unpleasant texture. Set a timer for 10 minutes and check it.
Use Room Temperature Dairy: This is a small detail that makes a big difference. Cold cream cheese and butter won’t blend as smoothly into the hot cauliflower, leaving you with little lumps. Let them sit on the counter for 15 minutes before you start cooking.
Season in Layers: Add a pinch of salt to the steaming water, then season again when you blend the mash. This builds flavor from the inside out, rather than just relying on the final sprinkle of salt.
Multitasking Strategy: While the cauliflower is steaming, you can chop the chives, mince the garlic, and get your dairy ingredients out of the fridge. This way, everything is ready to go the second the cauliflower is done.
Variations & Adaptations
This recipe is a fantastic base for experimentation. Here are a few of my favorite twists:
- Vegan Version: Replace the butter with vegan butter or olive oil, the cream cheese with a dairy-free cream cheese, and the milk with unsweetened oat milk. Use a dollop of coconut cream instead of sour cream. The flavor will be slightly different, but still incredibly creamy.
- Roasted Garlic Cauliflower Mash: Instead of using raw garlic, roast a whole head of garlic in the oven until it’s soft and caramelized. Squeeze the cloves out of their skins and blend them into the mash. It adds a deep, sweet, nutty flavor that is absolutely divine. I did this for Thanksgiving last year, and it stole the show.
- Cheesy Cauliflower Mash: Stir in 1/2 cup of sharp grated cheddar or Parmesan cheese after blending. The cheese melts into the hot mash and adds a savory, umami kick. It’s a great way to win over picky eaters.
- Spicy Southwest Mash: Add 1/4 teaspoon of smoked paprika, a pinch of cayenne pepper, and 2 tablespoons of chopped pickled jalapeños. Fold in some chopped cilantro instead of chives. This version is fantastic alongside grilled chicken or fish.
- Herb Garden Mash: Swap the chives for a mix of fresh herbs like parsley, dill, and a little bit of fresh thyme. This is a beautiful, springy variation that goes perfectly with roasted lamb or a light salad.
Serving & Storage Suggestions
This creamy cauliflower mash is incredibly versatile. Here’s how to serve and store it for the best results.
Serving: Serve this mash hot, straight from the food processor. It’s the perfect side dish for nearly any protein. I love it with a perfectly seared steak, roasted chicken thighs, or even a simple piece of grilled salmon. It also works beautifully as a base for a hearty stew or braised short ribs. For a lighter meal, serve it alongside a big green salad with a lemon vinaigrette. The creamy mash and the bright, acidic salad are a match made in heaven.
Storage: Let any leftover mash cool completely to room temperature. Transfer it to an airtight container and store it in the refrigerator for up to 5 days. The flavors actually meld together and get even better overnight.
Reheating: The best way to reheat this mash is in a small saucepan over low heat. Add a splash of milk or water to loosen it up, and stir frequently until it’s hot. You can also microwave it in 30-second bursts, stirring in between. Just be careful not to overheat it, or it can become grainy.
Freezing: This mash freezes surprisingly well. Spoon it into a freezer-safe bag or container, press out the air, and freeze for up to 3 months. Thaw it overnight in the refrigerator before reheating. The texture might be slightly less fluffy after freezing, but it will still be delicious.
Flavor Development: I actually prefer the leftovers. The garlic and chive flavors mellow and meld together, creating an even more harmonious dish. Don’t be afraid to make a double batch!
Nutritional Information & Benefits
One of the main reasons I love this recipe is how it fits into a balanced, health-conscious lifestyle. It’s proof that eating well doesn’t mean eating bland food.
Here is an approximate nutritional breakdown per serving (based on 4 servings):
- Calories: 185
- Fat: 14g
- Carbohydrates: 12g
- Fiber: 5g
- Sugar: 5g
- Protein: 7g
Health Benefits: Cauliflower is a nutritional powerhouse. It’s packed with vitamin C, vitamin K, and fiber, which supports digestive health. It’s also a great source of choline, a nutrient important for brain health. By using cauliflower instead of potatoes, you’re cutting the carbs by more than half and adding a huge boost of vitamins. The Greek yogurt adds protein and probiotics, while the chives provide a small amount of vitamin A and antioxidants.
Dietary Considerations: This recipe is naturally gluten-free, low-carb, and keto-friendly. It can easily be made vegetarian and vegan with the swaps mentioned above. It contains dairy in its standard form, but the dairy-free alternatives work wonderfully.
Conclusion
This Creamy Healthy Cauliflower Mash with Chives has become a regular in my weekly meal rotation. It’s the kind of recipe that makes you feel good about what you’re eating without making you feel like you’re missing out. It’s comfort food, but lighter. It’s simple, but it feels special.
I honestly love how forgiving this recipe is. You can tweak it a hundred different ways, and it almost always turns out delicious. That’s the mark of a great recipe, in my opinion. It’s a technique, not a rigid set of rules.
I’d love to hear how you make this your own! Did you try the roasted garlic version? Or maybe you added a pinch of nutmeg? Drop a comment below and let me know. And if you loved it as much as I do, please share this post with a friend who’s trying to eat a little lighter this week. Happy cooking, friend!
Frequently Asked Questions
Can I use frozen cauliflower for this recipe?
Yes, you can use frozen cauliflower florets in a pinch. However, frozen cauliflower tends to hold more water, so it’s even more important to dry it thoroughly after steaming. You may also need to cook it for a minute or two less, as frozen florets are often pre-blanched.
Why is my cauliflower mash watery?
This is the most common issue, and it almost always comes down to one thing: not drying the cauliflower after steaming. The second culprit is overcooking, which causes the florets to absorb too much water. Make sure to pat them dry with a clean kitchen towel before blending.
Can I make this recipe without a food processor?
Absolutely! If you don’t have a food processor or blender, you can use a potato masher or a ricer. The texture will be more rustic and chunky, but it will still taste delicious. Just make sure the cauliflower is very tender so it mashes easily.
Can I make this cauliflower mash ahead of time?
Yes, this is a great make-ahead dish. Prepare the mash as directed, let it cool, and store it in the refrigerator for up to 5 days. Reheat it gently on the stovetop with a splash of milk to restore its creamy texture. It’s perfect for holiday meal prep.
Is this recipe suitable for a keto diet?
Yes, this recipe is very keto-friendly. Cauliflower is low in carbs, and the high fat content from the butter, cream cheese, and sour cream fits perfectly into a ketogenic macro ratio. Just be sure to use full-fat dairy for the best results.
Pin This Recipe!
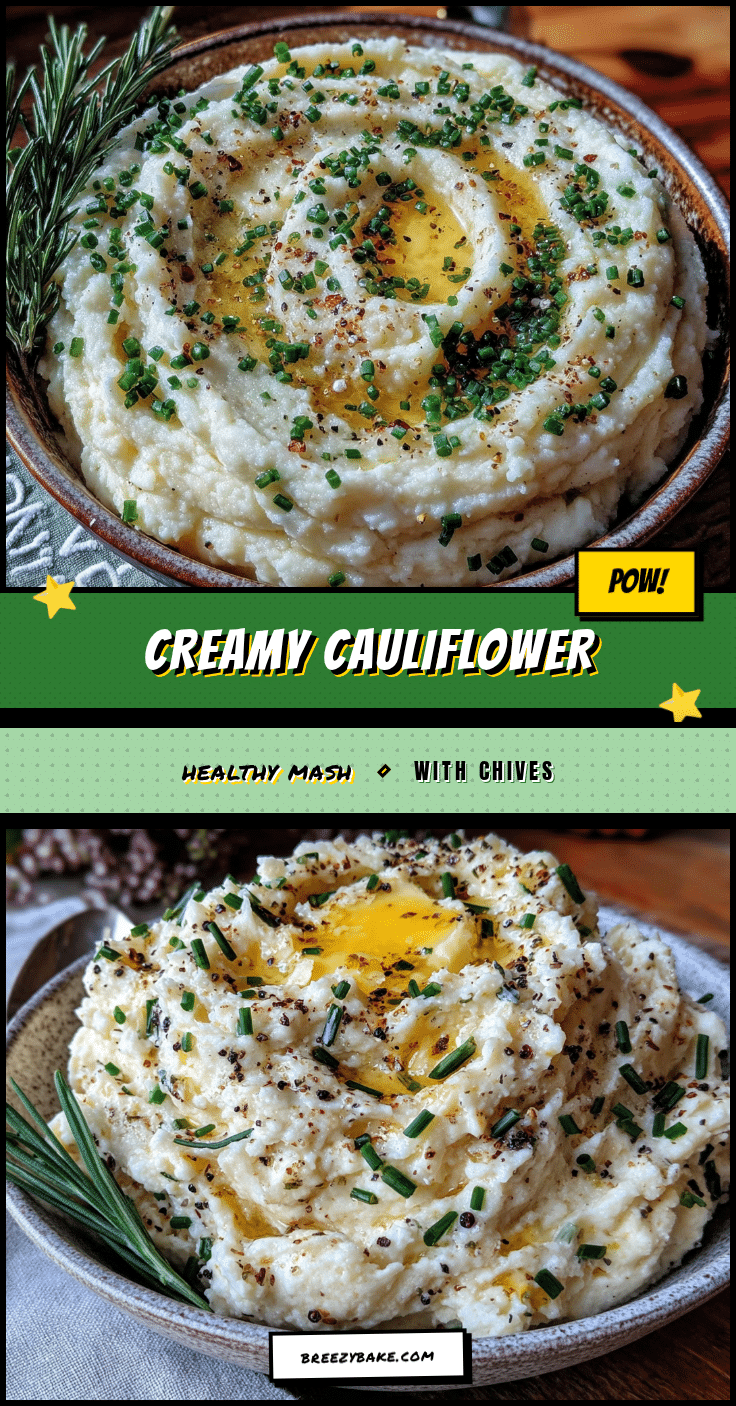
Creamy Healthy Cauliflower Mash with Chives (Easy Side Dish)

This creamy, buttery cauliflower mash is a healthy alternative to mashed potatoes, made with simple ingredients and ready in under 30 minutes. It’s a guilt-free side dish that’s perfect for weeknights or holiday meals.
- Prep Time: 10 minutes
- Cook Time: 12 minutes
- Total Time: 22 minutes
- Yield: 4 servings 1x
- Category: Side Dish
- Cuisine: American
Ingredients
- 1 large head of cauliflower (about 2 to 2.5 pounds), cut into florets
- 2 tablespoons unsalted butter
- 2 ounces cream cheese, softened
- 1/4 cup milk (whole milk or 2%)
- 1/4 cup sour cream or plain Greek yogurt
- 1 clove garlic, minced
- Salt and freshly ground black pepper to taste
- 3 tablespoons fresh chives, finely chopped, plus more for garnish
Instructions
- Prepare the cauliflower: Wash the head of cauliflower and remove the green leaves and the tough core. Cut it into uniform florets, about 1 to 2 inches in size.
- Steam the cauliflower: Fill a large pot with about an inch of water and bring it to a boil. Place the cauliflower florets in a steamer basket, cover the pot, and steam for 10 to 12 minutes until fork-tender.
- Dry the cauliflower: Carefully transfer the steamed cauliflower to a clean kitchen towel or paper towels. Let it sit for 2 to 3 minutes to steam off excess moisture. Gently press another towel on top to absorb water.
- Combine the ingredients: In the bowl of a food processor, add the dried cauliflower florets, softened butter, cream cheese, milk, sour cream (or Greek yogurt), and minced garlic. Season with a generous pinch of salt and a few cracks of black pepper.
- Blend until smooth: Process the mixture for about 30 to 45 seconds, scraping down the sides of the bowl halfway through. The mash should be completely smooth and velvety. If too thick, add another tablespoon of milk; if too thin, add another tablespoon of cream cheese.
- Fold in the chives: Transfer the mash to a serving bowl and gently fold in the chopped fresh chives. Reserve a small pinch for garnish.
- Taste and adjust: Give it a final taste and adjust the salt and pepper as needed.
- Serve immediately: Spoon the mash into a warm serving dish, top with reserved chives, and a small pat of butter if desired. Serve hot.
Notes
The drying step is crucial to avoid a watery mash. Use room temperature dairy for smoother blending. For a vegan version, substitute butter with vegan butter, cream cheese with dairy-free cream cheese, milk with unsweetened oat milk, and sour cream with coconut cream.
Nutrition
- Serving Size: 1 serving (about 1 c
- Calories: 185
- Sugar: 5
- Sodium: 320
- Fat: 14
- Saturated Fat: 8
- Carbohydrates: 12
- Fiber: 5
- Protein: 7
Keywords: cauliflower mash, healthy side dish, low-carb, keto, gluten-free, vegetarian, creamy cauliflower, chives