The last drop of soup was gone, and my friend actually licked the bowl. Not in a cute, joking way—she seriously picked it up and went for it. I just stood there, spatula in hand, not sure whether to apologize or ask if she wanted me to leave the room. That was the moment I knew this honeynut squash soup was different.
It started on a random Tuesday, which is honestly how most of my good recipes happen. I’d grabbed a few honeynut squashes at the market because they were tiny and cute—no grand plan, just impulse. They sat on my counter for three days, staring at me, until I finally caved and roasted one out of pure guilt. That first batch was fine, but it was missing something. A little flat. A little too polite.
Then I remembered the brown butter I’d made last week for a batch of chocolate-dipped strawberry shortcake minis. That nutty, almost-toasty flavor felt like it could wake the soup up. So I browned a few tablespoons, stirred it in, and took a taste. Honestly? I almost dropped the spoon. The brown butter didn’t just complement the squash—it made it feel whole. Like the soup had been waiting for its partner the whole time.
This isn’t one of those recipes that took years to perfect. It’s one of those that clicked into place because I finally stopped overthinking it. And now, every time I make it, someone asks for the recipe. I think that’s the best kind of win.
Why You’ll Love This Recipe
This creamy honeynut squash soup has become my go-to for fall dinners, holiday starters, and those lazy Sunday afternoons when you just want something warm in a bowl. It’s not complicated, but it tastes like you spent hours fussing over it.
- Quick & Easy: From start to finish, this soup comes together in about 45 minutes. Most of that is hands-off roasting time, so you can tidy up the kitchen or just sit down for a minute.
- Simple Ingredients: You probably already have onions, garlic, broth, and butter in your kitchen. The only special item is the honeynut squash, which is showing up at more grocery stores every season.
- Perfect for Entertaining: This soup looks gorgeous in little cups for a dinner party starter or in big bowls for a cozy family meal. It’s fancy enough for guests but easy enough for a Tuesday.
- Crowd-Pleaser: I’ve served this to kids, picky eaters, and full-on food snobs. Everyone goes back for seconds. The brown butter really seals the deal.
- Unbelievably Delicious: The texture is silky without being heavy, and the flavor is sweet and savory with that nutty brown butter finish. It’s comfort food that still feels light.
What makes this recipe different? It’s the brown butter, hands down. Most squash soups rely on cream or coconut milk for richness, but the brown butter brings a toasty depth that cream just can’t match. It’s a small twist that changes everything.
This soup is the kind that makes you close your eyes after the first bite. It’s simple, honest, and exactly what you need on a chilly day.
What Ingredients You Will Need
This recipe uses simple, wholesome ingredients to deliver bold flavor and a silky texture. Most of these are pantry staples, and the few that aren’t are easy to find at any grocery store.
For the Soup
- Honeynut squash (3 medium, about 2 lbs total) — peeled, seeded, and cubed into 1-inch pieces. Honeynut squash is smaller and sweeter than butternut, with a thinner skin that’s easier to peel. If you can’t find it, butternut squash works great too.
- Yellow onion (1 large, diced) — adds a savory base that balances the sweetness of the squash.
- Garlic cloves (4 cloves, smashed) — I like to roast them right alongside the squash for a mellow, sweet flavor.
- Olive oil (2 tablespoons) — for roasting the squash and sautéing the onion. A good quality extra-virgin olive oil makes a difference here.
- Vegetable broth (3 cups) — use low-sodium so you can control the salt level. Chicken broth works too if you’re not keeping it vegetarian.
- Salt (1 teaspoon, plus more to taste) — I prefer kosher salt for its clean flavor and easy control.
- Black pepper (½ teaspoon, freshly ground) — fresh ground really does taste better here.
- Maple syrup (1 tablespoon, optional) — adds a touch of sweetness if your squash isn’t super sweet. Taste your squash first before adding.
For the Brown Butter
- Unsalted butter (4 tablespoons, cut into pieces) — unsalted is important so you can control the salt level of the final soup. I like using a good European-style butter like Kerrygold for the richest flavor.
- Fresh sage leaves (8-10 leaves, optional but highly recommended) — these get crispy in the brown butter and make an incredible garnish.
For Garnish (Optional but Recommended)
- Heavy cream or coconut cream (a drizzle) — for that beautiful swirl on top.
- Toasted pumpkin seeds (2 tablespoons) — adds a nice crunch.
- Fresh thyme sprigs (a few) — for color and a little herbal note.
If you’re looking for a lighter option, you can swap the heavy cream for a splash of unsweetened almond milk. The soup will still be creamy from the blended squash itself.
Equipment Needed
You don’t need a ton of fancy equipment for this soup, which is part of why I love it. Here’s what you’ll need:
- Baking sheet (half-sheet size) — for roasting the squash and garlic. A rimmed sheet works best to catch any juices.
- Parchment paper — makes cleanup so much easier. Trust me on this one.
- Large pot or Dutch oven (5-6 quart) — for sautéing the onion and simmering the soup. A heavy-bottomed pot distributes heat evenly and prevents scorching.
- Immersion blender — my preferred tool for pureeing soup right in the pot. It’s faster and creates less mess than a countertop blender. If you don’t have one, a regular blender works fine—just work in batches and be careful with the hot liquid.
- Small skillet — for browning the butter. A light-colored pan helps you see the color change.
- Chef’s knife and cutting board — a sharp knife makes peeling and cubing the squash so much easier.
- Vegetable peeler — for peeling the squash. A Y-peeler gives you more control than a straight one.
If you’re investing in one tool for this recipe, let it be an immersion blender. I’ve had mine for years and use it for everything from soup to smoothies. You can find a good one for under $30.
Preparation Method
Step 1: Roast the Squash and Garlic
Preheat your oven to 400°F (200°C). Line a baking sheet with parchment paper. Toss the cubed honeynut squash and smashed garlic cloves with 1 tablespoon of olive oil, ½ teaspoon of salt, and ¼ teaspoon of black pepper. Spread everything in a single layer—crowding the pan will steam the squash instead of roasting it. Roast for 25-30 minutes, flipping halfway through, until the squash is tender and the edges are starting to caramelize. You want it fork-tender, not mushy.
Step 2: Sauté the Onion
While the squash roasts, heat the remaining 1 tablespoon of olive oil in your large pot over medium heat. Add the diced onion and a pinch of salt. Cook for 6-8 minutes, stirring occasionally, until the onion is soft and translucent. You’re not looking for color here—just gentle softening. If the onion starts to brown, turn the heat down a little.
Step 3: Simmer the Soup
Add the roasted squash and garlic to the pot with the onions. Pour in the vegetable broth and bring everything to a gentle simmer over medium-high heat. Once it’s bubbling, reduce the heat to low and let it cook for 10 minutes. This gives the flavors time to meld together. Taste the broth at this point—it should smell sweet and savory. If it tastes flat, add another pinch of salt.
Step 4: Blend Until Smooth
Remove the pot from the heat. Use your immersion blender to puree the soup until it’s completely smooth. If you’re using a countertop blender, let the soup cool for 5 minutes first, then blend in batches, filling the blender no more than halfway. Hold the lid down with a towel to prevent any hot splashes. Blend until the soup is velvety smooth, about 1-2 minutes. If it’s too thick for your liking, stir in an extra ¼ cup of broth or water.
Step 5: Make the Brown Butter
While the soup is blending, make the brown butter. Place the small skillet over medium heat and add the butter pieces. Stir constantly with a spatula or wooden spoon. The butter will melt, then foam, then start to turn golden. Keep stirring—this happens fast. After about 3-4 minutes, the butter will turn a deep amber color and smell nutty and toasty. The moment it reaches that color, remove the pan from the heat. If you’re using sage leaves, drop them into the hot butter for about 30 seconds until they crisp up. They’ll sizzle and curl—that’s exactly what you want.
Step 6: Finish and Serve
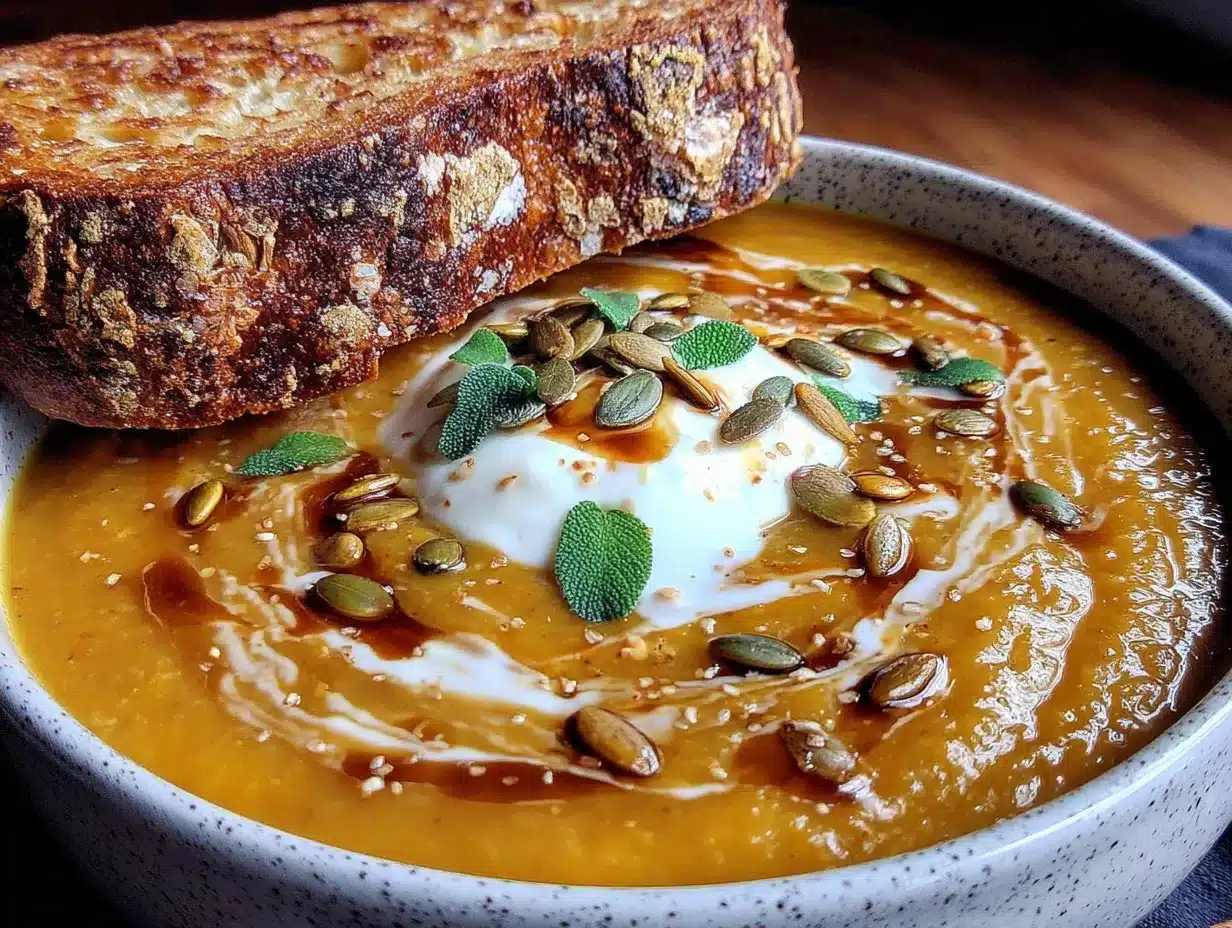
Stir the brown butter into the blended soup. Taste and adjust the salt and pepper. If the soup needs a little sweetness, stir in the maple syrup. Ladle the soup into bowls, drizzle with a little cream, and top with crispy sage leaves and toasted pumpkin seeds. Serve hot.
Cooking Tips & Techniques
I’ve made this soup more times than I can count, and I’ve learned a few things the hard way. Here are my best tips for getting it right every time.
Don’t skip roasting the squash. I know it’s tempting to boil it to save time, but roasting concentrates the natural sugars and gives the soup a deeper, caramelized flavor. Boiling just dilutes everything. Trust the oven on this one.
Watch the brown butter like a hawk. The line between perfect brown butter and burnt butter is about 15 seconds. Once you see those amber specks and smell that nutty aroma, pull it off the heat immediately. I’ve burned more batches than I care to admit because I looked away for “just a second.”
Peel the squash with a Y-peeler. Honeynut squash has thinner skin than butternut, but it’s still tough. A sharp Y-peeler makes the job quick and safe. If the squash is really firm, microwave it for 30 seconds to soften the skin slightly.
Season as you go. Adding salt at each stage—roasting, sautéing, and blending—builds flavor layer by layer. If you wait until the end, the soup will taste salty without depth.
Let the soup rest before serving. If you have time, let the finished soup sit for 10-15 minutes before serving. The flavors continue to develop and meld, and the texture settles into something even creamier.
One mistake I made early on was adding too much liquid. Start with 3 cups of broth and add more only if needed. You can always thin the soup out, but you can’t undo a watery batch.
Variations & Adaptations
This soup is flexible, and I love playing around with it depending on the season or what’s in my fridge.
Vegan Version: Swap the butter for vegan butter or coconut oil when browning. Use full-fat coconut milk instead of heavy cream for the drizzle. The coconut flavor pairs beautifully with the squash and brown butter substitute.
Spicy Twist: Add a minced jalapeño or a pinch of red pepper flakes when sautéing the onion. The heat cuts through the sweetness and adds a nice kick. I tried this last fall and it’s become my husband’s favorite version.
Apple-Squash Combo: Roast one peeled and cubed apple (Honeycrisp or Fuji work great) alongside the squash. The apple adds natural sweetness and a subtle fruity note that’s really lovely. This is my go-to variation when apples are in season.
Herb-Infused: Add a sprig of fresh rosemary or thyme to the pot while the soup simmers. Remove it before blending. The herbal notes make the soup feel even cozier and more complex.
Curried Version: Stir in 1 teaspoon of curry powder and ½ teaspoon of ground ginger when you sauté the onion. It transforms the soup into something warm and aromatic, perfect for a chilly evening.
If you’re feeding a crowd, this soup doubles beautifully. Just use a larger pot and give yourself an extra 5 minutes of roasting time for the squash.
Serving & Storage Suggestions
This soup is best served hot, straight from the pot, but it’s also wonderful made ahead. The flavors actually deepen overnight, so leftovers taste even better the next day.
Serving: Ladle the soup into warm bowls and top with a swirl of cream, crispy sage leaves, and a sprinkle of pumpkin seeds. A few cracks of fresh black pepper on top add a nice finishing touch. For a complete meal, serve with crusty bread, a simple green salad, or alongside a healthy chicken veggie skillet wrap for a satisfying lunch.
Storage: Let the soup cool completely, then transfer it to an airtight container. It will keep in the refrigerator for up to 5 days. The soup will thicken as it sits, so add a splash of broth or water when reheating to bring it back to the right consistency.
Freezing: This soup freezes beautifully. Pour it into freezer-safe containers or zip-top bags, leaving an inch of headroom for expansion. Freeze for up to 3 months. Thaw overnight in the refrigerator before reheating.
Reheating: Reheat gently on the stovetop over medium-low heat, stirring occasionally. You can also microwave individual portions in 30-second bursts, stirring between each. Don’t let it boil—high heat can break the emulsion and make the soup grainy.
One thing I love about this soup is how the brown butter flavor mellows and integrates overnight. If you’re making it for a dinner party, make it a day ahead and reheat it. Your future self will thank you.
Nutritional Information & Benefits
This soup is surprisingly nutritious for how indulgent it tastes. Honeynut squash is packed with vitamin A, vitamin C, and fiber, making it a great choice for supporting immune health and digestion. The brown butter adds a small amount of healthy fats that help your body absorb the fat-soluble vitamins in the squash.
Here’s the estimated nutrition per serving (based on 4 servings):
- Calories: 220
- Total Fat: 14g
- Saturated Fat: 7g
- Cholesterol: 30mg
- Sodium: 580mg
- Total Carbohydrates: 24g
- Dietary Fiber: 4g
- Sugars: 8g
- Protein: 3g
This recipe is naturally gluten-free and can easily be made vegan with the substitutions mentioned above. It’s also low in added sugars—the sweetness comes mostly from the squash itself. If you’re watching your sodium, use low-sodium broth and adjust the salt at the end.
I love that this soup feels like a treat but is actually full of good-for-you ingredients. It’s the kind of meal that nourishes you from the inside out, without making you feel like you’re eating “health food.”
Conclusion
This creamy honeynut squash soup with brown butter has become a staple in my kitchen for a reason. It’s simple enough for a weeknight, elegant enough for company, and so full of flavor that everyone asks for the recipe. The brown butter is the secret weapon—it turns an already good soup into something truly memorable.
I hope you give this recipe a try and make it your own. Maybe you’ll add a pinch of cinnamon, or swap the sage for thyme, or double the batch so you have leftovers for days. However you make it, I think you’ll love it. And if someone licks the bowl? Just take it as a compliment.
I’d love to hear how it turns out for you. Leave a comment below and let me know if you tried any variations, or tag me in your photos on social media. Happy cooking!
Frequently Asked Questions
Can I use butternut squash instead of honeynut?
Absolutely. Honeynut squash is smaller and sweeter, but butternut squash works perfectly as a substitute. Just peel, seed, and cube it the same way. You may need to roast it for an extra 5-10 minutes since butternut pieces are often larger.
Can I make this soup ahead of time?
Yes, and I actually recommend it. The flavors deepen and meld overnight, making the soup taste even better the next day. Make it up to 3 days ahead, store it in the fridge, and reheat gently on the stovetop.
Is this soup freezer-friendly?
Yes, it freezes beautifully. Let the soup cool completely, then transfer it to freezer-safe containers. It will keep for up to 3 months. Thaw overnight in the fridge before reheating.
How do I make this soup vegan?
Swap the butter for vegan butter or coconut oil when browning, and use full-fat coconut milk instead of heavy cream for the drizzle. The rest of the ingredients are already plant-based. The coconut flavor pairs surprisingly well with the squash.
My soup turned out too thin. How can I fix it?
If your soup is thinner than you’d like, simmer it uncovered over medium-low heat for 10-15 minutes to let some of the liquid evaporate. Stir occasionally to prevent sticking. You can also blend in a handful of roasted cashews or a small cooked potato to thicken it naturally.
Pin This Recipe!

Creamy Honeynut Squash Soup Recipe with Easy Brown Butter

This creamy honeynut squash soup is elevated with nutty brown butter and crispy sage. It’s a simple, elegant fall soup that comes together in about 45 minutes and is perfect for weeknights or entertaining.
- Prep Time: 15 minutes
- Cook Time: 30 minutes
- Total Time: 45 minutes
- Yield: 4 servings 1x
- Category: Soup
- Cuisine: American
Ingredients
- 3 medium honeynut squash (about 2 lbs total), peeled, seeded, and cubed into 1-inch pieces
- 1 large yellow onion, diced
- 4 garlic cloves, smashed
- 2 tablespoons olive oil
- 3 cups low-sodium vegetable broth
- 1 teaspoon kosher salt, plus more to taste
- ½ teaspoon freshly ground black pepper
- 1 tablespoon maple syrup (optional)
- 4 tablespoons unsalted butter, cut into pieces
- 8–10 fresh sage leaves (optional)
- Heavy cream or coconut cream, for drizzling (optional)
- 2 tablespoons toasted pumpkin seeds (optional)
- Fresh thyme sprigs (optional)
Instructions
- Preheat oven to 400°F (200°C). Line a baking sheet with parchment paper.
- Toss cubed squash and smashed garlic with 1 tablespoon olive oil, ½ teaspoon salt, and ¼ teaspoon pepper. Spread in a single layer on the baking sheet. Roast for 25-30 minutes, flipping halfway, until tender and edges are caramelized.
- While squash roasts, heat remaining 1 tablespoon olive oil in a large pot over medium heat. Add diced onion and a pinch of salt. Cook 6-8 minutes, stirring occasionally, until soft and translucent.
- Add roasted squash and garlic to the pot with the onions. Pour in vegetable broth. Bring to a gentle simmer over medium-high heat, then reduce heat to low and cook for 10 minutes.
- Remove pot from heat. Use an immersion blender to puree soup until completely smooth. (Alternatively, let cool 5 minutes, then blend in batches in a countertop blender.)
- While soup blends, make brown butter: Place small skillet over medium heat. Add butter pieces and stir constantly. After 3-4 minutes, butter will turn deep amber and smell nutty. Remove from heat immediately. If using sage, drop leaves into hot butter for about 30 seconds until crispy.
- Stir brown butter into blended soup. Taste and adjust salt and pepper. Add maple syrup if needed. Ladle into bowls, drizzle with cream, and top with crispy sage, pumpkin seeds, and thyme if desired. Serve hot.
Notes
Don’t skip roasting the squash—it concentrates the natural sugars. Watch the brown butter carefully; it can burn in seconds. For a vegan version, use vegan butter or coconut oil and full-fat coconut milk. The soup thickens as it sits; add a splash of broth when reheating. Leftovers keep in the fridge for up to 5 days or freeze for up to 3 months.
Nutrition
- Serving Size: 1 bowl (about 1.5 cu
- Calories: 220
- Sugar: 8
- Sodium: 580
- Fat: 14
- Saturated Fat: 7
- Carbohydrates: 24
- Fiber: 4
- Protein: 3
Keywords: honeynut squash soup, brown butter, fall soup, creamy soup, easy soup recipe, vegetarian soup, gluten-free soup


