I ruined overnight oats for three straight years. Not a little bit—completely. They came out gluey, bland, or somehow both at once, and I kept blaming the recipe when the problem was me. I was treating them like regular oatmeal, cooking them on the stovetop out of habit, missing the entire point of the no-cook method. It took a rushed morning and a stubborn refusal to eat another sad bowl of instant oats before I finally did what the name suggested: I stopped cooking and started soaking. That morning, I threw oats, milk, and a vanilla bean into a jar, shook it like I was mad at it, and stuck it in the fridge overnight. The next day, I ate the creamiest, most satisfying breakfast I’d made in months, and I haven’t looked back since.
These Creamy No-Churn Vanilla Bean Overnight Oats are the result of that accidental breakthrough. They’re thick without being pasty, rich without being heavy, and sweet enough to feel like dessert but balanced enough to start your day right. The vanilla bean does something extract just can’t—it adds those tiny black specks and a floral, almost honey-like warmth that makes every spoonful feel intentional. Honestly, I’ve made this recipe more times than I can count, and it still surprises me how something so simple can taste so complete.
If you’ve had bad overnight oats before, I get it. I’ve been there. But this version is different. It’s the one that finally made me believe the hype.
Why You’ll Love This Recipe
I’ve tested this recipe with picky eaters, busy parents, and friends who swore they hated oatmeal. Every single person asked for the recipe. Here is why this version stands out from the dozens of overnight oat recipes floating around the internet.
- Ready in 5 Minutes, No Cooking Required : This is the ultimate set-it-and-forget-it breakfast. You spend five minutes shaking a jar before bed, and your morning self gets to sleep in a little longer. No pots, no stovetop, no timing.
- Simple, Whole-Food Ingredients : You don’t need weird specialty items or a trip to three different stores. Rolled oats, milk, yogurt, a vanilla bean, and a touch of sweetener are all it takes. I’ve made it with pantry staples more times than I can count.
- Perfect for Meal Prep : Make four or five jars on Sunday, and you have breakfast sorted for the workweek. They actually get creamier on day two and three, so the flavor keeps improving.
- Crowd-Pleaser for All Ages : My niece calls these “ice cream oatmeal,” which is basically the highest compliment a kid can give. Adults love them too—they’re sophisticated enough for brunch but simple enough for a Tuesday.
- Unbelievably Creamy Texture : The secret is the combination of Greek yogurt and whole milk, plus the overnight rest that lets the oats absorb liquid slowly. The result is a velvety, pudding-like consistency that doesn’t turn gummy.
This isn’t just another overnight oat recipe. It’s the one that uses real vanilla bean for that deep, aromatic flavor you can’t fake, plus a yogurt-to-milk ratio I dialed in after weeks of testing. The first time you take a bite, you’ll understand why I stopped cooking oats altogether.
What Ingredients You Will Need
This recipe uses simple, wholesome ingredients to deliver that rich, creamy texture and bold vanilla flavor without any fuss. Most of these are probably already in your kitchen, which is exactly how I like it.
For the Oat Base
- Rolled oats – 1 cup (90g). Use old-fashioned rolled oats, not instant or steel-cut. Rolled oats soften perfectly overnight without turning to mush. I prefer Bob’s Red Mill or Quaker Old-Fashioned for consistent results.
- Whole milk – ¾ cup (180ml). Whole milk gives the creamiest texture. You can use 2% in a pinch, but don’t go lower—the fat is what makes these oats luxurious.
- Plain Greek yogurt – ½ cup (120g). Full-fat Greek yogurt adds protein and that thick, tangy richness. I use Fage 5% for the best texture. Avoid nonfat Greek yogurt here; it can turn the oats slightly grainy.
- Vanilla bean – 1 whole bean. This is the star. Split it lengthwise and scrape out the seeds. The specks are where the magic lives. If you absolutely can’t find a vanilla bean, use 1½ teaspoons of pure vanilla extract, but the result won’t be quite as aromatic.
- Maple syrup or honey – 2 tablespoons (30ml). Just enough sweetness to balance the tang. Maple syrup adds a subtle warmth that pairs beautifully with vanilla. Honey works too, but use a mild one.
- Pinch of fine sea salt – Just a pinch. Salt doesn’t make it salty—it makes everything else taste more like itself. Don’t skip it.
For the Topping (Optional but Recommended)
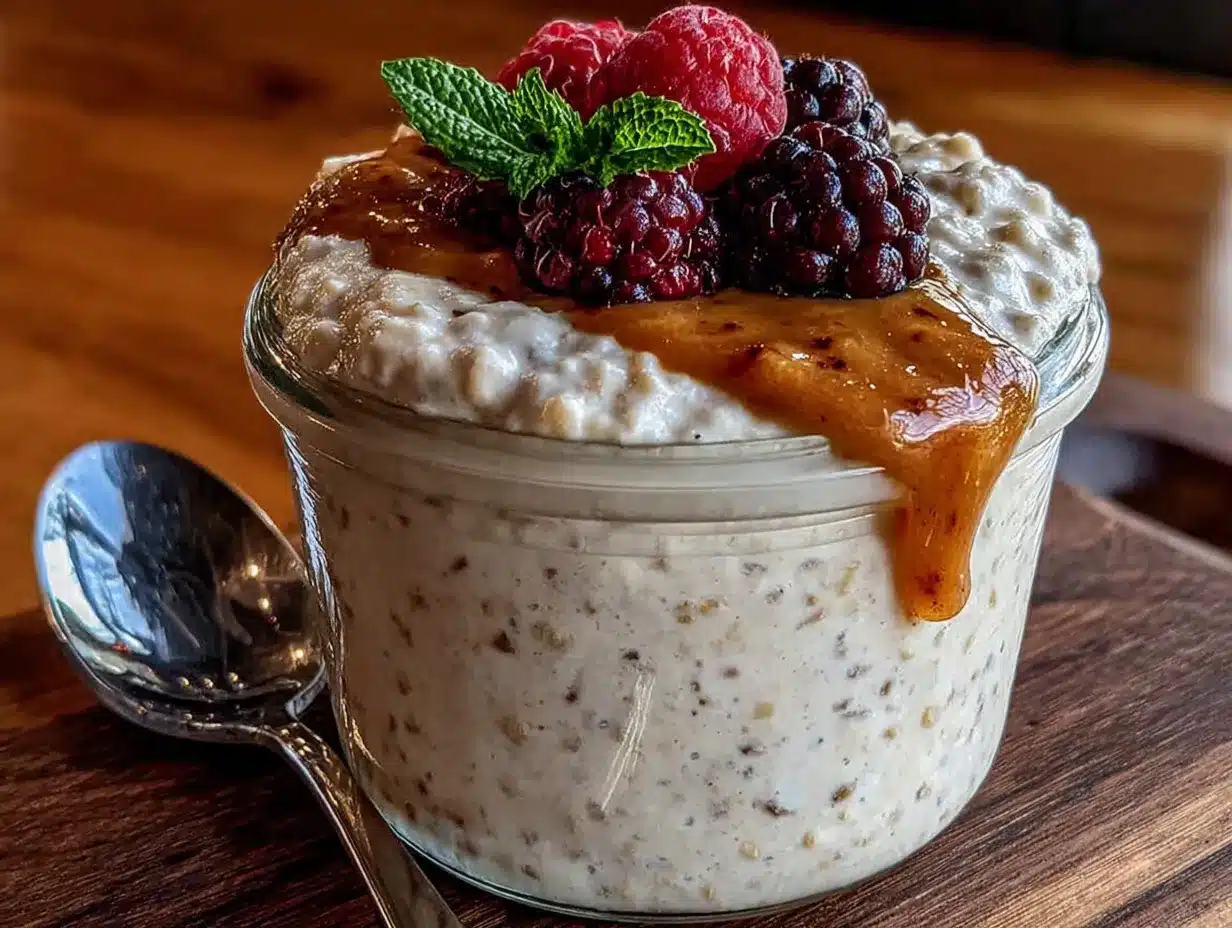
- Fresh berries – ½ cup (75g). Blueberries, raspberries, or sliced strawberries add brightness and a pop of color. In winter, I use thawed frozen berries.
- Sliced almonds or chopped pecans – 2 tablespoons (15g). A little crunch makes the creamy texture even more satisfying.
- Extra drizzle of maple syrup – For those who like it sweeter.
Ingredient Selection Tip: When choosing a vanilla bean, look for one that’s plump, moist, and slightly oily to the touch. Dry, brittle beans won’t have as much flavor. I keep mine in an airtight jar in the pantry—they last for months if stored properly.
Substitution Guidance: For a dairy-free version, swap the whole milk with full-fat oat milk or canned coconut milk, and use a thick coconut yogurt instead of Greek yogurt. For a gluten-free option, make sure your oats are certified gluten-free—cross-contamination is common with conventional oats. If you want to reduce sugar, use just 1 tablespoon of maple syrup and add a mashed very ripe banana to the mix for natural sweetness.
Equipment Needed
The beauty of this recipe is that it barely needs any equipment. Here is what you’ll need:
- Mason jar or airtight container – A 16-ounce (2-cup) jar works perfectly for a single serving. I use wide-mouth Ball jars because they’re easy to fill and clean. Any container with a tight-fitting lid will do.
- Sharp knife – For splitting the vanilla bean. A paring knife is ideal.
- Measuring cups and spoons – For accuracy. I’ve made this recipe enough to eyeball it, but measuring ensures consistent results every time.
- Spoon or small whisk – For stirring everything together. A fork works in a pinch.
- Cutting board – For slicing fruit toppings.
Budget-Friendly Alternative: Don’t have a mason jar? Any bowl covered with plastic wrap or a plate works fine. You can even use a reusable plastic container. The key is sealing it so the oats don’t dry out in the fridge.
Personal Note: I used to think I needed a fancy overnight oat jar with measurements printed on the side. Turns out, a regular jar and a permanent marker do the same job for a fraction of the price. Save your money for the vanilla beans.
Preparation Method
This is where the magic happens. Follow these steps, and you’ll have perfect overnight oats every single time.
- Split and scrape the vanilla bean. Lay the vanilla bean flat on your cutting board. Use a sharp paring knife to slice it lengthwise down the center, from tip to tip, without cutting all the way through. Open the bean like a book. Using the back of the knife, scrape out the tiny black seeds. You should see a dark, almost oily paste. This is pure vanilla flavor. Don’t throw away the pod—bury it in a jar of sugar to make vanilla sugar later.
- Combine the wet ingredients. In your mason jar or a small bowl, add the whole milk, Greek yogurt, maple syrup, and the scraped vanilla bean seeds. Stir with a spoon or small whisk until the yogurt is fully incorporated and the vanilla seeds are evenly distributed. You should see tiny black specks floating throughout the liquid. This is a good sign.
- Add the dry ingredients. Pour in the rolled oats and the pinch of salt. Stir again until every oat is coated in the liquid mixture. There shouldn’t be any dry oats floating on top. If the mixture looks too thick, add an extra tablespoon of milk. If it seems too thin, don’t worry—the oats will absorb the liquid overnight.
- Seal and shake. Screw the lid on tightly and shake the jar vigorously for about 30 seconds. This isn’t just for fun—shaking aerates the mixture and helps the oats start absorbing liquid immediately. You should hear the ingredients sloshing around. When you stop, the mixture should look uniform.
- Refrigerate overnight (or at least 6 hours). Place the jar in the refrigerator. The oats need time to soften and absorb the liquid. I usually make mine right after dinner and let them sit until breakfast the next morning. The minimum is 6 hours, but 8 to 12 hours is ideal. Don’t rush this step—the texture improves with time.
- Stir and adjust consistency in the morning. Take the jar out of the fridge and remove the lid. Give it a good stir. The oats will have thickened significantly. If you prefer a thinner consistency, stir in a splash of milk (about 1 to 2 tablespoons) until it reaches your desired texture. If it’s too thin, let it sit for another 30 minutes.
- Add toppings and serve. Spoon the oats into a bowl or eat them straight from the jar. Top with fresh berries, sliced almonds, and an extra drizzle of maple syrup if you like. The contrast of cold, creamy oats with fresh fruit and crunchy nuts is what makes this breakfast feel special.
Sensory Cue: When you open the jar in the morning, you should smell sweet, floral vanilla immediately. The oats should look thick and almost pudding-like, with those beautiful black vanilla specks visible throughout. If the mixture has separated slightly, don’t worry—just stir it back together.
Personal Tip: I always make two jars at a time because one is never enough. Also, I’ve learned the hard way to leave at least an inch of space at the top of the jar before shaking. Overnight oats expand slightly, and a full jar will leak everywhere when you shake it. Trust me on this one.
Cooking Tips & Techniques
After dozens of batches, I’ve collected a few tricks that make these oats consistently perfect.
Don’t use instant oats. I made this mistake early on. Instant oats turn into a gluey, unappetizing paste overnight. Rolled oats are the only option here—they soften just enough while keeping a pleasant, chewy texture. Steel-cut oats won’t soften enough in the fridge, so skip those too.
The yogurt-to-milk ratio matters. I tested this recipe with equal parts yogurt and milk, and the result was too thick and tangy. With more milk than yogurt, the oats stay creamy without being overpowering. The ¾ cup milk to ½ cup yogurt ratio is my sweet spot. If you want even more protein, increase the yogurt to ¾ cup and decrease the milk to ½ cup, but expect a thicker, tarter result.
Let the vanilla bean steep. For the most intense vanilla flavor, let the scraped seeds sit in the milk mixture for 10 minutes before adding the oats. This gives the vanilla time to infuse the liquid. It’s a small step that makes a noticeable difference.
Use a cold jar. If you’re making these for meal prep, chill the jars before adding the ingredients. Cold jars help the oats start absorbing liquid more slowly, which leads to a creamier texture. I keep my jars in the fridge so they’re always ready.
Don’t skip the salt. I know it seems weird to add salt to a sweet breakfast, but that tiny pinch brightens every other flavor. Without it, the oats taste flat. With it, the vanilla and maple syrup pop.
My biggest failure: I once forgot to put the lid on the jar before refrigerating. The oats developed a thick, dry skin on top, and the texture was completely ruined. Always seal your container tightly. If you’re using a bowl without a lid, press plastic wrap directly onto the surface of the oats to prevent a skin from forming.
Variations & Adaptations
This base recipe is a blank canvas. Here are a few ways I’ve changed it up depending on my mood or what’s in my fridge.
Chocolate Vanilla Bean Overnight Oats
Add 1 tablespoon of unsweetened cocoa powder to the dry ingredients before mixing. The chocolate and vanilla combination is honestly irresistible. I use Dutch-process cocoa for a smoother, less acidic flavor. Top with dark chocolate shavings for an extra treat.
Vegan Coconut Vanilla Overnight Oats
Swap the whole milk with full-fat canned coconut milk and use a thick coconut-based yogurt. The coconut adds a natural sweetness that pairs beautifully with the vanilla. I’ve made this version for vegan friends, and they always ask for the recipe. Add a tablespoon of shredded coconut on top for texture.
Berry Vanilla Compote Swirl
Instead of fresh berries on top, make a quick compote. Simmer 1 cup of frozen mixed berries with 1 tablespoon of maple syrup in a small saucepan for 5 minutes until it thickens. Let it cool, then swirl it into the oats before serving. The warm-cold contrast is incredible.
Peanut Butter Banana Version
Mash half a very ripe banana and stir it into the oat mixture along with 1 tablespoon of creamy peanut butter. The banana adds natural sweetness and makes the oats even creamier. This version tastes like a healthier banana bread. Top with sliced banana and a drizzle of peanut butter.
Seasonal Adaptation: In the fall, I add ½ teaspoon of pumpkin pie spice and swap the maple syrup for brown sugar. In summer, I use fresh peaches and a splash of almond extract alongside the vanilla. The recipe is endlessly flexible.
Serving & Storage Suggestions
These oats are best served cold, straight from the fridge. The cold temperature keeps the texture thick and pudding-like, which is part of what makes them so satisfying. If you prefer a warmer breakfast, you can microwave the oats for 30 to 45 seconds, but don’t overdo it—heating them too long will make them gummy.
Presentation Idea: For a pretty brunch spread, layer the oats in a clear glass with yogurt, granola, and fresh berries. The vanilla specks against the white oats look gorgeous. I’ve served these at brunch alongside a Fresh Galentine’s Berry Parfait Mini Platter for a complete, colorful spread that impresses guests without keeping me in the kitchen.
Storage Instructions: Store the oats in an airtight container in the refrigerator for up to 5 days. They actually get creamier on days 2 and 3 as the oats continue to absorb the liquid. If the mixture thickens too much after a few days, stir in a splash of milk to loosen it up. I don’t recommend freezing these—the texture becomes watery and unappealing after thawing.
Reheating Tips: If you want to eat these warm, transfer the oats to a microwave-safe bowl and heat in 15-second intervals, stirring between each, until just warm. You can also eat them cold with a hot cup of coffee for a temperature contrast that works surprisingly well.
Flavor Development: The vanilla flavor actually deepens over time. By day three, the oats taste noticeably more aromatic and complex. This is one of those rare recipes that gets better as it sits, which makes it perfect for meal prep.
Nutritional Information & Benefits
Here is the estimated nutritional breakdown for one serving of the base recipe (without toppings):
| Nutrient | Amount |
|---|---|
| Calories | 345 |
| Protein | 15g |
| Carbohydrates | 48g |
| Fiber | 5g |
| Fat | 11g |
| Sugar | 16g (natural + added) |
Health Benefits: Rolled oats are packed with beta-glucan, a type of soluble fiber that helps lower cholesterol and keeps you full for hours. Greek yogurt adds probiotics for gut health and a solid protein boost that stabilizes blood sugar. The vanilla bean contains small amounts of antioxidants, though honestly, I include it mostly for the flavor. This breakfast keeps me satisfied until lunch without the mid-morning energy crash I used to get from sugary cereals.
Dietary Considerations: This recipe is vegetarian and can easily be made gluten-free by using certified gluten-free oats. For a lower-carb option, reduce the oats to ¾ cup and add ¼ cup of chia seeds or ground flaxseed. The chia seeds also create a lovely tapioca-like texture. If you’re watching added sugars, use just 1 tablespoon of maple syrup or omit it entirely—the vanilla and yogurt provide plenty of flavor on their own.
Potential Allergens: This recipe contains dairy and gluten (from oats, though oats themselves are gluten-free, cross-contamination is common). For a nut-free version, skip the almond topping or use seeds instead.
Conclusion
These Creamy No-Churn Vanilla Bean Overnight Oats are proof that a simple breakfast can feel like a treat. They take five minutes to throw together, use ingredients you probably already have, and deliver a texture and flavor that honestly rivals any fancy café oatmeal I’ve ever ordered. The real vanilla bean makes all the difference—those tiny black specks aren’t just for looks; they carry a depth of flavor that extract can’t touch.
I love this recipe because it makes my mornings easier without making them boring. Whether I’m rushing out the door or sitting down for a slow weekend breakfast, these oats fit the moment. They’re forgiving enough for beginners and satisfying enough for experienced cooks who just want something good without the effort.
Try them once, and I think you’ll see what I mean. And if you come up with your own variation—a new fruit combo, a spice addition, a different nut topping—please come back and tell me about it in the comments. I’m always looking for new ideas, and honestly, this recipe is meant to be played with. Your perfect version is just one jar away.
Frequently Asked Questions
Can I make these oats with steel-cut oats?
I don’t recommend it. Steel-cut oats don’t absorb liquid as readily as rolled oats, so they’ll stay hard and crunchy even after a full night in the fridge. Stick with old-fashioned rolled oats for the best texture. If you only have steel-cut oats, you’ll need to cook them on the stovetop first, which defeats the purpose of a no-churn recipe.
How long do these overnight oats last in the fridge?
They’ll keep for up to 5 days in an airtight container. The texture actually improves on days 2 and 3 as the oats continue to soften and the vanilla flavor deepens. If the mixture becomes too thick after a few days, just stir in a tablespoon or two of milk to loosen it up before eating.
Can I use vanilla extract instead of a vanilla bean?
Yes, absolutely. Use 1½ teaspoons of pure vanilla extract instead of the vanilla bean. The flavor won’t be quite as complex or aromatic, and you won’t get those beautiful black specks, but it will still taste delicious. Avoid imitation vanilla extract—the artificial flavor is noticeable and doesn’t pair as well with the other ingredients.
Why did my overnight oats turn out watery?
This usually happens when the ratio of liquid to oats is off, or if you didn’t stir the mixture thoroughly before refrigerating. Make sure you’re using exactly ¾ cup milk to 1 cup oats. Also, give the jar a good shake before putting it in the fridge. If your oats are still watery in the morning, stir in an extra tablespoon of Greek yogurt or a tablespoon of chia seeds to thicken them up.
Can I heat these oats up in the microwave?
Yes, but do it gently. Transfer the oats to a microwave-safe bowl and heat in 15-second intervals, stirring between each, until just warm. Overheating will make the oats gummy and ruin the creamy texture. I prefer eating them cold, but warmed oats with a pat of butter and a drizzle of maple syrup is a cozy alternative for chilly mornings.
Pin This Recipe!
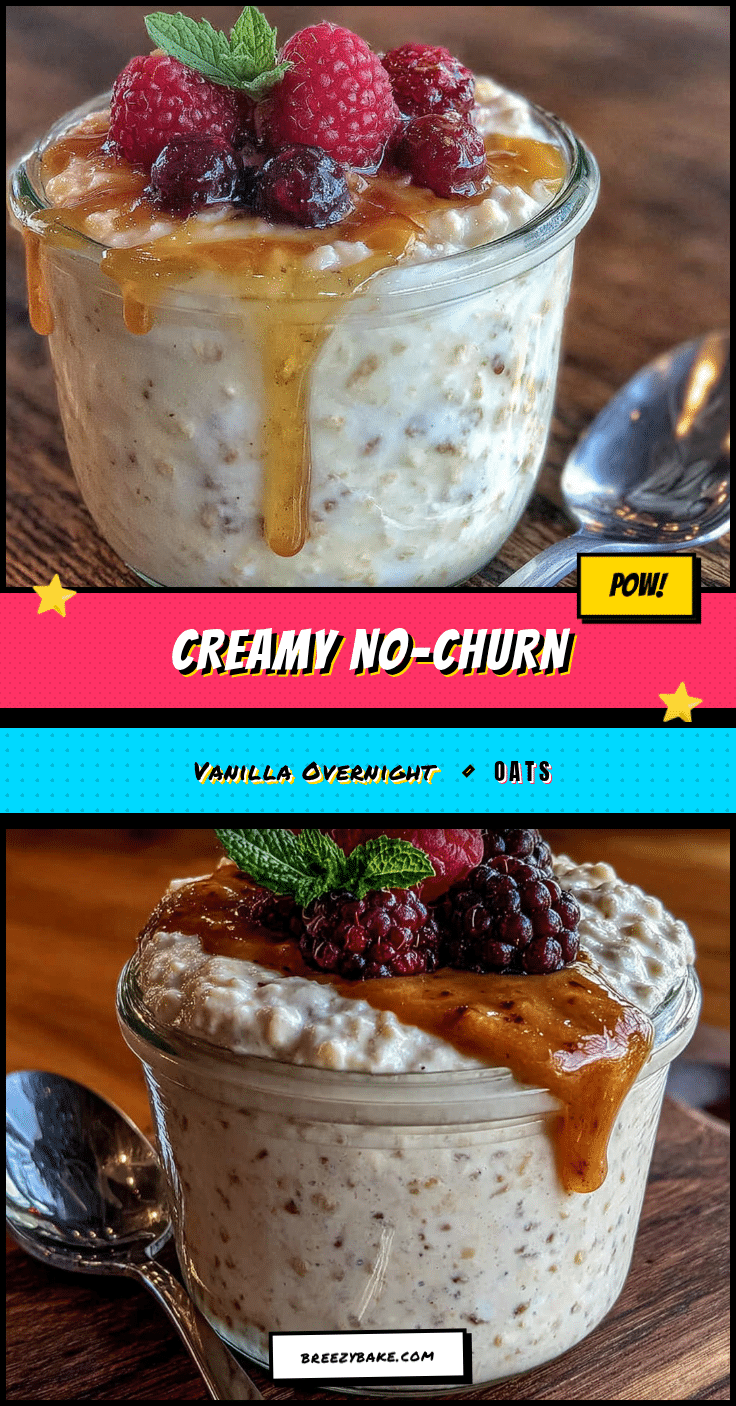
Creamy No-Churn Vanilla Bean Overnight Oats (Easy 5-Min Recipe)
These creamy no-churn vanilla bean overnight oats are thick, rich, and sweet enough to feel like dessert but balanced enough to start your day right. Made with real vanilla bean, Greek yogurt, and whole milk, they come together in just 5 minutes for a perfect make-ahead breakfast.
- Prep Time: 5 minutes
- Cook Time: 0 minutes
- Total Time: 5 minutes plus overnight refrigeration
- Yield: 1 serving 1x
- Category: Breakfast
- Cuisine: American
Ingredients
- 1 cup (90g) rolled oats
- ¾ cup (180ml) whole milk
- ½ cup (120g) plain Greek yogurt (full-fat recommended)
- 1 whole vanilla bean
- 2 tablespoons (30ml) maple syrup or honey
- Pinch of fine sea salt
- ½ cup (75g) fresh berries (optional topping)
- 2 tablespoons (15g) sliced almonds or chopped pecans (optional topping)
- Extra drizzle of maple syrup (optional topping)
Instructions
- Split and scrape the vanilla bean: Lay the vanilla bean flat on a cutting board. Use a sharp paring knife to slice it lengthwise down the center, from tip to tip, without cutting all the way through. Open the bean like a book. Using the back of the knife, scrape out the tiny black seeds.
- Combine the wet ingredients: In a mason jar or small bowl, add the whole milk, Greek yogurt, maple syrup, and the scraped vanilla bean seeds. Stir with a spoon or small whisk until the yogurt is fully incorporated and the vanilla seeds are evenly distributed.
- Add the dry ingredients: Pour in the rolled oats and the pinch of salt. Stir again until every oat is coated in the liquid mixture. If the mixture looks too thick, add an extra tablespoon of milk.
- Seal and shake: Screw the lid on tightly and shake the jar vigorously for about 30 seconds until the mixture looks uniform.
- Refrigerate overnight (or at least 6 hours): Place the jar in the refrigerator. The oats need time to soften and absorb the liquid. 8 to 12 hours is ideal.
- Stir and adjust consistency in the morning: Take the jar out of the fridge and remove the lid. Give it a good stir. If you prefer a thinner consistency, stir in a splash of milk (about 1 to 2 tablespoons) until it reaches your desired texture.
- Add toppings and serve: Spoon the oats into a bowl or eat them straight from the jar. Top with fresh berries, sliced almonds, and an extra drizzle of maple syrup if desired.
Notes
For dairy-free version, swap whole milk with full-fat oat milk or canned coconut milk, and use thick coconut yogurt. For gluten-free, use certified gluten-free oats. To reduce sugar, use 1 tablespoon maple syrup and add a mashed very ripe banana. The vanilla flavor deepens over time; oats keep for up to 5 days in the fridge. Do not freeze.
Nutrition
- Serving Size: 1 serving (about 1 c
- Calories: 345
- Sugar: 16
- Sodium: 150
- Fat: 11
- Saturated Fat: 4
- Carbohydrates: 48
- Fiber: 5
- Protein: 15
Keywords: overnight oats, vanilla bean, no-cook breakfast, meal prep, creamy oats, healthy breakfast, easy breakfast


