Third batch this week, and I finally stopped adding things to it. That’s the thing about a good butternut squash soup—it doesn’t need the cream, the apple, or the pinch of cayenne I kept throwing in. The first time, I overthought it completely. Second time, I under-roasted the squash and ended up with something that tasted more like sad pumpkin water. But this third bowl? The one where I just let the squash caramelize until the edges looked like burnt honey and blended it with nothing but a splash of stock and a whisper of garlic? That one made me pause mid-spoonful.
I’m not claiming this is some revolutionary recipe. It’s just that I finally stopped trying to fix what wasn’t broken. Butternut squash, when you treat it right, does the heavy lifting all on its own. It gets sweet in a way that feels almost nutty, and the roasting concentrates that flavor into something you’d swear has butter in it—even when it doesn’t. I started making this soup because I had a squash rolling around my counter for two weeks, and honestly, I was tired of looking at it. I kept making it because it turned out to be the kind of dinner that doesn’t ask anything from you. No chopping marathon, no stirring every five minutes. Just roast, blend, eat.
And look, I know there are a million squash soup recipes out there. But this one sticks because it’s not trying to be fancy. It’s just warm, creamy, and exactly what you want on a night when the air gets that first real chill. I’ve made it for myself on a Tuesday and for friends who texted back “this is ridiculous” after the first bite. You don’t need a reason to make it. Just a squash and a little patience.
Why You’ll Love This Recipe
This isn’t one of those soups that requires a trip to three different stores or a spice cabinet intervention. It’s straightforward, forgiving, and somehow tastes like you spent hours on it. Here’s why it works:
- Quick & Easy: From counter to bowl in about 30 minutes. The oven does most of the work, and you get to just hang out while the squash roasts.
- Simple Ingredients: You probably already have olive oil, salt, and garlic. Pick up a butternut squash and an onion, and you’re set. No heavy cream, no fancy stock.
- Perfect for Cozy Nights: This is the soup you want when the weather turns cool and you need something that feels like a hug in a bowl. Great for a quiet dinner or a casual gathering.
- Crowd-Pleaser: I’ve served this to picky eaters and vegetable skeptics, and it disappears every time. The natural sweetness wins people over.
- Unbelievably Creamy: The secret is in the roasting. High heat brings out the squash’s natural sugars and gives it a silky texture without a drop of dairy. It’s rich without being heavy.
What makes this soup different? It’s the method. Most recipes tell you to boil the squash, which waters down the flavor. Roasting intensifies everything—the sweetness, the nuttiness, the depth. You end up with a soup that tastes complex but is embarrassingly simple. It’s the kind of recipe that makes you look like a pro even if you’re just winging it.
Honestly, this soup is my go-to when I need something reliable. It doesn’t stress me out, and it always delivers. That’s the kind of recipe worth keeping around.
What Ingredients You Will Need
This recipe relies on a short list of everyday ingredients, but each one plays a role. The quality of your squash matters most, so pick a good one if you can. Here’s what you’ll need:
- 1 medium butternut squash (about 2-3 pounds) — Peeled, seeded, and cut into 1-inch cubes. Look for one that feels heavy for its size with firm, unblemished skin. I’ve found that smaller squashes tend to be sweeter.
- 1 large yellow onion — Roughly chopped. Onion adds a savory base that balances the squash’s sweetness. You can use a white onion in a pinch, but yellow gives a milder flavor.
- 3-4 cloves garlic — Left whole with the skins on for roasting. Yes, you read that right. Roasting garlic in its skin keeps it from burning and makes it incredibly mellow and spreadable.
- 2 tablespoons olive oil — Use a good-quality one for roasting. It helps everything caramelize and adds a subtle fruity note.
- 3 cups vegetable or chicken broth — I prefer low-sodium so I can control the salt. A good broth makes a difference here, so use one you actually like the taste of. (I’m partial to Imagine Foods or Pacific Foods for store-bought.)
- 1/2 teaspoon salt — Plus more to taste. Start with less and adjust after blending.
- 1/4 teaspoon black pepper — Freshly ground, if you can. It adds a subtle warmth.
- Optional: 1/4 teaspoon ground nutmeg or cinnamon — Not necessary, but a tiny pinch adds a cozy undertone. I skip it most of the time, but it’s nice for a change.
- Optional toppings — A drizzle of olive oil, toasted pumpkin seeds, a swirl of coconut milk, or a few croutons. Whatever you like.
Substitution notes: If you don’t have butternut squash, you can use a sugar pumpkin or even sweet potatoes—just adjust roasting time as needed. For a vegan version, stick with vegetable broth and skip any dairy toppings. If you’re avoiding oil, you can roast the squash dry, but it won’t caramelize as well. For a lower-sodium option, use unsalted broth and season to taste at the end.
Equipment Needed
You don’t need a fancy kitchen to make this soup. Here’s what I use:
- Baking sheet — A rimmed half-sheet pan works best. It holds everything in one layer, which is key for even roasting. If you don’t have one, any large oven-safe pan will do.
- Chef’s knife and cutting board — A sharp knife makes peeling and cubing the squash much safer and easier. I’ve learned the hard way that a dull knife is a recipe for a bandage.
- Vegetable peeler — Optional, but it speeds up peeling the squash. A sturdy Y-peeler is my favorite.
- Blender or immersion blender — An immersion blender lets you blend right in the pot, which means less cleanup. A regular blender works too—just let the soup cool slightly and blend in batches, leaving the lid slightly ajar to release steam.
- Large pot or Dutch oven — For simmering the soup after blending. A 4- to 5-quart pot is plenty.
- Wooden spoon or spatula — For stirring and scraping every last bit of roasted goodness into the pot.
If you don’t have an immersion blender, a regular blender is totally fine. Just be careful with the hot liquid—work in small batches and hold the lid with a towel. A potato masher could work in a pinch, but the texture won’t be as silky. I’ve used a cheap blender for years, and it does the job. No need to spend a lot.
Preparation Method

Let’s get cooking. This comes together faster than you’d think, and most of the time is hands-off while the squash roasts.
- Preheat your oven to 425°F (220°C). Line a baking sheet with parchment paper for easy cleanup, though it’s not strictly necessary.
- Prep the squash. Cut off both ends of the butternut squash, then slice it in half where the narrow neck meets the round bulb. Use a vegetable peeler to remove the skin, then scoop out the seeds with a spoon. Cut the flesh into 1-inch cubes. Try to make them roughly the same size so they cook evenly. This takes about 10 minutes the first time, but you’ll get faster.
- Toss with oil and season. Place the cubed squash and chopped onion on the baking sheet. Add the whole garlic cloves (skins on). Drizzle with 2 tablespoons olive oil, then sprinkle with 1/2 teaspoon salt and 1/4 teaspoon pepper. Toss everything with your hands until evenly coated. Spread it in a single layer—crowding the pan will steam the squash instead of roasting it.
- Roast for 25-30 minutes. Roast until the squash is tender when pierced with a fork and the edges are caramelized and slightly browned. The onions should be soft and translucent. The garlic will be soft and fragrant. Halfway through, give the pan a shake to ensure even cooking.
- Pop the garlic out of its skin. Let the roasted garlic cool for a minute, then squeeze the cloves out of their skins. They should slip right out. Discard the skins.
- Combine and blend. Transfer the roasted squash, onions, and garlic to a large pot or Dutch oven. Add 3 cups of broth. Use an immersion blender to puree until completely smooth. If using a regular blender, work in batches, filling the pitcher no more than halfway. Hold the lid with a kitchen towel and blend on low, then increase speed. Be careful—hot liquid expands.
- Simmer and adjust. Place the pot over medium heat and bring the soup to a gentle simmer. Taste it. Add more salt or pepper if needed. If it’s too thick, stir in a little more broth or water until it reaches your preferred consistency. If you’re using nutmeg or cinnamon, stir it in now.
- Serve hot. Ladle into bowls and add your favorite toppings. A drizzle of olive oil, a sprinkle of pumpkin seeds, or a swirl of coconut milk all work beautifully.
A note on timing: The total active time is about 10 minutes of prep and 5 minutes of blending. The rest is roasting. You can easily make the soup ahead and reheat it later—the flavors actually get better the next day.
Cooking Tips & Techniques
After making this soup more times than I can count, I’ve picked up a few tricks that make a real difference.
Don’t skip the high heat. Roasting at 425°F is non-negotiable. Lower temperatures won’t caramelize the squash properly, and you’ll end up with a soup that’s sweet but flat. Those browned edges are where the flavor lives. I once tried roasting at 375°F because I was in a rush and didn’t want to wait for the oven to preheat fully. The soup was fine, but it lacked that deep, almost nutty richness. Never again.
Keep the garlic skins on. I know it feels wrong, but trust me. The skins protect the garlic from burning while it roasts, and the cloves come out soft and sweet instead of bitter. If you peel them first, they’ll burn at the edges and ruin the flavor.
Blend while everything is still warm. Hot liquids blend more smoothly. If you let the roasted vegetables cool completely, the soup can turn out a little grainy. Not a huge deal, but worth timing right.
Season at the end. Broths vary in saltiness, so wait until after blending to add more salt. I’ve oversalted a batch before because I added salt at the beginning and the broth was already salty. Now I always start with less and adjust.
Make it ahead. This soup is actually better the next day. The flavors meld and deepen overnight. I often make a double batch on Sunday and eat it for lunch all week. It reheats beautifully on the stovetop or in the microwave.
A common mistake: Adding too much liquid. Start with 3 cups of broth and add more only if needed. Too much liquid makes the soup thin and watery. You can always add, but you can’t take away. I learned this the hard way when I dumped in an entire carton of broth and ended up with squash-flavored water.
Variations & Adaptations
This soup is a blank canvas. Here are a few ways to switch it up:
- Spicy version: Add a pinch of cayenne pepper or a small chopped jalapeño to the roasting pan. The heat cuts through the sweetness beautifully. I did this once when I had a cold, and it was exactly what I needed.
- Creamy coconut version: Swap 1 cup of the broth for full-fat coconut milk. Blend it in at the end for a luscious, dairy-free soup that tastes tropical. It’s my go-to when I want something extra indulgent.
- Herb-infused version: Toss a few sprigs of fresh thyme or rosemary onto the baking sheet with the squash. Remove the stems before blending. The herbs add an earthy, aromatic layer that feels sophisticated.
- Apple-squash version: Add one peeled and chopped apple (like Honeycrisp or Fuji) to the roasting pan. It boosts the sweetness and adds a subtle fruitiness. I tried this on a whim and loved it.
- Ginger version: Add a 1-inch piece of fresh ginger, peeled and sliced, to the pot before blending. Ginger adds warmth and a little zing. Perfect for when you’re feeling under the weather.
For dietary needs, this recipe is naturally gluten-free and dairy-free as written. For a lower-carb option, you can swap half the squash for cauliflower—roast it the same way. I’ve done this, and while the texture is slightly different, it’s still delicious.
Serving & Storage Suggestions
This soup is best served hot, straight from the pot. Ladle it into bowls and finish with a drizzle of good olive oil, a sprinkle of flaky salt, and a few toasted pumpkin seeds for crunch. A swirl of coconut milk or a dollop of Greek yogurt (if you’re not dairy-free) adds a lovely creaminess.
For a complete meal, pair it with a simple green salad dressed with lemon vinaigrette or a crusty piece of bread for dipping. I love serving it alongside a healthy chicken veggie skillet wrap for a cozy, balanced dinner. It also works beautifully as a starter for a fall dinner party—just serve it in small cups or bowls.
Storage: Let the soup cool completely, then transfer it to an airtight container. It will keep in the refrigerator for up to 5 days. The flavors actually improve after a day or two, so don’t be afraid to make it ahead.
Freezing: This soup freezes wonderfully. Pour it into freezer-safe containers or zip-top bags, leaving a little room for expansion. It will keep for up to 3 months. Thaw overnight in the refrigerator before reheating.
Reheating: Warm the soup on the stovetop over medium-low heat, stirring occasionally. If it’s too thick after thawing, add a splash of broth or water to loosen it. You can also reheat individual portions in the microwave—just cover the bowl and heat in 1-minute intervals, stirring between each.
Nutritional Information & Benefits
This soup is as good for you as it tastes. Here’s a rough estimate per serving (based on 4 servings):
- Calories: ~180
- Fat: 7g
- Carbohydrates: 28g
- Fiber: 5g
- Protein: 3g
- Sodium: 450mg (varies with broth)
Health benefits: Butternut squash is packed with vitamin A (over 400% of your daily needs per cup), vitamin C, and fiber. It’s great for eye health, immune support, and digestion. The olive oil provides healthy monounsaturated fats, and the garlic offers anti-inflammatory properties. This soup is naturally gluten-free, dairy-free, and vegan, making it a great option for a wide range of diets.
Potential allergens: This recipe is free of the top allergens, but always check your broth label for any hidden ingredients. If you’re sensitive to nightshades, note that butternut squash is not a nightshade, so it’s safe.
Conclusion
This creamy roasted butternut squash soup is the kind of recipe you’ll come back to again and again. It’s simple enough for a weeknight, elegant enough for company, and forgiving enough for a beginner. The roasting does the heavy lifting, and the result is a soup that tastes rich and complex without a lot of effort.
I love this recipe because it reminds me that good food doesn’t have to be complicated. Sometimes the best meals come from letting a single ingredient shine. Whether you’re making it for yourself on a quiet evening or serving it to friends, this soup delivers comfort in every spoonful.
Now I want to hear from you. Did you try this recipe? Did you add your own twist? Drop a comment below and let me know how it turned out. And if you loved it, share it with someone who needs a little warmth in their life. Happy cooking!
Frequently Asked Questions
Can I use frozen butternut squash?
Yes, you can use frozen butternut squash, but the texture won’t be quite the same. Frozen squash releases more water as it roasts, so it won’t caramelize as well. To get the best results, thaw the squash first, pat it dry with paper towels, and spread it in a single layer on the baking sheet. You may need to roast it a few minutes longer to evaporate the extra moisture.
How can I make this soup thicker?
If your soup is too thin, you have a few options. Simmer it uncovered for 5-10 minutes to let some of the liquid evaporate. You can also blend in a small cooked potato or a handful of raw cashews (soaked in hot water for 15 minutes) for extra body. Alternatively, reduce the amount of broth you add at the beginning—start with 2 cups and add more only if needed.
Can I make this soup in an Instant Pot or slow cooker?
Absolutely. For an Instant Pot, use the sauté function to soften the onion and garlic, then add the cubed squash and broth. Pressure cook on high for 8 minutes, then blend. For a slow cooker, combine all ingredients (except the broth) and cook on low for 6-8 hours or high for 3-4 hours. Add the broth at the end before blending. Note that you won’t get the same caramelized flavor without roasting, so the soup will be milder. You can add a tablespoon of tomato paste or a splash of soy sauce to deepen the flavor.
Is this soup freezer-friendly?
Yes, it freezes beautifully. Let the soup cool completely, then pour it into freezer-safe containers or zip-top bags. Leave about an inch of headspace for expansion. It will keep for up to 3 months. To thaw, transfer it to the refrigerator overnight, then reheat on the stovetop or in the microwave. You may need to add a splash of broth or water to adjust the consistency after thawing.
What can I use instead of butternut squash?
If you don’t have butternut squash, you can substitute sugar pumpkin, kabocha squash, or even sweet potatoes. Each will give a slightly different flavor and texture, but the method remains the same. Sugar pumpkin is the closest match in sweetness and texture. Sweet potatoes will make the soup a bit starchier and sweeter. Acorn squash works too, but it’s less sweet and more fibrous, so you may want to add a touch of maple syrup or honey at the end.
Pin This Recipe!
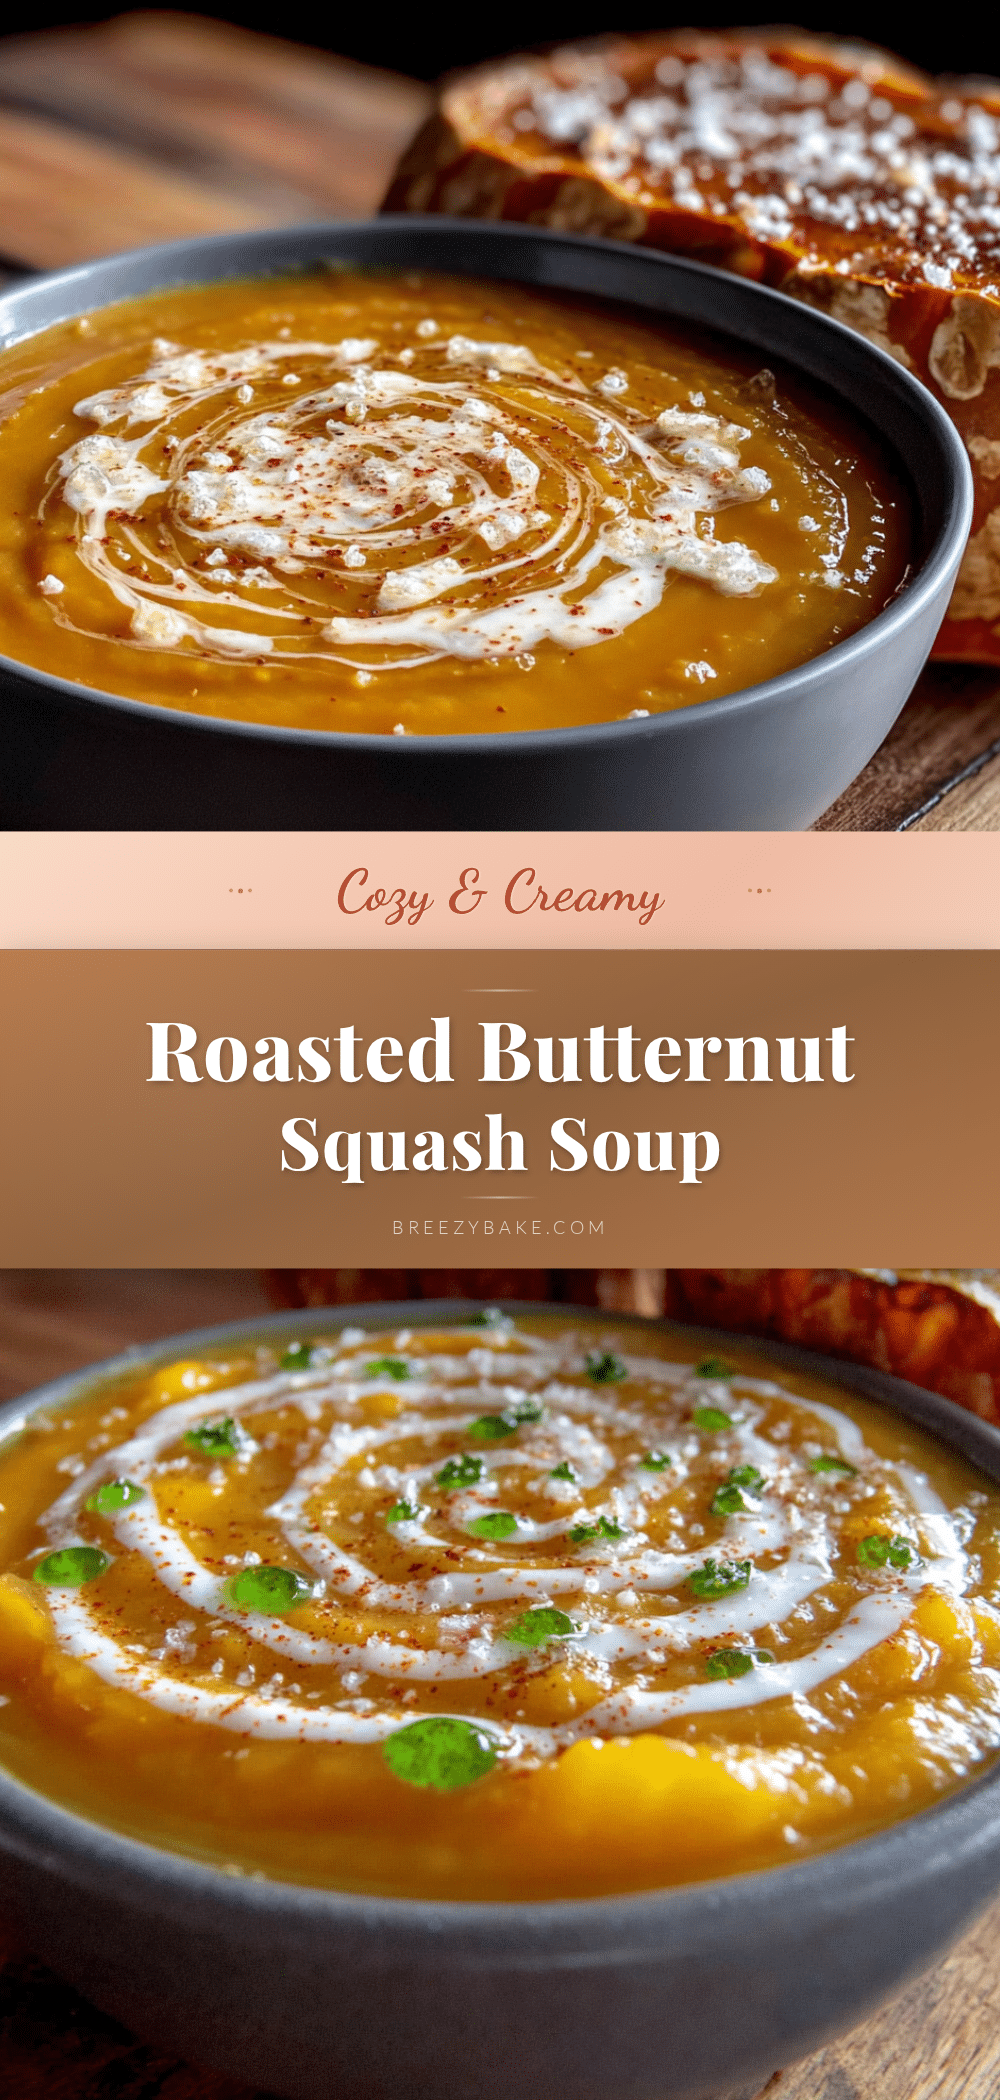
Creamy Roasted Butternut Squash Soup: Easy 30-Minute Recipe

This creamy roasted butternut squash soup is simple, comforting, and ready in about 30 minutes. Roasting the squash brings out its natural sweetness and creates a silky, dairy-free texture that’s perfect for cozy nights.
- Prep Time: 10 minutes
- Cook Time: 30 minutes
- Total Time: 40 minutes
- Yield: 4 servings 1x
- Category: Soup
- Cuisine: American
Ingredients
- 1 medium butternut squash (about 2–3 pounds), peeled, seeded, and cut into 1-inch cubes
- 1 large yellow onion, roughly chopped
- 3–4 cloves garlic, left whole with skins on
- 2 tablespoons olive oil
- 3 cups vegetable or chicken broth (low-sodium preferred)
- 1/2 teaspoon salt
- 1/4 teaspoon black pepper, freshly ground
- Optional: 1/4 teaspoon ground nutmeg or cinnamon
- Optional toppings: olive oil drizzle, toasted pumpkin seeds, coconut milk swirl, croutons
Instructions
- Preheat your oven to 425°F (220°C). Line a baking sheet with parchment paper for easy cleanup.
- Prep the squash: Cut off both ends, slice in half where the narrow neck meets the round bulb. Use a vegetable peeler to remove the skin, then scoop out the seeds. Cut the flesh into 1-inch cubes.
- Toss with oil and season: Place cubed squash and chopped onion on the baking sheet. Add whole garlic cloves (skins on). Drizzle with 2 tablespoons olive oil, sprinkle with 1/2 teaspoon salt and 1/4 teaspoon pepper. Toss to coat evenly and spread in a single layer.
- Roast for 25-30 minutes until squash is tender and edges are caramelized. Shake the pan halfway through.
- Let roasted garlic cool for a minute, then squeeze cloves out of their skins. Discard skins.
- Transfer roasted squash, onions, and garlic to a large pot or Dutch oven. Add 3 cups broth. Use an immersion blender to puree until smooth. If using a regular blender, work in batches, filling no more than halfway, and hold lid with a towel.
- Place pot over medium heat and bring to a gentle simmer. Taste and adjust salt and pepper. If too thick, add more broth or water. Stir in nutmeg or cinnamon if using.
- Serve hot with desired toppings.
Notes
Don’t skip the high heat (425°F) for proper caramelization. Keep garlic skins on to prevent burning. Blend while warm for smoothest texture. Season at the end to avoid oversalting. Soup is even better the next day. For a thicker soup, simmer uncovered or add a cooked potato. For Instant Pot: sauté onion and garlic, add squash and broth, pressure cook on high for 8 minutes, then blend. For slow cooker: cook all ingredients (except broth) on low 6-8 hours or high 3-4 hours, add broth before blending.
Nutrition
- Serving Size: 1 serving (about 1.5
- Calories: 180
- Sugar: 8
- Sodium: 450
- Fat: 7
- Saturated Fat: 1
- Carbohydrates: 28
- Fiber: 5
- Protein: 3
Keywords: butternut squash soup, creamy soup, roasted squash, easy soup, fall soup, dairy-free soup, vegan soup, gluten-free soup


