“These are dangerously good,” my brother said, reaching for a sixth wing before the first ones even had a chance to cool. And that was it — the moment these Crispy Baked Honey Sriracha Chicken Wings became the official wing of every game day, lazy Sunday, and “I need something sticky and spicy” kind of night at our place.
I wasn’t trying to reinvent the wing. Honestly, I was tired of the mess that comes with deep frying — the oil splatter, the lingering smell, the guilt. So I went looking for a way to get that same shatteringly crisp skin without submerging anything in hot fat. What I found was a method that uses a clever trick (baking powder, if you must know) and a sauce that walks that perfect line between sweet heat and sticky goodness. The first time I pulled a tray of these out of the oven, the kitchen smelled like a Friday night takeout order, but better. The wings were bronzed, the edges caramelized, and the sauce clung to every ridge like it belonged there.
These wings aren’t fussy. They don’t require a thermometer or a fryer or any special equipment. They just need a little patience — and maybe a stack of napkins nearby. Because once you start, it’s hard to stop.
Why You’ll Love This Recipe
Let me tell you why these wings have earned a permanent spot in my rotation. I’ve tested this recipe more times than I care to count, tweaking the temperature, the sauce ratio, even the brand of Sriracha. What I landed on is a wing that delivers on every promise.
- Oven-Baked, Not Fried: You get all the crunch without the oil bath. The baking powder trick creates a dry surface that crisps up like magic in a hot oven.
- Sweet & Spicy Balance: The honey mellows out the Sriracha’s kick, and a splash of rice vinegar cuts through the richness. It’s the kind of sauce that makes you lick your fingers — and I won’t judge if you do.
- Simple Pantry Ingredients: You probably have most of this stuff already. No fancy chili oils or obscure fermented pastes. Just honest ingredients that work.
- Perfect for Game Day or Any Day: These wings are a guaranteed crowd-pleaser. I’ve brought them to potlucks, served them for dinner with a side of veggies, and even packed them for picnics (cold wings are surprisingly good). If you love game-day snacks, you might also enjoy these Crispy Super Bowl Chicken Wing Bites for another take on crispy wings.
- Foolproof Method: I’ve burned wings, undercooked wings, and made wings so sad they belonged in a support group. This method works every single time, as long as you follow the drying step.
These wings aren’t just good — they’re the kind that make you close your eyes after the first bite. The kind where you look around the table and see everyone else doing the same thing. It’s comfort food that feels a little bit special, without needing a deep fryer or a culinary degree.
What Ingredients You Will Need
This recipe uses simple, honest ingredients to build layers of flavor. The magic is in the technique, not the grocery list. Here’s what you’ll need:
For the Wings
- Chicken wings: 2 pounds (about 900g), separated into drums and flats. I prefer buying whole wings and cutting them myself — it’s cheaper and you get the wing tips for stock. Look for fresh, not frozen, if you can.
- Baking powder: 1½ teaspoons. This is the secret to crispy skin. Not baking soda — baking powder. Trust me on this one.
- Salt: 1 teaspoon of kosher salt. I use Diamond Crystal. If you’re using table salt, cut it back to ¾ teaspoon.
- Black pepper: ½ teaspoon, freshly ground.
- Garlic powder: ½ teaspoon. Not garlic salt — we already have enough salt.
- Cornstarch: 1 tablespoon. This adds an extra layer of crunch. Optional but recommended.
For the Honey Sriracha Sauce
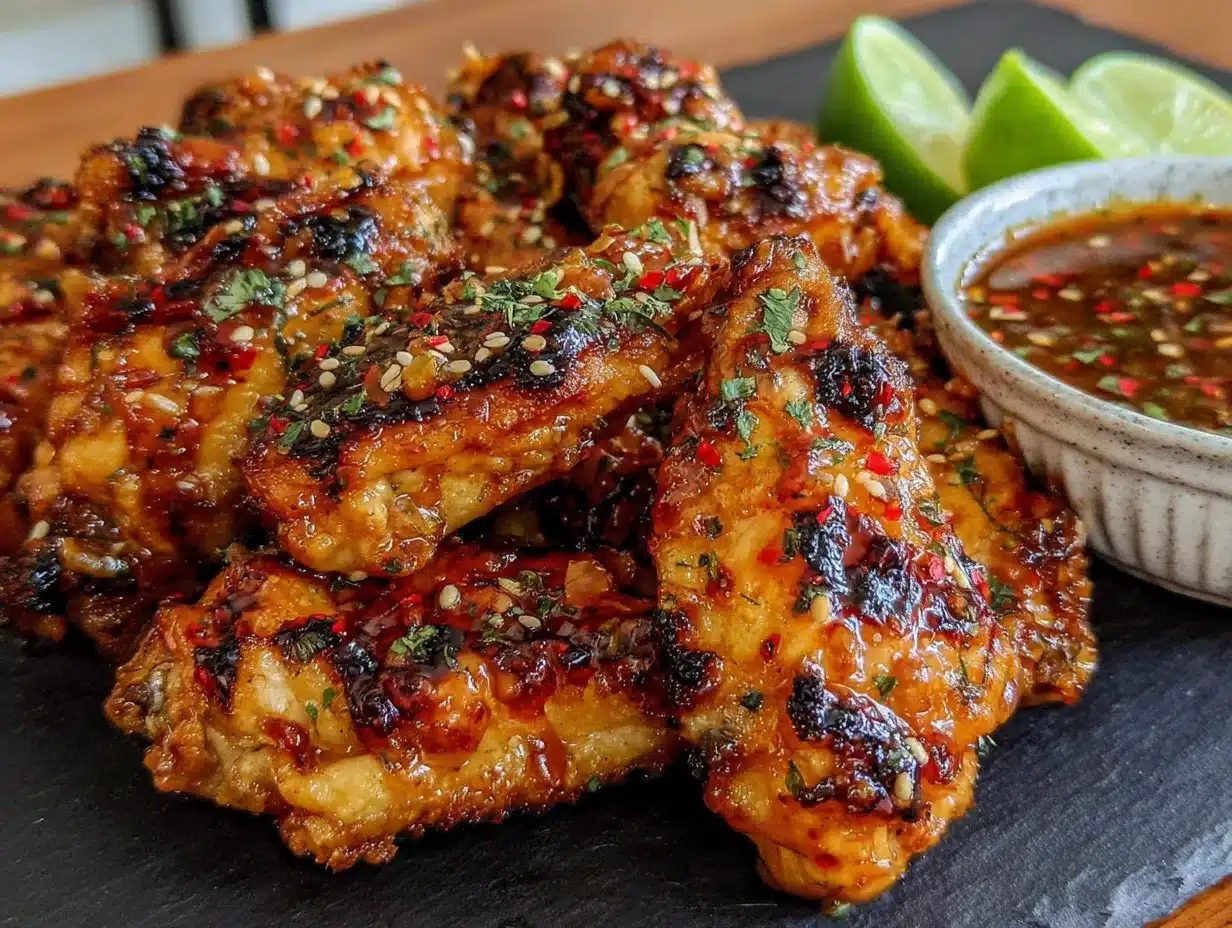
- Honey: ⅓ cup (about 110g). Use a runny, mild honey. Strong-flavored honey like buckwheat can overpower the sauce.
- Sriracha: 3 tablespoons. I like Huy Fong brand, but any good-quality Sriracha works. Adjust to your heat tolerance — start with 2 tablespoons if you’re sensitive.
- Rice vinegar: 1 tablespoon. Unseasoned. This brightens the sauce and cuts the sweetness.
- Soy sauce: 1 tablespoon. Low-sodium is best here. It adds umami without making the sauce too salty.
- Butter: 1 tablespoon, unsalted. This gives the sauce a silky finish and helps it cling to the wings.
- Garlic: 2 cloves, minced. Fresh garlic makes a difference here — don’t use the jarred stuff.
For Garnish (Optional but Recommended)
- Sesame seeds: 1 teaspoon, toasted.
- Green onions: 2, thinly sliced on the diagonal.
- Lime wedges: For squeezing over the top right before serving.
I’ve made these wings with a few different Sriracha brands, and the heat level varies quite a bit. If you’re feeding a crowd with different spice tolerances, you can always serve the sauce on the side. For a milder version, try mixing the honey and Sriracha at a 2:1 ratio instead. If you’re looking for other crowd-pleasing appetizers, these Crispy Loaded Bacon Cheeseburger Tater Tot Casserole bites are always a hit too.
Equipment Needed
You don’t need a professional kitchen to make these wings. Here’s what I use:
- Baking sheet: A rimmed half-sheet pan (18×13 inches) works best. The rim catches any drips and keeps your oven clean.
- Wire rack: This fits inside the baking sheet and lets air circulate around the wings. It’s the key to even crisping. If you don’t have one, you can flip the wings halfway through, but the results won’t be as good.
- Mixing bowls: One large bowl for tossing the wings with the dry ingredients, and one small bowl for the sauce.
- Tongs: For turning the wings halfway through baking. Metal tongs are best — silicone ones can be slippery with oily wings.
- Small saucepan: For making the sauce. A non-stick pan works well here because the honey can stick to stainless steel.
- Paper towels: You’ll need these for drying the wings thoroughly. This step is non-negotiable.
I’ve made these wings on a cheap baking sheet from the grocery store and on a fancy restaurant-grade one. Honestly? The cheap one worked fine. The wire rack matters more than the pan, so if you’re on a budget, spend your money there. If you don’t have a wire rack, you can use a cooling rack that’s oven-safe — just make sure it sits flat on the baking sheet.
Preparation Method
Let’s get into the nitty-gritty. This method has been tested and tweaked more times than I’d like to admit. Follow these steps, and you’ll have wings that rival any restaurant version.
- Prep the wings: Start by patting the chicken wings dry with paper towels. I mean really dry — you want to remove as much moisture as possible. If you have time, leave them uncovered in the fridge for an hour or two. This dries out the skin even more and gives you a better crust.
- Mix the dry rub: In a large bowl, whisk together the baking powder, salt, pepper, garlic powder, and cornstarch. Make sure there are no clumps — baking powder loves to hide in little pockets.
- Season the wings: Add the dried wings to the bowl and toss until every piece is evenly coated. Use your hands for this — it’s faster and you can feel if any spots are missed. The mixture should look like a light dusting, not a thick paste.
- Arrange on the rack: Place a wire rack inside your baking sheet and spray it lightly with cooking spray. Arrange the wings in a single layer, making sure they’re not touching. Crowding the pan will steam the wings instead of crisping them. If you need to, use two baking sheets.
- First bake: Preheat your oven to 250°F (120°C). Yes, low heat first. This renders the fat slowly and dries out the skin. Bake for 30 minutes. The wings will look pale and unappetizing — that’s normal.
- Crank the heat: After 30 minutes, increase the oven temperature to 425°F (220°C). Don’t take the wings out — just turn the oven up. Bake for another 40-45 minutes, turning the wings halfway through with tongs. The skin should be golden brown and crispy, with little bubbles on the surface.
- Make the sauce: While the wings are baking, combine the honey, Sriracha, rice vinegar, soy sauce, and minced garlic in a small saucepan. Bring to a simmer over medium heat, stirring occasionally. Let it bubble gently for 3-4 minutes until it thickens slightly. Remove from heat and stir in the butter until melted and smooth.
- Toss the wings: When the wings come out of the oven, let them rest on the rack for 2 minutes. Then transfer them to a large bowl, pour the sauce over the top, and toss gently with tongs until every wing is coated. Don’t oversauce — you want a glossy coating, not a pool of sauce at the bottom of the bowl.
- Serve immediately: Transfer the glazed wings to a serving platter. Sprinkle with sesame seeds and sliced green onions. Serve with lime wedges on the side for squeezing. The wings are best eaten within 15 minutes of saucing — the longer they sit, the softer the skin gets.
A few things I’ve learned the hard way: Don’t skip the low-temperature step. I tried rushing this once and ended up with wings that were cooked through but had rubbery skin. The two-temperature method is non-negotiable for that shatteringly crisp texture. Also, if your wings are browning too fast at the high temperature, tent them loosely with foil — every oven runs a little differently.
Cooking Tips & Techniques
After more batches of wings than I can count, here are the things I wish someone had told me earlier:
The drying step matters more than you think. I once made these wings in a hurry and barely patted them dry. The skin came out tough and chewy instead of crispy. Moisture is the enemy of crispiness, so take the extra minute to really dry those wings. If you have time, let them sit uncovered in the fridge overnight — it’s a game-changer.
Don’t skip the wire rack. I know it’s an extra thing to wash, but it makes a huge difference. When wings sit directly on the baking sheet, the bottom gets soggy from the rendered fat. The wire rack lets air circulate underneath, so every part of the wing gets crispy. If you don’t have a rack, you can flip the wings every 15 minutes, but it’s not quite the same.
Sauce at the last minute. I made the mistake of saucing the wings too early once, and by the time I served them, the skin had softened into a sad, sticky mess. Toss the wings in the sauce right before serving, and serve any extra sauce on the side for dipping.
Watch the sugar content in your sauce. Honey burns faster than you’d expect. If your sauce starts to look dark and bubbly in the pan, pull it off the heat immediately. You can always thin it with a splash of water if it gets too thick.
If you’re serving these wings as part of a bigger spread, timing is everything. I like to get the wings into the oven first, then prep other dishes while they bake. These Crispy Super Bowl Bacon Ranch Chicken Flatbread Minis pair beautifully with these wings for a full game-day menu.
Variations & Adaptations
One of the best things about this recipe is how flexible it is. Here are some variations I’ve tried and loved:
Extra Spicy Version: Add 1 teaspoon of red pepper flakes to the sauce, or swap half the Sriracha for sambal oelek (a coarser chili paste). My brother-in-law requests this version every time he visits — he says the original isn’t hot enough for him.
Garlic Lover’s Wings: Double the garlic in the sauce and add 2 more minced cloves right before serving. The raw garlic adds a sharp kick that contrasts beautifully with the sweet honey.
Air Fryer Method: If you don’t want to heat up your whole oven, these wings work great in an air fryer. Cook at 375°F (190°C) for 20-25 minutes, shaking the basket halfway through. The skin gets just as crispy, and it’s faster. Just make sure not to overcrowd the basket — work in batches if needed.
Gluten-Free Option: This recipe is naturally gluten-free if you use tamari instead of soy sauce. Just check your Sriracha brand — most are gluten-free, but some contain wheat-based ingredients.
Milder Version for Kids: Reduce the Sriracha to 1 tablespoon and add an extra tablespoon of honey. You can also serve the sauce on the side so everyone can control their own heat level. My niece loves these with a side of ranch dressing for dipping.
I once tried a version with maple syrup instead of honey — it was good, but the flavor was more woodsy and less floral. Stick with honey if you can, but maple syrup works in a pinch.
Serving & Storage Suggestions
These wings are best served hot, right after saucing. The contrast between the crispy skin and the sticky glaze is at its peak within the first 15 minutes. Here’s how I like to serve them:
Temperature: Serve the wings hot, but not screaming hot — let them rest for 2-3 minutes after saucing so the glaze sets slightly. Room temperature wings are also delicious, especially at parties where people are grazing.
Presentation: Arrange the wings on a large platter in a single layer. Sprinkle with sesame seeds, sliced green onions, and a few pinches of flaky sea salt. Put lime wedges around the edges — a squeeze of lime right before eating brightens everything up.
Dipping Sauces: These wings are saucy enough on their own, but I always put out extra ranch or blue cheese dressing for dipping. The cool, creamy dressing balances the heat beautifully.
Side Dishes: These wings go with pretty much anything. I love them with celery and carrot sticks (classic), a simple cucumber salad, or crispy roasted potatoes. For a lighter option, try serving them alongside this Healthy Ranch Chicken Grain Bowls Recipe with Fresh Veggies for a complete meal.
Storage: Leftover wings (if you have any) can be stored in an airtight container in the refrigerator for up to 3 days. The skin will soften, but the flavor will still be great. To reheat, place them on a wire rack over a baking sheet and bake at 400°F (200°C) for 8-10 minutes. This helps restore some of the crispiness. Avoid microwaving — it turns the skin into rubber.
Freezing: You can freeze the baked (but unsauced) wings for up to 3 months. Cool them completely, then freeze in a single layer on a baking sheet. Once frozen, transfer to a freezer bag. To serve, reheat directly from frozen at 400°F (200°C) for 15-18 minutes, then toss with fresh sauce.
The flavors actually deepen overnight. I’ve been known to make a double batch just so I can have cold wings straight from the fridge the next day — don’t knock it till you try it.
Nutritional Information & Benefits
Here’s the approximate nutritional breakdown for a serving of 4-5 wings (about ⅙ of the recipe):
| Nutrient | Amount |
|---|---|
| Calories | 320 |
| Protein | 22g |
| Fat | 18g |
| Saturated Fat | 6g |
| Carbohydrates | 18g |
| Sugar | 16g |
| Sodium | 580mg |
| Fiber | 0g |
Chicken wings are a good source of protein, selenium, and B vitamins. The skin contains healthy fats, and the baking method keeps the fat content lower than deep-fried versions. Honey provides antioxidants and has antibacterial properties, while Sriracha contains capsaicin, which may boost metabolism and reduce inflammation.
These wings are not low-calorie — let’s be honest — but they’re made with whole ingredients and no artificial additives. If you’re watching your sodium, use low-sodium soy sauce and reduce the added salt in the dry rub. For a lower-sugar option, you can reduce the honey to ¼ cup and add a splash more rice vinegar.
This recipe is naturally gluten-free (check your Sriracha and use tamari), dairy-free (the butter is optional), and contains no nuts or eggs. However, it does contain soy and is not suitable for a vegan diet.
Conclusion
These Crispy Baked Honey Sriracha Chicken Wings have become my go-to for any occasion that calls for something sticky, spicy, and satisfying. They’re the wings I bring to parties, the wings I make when I’m craving takeout but don’t want to spend the money, and the wings I turn to when I need a guaranteed crowd-pleaser.
The best part? They’re baked, not fried. You get all the crunch and flavor without the mess and guilt of deep frying. The two-temperature method is a bit unconventional, but it works — every single time. And the sauce? It’s the kind of sweet-heat balance that makes you reach for just one more wing, even when you’re full.
I’d love to hear how these turn out for you. Did you adjust the spice level? Add your own twist? Drop a comment below and let me know — I read every single one. And if you’re looking for more easy, crowd-pleasing recipes, don’t forget to check out these Crispy Loaded Bacon Mac and Cheese Casserole bites for another indulgent treat. Happy cooking, and don’t forget the napkins!
Frequently Asked Questions
Can I use frozen chicken wings for this recipe?
Yes, but you’ll need to thaw them completely first and pat them very dry. Frozen wings release more moisture as they cook, which can interfere with the crisping process. I recommend thawing them in the refrigerator overnight, then drying them thoroughly before seasoning.
Why did my wings come out soggy?
This usually happens for one of three reasons: the wings weren’t dried properly before seasoning, the baking sheet was overcrowded, or the sauce was applied too early. Make sure your wings are very dry, give them space on the baking sheet, and toss them in the sauce right before serving.
Can I make these wings ahead of time?
You can bake the wings ahead of time (without the sauce) and reheat them later. Bake them through step 6, let them cool completely, and store them in the refrigerator. When you’re ready to serve, reheat them at 400°F (200°C) for 8-10 minutes, then toss with fresh sauce. The sauce should always be made fresh.
How do I make the wings less spicy?
Reduce the Sriracha to 1-2 tablespoons and increase the honey by a tablespoon. You can also add a tablespoon of ketchup to the sauce — it adds sweetness and color without extra heat. For a completely mild version, skip the Sriracha altogether and use a sweet chili sauce instead.
Can I use this method for other chicken parts?
Absolutely! This two-temperature method works beautifully for chicken thighs, drumsticks, and even bone-in chicken breasts. Just adjust the cooking time based on the size of the pieces — thighs and drumsticks may need an extra 10-15 minutes at the high temperature. The sauce is also great on grilled chicken or as a glaze for roasted vegetables.
Pin This Recipe!
Crispy Baked Honey Sriracha Chicken Wings

These oven-baked wings are perfectly crispy and coated in a sweet and spicy honey Sriracha glaze. They’re a crowd-pleasing appetizer or main dish that’s easy to make with simple pantry ingredients.
- Prep Time: 15 minutes
- Cook Time: 1 hour 10 minutes
- Total Time: 1 hour 25 minutes
- Yield: 4 servings 1x
- Category: Appetizer
- Cuisine: Asian-American
Ingredients
- 2 pounds chicken wings, separated into drums and flats
- 1½ teaspoons baking powder
- 1 teaspoon kosher salt
- ½ teaspoon black pepper, freshly ground
- ½ teaspoon garlic powder
- 1 tablespoon cornstarch
- ⅓ cup honey
- 3 tablespoons Sriracha
- 1 tablespoon rice vinegar (unseasoned)
- 1 tablespoon low-sodium soy sauce
- 1 tablespoon unsalted butter
- 2 cloves garlic, minced
- 1 teaspoon sesame seeds (toasted, for garnish)
- 2 green onions (thinly sliced, for garnish)
- Lime wedges (for serving)
Instructions
- Pat the chicken wings dry with paper towels. For best results, leave them uncovered in the fridge for 1-2 hours to dry further.
- In a large bowl, whisk together baking powder, salt, pepper, garlic powder, and cornstarch until no clumps remain.
- Add the dried wings to the bowl and toss with your hands until evenly coated.
- Place a wire rack inside a rimmed baking sheet and spray lightly with cooking spray. Arrange wings in a single layer, not touching.
- Preheat oven to 250°F (120°C). Bake wings for 30 minutes.
- Increase oven temperature to 425°F (220°C) without removing wings. Bake for 40-45 minutes, turning halfway through, until golden brown and crispy.
- While wings bake, combine honey, Sriracha, rice vinegar, soy sauce, and minced garlic in a small saucepan. Bring to a simmer over medium heat, stirring occasionally. Cook for 3-4 minutes until slightly thickened. Remove from heat and stir in butter until melted.
- Let baked wings rest on the rack for 2 minutes. Transfer to a large bowl, pour sauce over, and toss gently with tongs to coat.
- Transfer to a serving platter. Sprinkle with sesame seeds and green onions. Serve with lime wedges.
Notes
Don’t skip the low-temperature step; it renders fat and dries the skin for maximum crispiness. Sauce the wings right before serving to keep the skin crispy. For extra crispiness, let wings dry uncovered in the fridge overnight.
Nutrition
- Serving Size: 4-5 wings
- Calories: 320
- Sugar: 16
- Sodium: 580
- Fat: 18
- Saturated Fat: 6
- Carbohydrates: 18
- Protein: 22
Keywords: baked chicken wings, honey sriracha wings, crispy wings, game day appetizer, oven baked wings


