I figured crispy baked chicken required a deep fryer, a breading station with three bowls, and at least thirty minutes of messy prep work. It took about one evening of staring at a sad, soggy chicken breast I’d just pulled from the oven for that assumption to fall apart completely. The coating was pale, the texture was rubbery, and honestly, I was ready to swear off baked chicken for good.
That was before I got stubborn about it. I wanted the crunch without the gallon of oil. I wanted the flavor without the fuss. So I started tinkering — testing different coatings, adjusting oven temperatures, and learning the hard way that wet chicken and dry breadcrumbs don’t just mix. They need a little coaxing. A little strategy. And a whole lot of Parmesan.
This crispy baked Parmesan crusted chicken breast is what came out of those experiments. It’s the version that finally made me stop missing fried chicken. The crust is golden, craggy, and packed with salty, nutty Parmesan flavor. The inside stays juicy and tender — no dried-out chicken here. And the whole thing comes together in about thirty minutes, which is honestly faster than I can decide what to order for takeout.
I’ve made this for busy weeknights when I needed dinner on the table before the kids lost their minds. I’ve made it for Sunday meal prep, slicing it cold over salads for lunch. And I’ve made it just for myself on a Tuesday, because sometimes you need a crispy chicken breast and a quiet kitchen. It works every time.
Why You’ll Love This Recipe
I’ve tested this recipe more times than I care to count, tweaking ratios, adjusting bake times, and even burning a batch or two (the smoke detector in my kitchen has strong opinions). What I landed on is a method that delivers consistently — the kind of chicken that makes people ask, “Wait, you baked this?”
- Quick & Easy: From fridge to table in about 30 minutes. No marinating, no complicated steps, no standing over a hot stove.
- Simple Ingredients: You probably have everything in your kitchen right now. Chicken, Parmesan, breadcrumbs, eggs, and a few pantry staples. That’s it.
- Perfect for Busy Weeknights: This is the dinner that saves you when you’re tired, hungry, and out of ideas. Pair it with a salad, some roasted veggies, or even pasta.
- Crowd-Pleaser: Kids love the crunchy coating. Adults love that it’s not greasy. Everyone loves that it actually tastes like real food, not diet food pretending to be something it’s not.
- Unbelievably Delicious: The Parmesan crust gets shatteringly crisp in the oven, while the chicken stays tender and juicy. It’s the kind of texture contrast that makes you close your eyes after the first bite.
What makes this version different from all the other baked chicken recipes out there? It’s the technique. I use a simple two-step coating method that locks in moisture while building that irresistible crust. Plus, I grate my Parmesan fresh — the pre-shredded stuff just doesn’t melt and crisp the same way. Trust me on this one.
What Ingredients You Will Need
This recipe relies on simple, wholesome ingredients that work together to create big flavor and satisfying texture without any fuss. Most of these are pantry staples, which is exactly what you want in a weeknight dinner.
For the Chicken
- Boneless, skinless chicken breasts — 2 large (about 1.5 pounds total). Look for breasts that are evenly thick so they cook uniformly. If they’re very large, butterfly them or pound to even thickness.
- Olive oil — 2 tablespoons. You’ll brush this on the chicken before coating. It helps the crust stick and promotes browning.
- Salt and black pepper — to taste. Don’t skip seasoning the chicken itself — it makes a difference.
For the Parmesan Crust
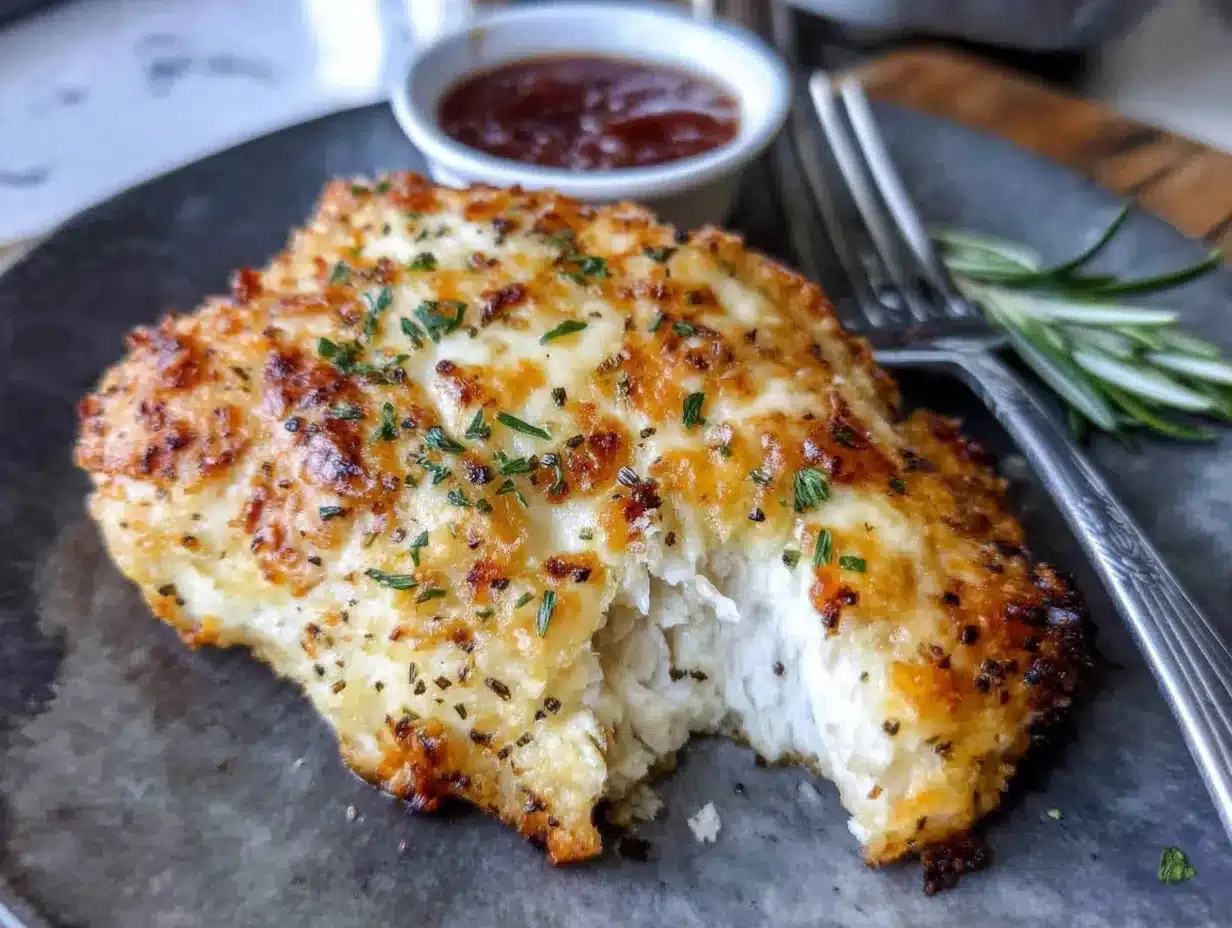
- Freshly grated Parmesan cheese — 1 cup. This is non-negotiable. The pre-grated stuff in the green can won’t melt properly and won’t give you that crispy, golden crust. Grate it yourself from a block of Parmigiano-Reggiano if you can — the flavor is noticeably better.
- Panko breadcrumbs — 1/2 cup. Panko is lighter and crispier than regular breadcrumbs. If you only have regular, you can use them, but the texture won’t be quite as crunchy.
- Garlic powder — 1 teaspoon. Adds savory depth without being overpowering.
- Dried Italian seasoning — 1 teaspoon. A blend of oregano, basil, and thyme works beautifully here.
- Paprika — 1/2 teaspoon. For color and a subtle smoky sweetness.
- Pinch of cayenne pepper — optional, but I love the tiny kick it adds. Totally skippable if you’re spice-averse.
For the Egg Wash
- Large egg — 1. This helps the coating adhere to the chicken.
- Dijon mustard — 1 teaspoon. It adds a little tang and helps the egg wash cling better. You won’t taste it in the final dish.
- Water — 1 tablespoon. Thins the egg wash just enough for even coating.
I prefer using Kraft grated Parmesan when I’m in a pinch, but honestly, nothing beats grating your own from a block of BelGioioso or Locatelli. The texture is finer and it melts into the panko beautifully.
Equipment Needed
You don’t need any fancy gadgets for this recipe — just basic kitchen tools you probably already own.
- Baking sheet — A rimmed half-sheet pan works best. Line it with parchment paper or aluminum foil for easy cleanup.
- Wire rack — Optional but recommended. Placing a wire rack on the baking sheet allows air to circulate under the chicken, keeping the bottom crust crispy instead of soggy. If you don’t have one, just flip the chicken halfway through baking.
- Three shallow bowls — For the coating station. Pie plates or wide soup bowls work perfectly.
- Pastry brush — For brushing the olive oil onto the chicken. A silicone one is easiest to clean.
- Box grater or Microplane — For grating the Parmesan. A Microplane gives you the finest texture, which helps the crust adhere better.
- Meat mallet or rolling pin — For pounding the chicken to even thickness. If you don’t have one, just use your fists (seriously, it works) or ask the butcher to do it for you.
- Instant-read thermometer — Not strictly necessary, but it takes the guesswork out of knowing when the chicken is done. Chicken breasts are perfectly cooked at 165°F.
I’ve made this recipe with and without the wire rack, and honestly, the rack makes a noticeable difference. It’s worth digging one out of the back of your cabinet. If you don’t have one, just flip the chicken halfway through and don’t overcrowd the pan.
Preparation Method
Let’s walk through this step by step. I’ll include all the little details I’ve learned from making this dozens of times — the things that turn good chicken into great chicken.
- Preheat your oven to 425°F (220°C). Get it nice and hot — this high heat is what creates that crispy crust. Place a wire rack on a rimmed baking sheet and spray it lightly with cooking spray. If you’re not using a rack, line the sheet with parchment paper.
- Prep the chicken. Place your chicken breasts on a cutting board. If they’re thick on one end and thin on the other (which most are), cover them with plastic wrap and gently pound them to an even thickness — about 1/2 to 3/4 inch thick. This ensures they cook evenly. Pat the chicken dry with paper towels. This is important — excess moisture will steam the coating instead of crisping it.
- Season the chicken. Brush both sides of each breast with olive oil. Season generously with salt and black pepper. Don’t be shy here — the seasoning on the chicken itself is what flavors the meat from the inside out.
- Set up your coating station. Grab three shallow bowls. In the first bowl, place 2 tablespoons of all-purpose flour. In the second, whisk together the egg, Dijon mustard, and water until smooth. In the third, combine the grated Parmesan, panko breadcrumbs, garlic powder, Italian seasoning, paprika, and cayenne (if using). Mix everything together with a fork so the Parmesan is evenly distributed.
- Coat the chicken. Working with one piece at a time, dredge the chicken in the flour, shaking off any excess. This thin flour layer helps the egg wash stick. Next, dip it into the egg mixture, letting any excess drip off. Finally, press it firmly into the Parmesan-panko mixture, making sure every surface is well coated. Don’t be afraid to really press it in — you want that crust to be thick and craggy.
- Place on the rack. Transfer the coated chicken to the prepared wire rack. Leave a little space between each piece so the hot air can circulate. If you’re not using a rack, place them directly on the parchment-lined baking sheet.
- Bake for 18-22 minutes. Pop the pan into the preheated oven and set a timer for 18 minutes. At 18 minutes, check the internal temperature with an instant-read thermometer inserted into the thickest part of the breast. You’re looking for 165°F (74°C). If it’s not there yet, give it another 2-3 minutes. The crust should be deep golden brown and crispy to the touch.
- Let it rest. Remove the chicken from the oven and let it rest on the rack for 5 minutes. This is crucial — it allows the juices to redistribute so the meat stays tender and moist. If you cut into it immediately, all those juices will run out onto the cutting board instead of staying in the chicken.
- Serve and enjoy. Transfer the chicken to a cutting board, slice against the grain if desired, and serve immediately. The crust is at its crispiest right out of the oven.
A few things I’ve learned the hard way: Don’t skip the flour step. I tried once thinking it would save time, and the egg wash just slid right off the chicken. Also, if your chicken breasts are very large (like those giant ones from Costco), you might need to add a few minutes to the baking time. Always go by temperature, not time.
Cooking Tips & Techniques
Over the years, I’ve made every mistake in the book with baked chicken. Here’s what I’ve learned so you don’t have to repeat my failures.
The biggest mistake people make is using pre-shredded Parmesan. I get it — it’s convenient. But those bags of shredded cheese are coated in cellulose (wood pulp, basically) to prevent clumping, which means they don’t melt properly. You end up with a pale, powdery crust instead of a golden, crispy one. Spend the two minutes grating your own. It makes a world of difference.
Don’t overcrowd the pan. If you’re doubling the recipe, use two baking sheets or work in batches. When the chicken pieces are too close together, they steam instead of bake, and you lose all that beautiful crunch. Airflow is your friend here.
Pounding to even thickness isn’t optional. I know it’s an extra step, but it’s the difference between perfectly cooked chicken and chicken that’s dry on one end and undercooked on the other. If you’re short on time, ask your butcher to do it for you. Most will happily oblige.
Let the chicken come to room temperature before baking. If you pull the chicken straight from the fridge and pop it in the oven, the outside will cook faster than the inside. Let it sit on the counter for about 15 minutes after coating. This helps it cook more evenly.
Use a thermometer. I cannot stress this enough. Chicken breasts are notoriously easy to overcook, and an instant-read thermometer takes all the guesswork out of it. At 165°F, you’re done. Pull it out immediately. Every degree past that is a step toward dry chicken.
I once forgot to set a timer and ended up with chicken that was basically edible shoe leather. That was the day I bought a thermometer with an alarm. Best decision I ever made in the kitchen.
Variations & Adaptations
This recipe is incredibly flexible. Here are some ways to change it up depending on what you have on hand or what you’re craving.
Gluten-Free Version: Swap the all-purpose flour for a gluten-free blend (like Bob’s Red Mill 1-to-1) and use gluten-free panko breadcrumbs. The texture will be slightly different, but it still gets wonderfully crispy. I’ve tested this with my gluten-sensitive friends and they couldn’t tell the difference.
Spicy Kick: Add an extra 1/2 teaspoon of cayenne pepper to the coating mixture, or mix in some red pepper flakes. You can also add a dash of hot sauce to the egg wash for an extra layer of heat. I love doing this when I’m craving something with a little more oomph.
Herb-Crusted Version: Add 2 tablespoons of finely chopped fresh herbs to the Parmesan mixture. Parsley, thyme, and rosemary all work beautifully. Fresh herbs add a brightness that dried herbs just can’t match. This is my go-to for spring and summer dinners.
Lemon-Pepper Twist: Add the zest of one lemon and 1 teaspoon of freshly cracked black pepper to the coating. The lemon zest adds a bright, citrusy note that cuts through the richness of the Parmesan. Serve with lemon wedges for squeezing over the top.
Air Fryer Adaptation: This recipe works beautifully in an air fryer. Preheat the air fryer to 400°F (200°C). Cook the chicken in a single layer (you may need to work in batches) for 12-15 minutes, flipping halfway through. The crust gets even crispier in the air fryer, if you can believe it. I’ve been using this method more and more lately — it’s faster and the results are consistently perfect.
I personally love the lemon-pepper version during the summer months. It’s light, fresh, and pairs perfectly with a simple arugula salad. During colder months, I lean toward the herb-crusted version with roasted root vegetables on the side.
Serving & Storage Suggestions
This chicken is incredibly versatile when it comes to serving. Here’s how I like to enjoy it.
Serving Temperature: Serve the chicken hot, straight from the oven, when the crust is at its crispiest. Let it rest for those 5 minutes, then slice and serve immediately. If you’re making it for meal prep, let it cool completely before storing.
What to Serve With It: This chicken pairs beautifully with almost anything. I love it with a simple green salad dressed with lemon vinaigrette, roasted asparagus or broccoli, mashed potatoes, or even a side of pasta tossed with olive oil and garlic. For a lighter meal, slice it over a bed of mixed greens with cherry tomatoes, cucumber, and a light ranch dressing. If you’re looking for more weeknight inspiration, this chicken is fantastic alongside my healthy chicken veggie skillet wraps for a complete meal that comes together fast.
Storage: Store leftover chicken in an airtight container in the refrigerator for up to 4 days. The crust will soften over time, but it’s still delicious. I often slice the cold chicken and add it to salads or sandwiches for lunch the next day.
Reheating: The best way to reheat this chicken is in the oven or air fryer. Place it on a wire rack over a baking sheet and warm it at 350°F (175°C) for about 10 minutes, or until heated through. The air fryer works even faster — just 5-6 minutes at 350°F. Avoid the microwave, as it will make the crust soggy and the chicken rubbery.
Freezing: You can freeze the baked chicken for up to 3 months. Let it cool completely, then wrap each piece individually in plastic wrap and place in a freezer-safe bag. To reheat, thaw overnight in the refrigerator, then reheat in the oven or air fryer as directed above. The crust won’t be quite as crispy as fresh, but it’s still a great option for busy nights.
I’ve found that the flavors actually deepen a bit after a day in the fridge. The Parmesan and herbs meld together in a way that’s really satisfying. It’s one of those rare dishes that tastes almost as good the next day.
Nutritional Information & Benefits
Here’s a rough estimate of the nutritional content per serving (based on 2 servings, using the ingredients listed above):
| Nutrient | Amount per Serving |
|---|---|
| Calories | 410 |
| Protein | 48g |
| Fat | 18g |
| Saturated Fat | 6g |
| Carbohydrates | 12g |
| Fiber | 1g |
| Sugar | 1g |
| Sodium | 680mg |
This recipe is naturally low-carb and gluten-free adaptable. Chicken breast is an excellent source of lean protein, which supports muscle maintenance and keeps you feeling full and satisfied. Parmesan cheese adds calcium and a good dose of umami flavor without needing a lot of it. The olive oil provides healthy monounsaturated fats, which are great for heart health.
If you’re watching your sodium intake, you can reduce the salt in the coating and use a low-sodium Parmesan. Just be aware that the crust won’t be quite as flavorful. I personally find the Parmesan adds enough saltiness that I don’t need to add much extra salt.
This recipe is also kidney-friendly and diabetic-friendly when served with non-starchy vegetables. It’s a meal that works for a wide range of dietary needs, which is one of the reasons I make it so often.
Conclusion
This crispy baked Parmesan crusted chicken breast has become a staple in my kitchen for good reason. It’s quick, it’s easy, and it delivers that satisfying crunch we all crave without the mess and guilt of deep frying. The combination of nutty Parmesan, crispy panko, and tender, juicy chicken is honestly hard to beat.
What I love most about this recipe is how forgiving it is. You can tweak the seasonings, swap in different cheeses, or adapt it for the air fryer, and it still comes out beautifully. It’s the kind of recipe that builds confidence in the kitchen — once you see how easy it is to get that perfect crust, you’ll start looking for other things to coat and bake.
I’d love to hear how this turns out for you. Did you try a variation? Did you serve it with something amazing? Drop a comment below and let me know. And if you’re looking for more quick and easy dinner ideas, check out this healthy low-cal ranch chicken skillet — it’s another one of my weeknight favorites.
Now go make some crispy chicken. You’ve got this.
Frequently Asked Questions
Can I use chicken thighs instead of chicken breasts?
Absolutely! Boneless, skinless chicken thighs work great with this recipe. They have a higher fat content, which means they stay even juicier. Adjust the baking time to about 20-25 minutes, or until the internal temperature reaches 175°F (80°C) for thighs. The crust will be just as crispy and delicious.
How do I keep the crust from falling off?
The key is the flour-and-egg wash combo. Don’t skip the flour step — it creates a dry surface that helps the egg wash stick. Also, make sure you press the Parmesan-panko mixture firmly onto the chicken. And let the chicken rest for 5 minutes after baking before cutting into it. This gives the crust time to set.
Can I make this recipe dairy-free?
Yes, with a few swaps. Use a dairy-free Parmesan alternative (many brands make convincing versions) or try nutritional yeast for a cheesy flavor without the dairy. You can also use a dairy-free milk wash instead of the egg wash, though the crust won’t be quite as sturdy. I’ve tested this with Violife’s vegan Parmesan and it worked surprisingly well.
Why is my chicken dry?
Overcooking is the most common culprit. Chicken breasts are lean and cook quickly, so it’s easy to go from perfectly juicy to dry in just a couple of minutes. Use an instant-read thermometer and pull the chicken out at exactly 165°F (74°C). Also, letting it rest for 5 minutes before cutting allows the juices to redistribute throughout the meat.
Can I prep this ahead of time?
You can coat the chicken up to 4 hours ahead and keep it in the refrigerator on the wire rack, uncovered. This actually helps the crust dry out a bit, which makes it even crispier during baking. Just add a minute or two to the baking time since you’re starting with cold chicken. I wouldn’t recommend prepping it more than 4 hours ahead, as the crust can start to get gummy.
Pin This Recipe!
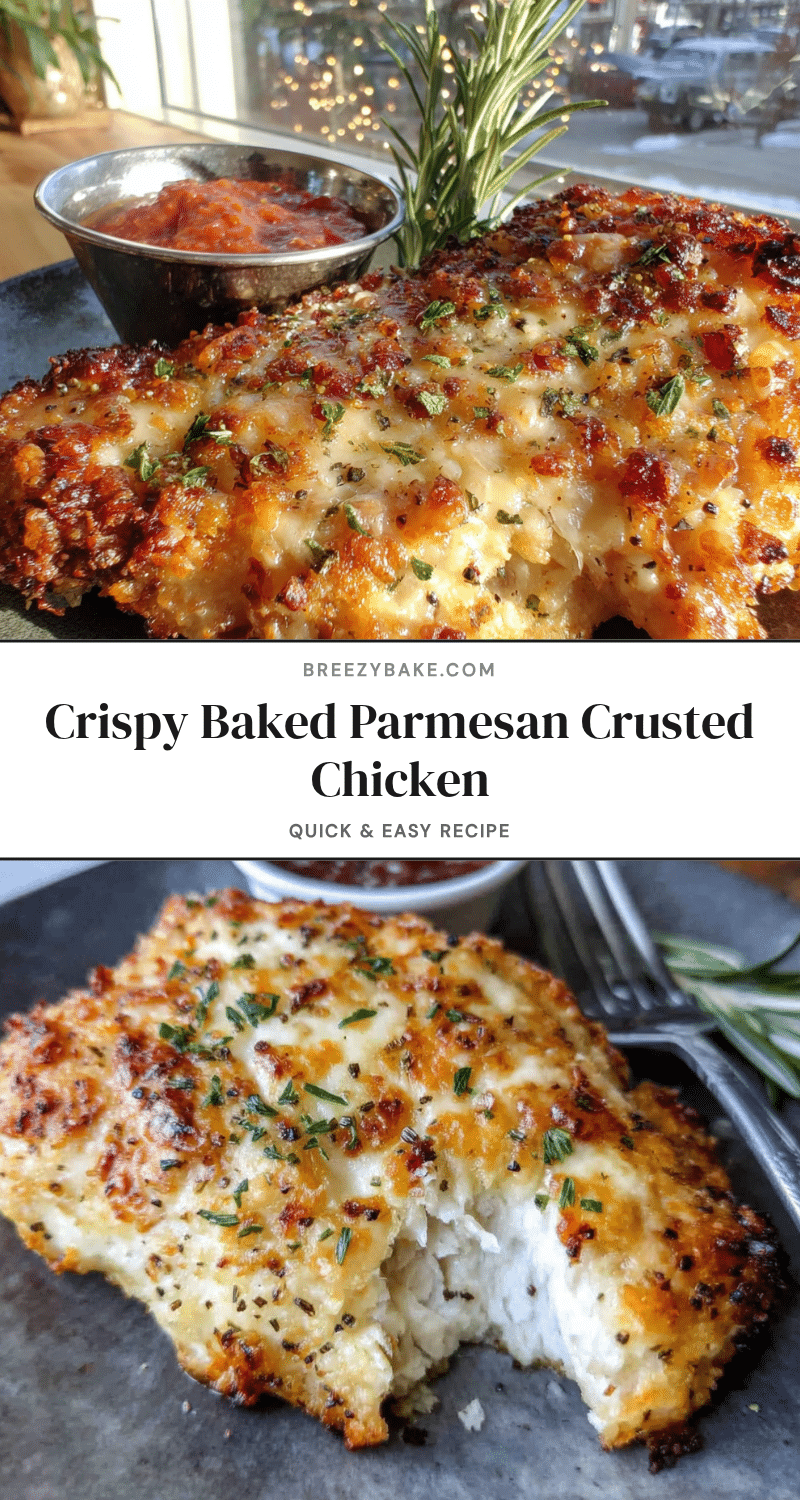
Crispy Baked Parmesan Crusted Chicken: Easy 30-Min Recipe

This crispy baked Parmesan crusted chicken breast is golden, craggy, and packed with salty, nutty Parmesan flavor. The inside stays juicy and tender, and the whole thing comes together in about thirty minutes.
- Prep Time: 10 minutes
- Cook Time: 20 minutes
- Total Time: 30 minutes
- Yield: 2 servings 1x
- Category: Main Course
- Cuisine: American
Ingredients
- 2 large boneless, skinless chicken breasts (about 1.5 pounds total)
- 2 tablespoons olive oil
- Salt and black pepper to taste
- 1 cup freshly grated Parmesan cheese
- 1/2 cup panko breadcrumbs
- 1 teaspoon garlic powder
- 1 teaspoon dried Italian seasoning
- 1/2 teaspoon paprika
- Pinch of cayenne pepper (optional)
- 1 large egg
- 1 teaspoon Dijon mustard
- 1 tablespoon water
- 2 tablespoons all-purpose flour
Instructions
- Preheat your oven to 425°F (220°C). Place a wire rack on a rimmed baking sheet and spray it lightly with cooking spray. If not using a rack, line the sheet with parchment paper.
- Place chicken breasts on a cutting board. Cover with plastic wrap and gently pound to an even thickness of about 1/2 to 3/4 inch. Pat dry with paper towels.
- Brush both sides of each breast with olive oil. Season generously with salt and black pepper.
- Set up a coating station with three shallow bowls. In the first bowl, place 2 tablespoons of all-purpose flour. In the second, whisk together the egg, Dijon mustard, and water until smooth. In the third, combine the grated Parmesan, panko breadcrumbs, garlic powder, Italian seasoning, paprika, and cayenne (if using). Mix well.
- Working with one piece at a time, dredge the chicken in the flour, shaking off excess. Dip into the egg mixture, letting excess drip off. Press firmly into the Parmesan-panko mixture, coating all sides.
- Transfer the coated chicken to the prepared wire rack, leaving space between pieces.
- Bake for 18-22 minutes, until the internal temperature reaches 165°F (74°C) and the crust is deep golden brown and crispy.
- Remove from oven and let rest on the rack for 5 minutes before serving.
- Serve immediately, sliced against the grain if desired.
Notes
Don’t skip the flour step—it helps the egg wash stick. Use freshly grated Parmesan for the best crust. Let the chicken come to room temperature before baking for even cooking. Use an instant-read thermometer to avoid overcooking.
Nutrition
- Serving Size: 1 chicken breast
- Calories: 410
- Sugar: 1
- Sodium: 680
- Fat: 18
- Saturated Fat: 6
- Carbohydrates: 12
- Fiber: 1
- Protein: 48
Keywords: crispy baked chicken, Parmesan crusted chicken, easy chicken recipe, 30-minute dinner, baked chicken breast


