My friend Jen asked why I couldn’t just toss the chicken thighs in a bag with the garlic and Parmesan and shake them up, instead of fussing with a separate bowl for dredging. I started to explain why that wouldn’t work — something about even coating and the breading sticking properly. Then I stopped. Honestly? I had no good reason except that’s how I’d always done it. So I handed her the bag, she shook it like she was mixing a cocktail, and those thighs came out more evenly coated than any batch I’d ever made with my precious two-bowl system. I stood there, spatula in hand, feeling both ridiculous and delighted. That moment changed how I prep this recipe forever, and now it’s my go-to move every single time.
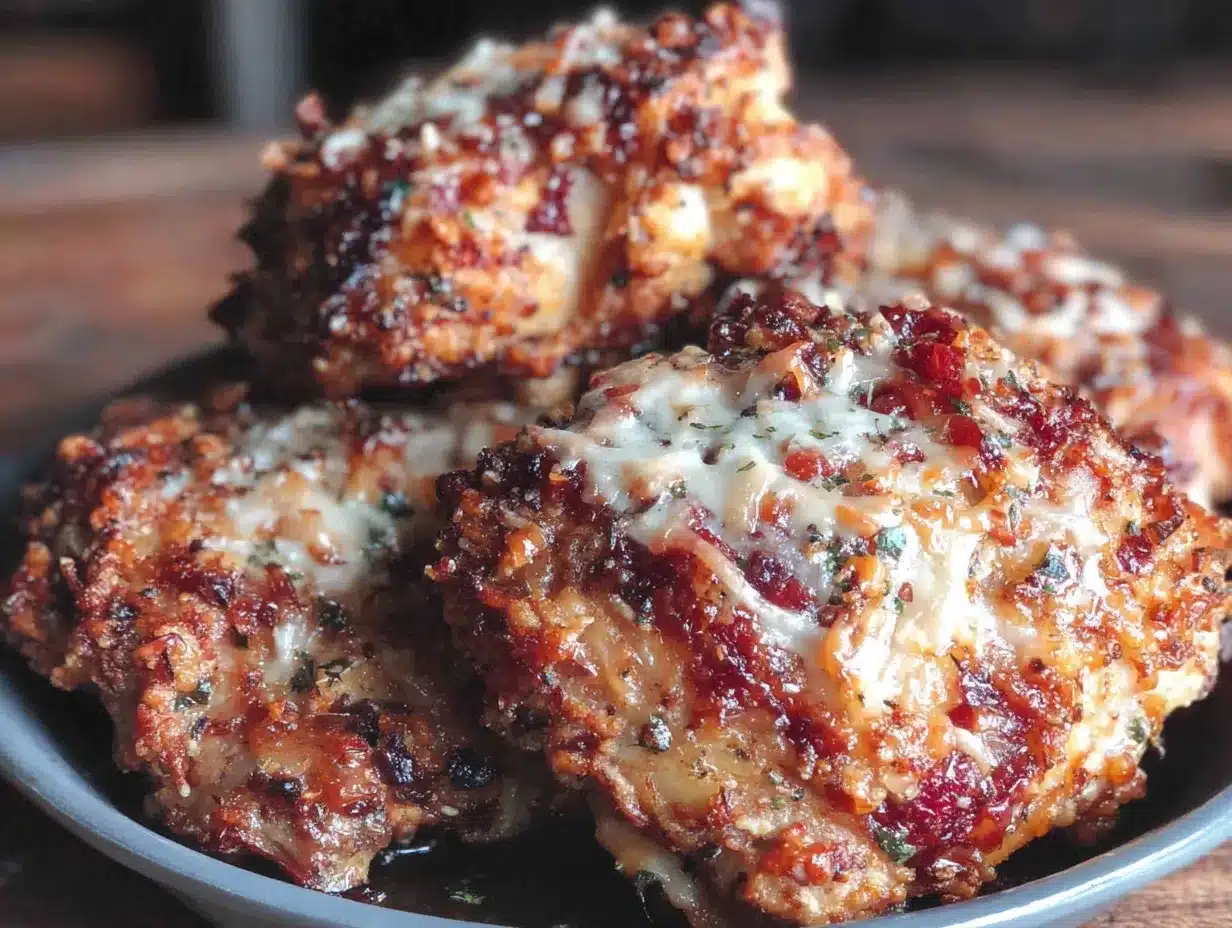
These Crispy Garlic Parmesan Chicken Thighs have become my secret weapon for dinner parties. I’m not supposed to play favorites with recipes, but this one has earned its spot. The skin gets shatteringly crisp, the meat stays juicy, and that garlic-Parmesan crust? It’s the kind of thing that makes people pause mid-conversation to take another bite. I’ve served it at casual potlucks where folks went back for thirds and at sit-down dinners where guests asked for the recipe before dessert. There’s something about that golden-brown crust and the way the kitchen smells while it bakes — maybe you know that feeling when a dish just works, and you can’t help but feel a little proud.
The best part is how simple it is. I mean, we’re talking about chicken thighs, garlic, Parmesan, and a few pantry staples. No complicated techniques, no special equipment, just honest cooking that delivers every single time. I’ve made this so many times I could do it in my sleep, but it still feels special when I pull that pan out of the oven. That’s the kind of recipe you want in your back pocket, especially when you’re hosting.
Why You’ll Love This Recipe
Let me tell you why these Crispy Garlic Parmesan Chicken Thighs have become my most-requested dish for gatherings. I’ve tested this recipe at least a dozen times — tweaking the temperature, adjusting the coating, even trying different brands of Parmesan — and this version is absolutely the one. It’s the perfect balance of crispy, savory, and downright satisfying.
- Quick & Easy : Comes together in under 45 minutes, with only 10 minutes of active prep. Perfect for those evenings when guests are on their way and you need something impressive fast.
- Simple Ingredients : No fancy grocery trips needed. You likely have garlic, olive oil, and breadcrumbs in your pantry right now. The Parmesan is the only “special” ingredient, and it’s worth every penny.
- Perfect for Dinner Parties : This dish steals the show without stealing your time. It bakes hands-free while you prep sides, set the table, or pour drinks. I’ve served it at birthday dinners, holiday gatherings, and casual Sunday suppers — it never disappoints.
- Crowd-Pleaser : Kids devour it, adults rave about it, and even picky eaters go back for seconds. The crispy coating appeals to everyone, and the garlic-Parmesan flavor is universally loved.
- Unbelievably Delicious : The texture is next-level comfort food. That crackly crust gives way to tender, juicy meat, and the garlic-Parmesan coating is savory perfection. It’s the kind of dish that makes you close your eyes after the first bite.
What makes this recipe different from all the others? It’s the technique. Most recipes have you dip the chicken in egg, then breadcrumbs, then bake — but that can get messy and the coating sometimes slides off. My method uses a simple shake-in-a-bag approach (thanks, Jen!) that gives you an even, stubbornly adherent crust every time. Plus, I’ve perfected the oven temperature to get that deep golden color without burning the garlic or Parmesan. This isn’t just another chicken recipe — it’s your best version.
This recipe is the kind that makes you look like a hero in the kitchen without breaking a sweat. It’s comfort food reimagined — faster, easier, but with the same soul-soothing satisfaction. Perfect for impressing guests without stress, or turning a simple Tuesday dinner into something memorable.
What Ingredients You Will Need
This recipe uses simple, wholesome ingredients that deliver bold flavor and that irresistible crispy texture. Most of these are pantry staples, which makes this dish perfect for last-minute entertaining. Here’s what you’ll need:
For the Chicken
- 6 bone-in, skin-on chicken thighs (about 2.5 pounds total) — Bone-in thighs stay juicier during baking, and the skin helps create that crispy exterior. I prefer organic or air-chilled chicken for better flavor, but any good-quality chicken works.
- 2 tablespoons olive oil — Helps the coating stick and promotes browning. Use a good extra-virgin olive oil for richer flavor.
- 1 teaspoon salt — I use fine sea salt. Kosher salt works too, but you may need a bit more since the crystals are larger.
- 1/2 teaspoon black pepper — Freshly ground is best. It adds a subtle warmth that complements the garlic.
For the Crispy Coating
- 1 cup panko breadcrumbs — These create a lighter, crunchier crust than regular breadcrumbs. I’ve tried both, and panko is absolutely the way to go for maximum crispiness. (Look for the Japanese-style panko in the Asian foods aisle or near the breadcrumbs.)
- 1/2 cup freshly grated Parmesan cheese — Please, please grate it yourself. The pre-shredded stuff has anti-caking agents that prevent it from melting properly and sticking to the chicken. I recommend a block of Parmigiano-Reggiano for the best flavor — it’s worth the extra minute of grating.
- 4 cloves garlic, minced — Fresh garlic is non-negotiable here. The jarred stuff won’t give you the same punch. I use a microplane for super-fine mincing, but a garlic press works great too.
- 1 teaspoon dried Italian seasoning — Adds a lovely herbaceous note. You can substitute with 1/2 teaspoon dried oregano and 1/2 teaspoon dried basil if you don’t have Italian seasoning.
- 1/2 teaspoon paprika — Not just for color! It adds a subtle smokiness and helps the coating brown beautifully. Smoked paprika is amazing here if you have it.
- 1/4 teaspoon garlic powder — This might seem redundant with the fresh garlic, but the powder adds depth and ensures every bite has garlic flavor.
For Garnish (Optional but Recommended)
- 2 tablespoons fresh parsley, chopped — Adds a pop of color and freshness that balances the richness.
- Lemon wedges — A squeeze of lemon juice right before serving brightens all the flavors. Trust me on this one.
- Extra grated Parmesan — Because you can never have too much.
Substitution Guidance: If you need a gluten-free option, use gluten-free panko breadcrumbs — they work beautifully. For a dairy-free version, substitute the Parmesan with nutritional yeast (about 1/3 cup) and add an extra tablespoon of olive oil to help the coating stick. I’ve tested both substitutions and they’re surprisingly good, though the flavor profile changes slightly.
Equipment Needed
You don’t need a fancy kitchen to make these Crispy Garlic Parmesan Chicken Thighs. Here’s what you’ll need:
- Large resealable plastic bag — For shaking the coating mixture with the chicken. A gallon-size works perfectly. If you don’t have one, you can use a large bowl with a tight-fitting lid or just toss everything in a bowl with your hands (messier but effective).
- Baking sheet or shallow baking dish — A rimmed baking sheet works best because it allows air to circulate around the chicken, promoting even browning. I use a half-sheet pan. A 9×13-inch baking dish also works, though the chicken won’t get quite as crispy on the bottom.
- Wire rack — This is optional but highly recommended. Placing a wire rack on the baking sheet elevates the chicken so air circulates underneath, making the bottoms crispy too. If you don’t have one, just flip the chicken halfway through baking.
- Parchment paper or aluminum foil — For easy cleanup. I line my baking sheet with parchment paper, then place the wire rack on top. The cleanup takes about 30 seconds.
- Meat thermometer — Essential for perfectly cooked chicken. I use an instant-read thermometer. Chicken thighs are done at 165°F, but I pull them at 160°F because they continue cooking as they rest.
- Microplane or garlic press — For mincing the garlic. A sharp knife works too, but a microplane makes it effortless and gives you almost paste-like garlic that melts into the coating.
- Chef’s knife and cutting board — For prepping the garlic and parsley.
I’ve made this recipe with and without the wire rack, and honestly, the rack makes a noticeable difference in crispiness. But if you don’t have one, don’t let that stop you — just flip the chicken halfway through and you’ll still get great results.
Preparation Method
Let me walk you through making these Crispy Garlic Parmesan Chicken Thighs step by step. I’ve included all my little tricks and timing tips so you can nail it on your first try.
- Preheat your oven to 400°F (200°C). Getting the oven hot before you start is crucial — you want that immediate blast of heat to start crisping the skin right away. While the oven heats, line a baking sheet with parchment paper and place a wire rack on top if you’re using one.
- Pat the chicken thighs dry with paper towels. This is one of the most important steps. Excess moisture is the enemy of crispy skin. Really press those paper towels into the skin to absorb as much moisture as possible. I usually go through 3-4 paper towels for 6 thighs. Once they’re dry, season both sides with salt and pepper.
- Make the coating mixture. In a large resealable plastic bag, combine the panko breadcrumbs, grated Parmesan, minced garlic, Italian seasoning, paprika, and garlic powder. Seal the bag and shake it to mix everything together. The garlic will clump slightly — that’s fine. Those little garlicky bits will create delicious crispy spots on the chicken.
- Coat the chicken. Drizzle the olive oil over the seasoned chicken thighs and rub it in with your hands to coat evenly. Then, one at a time, place each thigh in the bag with the coating mixture. Seal the bag (leave a little air inside for shaking room) and shake vigorously until each thigh is thoroughly coated. I shake for about 30 seconds total. Open the bag and press any extra coating onto the thighs with your fingers — don’t waste any of that goodness.
- Arrange the chicken on the prepared baking sheet. Place the coated thighs on the wire rack (or directly on the parchment-lined sheet), skin side up. Make sure they’re not touching each other — you want space between them so the heat can circulate and crisp all sides. If they’re crowded, they’ll steam instead of crisp.
- Bake for 35-40 minutes. The exact time depends on the size of your thighs. At the 20-minute mark, check them — if the coating is browning too quickly, tent loosely with foil. I usually don’t need to, but ovens vary. The chicken is done when the internal temperature reaches 165°F (74°C) at the thickest part, and the coating is deep golden brown and crispy.
- Let rest for 5 minutes. This is important! Resting allows the juices to redistribute throughout the meat. If you cut into them immediately, all those delicious juices will run out onto the plate instead of staying in the chicken. The coating also sets during this time, becoming even crispier.
- Garnish and serve. Sprinkle with fresh parsley and extra Parmesan if desired. Serve with lemon wedges for squeezing over the top. That hit of acidity cuts through the richness and makes everything sing.
Pro tip from my kitchen: I once forgot to pat the chicken dry — I was in a hurry and thought, “How much difference can it really make?” The answer: a lot. The coating got soggy and the skin never crisped up. Learn from my mistake, friends. Pat those thighs dry like your dinner party reputation depends on it.
Cooking Tips & Techniques
Over the years, I’ve learned a few things that make these Crispy Garlic Parmesan Chicken Thighs absolutely foolproof. Here are my best tips:
Don’t skip the wire rack. I know I mentioned this already, but it bears repeating. The first time I made this recipe, I placed the chicken directly on the baking sheet. The bottoms were okay, but not crispy. A friend suggested using a wire rack, and the difference was night and day. The air circulates all around the chicken, giving you that all-over crunch. If you don’t have a wire rack, flip the chicken halfway through baking to crisp both sides.
Grate your own Parmesan. I cannot stress this enough. Pre-shredded Parmesan is coated with cellulose and other anti-caking agents that prevent it from melting and sticking properly. It also doesn’t have the same flavor. Spend the extra 90 seconds grating a block of real Parmigiano-Reggiano. Your taste buds will thank you.
Watch the garlic. Fresh garlic can burn easily at high temperatures. That’s why I use a combination of fresh minced garlic and garlic powder. The fresh garlic gives you that punchy flavor, while the garlic powder ensures you get garlic in every bite without the risk of burnt bits. If you notice the coating browning too quickly, tent with foil for the last 10 minutes of baking.
Let the chicken come to room temperature. Take the chicken out of the fridge 20 minutes before you start prepping. Cold chicken takes longer to cook, which means the coating has more time to potentially burn before the meat is done. Room-temperature chicken cooks more evenly.
Double the recipe for parties. These reheat beautifully (see the storage section below), so I always make extra. For a dinner party, I plan on 2 thighs per person, plus a couple extra because someone always wants seconds. I’ve learned this the hard way — running out of these at a party is a tragedy.
Variations & Adaptations
One of the things I love about this recipe is how adaptable it is. Here are some variations I’ve tried and loved:
Spicy Buffalo Version: Add 2 tablespoons of hot sauce (Frank’s RedHot is my go-to) to the olive oil before coating the chicken. Reduce the paprika to 1/4 teaspoon and add 1/2 teaspoon cayenne pepper to the breadcrumb mixture. Serve with blue cheese or ranch dressing for dipping. I made this for a Super Bowl party and it was gone in 20 minutes.
Herb and Lemon Version: Add the zest of one lemon to the breadcrumb mixture along with 2 tablespoons of fresh chopped rosemary and thyme. Replace the Italian seasoning with 1 teaspoon each of dried rosemary and thyme. This version is lighter and brighter — perfect for spring and summer gatherings.
Low-Carb/Keto Version: Replace the panko breadcrumbs with crushed pork rinds (about 1 cup) and add an extra 1/4 cup of Parmesan. The pork rinds create an incredibly crispy coating that’s completely carb-free. I’ve tested this for a friend on keto and she said it was the best “breaded” chicken she’d had since starting the diet.
Air Fryer Method: Cook at 375°F (190°C) for 18-22 minutes, flipping halfway through. The air fryer gives you an even crispier exterior in less time. I use this method when I’m only making 3-4 thighs for a quick weeknight dinner. Just make sure not to overcrowd the basket — cook in batches if needed.
Dairy-Free Adaptation: Substitute the Parmesan with 1/3 cup nutritional yeast and add 2 tablespoons of olive oil to the breadcrumb mixture. The nutritional yeast gives you that savory, cheesy flavor without any dairy. I’ve served this to dairy-free guests who didn’t even notice the difference.
Serving & Storage Suggestions
These Crispy Garlic Parmesan Chicken Thighs are incredibly versatile when it comes to serving. Here’s how I like to present them for dinner parties:
Serving Temperature: Serve hot, right out of the oven. The coating is at its crispiest within 10 minutes of coming out of the oven. If you’re serving buffet-style, keep them warm in a low oven (200°F) on the wire rack, uncovered, for up to 30 minutes. Covering them will trap steam and soften the coating.
What to Serve Alongside: For a dinner party, I love serving these with roasted vegetables (asparagus, broccoli, or Brussels sprouts work beautifully), a simple arugula salad with lemon vinaigrette, and garlic mashed potatoes or crusty bread to soak up any juices. The freshness of the salad balances the richness of the chicken perfectly. If you’re feeling fancy, a side of creamy polenta is absolutely divine.
Presentation Tips: Arrange the chicken on a large platter, overlapping slightly. Sprinkle generously with fresh parsley and extra Parmesan. Place lemon wedges around the edges. The bright yellow lemons and green parsley create a beautiful presentation that looks like you spent hours on it. I sometimes add a few sprigs of fresh rosemary for color.
Storage Instructions: Store leftovers in an airtight container in the refrigerator for up to 4 days. The coating will soften slightly, but the flavor remains excellent. To reheat and restore crispiness, place the thighs on a wire rack over a baking sheet and warm in a 375°F oven for 8-10 minutes. The microwave will make them soggy — avoid it if you can.
Freezer Instructions: These freeze beautifully! Place cooled chicken thighs in a single layer on a baking sheet and freeze until solid (about 2 hours). Transfer to a freezer-safe container or bag for up to 3 months. To reheat, bake from frozen at 375°F for 20-25 minutes, or until heated through and crispy. I always keep a batch in the freezer for emergency dinners or unexpected guests.
Flavor Development: Honestly, these are even better the next day. The flavors meld together overnight, and the garlic becomes more mellow and integrated. I often make these a day ahead for parties and reheat them just before serving. Nobody has ever complained.
Nutritional Information & Benefits
While I wouldn’t call these health food, they’re certainly a more wholesome option than fried chicken. Here’s the estimated nutritional breakdown per serving (1 thigh):
| Nutrient | Amount |
|---|---|
| Calories | 385 |
| Protein | 32g |
| Fat | 24g |
| Saturated Fat | 7g |
| Carbohydrates | 8g |
| Fiber | 1g |
| Sugar | 1g |
| Sodium | 520mg |
Health Benefits: Chicken thighs are an excellent source of protein, which is essential for muscle repair and growth. They’re also rich in B vitamins, particularly B6 and B12, which support energy metabolism and brain function. The garlic in this recipe is known for its immune-boosting properties and anti-inflammatory effects. Parmesan cheese provides calcium and protein, while the olive oil offers heart-healthy monounsaturated fats.
Dietary Considerations: This recipe is naturally low-carb (about 8g per serving) and can be made gluten-free and keto-friendly with the substitutions mentioned above. It’s not suitable for dairy-free diets as written, but the dairy-free adaptation works beautifully. The recipe contains common allergens: dairy (cheese) and gluten (breadcrumbs).
My Perspective: I believe in balance. This recipe is indulgent and satisfying, but it’s made with real, whole ingredients. I serve it alongside plenty of vegetables and a fresh salad to round out the meal. It’s the kind of dish that nourishes both body and soul — and honestly, that’s the kind of cooking I love most.
Conclusion
These Crispy Garlic Parmesan Chicken Thighs have become my signature dish for a reason. They’re impressive enough for dinner parties, simple enough for weeknights, and absolutely delicious every single time. That golden, crunchy coating, the juicy meat underneath, the way the garlic and Parmesan meld together — it’s comfort food at its finest.
I love this recipe because it reminds me that sometimes the best discoveries come from letting go of our rigid ways. Jen’s shake-in-a-bag method taught me that there’s always room to learn something new, even in the kitchen where I feel most confident. And that’s what cooking is all about — sharing, experimenting, and finding joy in the process.
I’d love to hear how these turn out for you! Did you try any variations? Serve them at a party? Have your own kitchen discovery to share? Drop a comment below and let me know. And if you loved this recipe, please share it with your friends and family — I want everyone to experience the magic of perfectly crispy, garlicky, cheesy chicken thighs.
Happy cooking, friends. Your next dinner party just got a whole lot more delicious.
Frequently Asked Questions
Can I use boneless, skinless chicken thighs?
Yes, but the cooking time will be shorter — about 20-25 minutes at 400°F. The coating may not get quite as crispy without the skin, but it will still be delicious. Check for doneness at 165°F internal temperature.
Why did my coating fall off?
This usually happens for one of two reasons: the chicken wasn’t patted dry enough, or the coating wasn’t pressed on firmly. Make sure to really dry those thighs with paper towels, and press the coating into the chicken with your hands after shaking in the bag.
Can I make these ahead of time?
Absolutely! You can coat the chicken up to 24 hours in advance and keep it covered in the refrigerator. Let it come to room temperature for 20 minutes before baking. Or bake them fully, then reheat as directed in the storage section.
What’s the best way to reheat leftovers?
The oven is your friend here. Place leftover thighs on a wire rack over a baking sheet and warm at 375°F for 8-10 minutes. This restores the crispiness. Avoid the microwave — it will make the coating soft and soggy.
Can I use chicken breasts instead?
You can, but I recommend pounding them to an even thickness (about 1/2 inch) first. Boneless, skinless chicken breasts will cook in about 18-22 minutes at 400°F. Keep in mind that breasts are leaner and can dry out more easily, so watch the internal temperature carefully.
Pin This Recipe!
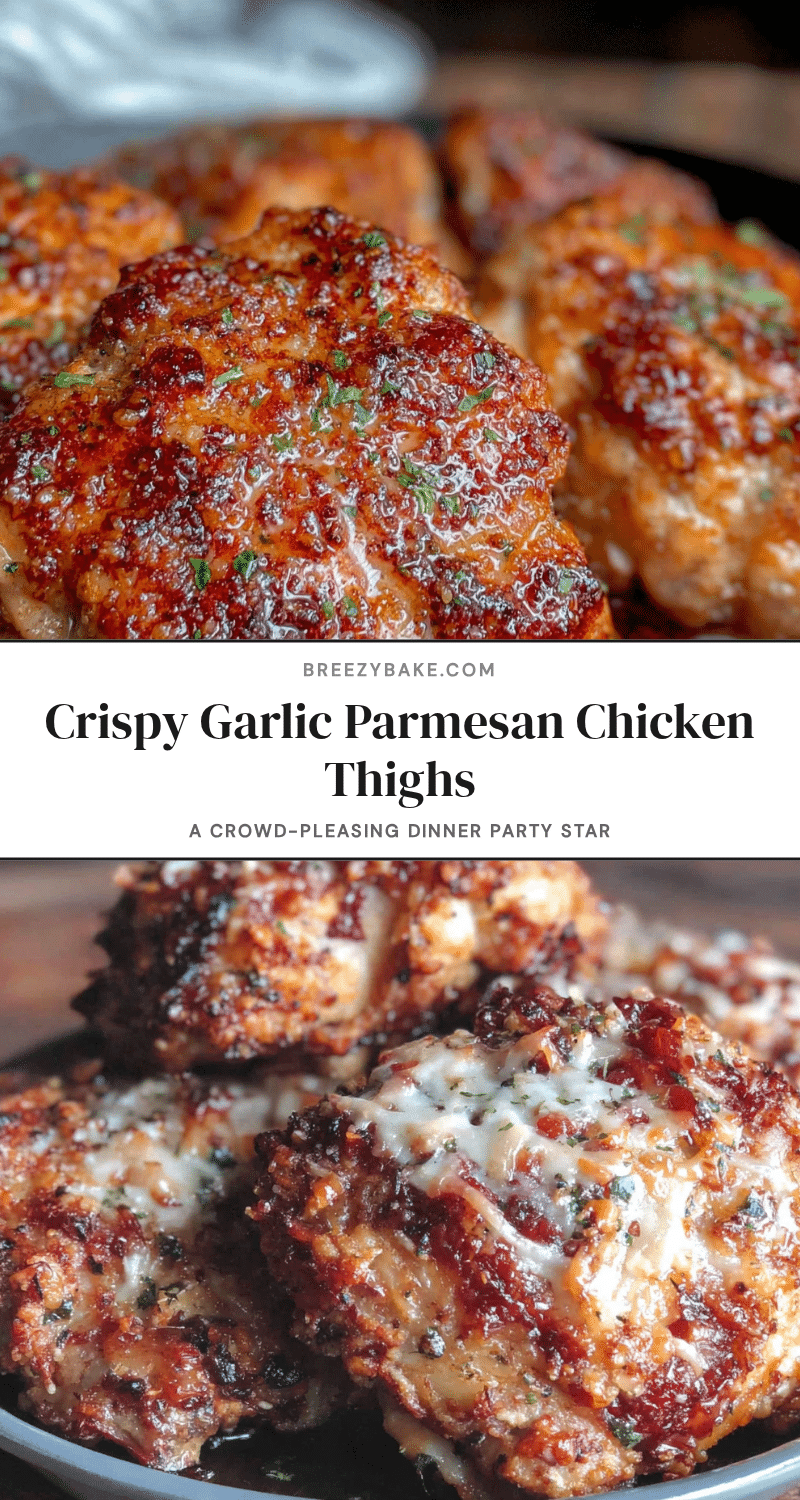
Crispy Garlic Parmesan Chicken Thighs: Easy Dinner Recipe
These Crispy Garlic Parmesan Chicken Thighs are a quick and easy dinner recipe with a shatteringly crisp crust, juicy meat, and a savory garlic-Parmesan coating. Perfect for dinner parties or weeknight meals, this dish comes together in under 45 minutes with simple ingredients.
- Prep Time: 10 minutes
- Cook Time: 35-40 minutes
- Total Time: 45 minutes
- Yield: 6 servings 1x
- Category: Main Course
- Cuisine: American
Ingredients
- 6 bone-in, skin-on chicken thighs (about 2.5 pounds total)
- 2 tablespoons olive oil
- 1 teaspoon fine sea salt
- 1/2 teaspoon freshly ground black pepper
- 1 cup panko breadcrumbs
- 1/2 cup freshly grated Parmesan cheese
- 4 cloves garlic, minced
- 1 teaspoon dried Italian seasoning
- 1/2 teaspoon paprika
- 1/4 teaspoon garlic powder
- 2 tablespoons fresh parsley, chopped (for garnish)
- Lemon wedges (for serving)
- Extra grated Parmesan (for garnish)
Instructions
- Preheat your oven to 400°F (200°C). Line a baking sheet with parchment paper and place a wire rack on top if using.
- Pat the chicken thighs dry with paper towels to remove excess moisture. Season both sides with salt and pepper.
- In a large resealable plastic bag, combine panko breadcrumbs, grated Parmesan, minced garlic, Italian seasoning, paprika, and garlic powder. Seal and shake to mix.
- Drizzle olive oil over the seasoned chicken thighs and rub in with your hands to coat evenly. Place each thigh in the bag with the coating mixture, seal, and shake vigorously until thoroughly coated. Press any extra coating onto the thighs with your fingers.
- Arrange the coated thighs on the prepared baking sheet (on the wire rack or directly on parchment), skin side up, making sure they are not touching.
- Bake for 35-40 minutes, until the internal temperature reaches 165°F (74°C) at the thickest part and the coating is deep golden brown and crispy. If browning too quickly at 20 minutes, tent loosely with foil.
- Let rest for 5 minutes before serving to allow juices to redistribute and coating to set.
- Garnish with fresh parsley and extra Parmesan. Serve with lemon wedges for squeezing over the top.
Notes
Pat the chicken thighs very dry for maximum crispiness. Use freshly grated Parmesan for best results. If coating browns too quickly, tent with foil. Let chicken come to room temperature for 20 minutes before baking for even cooking. For extra crispy bottoms, use a wire rack or flip halfway through.
Nutrition
- Serving Size: 1 thigh
- Calories: 385
- Sugar: 1
- Sodium: 520
- Fat: 24
- Saturated Fat: 7
- Carbohydrates: 8
- Fiber: 1
- Protein: 32
Keywords: crispy garlic parmesan chicken thighs, easy dinner recipe, baked chicken thighs, garlic parmesan chicken, dinner party chicken