Jen wasn’t trying to impress anyone. I’d stopped by to drop off a book I’d borrowed, and the smell hit me before I even got past her screen door. It was that deep, savory, slightly sweet aroma of onions and garlic hitting hot oil, mixed with something rich and meaty. I stood there for a second, just breathing it in, while she yelled for me to come in and shut the door — the flies were getting in.
I found her in the kitchen, wearing an old t-shirt with a hole in the collar, stirring a big skillet with a wooden spoon that looked like it had seen a decade of service. She glanced up, shrugged, and said, “It’s just dinner. Ground beef and rice. The kids love it.” She said it like it was nothing — like she hadn’t just created a cloud of pure comfort that made my stomach growl loud enough for her to hear. She laughed and handed me a fork.
That first bite was a revelation. It wasn’t fancy. It was just… perfect. The rice was tender, soaked in a lightly seasoned tomato broth. The beef was browned and crumbly, mixed with melty cheddar that stretched with every pull of the fork. It was the kind of meal that makes you close your eyes without thinking about it. I asked her for the recipe, and she scribbled it on a napkin. I’ve been making it ever since, and honestly, it’s become my go-to for those nights when I have zero energy but still want something that tastes like a hug. Maybe you’ve been there — staring into the fridge, too tired to think, but needing something real. This is that recipe.
Why You’ll Love This Recipe
This isn’t just another weeknight dinner. It’s the one you’ll turn to again and again because it actually delivers on every promise. I’ve tested this version at least a dozen times, tweaking the liquid ratio, the cheese amount, and the seasoning until it was just right.
- Quick & Easy: From start to finish, this meal is on the table in about 20 minutes. Seriously. It’s faster than ordering takeout and waiting for it to arrive.
- Simple Ingredients: You probably have most of these things in your pantry and fridge right now. No fancy trips to a specialty store required.
- Perfect for Weeknights: This is the definition of a busy-day meal. One skillet, minimal chopping, and almost no cleanup. It’s a lifesaver on a Tuesday.
- Crowd-Pleaser: My kids devour it. My husband asks for seconds. Even my picky neighbor, who “doesn’t really like casseroles,” asked for the recipe after I brought her a container.
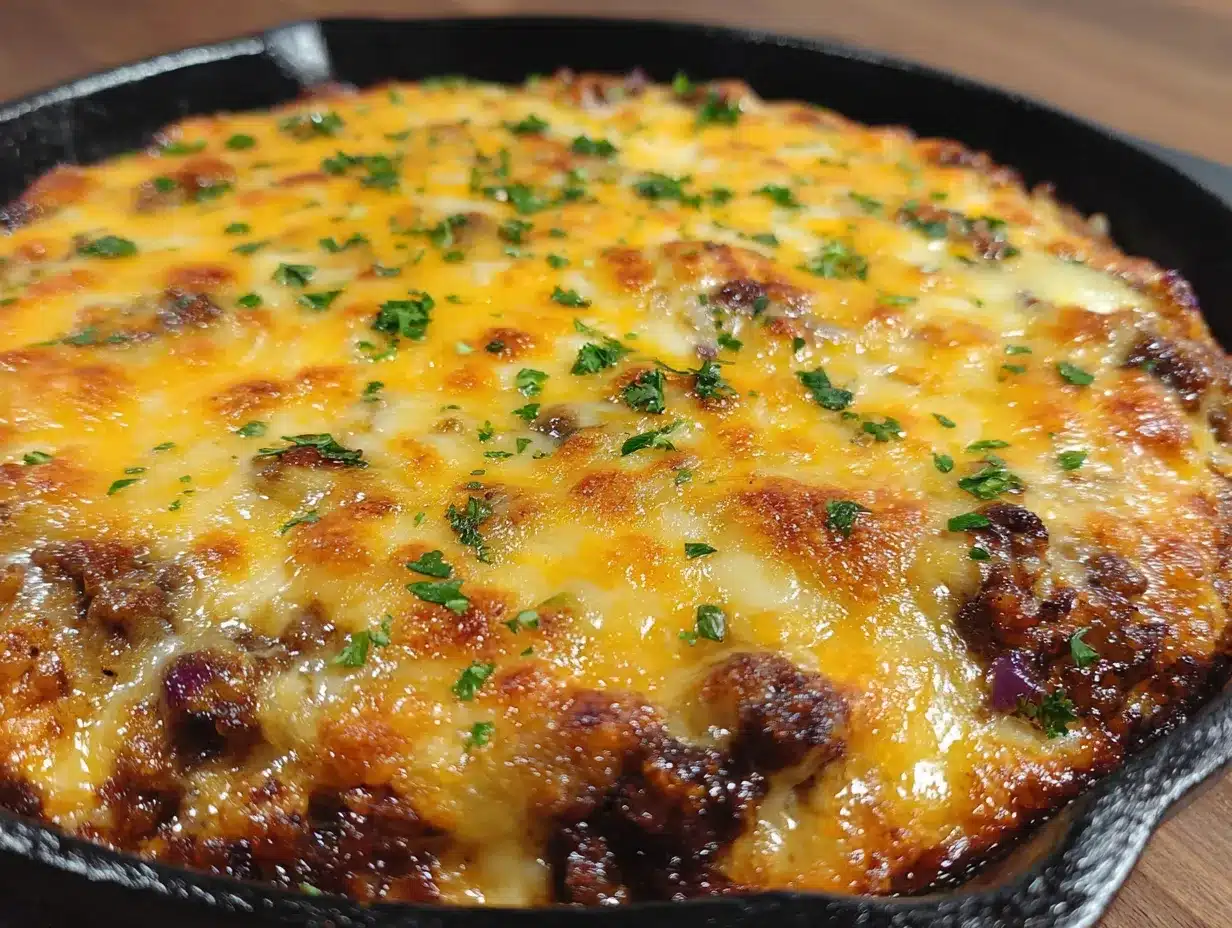
- Unbelievably Delicious: The texture is what gets me. The rice stays fluffy, the beef is savory, and the cheese creates this creamy, slightly crispy edge where it hits the pan. It’s comfort food at its finest.
What makes this version different? It’s the technique. Instead of cooking the rice separately, you cook it right in the skillet with the beef and broth. This lets the rice absorb all that beefy, savory flavor. It’s not just rice — it’s flavor-packed rice. Plus, using sharp cheddar instead of mild gives it a bolder, more satisfying taste. This isn’t just another recipe; it’s the best version of a classic.
What Ingredients You Will Need
This recipe relies on a handful of pantry staples that come together to create something truly special. Each ingredient has a job, and they all work in harmony to build that deep, comforting flavor.
- Ground Beef (1 lb / 450g): I use 80/20 ground beef for the best flavor. The fat renders down and helps brown the meat, creating that savory base. You can use leaner beef, but the final dish will be a little less rich.
- Long-Grain White Rice (1 cup / 200g): Don’t use Minute Rice or instant rice here — it will turn to mush. Long-grain rice, like jasmine or basmati, holds its shape perfectly and absorbs the broth beautifully. (I’ve found that jasmine rice gives the most fragrant result.)
- Beef Broth (2 cups / 480ml): This is the liquid that cooks the rice and builds the flavor. I recommend a low-sodium broth so you can control the salt level. Swanson’s is my go-to brand for consistent taste.
- Yellow Onion (1 medium): Diced finely, it melts into the background, adding sweetness and depth. A good, sharp knife makes this job quick.
- Garlic (3 cloves): Minced fresh. Pre-minced garlic from a jar works in a pinch, but fresh garlic really adds a punchy aroma that makes the whole kitchen smell amazing.
- Diced Tomatoes (1 can, 14.5 oz / 411g): I use fire-roasted diced tomatoes for a subtle smoky flavor. Don’t drain them — the liquid is part of the cooking liquid. If you only have regular diced tomatoes, add a pinch of smoked paprika to mimic that fire-roasted taste.
- Sharp Cheddar Cheese (1.5 cups / 170g, shredded): Sharp cheddar is non-negotiable for me. It has a stronger flavor than mild cheddar, so you get that cheesy taste without needing a mountain of it. Shred it yourself from a block — pre-shredded cheese has anti-caking agents that prevent it from melting smoothly.
- Chili Powder (1 tsp): This adds a warm, earthy background note. It’s not spicy, just flavorful.
- Cumin (1/2 tsp): Cumin brings a slightly nutty, warm flavor that pairs beautifully with the beef and tomatoes.
- Salt and Black Pepper (to taste): Essential for bringing all the flavors into focus.
- Olive Oil (1 tbsp): For sautéing the onion and garlic.
- Optional Garnish: Fresh parsley or green onions, chopped. It adds a pop of color and freshness that cuts through the richness.
Equipment Needed
You don’t need a lot of fancy tools for this one, which is part of the beauty of it. Here’s what you’ll need to get the job done.
- Large Skillet or Dutch Oven (12-inch / 30cm): A deep, wide skillet with a lid is ideal. You need room to brown the beef and cook the rice without it spilling over. I use my trusty cast-iron skillet, but a non-stick pan works great too. If you don’t have a lid, a piece of aluminum foil works in a pinch.
- Wooden Spoon or Spatula: For breaking up the ground beef and stirring everything together. A wooden spoon won’t scratch your pan.
- Sharp Knife and Cutting Board: For dicing the onion and mincing the garlic. A good knife makes prep feel effortless.
- Measuring Cups and Spoons: Accuracy matters for the liquid-to-rice ratio, so use proper measuring tools.
- Cheese Grater: If you’re shredding your own cheese (which you should!), a box grater is your best friend. It’s a cheap tool that makes a huge difference in texture.
Preparation Method
Alright, let’s get cooking. This whole process moves quickly, so I like to have all my ingredients prepped and measured before I turn on the heat. It makes the whole thing feel smooth and stress-free.
- Prep the Aromatics: Start by dicing your onion and mincing your garlic. Set them aside together. Measure out your rice, broth, and spices. Shred your cheddar cheese if you haven’t already. Having everything ready is the secret to a calm cooking experience.
- Brown the Beef: Place your large skillet over medium-high heat. Add the olive oil and let it shimmer for a second. Then, add the ground beef. Break it up with your wooden spoon and let it cook undisturbed for a few minutes to get a good sear. You want some deep brown color, not just gray meat. This browning is where a ton of flavor comes from. Cook until no longer pink, about 5-7 minutes. If there’s a lot of excess fat, spoon most of it out, leaving about a tablespoon in the pan.
- Sauté the Aromatics: Reduce the heat to medium. Add the diced onion to the pan with the beef. Cook for 2-3 minutes, stirring occasionally, until the onion starts to soften and turn translucent. The smell at this point is incredible. Add the minced garlic and cook for another 30 seconds until fragrant — be careful not to burn the garlic, or it will turn bitter.
- Add the Rice and Spices: Sprinkle the uncooked rice, chili powder, cumin, salt, and pepper over the beef and onion mixture. Stir everything together for about a minute. This toasts the rice slightly and wakes up the spices, making them more aromatic.
- Pour in the Liquids: Add the can of diced tomatoes (with their juices) and the beef broth to the skillet. Stir well to combine, scraping up any brown bits from the bottom of the pan — that’s pure flavor. Bring the mixture to a strong simmer.
- Simmer and Cook: Once it’s bubbling, reduce the heat to low, cover the skillet with a tight-fitting lid, and let it simmer gently for 15-18 minutes. Do not lift the lid during this time! The steam is what cooks the rice perfectly. Set a timer and walk away.
- Check the Rice: After 15 minutes, carefully remove the lid. The rice should be tender and most of the liquid should be absorbed. If it’s still a bit soupy, let it cook uncovered for another 2-3 minutes. If the rice is still hard, add a splash more broth or water, cover, and cook for another 3-5 minutes.
- Add the Cheese and Finish: Once the rice is perfect, remove the pan from the heat. Sprinkle the shredded cheddar cheese evenly over the top. Cover the skillet again for 1-2 minutes, just until the cheese is melted and gooey. Give it a final gentle stir to incorporate the cheese, or leave it on top for a beautiful, melty presentation.
- Rest and Serve: Let the skillet sit for about 5 minutes before serving. This allows the dish to set slightly, making it easier to serve. Garnish with fresh parsley or green onions if you’re feeling fancy, and dig in!
Cooking Tips & Techniques
Over the many times I’ve made this, I’ve picked up a few tricks that make the process even smoother and the result even better. Trust me, these little things matter.
- Don’t Skip the Toasting: That one minute you spend stirring the rice with the spices before adding the liquid? It’s worth it. It gives the rice a slightly nutty flavor and helps keep the grains separate. I learned this the hard way after a few mushy batches.
- Resist the Urge to Peek: I know it’s tempting to lift the lid and check on the rice, but don’t do it. Every time you lift the lid, you let steam escape, which can mess with the cooking time and leave you with crunchy rice. Trust the process and the timer.
- Use a Heavy Pan: A heavy-bottomed skillet, like cast iron or stainless steel, distributes heat more evenly than a thin non-stick pan. This prevents hot spots that can burn the rice on the bottom before the rest is cooked. I once used a flimsy pan and ended up with a scorched layer — not fun to clean up.
- Toast the Spices for Extra Depth: After you add the chili powder and cumin to the rice, let them sizzle in the hot pan for about 30 seconds before adding the liquid. This “blooming” technique intensifies their flavor dramatically. It’s a small step that makes a big difference.
- For a Crispy Cheese Edge: If you love that slightly crispy, browned cheese that forms around the edges of a skillet, don’t stir the cheese in completely. Leave a little around the perimeter of the pan before you cover it to melt. It creates little crunchy bits of cheese that are absolutely addictive.
Variations & Adaptations
This recipe is a fantastic base that’s easy to adapt to whatever you have on hand or whatever your family craves. Don’t be afraid to play around with it.
- Spicy Southwest Style: Add a drained can of black beans and a can of corn (drained) along with the tomatoes and broth. Use pepper jack cheese instead of cheddar and add a diced jalapeño with the onion. A squeeze of lime juice at the end brightens everything up.
- Cheesy Taco Rice: Swap the chili powder and cumin for a packet of taco seasoning. Use Mexican blend cheese. Serve with your favorite taco toppings like sour cream, salsa, and sliced avocado. It’s like a deconstructed taco bowl in one pan.
- Low-Carb / Keto Version: Replace the white rice with cauliflower rice. You’ll need to adjust the liquid — use only 1 cup of broth instead of 2, and cook for only 5-7 minutes covered, until the cauliflower is tender. The texture is different, but the flavor is still fantastic.
- Vegetarian Version: Substitute the ground beef with a plant-based ground meat substitute or two cans of drained and rinsed black beans. Use vegetable broth instead of beef broth. The cooking time remains the same.
- Add More Veggies: This is a great way to use up leftover vegetables. Diced bell peppers, zucchini, or mushrooms can be sautéed along with the onion. Stir in a handful of spinach right at the end, just before adding the cheese, until it wilts.
Serving & Storage Suggestions
This dish is wonderfully versatile when it comes to serving and storing. It’s just as good the next day, which makes it perfect for meal prep.
- Serving Temperature: Serve it hot, straight from the skillet. The cheese should be melty and the rice steaming. A final sprinkle of fresh herbs really makes it pop.
- Presentation: For a casual weeknight, just serve it in bowls. If you want to be a little more presentable, spoon it onto a platter and top with extra cheese, a dollop of sour cream, and some chopped green onions.
- Complementary Dishes: This skillet is a complete meal on its own, but it pairs beautifully with a simple side salad dressed with a tangy vinaigrette to cut the richness. A side of steamed broccoli or roasted green beans also works wonderfully.
- Storage: Let any leftovers cool completely before transferring them to an airtight container. It will keep in the refrigerator for up to 4 days. The flavors actually meld together overnight, making it taste even better the next day.
- Reheating: The best way to reheat this is in a skillet over medium-low heat with a splash of water or broth to loosen it up. Stir occasionally until heated through. You can also microwave it in 30-second bursts, stirring in between, but the stovetop method gives you a better texture.
- Freezing: This dish freezes surprisingly well. Portion it into freezer-safe containers or zip-top bags. It will keep for up to 3 months. Thaw overnight in the refrigerator before reheating on the stovetop.
Nutritional Information & Benefits
This is a hearty, filling meal, but it also has some nutritional wins that make you feel a little better about that second helping. Here’s a rough estimate per serving (based on 6 servings).
- Estimated Nutritional Values (per serving): Calories: 480, Fat: 22g, Saturated Fat: 10g, Cholesterol: 90mg, Sodium: 680mg, Carbohydrates: 40g, Fiber: 3g, Sugar: 5g, Protein: 30g.
- Protein Power: The ground beef provides a solid dose of high-quality protein, which is great for muscle repair and keeping you full and satisfied.
- Iron and B Vitamins: Beef is an excellent source of heme iron (the type your body absorbs easily) and B vitamins, especially B12, which is crucial for energy and nerve function.
- Lycopene from Tomatoes: The diced tomatoes are rich in lycopene, a powerful antioxidant linked to heart health. Cooking the tomatoes actually makes the lycopene more available for your body to use.
- Calcium from Cheese: The cheddar cheese adds a good amount of calcium for strong bones and teeth.
- Dietary Considerations: This recipe is naturally nut-free and egg-free. To make it gluten-free, simply ensure your beef broth is certified gluten-free (most are).
Conclusion
This Easy Cheesy Ground Beef and Rice Skillet is more than just a quick dinner — it’s a reliable friend on a busy night. It’s the recipe I turn to when I’m short on time, low on energy, but still want to feed my family something that feels like a real meal. The combination of savory beef, tender rice, and melty cheese is just pure comfort.
I really hope you give this one a try. Don’t be afraid to make it your own — throw in some extra veggies, spice it up, or use a different cheese. The best recipes are the ones that adapt to your life. Let me know how it turns out for you in the comments below. Did you add a secret ingredient? Did your kids ask for seconds? I’d love to hear your stories. Happy cooking, and remember — dinner doesn’t have to be complicated to be absolutely wonderful.
Frequently Asked Questions
Can I use brown rice instead of white rice?
You can, but you’ll need to adjust the cooking time and liquid. Brown rice takes longer to cook (about 40-45 minutes) and needs more liquid (about 2.5 cups of broth). You’ll also need to simmer it covered for much longer. For the quick 20-minute version, stick with white rice.
What if my rice is still hard after 18 minutes?
Don’t panic! Add a splash of beef broth or water — about 1/4 cup — to the skillet. Cover it again and let it simmer on low for another 5-7 minutes. Check it again. The extra steam and liquid should finish cooking the rice. This can happen if your heat was too low or your lid wasn’t sealed tightly.
Can I make this in a slow cooker or Instant Pot?
Yes! For an Instant Pot, use the sauté function to brown the beef and onions, then add the remaining ingredients (except the cheese). Cook on high pressure for 5 minutes, then do a natural release for 10 minutes. For a slow cooker, brown the beef first, then add everything (use 2.5 cups broth) and cook on low for 4-5 hours. Stir in the cheese at the end.
How do I prevent the rice from getting mushy?
The key is the rice-to-liquid ratio and not overcooking it. Use 1 cup of long-grain rice to 2 cups of broth (plus the liquid from the tomatoes). Make sure your heat is on low once you cover the pan. A vigorous boil can break down the rice starch too quickly, leading to a mushy texture.
Can I use ground turkey or chicken instead of beef?
Absolutely. Ground turkey or chicken works great as a leaner option. Because they are leaner, you may need to add a tablespoon of olive oil to the pan before browning to prevent sticking. The flavor will be a little milder, so you might want to add an extra pinch of chili powder or cumin to boost the taste.
Pin This Recipe!
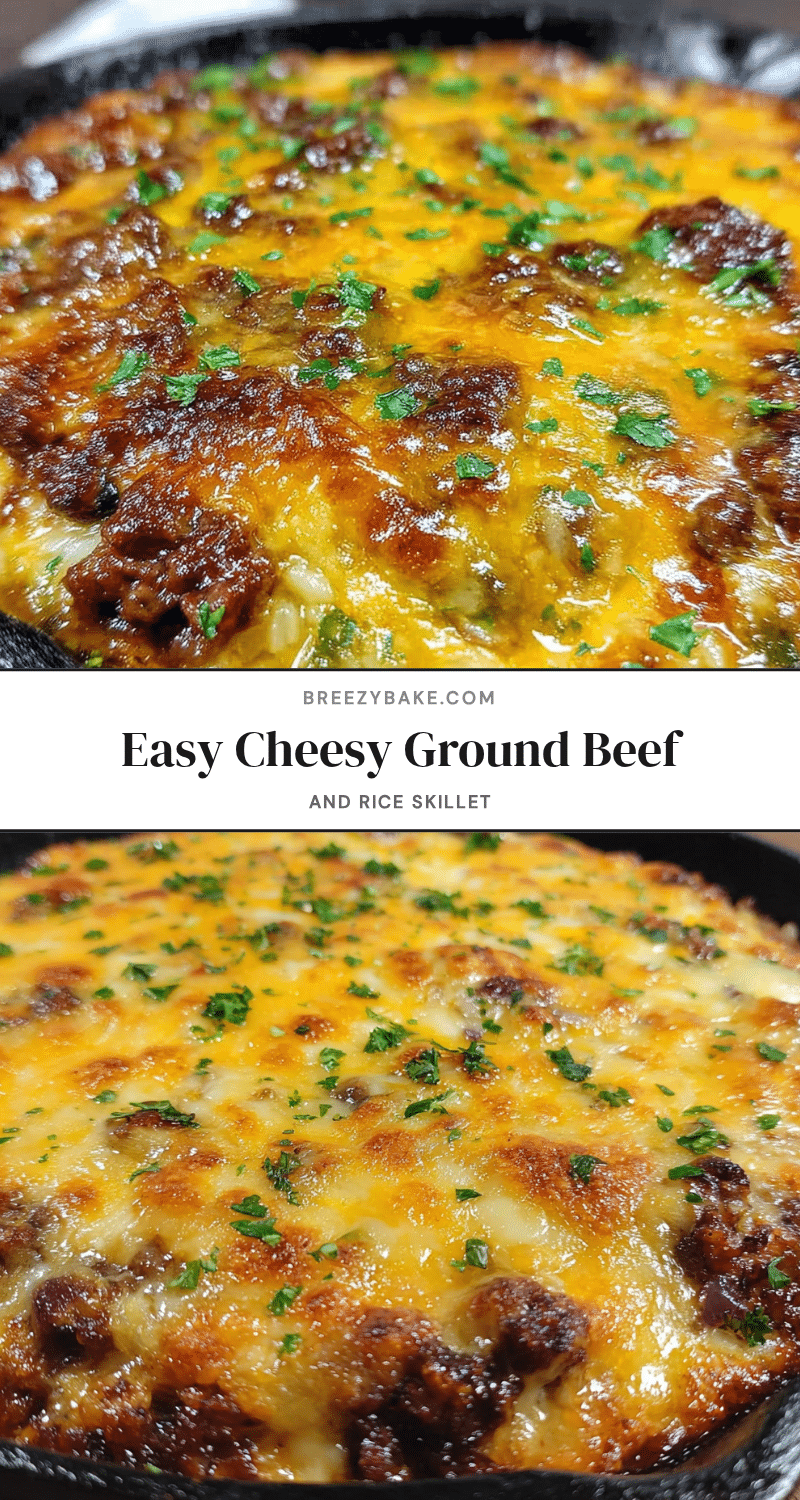
Easy Cheesy Ground Beef and Rice Skillet: Best 20-Minute Dinner

This quick and easy one-skillet dinner features savory ground beef, tender rice, and melty cheddar cheese, all cooked together in a flavorful tomato broth. It’s the perfect weeknight meal that comes together in just 20 minutes.
- Prep Time: 5 minutes
- Cook Time: 15 minutes
- Total Time: 20 minutes
- Yield: 6 servings 1x
- Category: Main Course
- Cuisine: American
Ingredients
- 1 lb (450g) ground beef (80/20)
- 1 cup (200g) long-grain white rice (jasmine or basmati)
- 2 cups (480ml) low-sodium beef broth
- 1 medium yellow onion, diced
- 3 cloves garlic, minced
- 1 can (14.5 oz / 411g) fire-roasted diced tomatoes, undrained
- 1.5 cups (170g) sharp cheddar cheese, shredded
- 1 tsp chili powder
- 1/2 tsp cumin
- Salt and black pepper to taste
- 1 tbsp olive oil
- Optional: fresh parsley or green onions for garnish
Instructions
- Prep the aromatics: dice the onion and mince the garlic. Measure out the rice, broth, and spices. Shred the cheddar cheese.
- Place a large skillet over medium-high heat. Add olive oil and let it shimmer. Add ground beef and break it up with a wooden spoon. Cook undisturbed for a few minutes to get a good sear, then cook until no longer pink, about 5-7 minutes. Spoon out excess fat, leaving about 1 tablespoon in the pan.
- Reduce heat to medium. Add diced onion and cook for 2-3 minutes until softened and translucent. Add minced garlic and cook for 30 seconds until fragrant.
- Sprinkle uncooked rice, chili powder, cumin, salt, and pepper over the beef and onion mixture. Stir for about 1 minute to toast the rice and spices.
- Add the can of diced tomatoes (with juices) and beef broth. Stir well, scraping up any brown bits from the bottom. Bring to a strong simmer.
- Reduce heat to low, cover with a tight-fitting lid, and simmer gently for 15-18 minutes. Do not lift the lid during this time.
- After 15 minutes, carefully remove the lid. The rice should be tender and most liquid absorbed. If still soupy, cook uncovered for 2-3 minutes. If rice is still hard, add a splash of broth or water, cover, and cook for another 3-5 minutes.
- Once rice is perfect, remove pan from heat. Sprinkle shredded cheddar cheese evenly over the top. Cover for 1-2 minutes until cheese is melted and gooey. Stir gently to incorporate or leave on top for presentation.
- Let the skillet rest for about 5 minutes before serving. Garnish with fresh parsley or green onions if desired.
Notes
For best results, use long-grain white rice (not instant). Do not lift the lid while the rice is simmering. For a crispy cheese edge, leave some cheese around the perimeter of the pan before covering to melt. Leftovers can be stored in an airtight container in the refrigerator for up to 4 days or frozen for up to 3 months.
Nutrition
- Serving Size: 1 serving (based on
- Calories: 480
- Sugar: 5
- Sodium: 680
- Fat: 22
- Saturated Fat: 10
- Carbohydrates: 40
- Fiber: 3
- Protein: 30
Keywords: ground beef, rice, skillet dinner, cheesy, quick dinner, weeknight meal, comfort food