My neighbor Frank is a retired accountant who wears the same style of white button-down shirt every single day. I’m not sure he owns anything else. So when he showed up at my door holding a tiny ramekin of what looked like pumpkin pie filling, I honestly thought he’d lost his mind. “Try this,” he said, thrusting it toward me with the intensity of a man who had just cracked the Da Vinci Code. “No crust. All flavor. My wife hates making pie crust, so I fixed it.”
I took a bite standing right there in my doorway, and let me tell you—I nearly dropped the dish. It was rich, velvety, and tasted like autumn had been condensed into a single spoonful. Frank, the man who spends his weekends balancing checkbooks for fun, had accidentally created the most requested dessert I now bring to every single dinner party. I mean, who saw that coming? Not me. Maybe you’ve been there—the last person you’d expect to revolutionize your recipe collection turns out to be a kitchen genius in disguise.
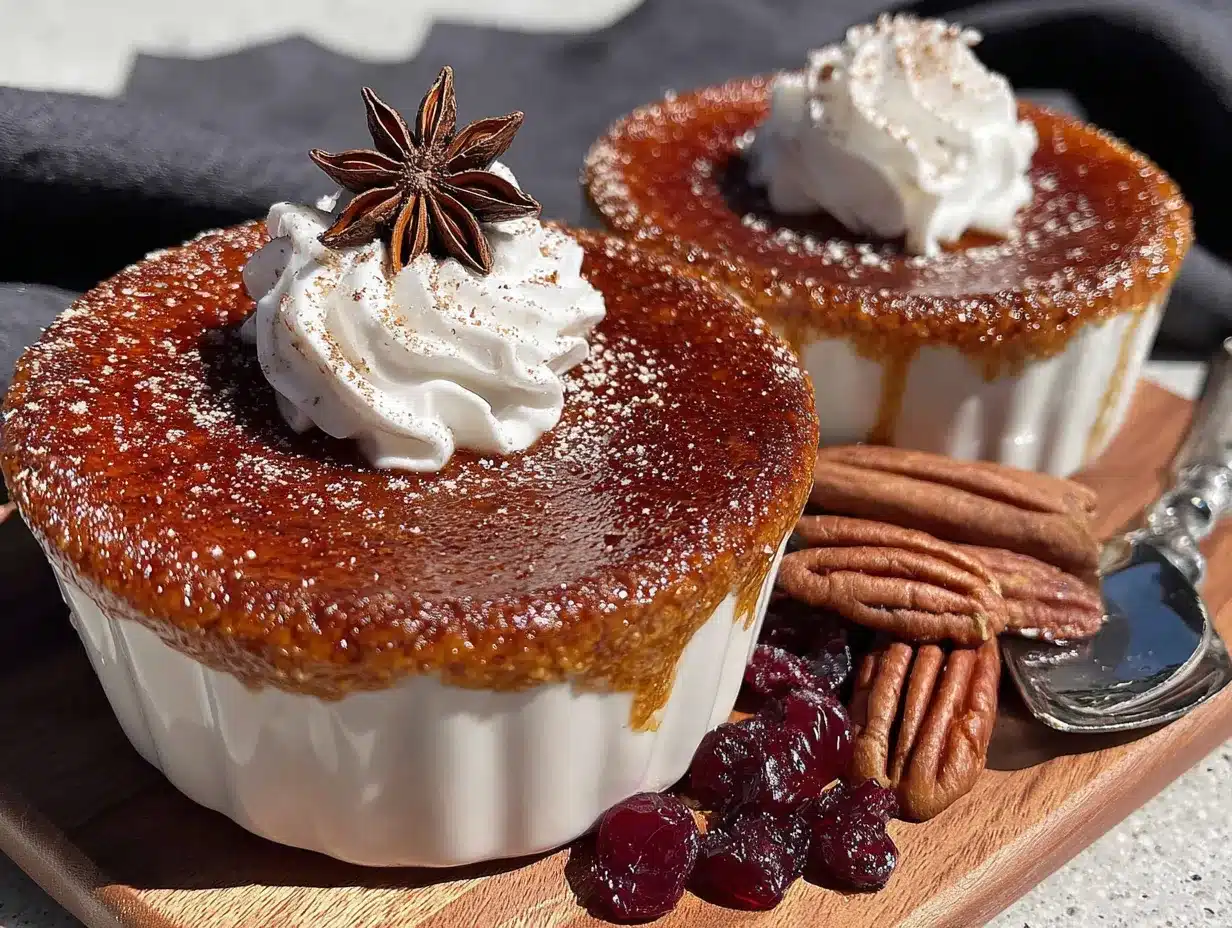
These crustless pumpkin pie custard cups are exactly what they sound like: all the creamy, spiced goodness of traditional pumpkin pie, minus the fuss of rolling out dough. They bake up in individual portions, which makes them perfect for hosting. No slicing, no fighting over the corner piece, no crust-related drama. Just pure, silky pumpkin custard that practically melts on your tongue. I’ve been making these for every gathering since that day, and they always disappear faster than anything else on the dessert table. Honestly, I don’t think Frank has any idea what a monster he created.
Why You’ll Love This Recipe
Let me save you some time and tell you straight up—this is the dessert that makes you look like a hero with almost zero effort. I’ve tested this recipe at least a dozen times across different ovens, different pumpkin brands, and even different ramekin sizes. It works every single time, and here’s why it’s become my go-to for every gathering.
- No Crust, No Stress : Skip the rolling, chilling, and blind baking. These custard cups go from mixing bowl to oven in under ten minutes. Your guests will never miss the crust—I promise.
- Perfect for Hosting : Individual servings mean no awkward slicing at the table. Just grab a ramekin and go. They’re also easy to prep the night before, so you’re not scrambling while your guests are sipping wine.
- Simple Ingredients : You probably already have everything in your pantry and fridge right now. Canned pumpkin, eggs, cream, sugar, and those classic pumpkin pie spices.
- Crowd-Pleaser Every Time : I’ve served these at Thanksgiving, Friendsgiving, casual potlucks, and even a birthday party where someone specifically requested “that pumpkin thing.” They get devoured by kids and adults alike.
- Unbelievably Creamy Texture : The secret is in the ratio—enough eggs to set the custard, enough cream to keep it silky, and just the right amount of spice to make you close your eyes after the first bite.
What makes this recipe different from every other pumpkin custard out there? It’s the texture, honestly. Most recipes end up either too eggy or too loose. I spent weeks tweaking the proportions until I landed on that perfect jiggle—firm enough to hold its shape, soft enough to feel luxurious on your tongue. It’s comfort food reimagined for the modern host who wants to impress without spending all day in the kitchen.
What Ingredients You Will Need
This recipe uses simple, wholesome ingredients that work together to create that signature silky texture and warm, spiced flavor. Nothing fancy here—just pantry staples that deliver big results. Here’s what you’ll need and why each ingredient matters.
For the Custard Base
- 1 can (15 ounces) pumpkin puree (not pumpkin pie filling—look for 100% pure pumpkin, I prefer Libby’s for consistent texture)
- 3 large eggs, at room temperature (cold eggs can make the custard lumpy, so let them sit out for 20 minutes)
- 1 cup heavy cream (or half-and-half for a lighter version, but full cream gives the best richness)
- ½ cup packed light brown sugar (dark brown works too, it just adds deeper molasses notes)
- ¼ cup granulated sugar (balances the brown sugar and helps with structure)
- 1 teaspoon vanilla extract (pure vanilla makes a difference, but imitation works in a pinch)
For the Spice Blend
- 2 teaspoons pumpkin pie spice (store-bought is fine, but I’ll share my homemade blend below)
- ½ teaspoon ground cinnamon (I add extra because I’m a cinnamon fanatic)
- ¼ teaspoon ground ginger (adds a little warmth without overpowering)
- ¼ teaspoon salt (don’t skip this—it makes all the flavors pop)
- ⅛ teaspoon ground cloves (optional, but I love that tiny punch of depth)
For Topping (Optional but Recommended)
- Whipped cream or coconut whipped cream for serving
- A light dusting of cinnamon or nutmeg for presentation
A quick note on the pumpkin puree: I’ve tried several brands, and Libby’s consistently gives the smoothest, most reliable results. Some store brands can be watery or stringy, which throws off the custard texture. If you’re using a generic brand, drain off any excess liquid before measuring. You want that puree thick and concentrated.
For the spice blend, if you don’t have pumpkin pie spice on hand, just mix 1 teaspoon cinnamon, ½ teaspoon nutmeg, ¼ teaspoon ginger, and ¼ teaspoon allspice. That’s essentially what’s in the store-bought stuff anyway. I sometimes make a double batch and keep it in a jar—it’s great for coffee, oatmeal, and obviously all things pumpkin.
Equipment Needed
You don’t need a fancy kitchen to pull these off. Here’s what I use every time I make these custard cups.
- Six 6-ounce ramekins (or eight 4-ounce ones for smaller portions—adjust baking time slightly)
- A large mixing bowl and a whisk (no electric mixer needed, which means less cleanup)
- A liquid measuring cup for the cream
- A fine-mesh strainer (optional but helpful for catching any egg bits)
- A baking dish large enough to hold the ramekins (for the water bath)
- A kettle or pot for hot water
If you don’t have ramekins, you can use a standard muffin tin—just grease it well and reduce the baking time by about 5 minutes. I’ve also used small oven-safe ceramic bowls in a pinch. The key is even heat distribution, so avoid glass if you can. I learned that the hard way when a glass dish cracked in the water bath. Stick with ceramic or porcelain ramekins for the best results.
One tip: if you’re making these for a party and only have four ramekins, just bake in batches. The custard mixture keeps fine in the fridge for a day. I’ve done this plenty of times when hosting larger groups.
Preparation Method
Alright, let’s get to the good part. I’m going to walk you through this step by step, including all the little things I’ve learned from making these more times than I can count.
- Preheat your oven to 325°F (163°C). Place your ramekins in a large baking dish. I use a 9×13-inch dish for six ramekins—they fit perfectly with a little space between each one.
- In your large mixing bowl, whisk together the pumpkin puree and both sugars until smooth. This takes about a minute. You want to break up any clumps of brown sugar. I press them against the side of the bowl with the back of my whisk.
- Add the eggs one at a time, whisking well after each addition. This is important—if you dump all three in at once, you’ll be chasing egg white strands around the bowl. I learned this the messy way. Whisk until the mixture looks glossy and uniform.
- Pour in the heavy cream and vanilla extract. Whisk gently until fully incorporated. Don’t go crazy here—over-whisking can incorporate too much air, which creates bubbles on top of your custard. You want it smooth, not frothy.
- Add all the spices and salt. Whisk one more time until everything is evenly distributed. Give the bottom of the bowl a scrape with a spatula to make sure no spices are hiding down there.
- For the smoothest custard, pour the mixture through a fine-mesh strainer into a clean bowl or large measuring cup. This catches any stray egg bits or spice clumps. I don’t always do this step, but when I’m serving guests, it’s worth the extra 30 seconds.
- Divide the custard evenly among your ramekins. I use a ¼-cup measuring scoop and give each ramekin about ½ cup of mixture. Leave about ¼ inch of space at the top—they’ll puff up slightly as they bake.
- Pour hot water into the baking dish until it reaches about halfway up the sides of the ramekins. Use water from a kettle or tap—just make sure it’s hot, not boiling. Be careful not to splash water into the custard. I pour slowly against the side of the dish.
- Carefully transfer the baking dish to the oven. Bake for 35 to 40 minutes, or until the edges are set and the centers jiggle slightly when you gently shake a ramekin. They should look like firm Jell-O—not liquid, but not stiff either.
- Remove from the oven and let the ramekins sit in the water bath for 5 minutes. Then transfer them to a wire rack to cool completely. The custard will continue setting as it cools.
- Once cool, cover each ramekin with plastic wrap and refrigerate for at least 4 hours. Overnight is even better. I know it’s hard to wait, but cold custard has a much better texture—firm, creamy, and perfectly sliceable with a spoon.
A note on timing: the total active time is about 15 minutes. The rest is just baking and chilling. I usually make these the morning of a dinner party and let them chill all day. By the time guests arrive, I just pull them out, add a dollop of whipped cream, and I’m done.
Cooking Tips & Techniques
After making these custard cups more times than I care to count, I’ve collected a few tricks that make the difference between good and unforgettable. Let me save you from my mistakes.
The water bath is non-negotiable. I tried skipping it once because I was in a hurry. Big mistake. The custards came out with rubbery edges and weird craters on top. The water bath creates gentle, even heat that keeps the custard silky. Don’t skip it, and don’t skimp on the water level—halfway up the ramekins is the sweet spot.
Watch for the jiggle. Overbaking is the number one killer of good custard. You want the centers to wobble like a relaxed belly laugh, not slosh like soup. If you insert a knife near the edge and it comes out clean but the center still jiggles, you’re perfect. Pull them out immediately.
Room temperature ingredients matter. I know, I know—nobody remembers to take eggs out ahead of time. But cold ingredients don’t emulsify properly, and you end up with a slightly grainy texture. If you’re in a rush, place the eggs in a bowl of warm water for 5 minutes. Works like a charm.
Don’t over-whisk. I did this the first three times and wondered why my custards had bubbles on top. Gentle, steady whisking is all you need. You’re combining ingredients, not aerating them. If you see bubbles forming, let the mixture rest for 5 minutes before pouring.
Let them chill completely. I know it’s tempting to dig in while they’re warm, but warm custard is loose and messy. Cold custard is firm, creamy, and actually tastes more pumpkin-y. The flavors need time to meld. Trust the process.
Variations & Adaptations
One of the best things about this recipe is how flexible it is. I’ve played around with different versions depending on who’s coming over and what’s in my pantry. Here are some of my favorites.
Dairy-Free Version : Swap the heavy cream for full-fat coconut cream (the kind in a can, not the refrigerated carton). Use a dairy-free milk like oat or almond for thinning if needed. The coconut adds a subtle tropical note that pairs surprisingly well with pumpkin spice. I served this at a Friendsgiving and nobody guessed it was dairy-free.
Maple Pumpkin Custard : Replace the brown sugar with ⅓ cup pure maple syrup and reduce the cream by 2 tablespoons to compensate for the extra liquid. The maple flavor is incredible with the pumpkin and spices. I make this version for fall brunches and it always gets compliments.
Chocolate Pumpkin Twist : Add 2 tablespoons of unsweetened cocoa powder to the spice mixture and increase the brown sugar to ⅔ cup. The chocolate and pumpkin combo sounds weird but trust me—it’s amazing. My niece calls these “pumpkin brownie cups” and requests them every year.
Keto-Friendly Option : Use a sugar substitute like monk fruit or erythritol in place of both sugars. Replace the cream with full-fat coconut cream. The texture is slightly less creamy but still very satisfying. I’ve made these for low-carb friends and they were thrilled.
Spice It Up : Add a pinch of cayenne pepper or chipotle powder to the spice blend for a sweet-heat kick. I tried this on a whim and now it’s my secret weapon for adult gatherings. The heat sneaks up on you after the sweetness fades.
Serving & Storage Suggestions
These custard cups are made for entertaining, so let’s talk about how to serve them like a pro.
Serving Temperature : Always serve cold, straight from the fridge. The texture is perfect at about 40°F. If you’ve chilled them overnight, let them sit at room temperature for 10 minutes before serving to take the chill off—but no longer, or they’ll start to sweat.
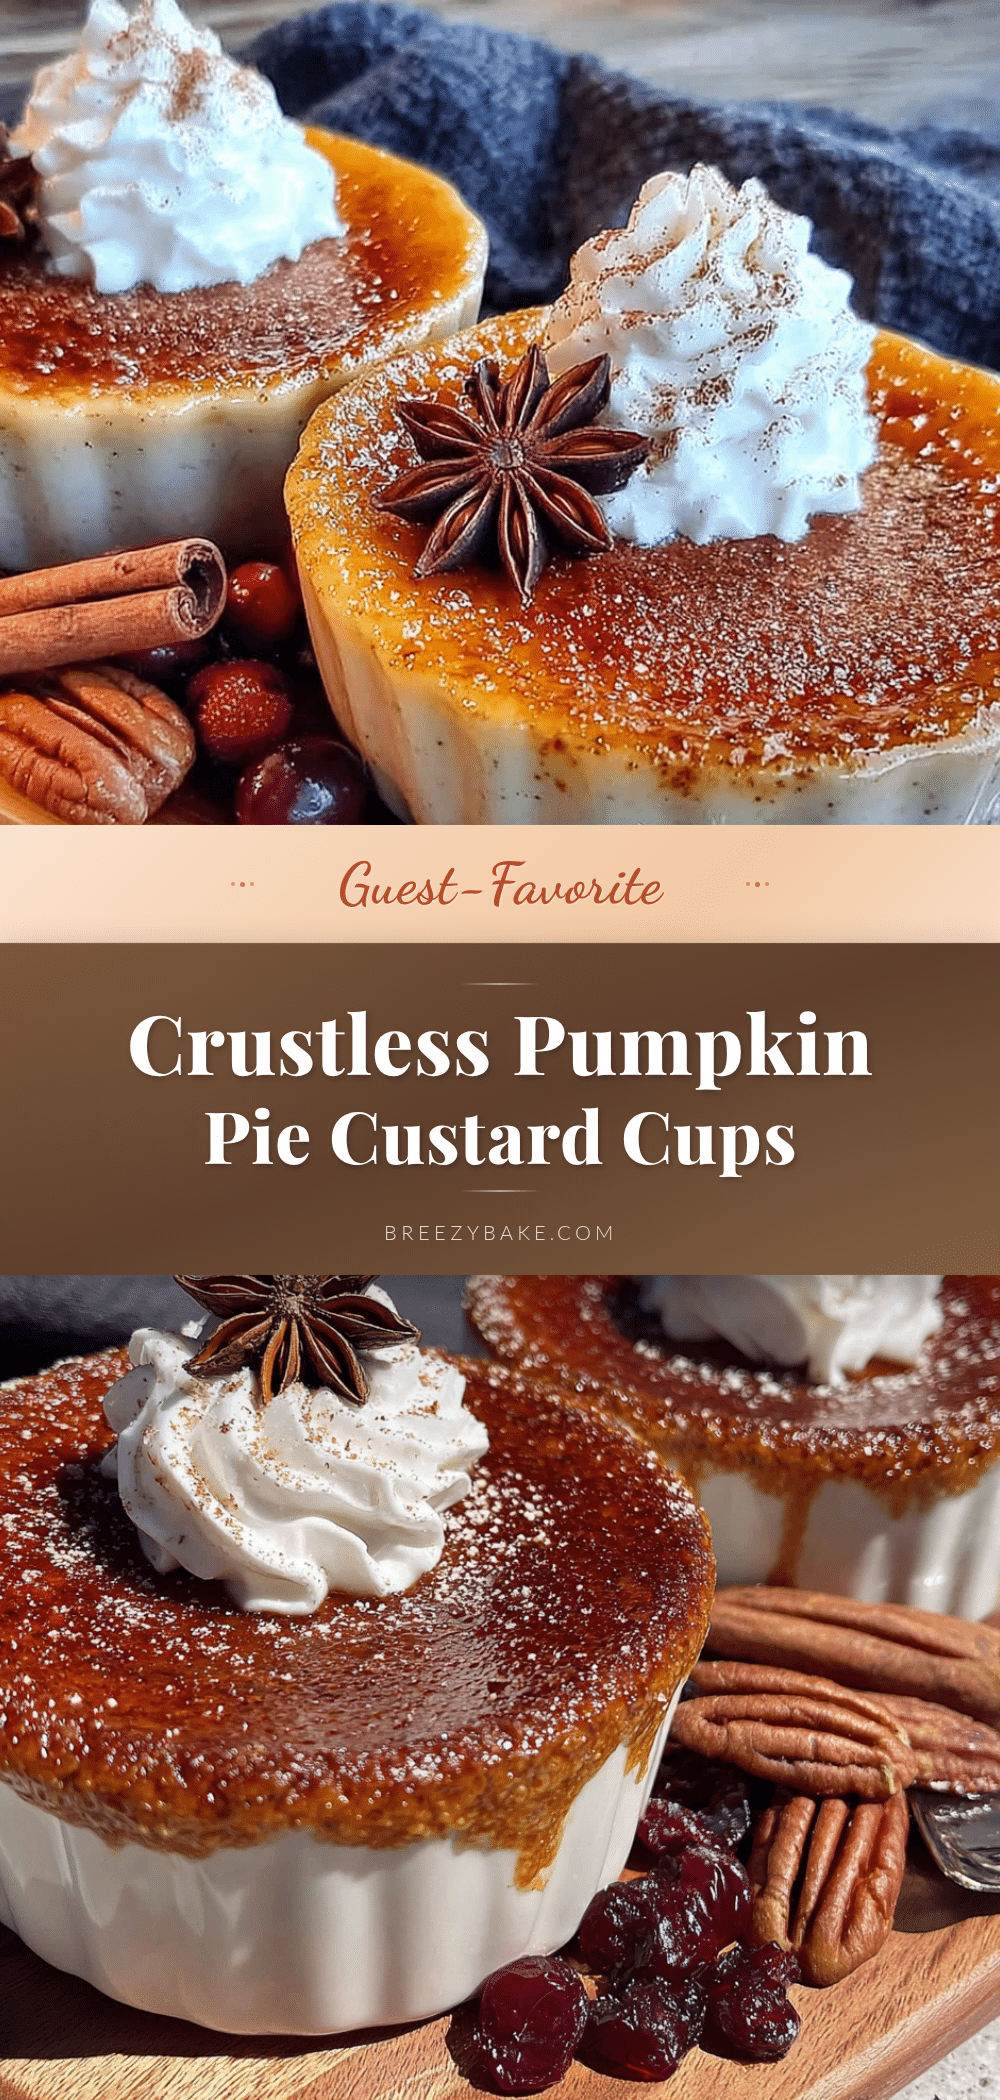
Presentation Tips : Top each ramekin with a generous swirl of whipped cream. I use a piping bag for a clean look, but a spoon works fine too. Dust with cinnamon or nutmeg, and add a small cinnamon stick or star anise for a visual pop. Place the ramekins on a wooden board or slate platter for that rustic-chic vibe.
What to Serve Alongside : These pair beautifully with a scoop of vanilla ice cream or a drizzle of caramel sauce. For a full dessert spread, serve alongside apple crisp, pecan bars, or a simple chocolate tart. Coffee, spiced cider, or a dessert wine like Muscat are perfect drink pairings.
Storage : Cover each ramekin tightly with plastic wrap or transfer custards to an airtight container. They’ll keep in the fridge for up to 5 days. The texture actually improves after day one as the flavors meld. Do not freeze—the custard gets watery and grainy when thawed.
Reheating : Honestly, I don’t recommend reheating these. They’re designed to be served cold. But if you absolutely must, microwave on low power for 15 seconds and eat immediately. The texture won’t be as nice, but the flavor is still there.
Make-Ahead Magic : These are perfect for prepping the day before your event. Bake, cool, cover, and refrigerate. On party day, just add toppings right before serving. I’ve done this for Thanksgiving, Christmas, and multiple dinner parties. It’s the ultimate stress-free dessert.
Nutritional Information & Benefits
I’m not a nutritionist, but I’ve done the math on these little cups of joy. Here’s what you’re looking at per serving (one 6-ounce ramekin, without whipped cream).
Estimated Nutrition Per Serving
- Calories: 245
- Fat: 16g (10g saturated)
- Carbohydrates: 23g (18g sugar)
- Protein: 5g
- Fiber: 2g
- Sodium: 210mg
Pumpkin is the star here, and it brings serious health benefits to the table. It’s packed with vitamin A (over 200% of your daily needs per serving), which supports eye health and immune function. The fiber helps keep you full, and the antioxidants in pumpkin are great for skin health. Plus, eggs provide high-quality protein and choline for brain health.
If you’re watching your sugar intake, the maple version has slightly less refined sugar, and the keto version is virtually sugar-free. For gluten-free diets, these are naturally gluten-free—no modifications needed. Just make sure your spice blend is certified gluten-free if that’s a concern.
I love that I can serve something this indulgent that also happens to be packed with real, whole-food ingredients. It feels good knowing my guests are getting more than just empty calories.
Conclusion
So there you have it—the dessert that started with a retired accountant and ended up as the most requested recipe in my collection. These crustless pumpkin pie custard cups are proof that sometimes the best things come from the most unexpected places. They’re simple enough for a Tuesday night, elegant enough for a holiday table, and forgiving enough for a beginner cook.
I honestly can’t recommend these enough. Whether you’re hosting a big Thanksgiving dinner or just want something cozy to enjoy with a cup of coffee, these little cups of autumn magic deliver every single time. The best part? You can customize them a hundred different ways and they’ll still turn out perfect.
I’d love to hear how yours turn out! Drop a comment below and let me know if you tried any of the variations, or if you came up with your own twist. Don’t forget to share this recipe with a friend who needs a stress-free dessert idea. And if you’re looking for more easy hosting recipes, check out my easy pumpkin desserts collection for more fall favorites.
Happy baking, and remember—sometimes the best recipes come from the people you least expect.
Frequently Asked Questions
Can I make these crustless pumpkin pie custard cups without a water bath?
Technically yes, but I don’t recommend it. The water bath ensures gentle, even heating that keeps the custard silky smooth. Without it, you’ll likely end up with rubbery edges and a less creamy texture. It’s worth the extra two minutes of setup.
How do I know when the custard cups are done baking?
The edges should be set and firm, while the centers still jiggle slightly when you gently shake the ramekin. Think firm Jell-O, not liquid soup. If you insert a knife near the edge and it comes out clean, you’re good to go.
Can I use fresh pumpkin instead of canned?
You can, but you’ll need to roast and puree it first, then drain off excess liquid. Fresh pumpkin has more water content than canned, so you may need to cook the puree down on the stove for 10 minutes to concentrate it. I’ve done it, and it’s delicious, but canned is more consistent and way less work.
How far in advance can I make these for a party?
You can make them up to 5 days in advance. I actually prefer making them 1 to 2 days ahead because the flavors meld and deepen over time. Just cover them tightly and keep refrigerated. Add whipped cream right before serving.
Can I freeze leftover pumpkin custard cups?
I don’t recommend freezing them. The custard’s texture changes significantly when thawed—it becomes watery and grainy. These are best enjoyed fresh, within 5 days of making them. If you have leftovers, share them with neighbors or coworkers!
Pin This Recipe!
Easy Crustless Pumpkin Pie Custard Cups Recipe
All the creamy, spiced goodness of traditional pumpkin pie, minus the fuss of rolling out dough. These individual custard cups bake up perfectly for hosting, with a silky texture that melts on your tongue.
- Prep Time: 15 minutes
- Cook Time: 35-40 minutes
- Total Time: 4 hours 50 minutes (includes chilling)
- Yield: 6 servings 1x
- Category: Dessert
- Cuisine: American
Ingredients
- 1 can (15 ounces) pumpkin puree (not pumpkin pie filling)
- 3 large eggs, at room temperature
- 1 cup heavy cream (or half-and-half for a lighter version)
- ½ cup packed light brown sugar (dark brown works too)
- ¼ cup granulated sugar
- 1 teaspoon vanilla extract
- 2 teaspoons pumpkin pie spice
- ½ teaspoon ground cinnamon
- ¼ teaspoon ground ginger
- ¼ teaspoon salt
- ⅛ teaspoon ground cloves (optional)
- Whipped cream or coconut whipped cream for serving (optional)
- A light dusting of cinnamon or nutmeg for presentation (optional)
Instructions
- Preheat your oven to 325°F (163°C). Place your ramekins in a large baking dish.
- In your large mixing bowl, whisk together the pumpkin puree and both sugars until smooth, about 1 minute.
- Add the eggs one at a time, whisking well after each addition, until the mixture looks glossy and uniform.
- Pour in the heavy cream and vanilla extract. Whisk gently until fully incorporated. Don’t over-whisk.
- Add all the spices and salt. Whisk one more time until everything is evenly distributed. Scrape the bottom of the bowl with a spatula.
- For the smoothest custard, pour the mixture through a fine-mesh strainer into a clean bowl or large measuring cup.
- Divide the custard evenly among your ramekins, using about ½ cup of mixture per ramekin. Leave about ¼ inch of space at the top.
- Pour hot water into the baking dish until it reaches about halfway up the sides of the ramekins.
- Carefully transfer the baking dish to the oven. Bake for 35 to 40 minutes, or until the edges are set and the centers jiggle slightly when you gently shake a ramekin.
- Remove from the oven and let the ramekins sit in the water bath for 5 minutes. Then transfer them to a wire rack to cool completely.
- Once cool, cover each ramekin with plastic wrap and refrigerate for at least 4 hours. Overnight is even better.
Notes
The water bath is non-negotiable for silky texture. Don’t overbake—centers should jiggle slightly. Room temperature ingredients are important for smooth emulsification. Let custards chill completely for best texture and flavor. Can be made up to 5 days in advance.
Nutrition
- Serving Size: 1 ramekin (6 ounces)
- Calories: 245
- Sugar: 18
- Sodium: 210
- Fat: 16
- Saturated Fat: 10
- Carbohydrates: 23
- Fiber: 2
- Protein: 5
Keywords: crustless pumpkin pie, pumpkin custard cups, easy pumpkin dessert, individual pumpkin pie, no crust pumpkin pie, gluten-free pumpkin dessert, fall dessert, Thanksgiving dessert


