The Halloween party was in six hours and I’d completely forgotten. Everyone else would be bringing elaborate themed treats—I’d seen the Pinterest boards, the meticulous cake pops, the fondant-covered cupcakes, the whole nine yards. I had a carton of eggs, a bag of sugar, and absolutely zero time. Honestly, my first thought was to just grab a bag of candy on the way. But something stubborn in me said, “No, you can do this.” I mean, how hard could a cookie be?
I’ll never forget the panic of staring into my pantry, convinced I was about to show up empty-handed. That’s when I remembered a basic meringue recipe my grandmother used to make—light, airy, and impossibly simple. The idea hit me like a ghostly apparition: pipe them into little ghost shapes, add some chocolate eyes, and boom—instant Halloween magic. No food coloring, no complicated decorating, no stress. Let me tell you, I was skeptical right up until the moment I pulled them out of the oven.
These ghost-shaped meringue cookies turned out to be the surprise hit of the party. People couldn’t believe they were made with just four ingredients. They disappeared faster than the elaborate treats, which honestly felt pretty good. The best part? They’re naturally gluten-free and low in fat, so you can enjoy a little spooky sweetness without the guilt. Maybe you’ve been there—scrambling for a last-minute contribution and feeling totally out of your depth. That’s exactly why I keep coming back to this recipe. It’s the kind of simple, reliable magic that saves the day, every single time.
Why You’ll Love This Recipe
Let me tell you why these little ghosts have become my go-to Halloween recipe. After testing this method about five times (yes, I had a few flat ghost disasters), I can confidently say this version works every single time. Here’s what makes them special:
- Quick & Easy: You can whip up the batter in under 10 minutes with just four ingredients. The oven does most of the work.
- Simple Ingredients: Eggs, sugar, vanilla, and chocolate chips—that’s it. No fancy grocery trips needed, and you probably already have everything in your kitchen.
- Perfect for Halloween: These are made for spooky season. They look adorable on any dessert table and kids absolutely love them.
- Crowd-Pleaser: I’ve brought these to three different Halloween parties now, and they always get rave reviews from kids and adults alike. Even people who “don’t like meringue” end up grabbing two.
- Unbelievably Delicious: The texture is what gets everyone—crispy on the outside, light as air on the inside, with that perfect little melt-in-your-mouth moment.
What makes this recipe different from the rest? It’s the technique. I learned the hard way that humidity is the enemy of meringue, so I’ve included specific tips to guarantee success. Plus, I’ve perfected the piping method so your ghosts actually look like ghosts—not sad blobs. This isn’t just another version of meringue cookies; it’s the version that makes you close your eyes after that first crispy bite. Honestly, it’s comfort food reimagined for the spooky season—lighter, simpler, but with the same soul-soothing satisfaction. Perfect for impressing guests without stress, or turning a simple Halloween gathering into something memorable.
What Ingredients You Will Need
This recipe uses simple, wholesome ingredients to deliver those light, crispy ghost cookies without any fuss. Everything is a pantry staple, which makes these perfect for last-minute Halloween emergencies (trust me, I’ve been there).
For the Meringue Base
- 3 large egg whites, at room temperature (this is crucial—cold eggs won’t whip up properly)
- ¾ cup (150g) granulated white sugar (I recommend C&H or Domino for consistent results)
- ½ teaspoon vanilla extract (use pure vanilla extract, not imitation, for the best flavor)
- ¼ teaspoon cream of tartar (this stabilizes the meringue and helps it hold its shape—don’t skip it)
For Decorating
- ¼ cup mini chocolate chips (I prefer Ghirardelli or Enjoy Life for allergy-friendly options)
- Optional: 1-2 drops black food coloring (to make chocolate eyes if you want to get fancy)
Ingredient Selection Tips: Look for eggs that are at least a week old—they actually whip up better than super fresh ones because they have slightly more air in them. I know that sounds backwards, but it’s true! For the sugar, make sure you’re using granulated white sugar, not powdered or brown sugar. The crystals need to dissolve completely into the egg whites to create that stable, glossy structure.
Substitution Guidance: If you’re avoiding refined sugar, you can try using superfine baker’s sugar, which dissolves even faster. For a dairy-free option, you’re already in luck—these cookies are naturally dairy-free. And if you need them to be vegan, you can use aquafaba (the liquid from a can of chickpeas) instead of egg whites, though the texture will be slightly different. I’ve tested that version and it works, but it takes a bit longer to whip up.
Equipment Needed
You don’t need a professional bakery setup to make these ghost cookies, which is honestly my favorite thing about them. Here’s what you’ll need:
- Electric mixer (stand mixer or hand mixer—I’ve used both, and they work equally well. Hand mixer takes a bit longer, about 8-10 minutes instead of 5-6)
- Large mixing bowl (make sure it’s completely clean and dry—any grease will ruin your meringue)
- Piping bag (disposable or reusable—I prefer Wilton disposable bags for easy cleanup)
- Large round piping tip (like Wilton 1A or Ateco 806—you want about a ½-inch opening)
- Baking sheet (lined with parchment paper—don’t use wax paper, it will stick)
- Kitchen scale (optional but helpful for consistent cookie sizes)
Budget-Friendly Options: No piping bag? No problem. You can use a sturdy zip-top bag with the corner snipped off. Just make sure the bag doesn’t have any holes, or you’ll end up with a sticky mess. I learned that one the hard way. For the parchment paper, the standard grocery store brand works perfectly—no need for the fancy pre-cut sheets.
Preparation Method
Let’s get these little ghosts ready for their spooky debut. Follow these steps carefully, and you’ll have perfect meringue cookies every time.
- Preheat your oven to 200°F (93°C). Line two baking sheets with parchment paper. The low temperature is what dries the cookies out without browning them—that’s how they stay ghostly white.
- Separate your eggs while they’re cold. It’s much easier to separate yolks from whites when they’re straight from the fridge. Then let the whites sit at room temperature for about 15 minutes. Cold egg whites take forever to whip up, and they don’t get as fluffy. Trust me on this one.
- Add the cream of tartar to the egg whites. Start beating on medium-low speed until the mixture becomes foamy, about 1 minute. You’ll see lots of tiny bubbles form—that’s exactly what you want.
- Gradually add the sugar, one tablespoon at a time. This is the most important step. If you dump all the sugar in at once, your meringue will be grainy and deflate. I usually add about a tablespoon every 15-20 seconds while the mixer is running on medium speed. The whole process takes about 2-3 minutes.
- Add the vanilla extract. Once all the sugar is incorporated, drizzle in the vanilla and increase the mixer speed to high. Beat for 5-7 minutes (8-10 if using a hand mixer) until the mixture is stiff and glossy. You’ll know it’s ready when you lift the beaters and the meringue forms stiff peaks that don’t droop. Also, rub a tiny bit between your fingers—if it feels smooth, the sugar has dissolved completely. If it feels grainy, keep beating.
- Transfer the meringue to a piping bag. Fit your bag with the large round tip and fill it about halfway. Don’t overfill, or you’ll end up with meringue everywhere (speaking from personal experience here).
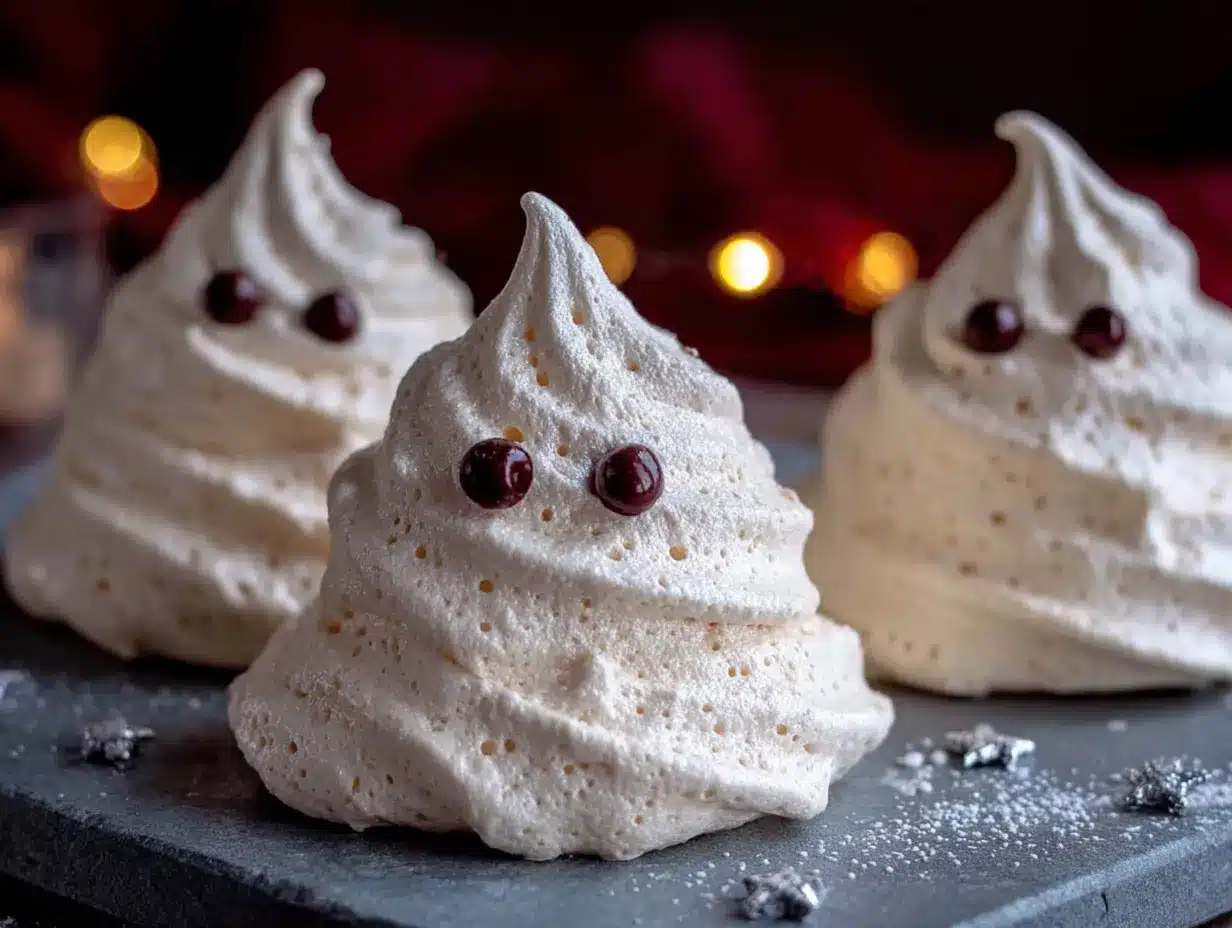
- Pipe the ghost shapes. Hold the piping bag straight up and down, about ½ inch above the baking sheet. Squeeze gently to create a round base, then slowly pull straight up while reducing pressure to create the ghost’s head. Release pressure completely and pull away quickly to create a little peak on top. Aim for about 2 inches tall and 1½ inches wide. Leave about 1 inch between each ghost.
- Add the chocolate eyes. While the meringue is still wet, gently press two mini chocolate chips into each ghost for eyes. Don’t push them in too deep, or they’ll sink into the cookie. Just a gentle press so they stick.
- Bake for 60-75 minutes. The cookies are done when they’re completely dry and can be easily lifted off the parchment paper. They should be firm to the touch but not brown at all. If they start to brown, your oven is too hot—open the door slightly to let some heat escape.
- Turn off the oven and let the cookies cool inside. Leave them in the oven with the door closed for at least 1 hour (overnight is even better). This helps them dry out completely and develop that perfect crispy texture.
Cooking Tips & Techniques
I’ve made these ghost cookies about a dozen times now, and let me tell you, I’ve learned some things the hard way. Here are my best tips for perfect results every time.
Humidity is your enemy. Meringue cookies hate humid days. If it’s raining or super muggy outside, your cookies might turn out sticky or chewy instead of crispy. Try to make these on a dry day, or run a dehumidifier in your kitchen for a few hours before you start. I learned this lesson after a particularly disastrous batch that never dried out—they were basically ghost-shaped marshmallows.
Don’t overmix or undermix. The perfect meringue is stiff and glossy, not dry and crumbly. If you overbeat, the mixture will separate and you’ll end up with watery liquid at the bottom of the bowl. If you underbeat, the cookies will spread out into flat blobs instead of holding their ghost shape. The sweet spot is when you lift the beater and the peak stands straight up without drooping.
Make sure your bowl is spotless. Any trace of grease or egg yolk will prevent the whites from whipping up properly. I always wipe my bowl and beaters with a little lemon juice or vinegar on a paper towel before I start. It sounds extra, but it makes a real difference.
Use parchment paper, not silicone mats. I know silicone baking mats are popular, but for meringue cookies, parchment paper works better. The cookies release more easily and the bottoms don’t get as brown. Plus, parchment paper is cheaper and easier to clean up.
Pipe in batches if you need to. If your meringue sits in the piping bag too long, it can start to separate. I usually fill the bag halfway, pipe about 15-20 ghosts, then refill. It takes a little longer, but the cookies look much better.
Variations & Adaptations
These ghost cookies are pretty perfect as-is, but I’ve played around with some fun variations that are worth trying.
Spooky Spider Variation: Instead of just eyes, pipe eight tiny legs coming out of each ghost using melted dark chocolate. Drizzle the chocolate from a small piping bag or even a toothpick. It takes a steady hand, but the result is seriously impressive. I tried this for a Halloween party and people thought I’d bought them from a bakery.
Pumpkin Spice Ghosts: Add ½ teaspoon pumpkin pie spice and ¼ teaspoon cinnamon to the sugar before you start mixing. The warm spices give the cookies a fall flavor that pairs beautifully with the vanilla. Just be careful not to add too much, or the spices will weigh down the meringue.
Chocolate-Dipped Ghosts: Once the cookies are completely cool, dip the bottoms in melted dark or white chocolate. Let the excess drip off, then place them on parchment paper to set. The chocolate adds a rich contrast to the light, airy cookie. I did this for a Christmas party once (I made snowmen instead of ghosts) and they were a huge hit.
Vegan Version: Substitute the egg whites with aquafaba (the liquid from a can of chickpeas). Use 3 tablespoons of aquafaba for each egg white. It takes longer to whip up—about 12-15 minutes—but it works surprisingly well. The texture is slightly less crispy, but still delicious.
Serving & Storage Suggestions
These ghost cookies are best served at room temperature, straight from the oven (well, after they’ve cooled completely). They have that perfect crispy texture that just melts in your mouth, and the chocolate eyes add a nice little pop of richness.
Presentation Ideas: Arrange them on a platter with some fake spider webs or dried orange slices for a spooky Halloween display. I like to pile them up on a cake stand so they look like a ghostly mountain. Kids especially love reaching in and grabbing their own ghost.
Storage Instructions: Store these cookies in an airtight container at room temperature for up to 2 weeks. Do NOT refrigerate them—the moisture from the fridge will make them sticky and soft. If you live in a humid climate, add a food-safe silica gel packet to the container to absorb excess moisture.
Freezer Tips: These cookies freeze beautifully. Place them in a single layer in a freezer-safe container with parchment paper between layers. They’ll keep for up to 3 months. To serve, just let them thaw at room temperature for about 15 minutes. They won’t be quite as crispy as fresh, but they’re still delicious.
Flavor Development: Honestly, these cookies taste best within the first 3-4 days. After that, they start to lose a bit of their crispness. But if you store them properly, they’ll stay good for much longer. I usually make a double batch and hide half in the freezer for myself.
Nutritional Information & Benefits
Per serving (1 ghost cookie):
- Calories: 25
- Total Fat: 0.5g
- Saturated Fat: 0g
- Cholesterol: 0mg
- Sodium: 10mg
- Total Carbohydrates: 5g
- Dietary Fiber: 0g
- Sugars: 5g
- Protein: 1g
Health Benefits: These cookies are naturally low in fat and calories, making them a lighter option for Halloween treats. The egg whites provide a small amount of protein, and since there’s no butter or oil, they’re much better for you than traditional cookies. Plus, they’re gluten-free, dairy-free, and nut-free, so they work for most dietary restrictions.
Dietary Considerations: These cookies are naturally gluten-free and dairy-free. They contain eggs, so they’re not vegan (unless you use the aquafaba substitution). If you’re watching your sugar intake, you can reduce the sugar to ½ cup, but the texture will be slightly less crispy. I’ve tried it, and it still works—they just don’t hold their shape quite as well.
Conclusion
These ghost-shaped meringue cookies have become a Halloween tradition in my kitchen, and I honestly can’t imagine the season without them. They’re proof that you don’t need fancy ingredients or hours of prep time to create something truly special. With just four simple ingredients and a little bit of patience, you can whip up a batch of spooky, adorable treats that will steal the show at any Halloween gathering.
I’d love to hear how your ghost cookies turn out! Did you try any fun variations? Did your kids help pipe the shapes? Drop a comment below and share your spooky creations—I read every single one and I’m always looking for new ideas to try. And if you’re feeling extra generous, snap a photo and tag me on social media. Nothing makes my day like seeing these little ghosts come to life in someone else’s kitchen.
So go ahead, preheat that oven, separate those eggs, and let the spooky baking begin. Your Halloween table is about to get a whole lot cuter—and a whole lot tastier. Happy haunting, friends!
Frequently Asked Questions
Can I make these ghost cookies ahead of time?
Absolutely! These cookies can be made up to 2 weeks in advance if stored properly in an airtight container at room temperature. They also freeze beautifully for up to 3 months. Just let them thaw at room temperature before serving.
Why did my meringue cookies turn out sticky?
Sticky meringue cookies are usually caused by humidity or under-baking. Make sure you bake them long enough (60-75 minutes) and let them cool completely in the turned-off oven. If it’s a humid day, try running a dehumidifier in your kitchen before you start.
Can I use liquid egg whites from a carton?
I don’t recommend it. Carton egg whites often have stabilizers added that prevent them from whipping up properly. Fresh egg whites from whole eggs give you the best volume and texture. Save the carton egg whites for scrambled eggs or omelets.
How do I know when the meringue is whipped enough?
You’re looking for stiff, glossy peaks that stand straight up when you lift the beater. The mixture should be thick and smooth, not grainy. Rub a tiny bit between your fingers—if it feels smooth, the sugar has dissolved completely and you’re good to go.
Can I make these without a piping bag?
Yes! You can use a sturdy zip-top bag with the corner snipped off, or even a spoon to drop dollops of meringue onto the baking sheet. They won’t look as ghost-like, but they’ll still taste delicious. Just shape them gently with the back of the spoon if you want to create a more defined shape.
Pin This Recipe!
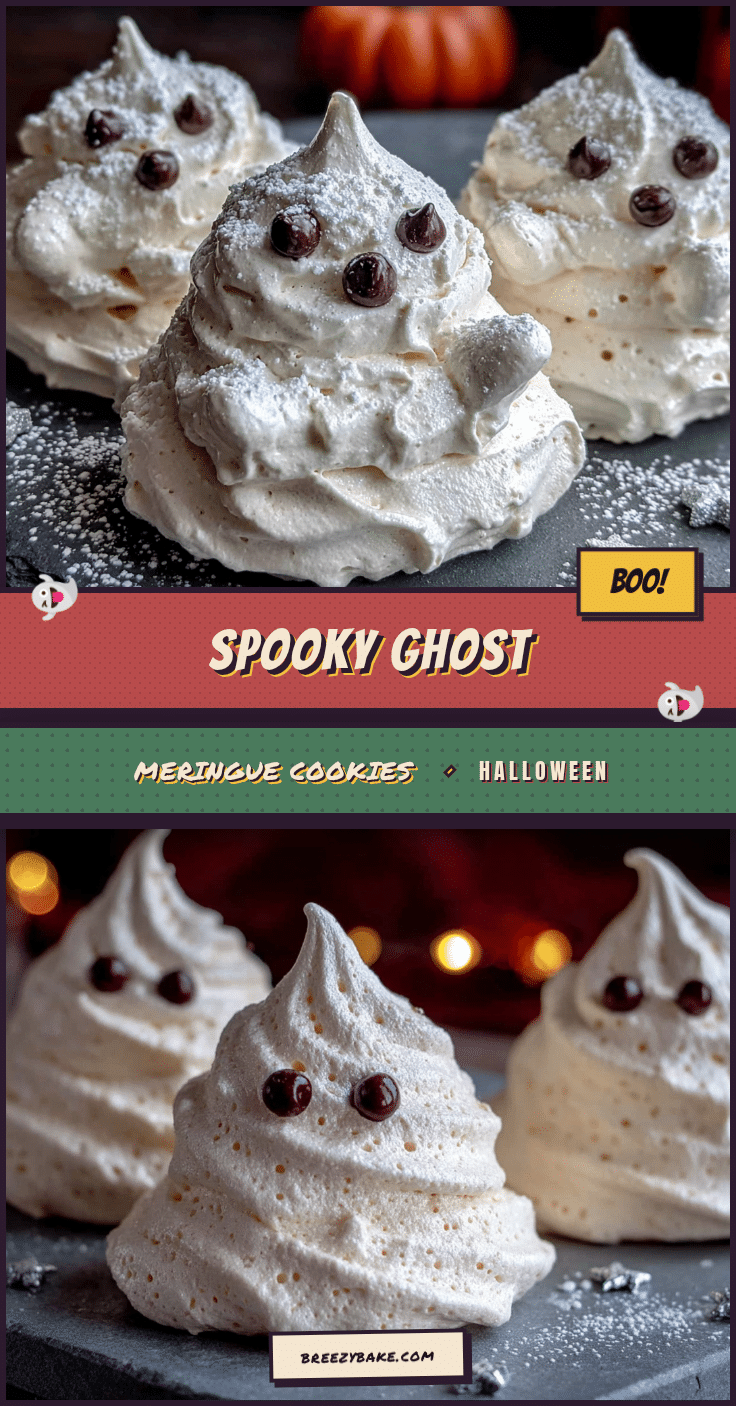
Easy Ghost-Shaped Meringue Cookies for Halloween Fun
These light, airy ghost-shaped meringue cookies are made with just four simple ingredients and are perfect for Halloween. They’re naturally gluten-free, low in fat, and come together in under 10 minutes of prep time.
- Prep Time: 10 minutes
- Cook Time: 60-75 minutes
- Total Time: 1 hour 10 minutes to 1 hour 25 minutes (plus cooling time)
- Yield: 30-40 cookies 1x
- Category: Dessert
- Cuisine: American
Ingredients
- 3 large egg whites, at room temperature
- ¾ cup (150g) granulated white sugar
- ½ teaspoon vanilla extract (pure, not imitation)
- ¼ teaspoon cream of tartar
- ¼ cup mini chocolate chips (for decorating)
- Optional: 1-2 drops black food coloring (for chocolate eyes)
Instructions
- Preheat your oven to 200°F (93°C). Line two baking sheets with parchment paper.
- Separate your eggs while they’re cold, then let the whites sit at room temperature for about 15 minutes.
- Add the cream of tartar to the egg whites. Start beating on medium-low speed until the mixture becomes foamy, about 1 minute.
- Gradually add the sugar, one tablespoon at a time, while the mixer is running on medium speed. Add about a tablespoon every 15-20 seconds, taking 2-3 minutes total.
- Add the vanilla extract. Increase the mixer speed to high and beat for 5-7 minutes (8-10 if using a hand mixer) until the mixture is stiff and glossy. The meringue should form stiff peaks that don’t droop, and feel smooth when rubbed between your fingers.
- Transfer the meringue to a piping bag fitted with a large round tip (like Wilton 1A or Ateco 806). Fill the bag about halfway.
- Pipe ghost shapes: Hold the piping bag straight up and down, about ½ inch above the baking sheet. Squeeze gently to create a round base, then slowly pull straight up while reducing pressure to create the ghost’s head. Release pressure completely and pull away quickly to create a little peak on top. Aim for about 2 inches tall and 1½ inches wide. Leave about 1 inch between each ghost.
- While the meringue is still wet, gently press two mini chocolate chips into each ghost for eyes. Don’t push them in too deep.
- Bake for 60-75 minutes. The cookies are done when they’re completely dry and can be easily lifted off the parchment paper. They should be firm to the touch but not brown.
- Turn off the oven and let the cookies cool inside with the door closed for at least 1 hour (overnight is even better).
Notes
Humidity is the enemy of meringue—make these on a dry day. Ensure your bowl and beaters are completely grease-free (wipe with lemon juice or vinegar). Do not refrigerate cookies; store in an airtight container at room temperature for up to 2 weeks. For best results, use fresh egg whites from whole eggs, not carton egg whites.
Nutrition
- Serving Size: 1 ghost cookie
- Calories: 25
- Sugar: 5
- Sodium: 10
- Fat: 0.5
- Carbohydrates: 5
- Protein: 1
Keywords: Halloween cookies, meringue cookies, ghost cookies, easy Halloween treats, gluten-free cookies, low-fat cookies, egg white cookies


