My eight-year-old asked why I couldn’t just stir the pumpkin filling right into the flour and butter mixture. I started to explain why that wouldn’t work—something about gluten development and the science of a flaky crust. Then I stopped. Honestly, I had no good reason except that I’d never seen it done that way. So I shrugged, handed her the whisk, and let her try. She dumped the pumpkin puree into the flour bowl, added the spices, and mixed it into a sticky, alarming paste. I was sure I’d be scraping a burnt, gummy mess off the pie dish an hour later. But I kept my mouth shut and let her press that strange dough into the pan. The pie that came out of the oven had the most impossibly tender, almost cookie-like crust I’d ever made—not a single tough bite. She’d accidentally created a hybrid method that bypassed the dreaded soggy bottom entirely. That Tuesday night, eating warm slices with whipped cream, I realized I’d been the student all along. This recipe is the result of that humbling moment, and I’ve never gone back to the old way. If you’ve ever wrestled with a cracked, shrinking crust or a filling that never sets right, maybe you’re ready to try something a little unconventional too.
Why You’ll Love This Homemade Pumpkin Pie
Let me tell you, this isn’t just another pumpkin pie recipe you’ll bookmark and forget. I’ve tested this method on six different occasions—Thanksgiving, a random Wednesday, a potluck where someone brought a store-bought version just to compare—and it won every single time. The crust is the thing that shocks people. It’s flaky, sure, but it’s also sturdy enough to hold a generous slice without crumbling into a plate of sad crumbs.
- Simple Ingredients: No weird shortening, no vodka trick, no specialty flours. You need butter, flour, sugar, eggs, pumpkin, and a few pantry spices. That’s it.
- Perfect for Busy Holidays: You can make the crust and filling a day ahead. Assemble and bake when you’re ready. Less stress, more wine.
- Crowd-Pleaser: I’ve served this to picky toddlers, crust-snubbing teenagers, and my uncle who “doesn’t do dessert.” Everyone goes back for seconds.
- Unbelievably Delicious: The filling is silky, not grainy. The spices are warm but not overwhelming. And that crust? It shatters when you bite into it, then melts on your tongue.
What makes this one different from the dozens of other pumpkin pie recipes out there? It’s the method my daughter stumbled into—a partial pre-bake of the crust that locks in flakiness, plus a filling that’s whisked by hand to avoid over-mixing. The result is a pie that looks like it came from a bakery but tastes like a hug from someone who really cares about dessert.
What Ingredients You Will Need
This recipe uses straightforward, honest ingredients that work together to deliver a pie that tastes like fall in a slice. Most of these are probably in your pantry or fridge right now.
For the Flaky All-Butter Crust
- 2 ½ cups all-purpose flour (I use Gold Medal or King Arthur—both work well; just don’t use bread flour, it’ll make the crust tough)
- 1 teaspoon salt (fine sea salt or table salt, not kosher flakes)
- 1 tablespoon granulated sugar (just a touch to help browning and balance the savory butter)
- 1 cup (2 sticks) cold unsalted butter, cut into small cubes (this is non-negotiable—cold butter creates steam pockets that make the crust flaky)
- ¼ to ½ cup ice water (start with ¼ cup and add more only if needed)
For the Pumpkin Filling
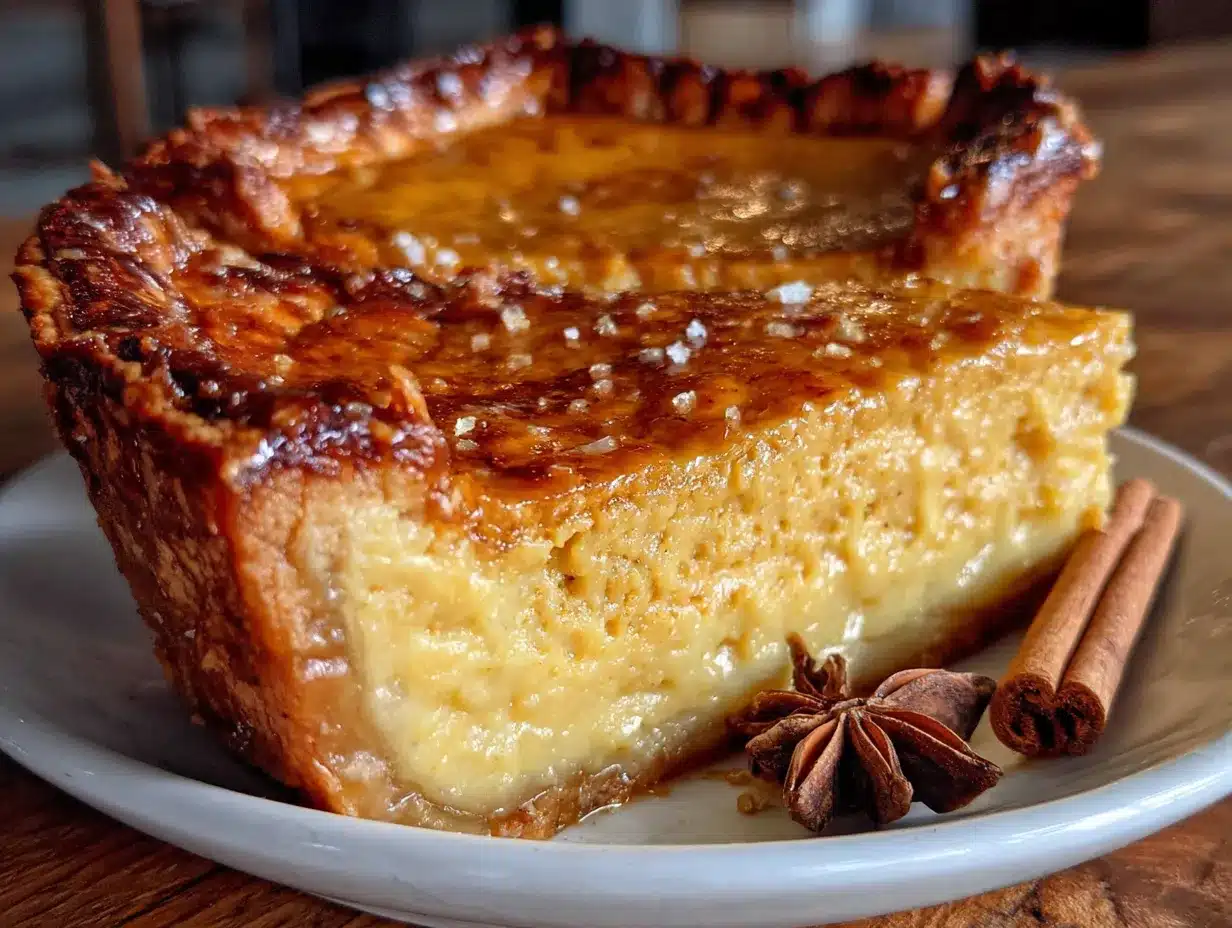
- 1 can (15 oz) pumpkin puree (not pumpkin pie filling—plain puree, like Libby’s or store brand; I’ve tried both and they’re nearly identical)
- ¾ cup granulated sugar (you can reduce to ½ cup if you prefer a less sweet pie, but don’t go lower or the texture suffers)
- 1 teaspoon ground cinnamon (I prefer Saigon cinnamon for its warmth, but any works)
- ½ teaspoon ground ginger (adds a little zing)
- ¼ teaspoon ground cloves (go easy—cloves are potent)
- ½ teaspoon salt (brings out all the other flavors)
- 2 large eggs (room temperature is best, but cold works in a pinch)
- 1 can (12 oz) evaporated milk (this gives the filling its silky texture; don’t substitute with regular milk or cream—it changes the consistency)
For Topping (Optional but Recommended)
- Whipped cream or vanilla ice cream (homemade or store-bought—no judgment here)
- A pinch of flaky sea salt (sprinkle on top before serving for a sweet-salty finish)
A quick note on substitutions: If you’re dairy-free, you can use a vegan butter stick (like Earth Balance) for the crust, but the texture will be slightly less flaky. For the filling, coconut milk works in place of evaporated milk, but the pie will have a faint coconut flavor—delicious, but not traditional.
Equipment Needed
You don’t need a fancy pastry station for this pie. Here’s what I use every single time:
- 9-inch pie dish (glass or ceramic works best—metal can over-brown the crust)
- Rolling pin (I use a basic wooden one; a wine bottle works in a pinch, just chill it first)
- Large mixing bowls (one for the crust, one for the filling)
- Pastry cutter or two forks (for cutting butter into flour—your hands work too, but work fast so the butter stays cold)
- Plastic wrap (for chilling the dough)
- Whisk (a sturdy one for the filling)
- Parchment paper and pie weights (or dried beans—I’ve used the same bag of pinto beans for years)
- Cooling rack (so the bottom doesn’t get soggy while it cools)
If you don’t have pie weights, don’t run out and buy them. Just line your crust with parchment and fill it with dry rice, beans, or even sugar (yes, sugar—it conducts heat beautifully and you can still use it after, though it’ll be toasted).
Preparation Method
This looks like a lot of steps, but I promise it’s straightforward. I’ve broken it down so you can follow along without stress.
Step 1: Make the Crust Dough
In a large bowl, whisk together the flour, salt, and sugar. Add the cold butter cubes. Using a pastry cutter or your fingertips, work the butter into the flour until the mixture looks like coarse meal with some pea-sized butter pieces remaining. Those little chunks are what create the flaky layers—don’t overwork them.
Sprinkle ¼ cup of ice water over the mixture and stir with a fork until the dough just comes together. If it seems dry, add more water one tablespoon at a time. The dough should be shaggy but hold together when squeezed. Flatten it into a disc, wrap in plastic, and refrigerate for at least 1 hour (or up to 3 days).
Step 2: Roll Out the Crust
On a lightly floured surface, roll the chilled dough into a 12-inch circle, about ⅛-inch thick. Don’t stress about perfect edges—you’ll trim them later. Carefully transfer the dough to your pie dish by rolling it around the rolling pin, then unrolling it over the dish. Gently press it into the bottom and sides, then trim the overhang to about ½ inch. Fold the edges under and crimp them with your fingers or a fork. Pop the whole thing in the fridge for 15 minutes while you preheat the oven to 375°F (190°C).
Step 3: Par-Bake the Crust
Line the chilled crust with parchment paper and fill with pie weights or dried beans. Bake for 15 minutes, then carefully remove the parchment and weights. Prick the bottom of the crust all over with a fork (this prevents bubbling). Return to the oven and bake for another 8-10 minutes, until the crust is lightly golden and dry to the touch. Set aside to cool slightly.
Step 4: Make the Filling
While the crust cools, whisk together the pumpkin puree, sugar, cinnamon, ginger, cloves, and salt in a large bowl. Add the eggs one at a time, whisking well after each. Slowly pour in the evaporated milk while whisking continuously. The mixture should be smooth and glossy. Don’t over-whisk—just until combined.
Step 5: Assemble and Bake
Pour the filling into the warm par-baked crust. The filling should come almost to the top—don’t worry if it looks full, it won’t overflow. Bake at 375°F (190°C) for 45-55 minutes, until the edges are set and the center jiggles just slightly when you gently shake the pan. A knife inserted an inch from the edge should come out clean, but the very center should still wobble a little.
Step 6: Cool and Serve
Let the pie cool on a wire rack for at least 2 hours. The filling will continue to set as it cools. Refrigerate for another hour if you want clean slices. Serve at room temperature or slightly chilled, topped with whipped cream and a sprinkle of flaky salt.
Cooking Tips & Techniques
I’ve made this pie at least twenty times, and I’ve messed up plenty. Here’s what I’ve learned the hard way so you don’t have to.
Keep everything cold. The butter, the water, even your hands if you can stand it. Warm butter melts into the flour instead of creating steam pockets, and you end up with a tough, dense crust. I once made the mistake of leaving my butter on the counter for an hour before starting—the crust was a disaster.
Don’t skip the par-bake. I know it adds time, but it’s the difference between a crisp bottom and a soggy one. That extra 10 minutes in the oven after removing the weights is critical—it seals the crust so the wet filling doesn’t soak in.
Watch the edges. If the crust is browning too fast (usually around the 30-minute mark), tent the edges with foil or a pie shield. I’ve burned the crimped edges more times than I care to admit, and it gives the whole pie a bitter taste.
Let it cool completely. I know it’s tempting to cut into a warm pie, but the filling needs time to set. Cutting too early gives you a runny mess. Trust me, I’ve served a soupy slice to guests before, and it’s embarrassing.
Multitask smartly. Make the crust dough while the butter is still cold. While it chills, prep your filling ingredients. While the crust par-bakes, whisk the filling. This way, everything comes together without a frantic rush.
Variations & Adaptations
This recipe is a great base, but don’t be afraid to play with it. Here are some twists I’ve tried and loved.
Spiced Pumpkin Pie
Add ¼ teaspoon of nutmeg and a pinch of cardamom to the filling. It gives the pie a more complex, almost chai-like flavor. I did this one year when I ran out of ginger, and it was a hit.
Gluten-Free Version
Substitute the all-purpose flour with a 1:1 gluten-free baking flour (I like Bob’s Red Mill). The crust will be a bit more crumbly, so handle it gently. Everything else stays the same.
Maple Pumpkin Pie
Replace ¼ cup of the granulated sugar with pure maple syrup. Reduce the evaporated milk by 2 tablespoons to compensate for the extra liquid. The maple flavor pairs beautifully with the pumpkin and spices.
Vegan Adaptation
Use vegan butter in the crust and replace the eggs with 2 tablespoons of ground flaxseed mixed with 6 tablespoons of water (let it sit for 5 minutes to thicken). Use full-fat coconut milk instead of evaporated milk. The texture won’t be as silky, but it’s still delicious.
I once tried a version with a gingersnap crust (crushed cookies mixed with melted butter) instead of the all-butter crust. It was amazing in its own way, but it’s a completely different pie—more like a cheesecake texture. If you’re feeling adventurous, give it a shot.
Serving & Storage Suggestions
This pie is best served at room temperature or slightly chilled. I prefer it with a generous dollop of lightly sweetened whipped cream and a sprinkle of flaky sea salt. The salt cuts through the sweetness and makes the spices pop.
For a full fall spread, serve it alongside a roasted butternut squash soup or a simple green bean casserole. A cup of hot apple cider or a dark roast coffee is the perfect beverage pairing.
Storage: Cover the pie loosely with plastic wrap or foil and refrigerate for up to 4 days. The crust will soften slightly over time, but the flavor actually improves after a day or two as the spices meld.
Freezing: You can freeze the baked pie for up to 3 months. Wrap it tightly in plastic wrap, then foil. Thaw overnight in the refrigerator before serving. Do not freeze an unbaked pie—the filling will separate and become watery.
Reheating: If you prefer warm pie, place individual slices on a baking sheet and warm in a 300°F (150°C) oven for 10 minutes. Don’t use the microwave—it will turn the crust into a soggy mess.
One thing I love about this pie is that the flavors get deeper and more rounded after a day in the fridge. If you can, make it a day ahead. Your future self will thank you.
Nutritional Information & Benefits
Here’s a rough estimate per slice (based on 8 servings):
- Calories: 380
- Fat: 22g
- Saturated Fat: 13g
- Carbohydrates: 42g
- Fiber: 3g
- Sugar: 24g
- Protein: 6g
Pumpkin is packed with vitamin A (great for eye health) and fiber, which helps keep you full. The butter provides a good dose of vitamin A and healthy fats, though it’s definitely a treat. If you’re watching your sugar, you can reduce it to ½ cup without sacrificing texture.
This recipe contains gluten, dairy, and eggs. For allergen-friendly options, see the variations section above.
I’m not a nutritionist, but I believe in balance. This pie is a special-occasion dessert, and it’s worth every single calorie. One slice won’t derail your health goals, and the joy it brings to a holiday table is immeasurable.
Conclusion
This homemade pumpkin pie with its flaky all-butter crust is more than a recipe—it’s a little piece of fall tradition that you can actually pull off without stress. The crust is forgiving, the filling is foolproof, and the result is a pie that tastes like it took hours of labor when it really just took a bit of patience and a cold stick of butter.
I love this recipe because it reminds me that sometimes the best discoveries come from letting someone else take the lead. That eight-year-old who dumped pumpkin into flour taught me more about baking than any cookbook ever did. Now, I hope this pie becomes a tradition in your kitchen too.
Have you tried this recipe? Did you add your own twist? I’d love to hear about it in the comments below. Share your photos, your substitutions, or your own kitchen mishaps—we’re all learning together here.
Happy baking, and don’t forget the whipped cream!
Frequently Asked Questions
Can I use a store-bought crust instead?
Yes, you absolutely can. The pie will still taste great, but you’ll miss out on that incredible flaky texture from the all-butter crust. If you’re short on time, go for it—no shame in that game.
Why did my crust shrink during baking?
This usually happens when the dough isn’t chilled enough before baking, or if it was overworked. Make sure to refrigerate the shaped crust for at least 15 minutes before par-baking. Also, don’t stretch the dough when fitting it into the dish—just gently press it in.
Can I make this pie ahead of time?
Absolutely. You can bake the pie up to 2 days in advance and keep it covered in the fridge. The flavors actually get better as they sit. Just bring it to room temperature before serving.
My filling turned out watery. What went wrong?
This can happen if the pie wasn’t baked long enough, or if the pumpkin puree had too much water content. Make sure to bake until the center is just slightly jiggly, and always use pure pumpkin puree, not pumpkin pie filling (which has added liquids).
Can I use fresh pumpkin instead of canned?
You can, but you’ll need to roast and puree it first. Fresh pumpkin has more water than canned, so you’ll need to drain the puree in a cheesecloth-lined sieve for a few hours before using. Honestly, canned is more consistent and saves a ton of time.
Pin This Recipe!
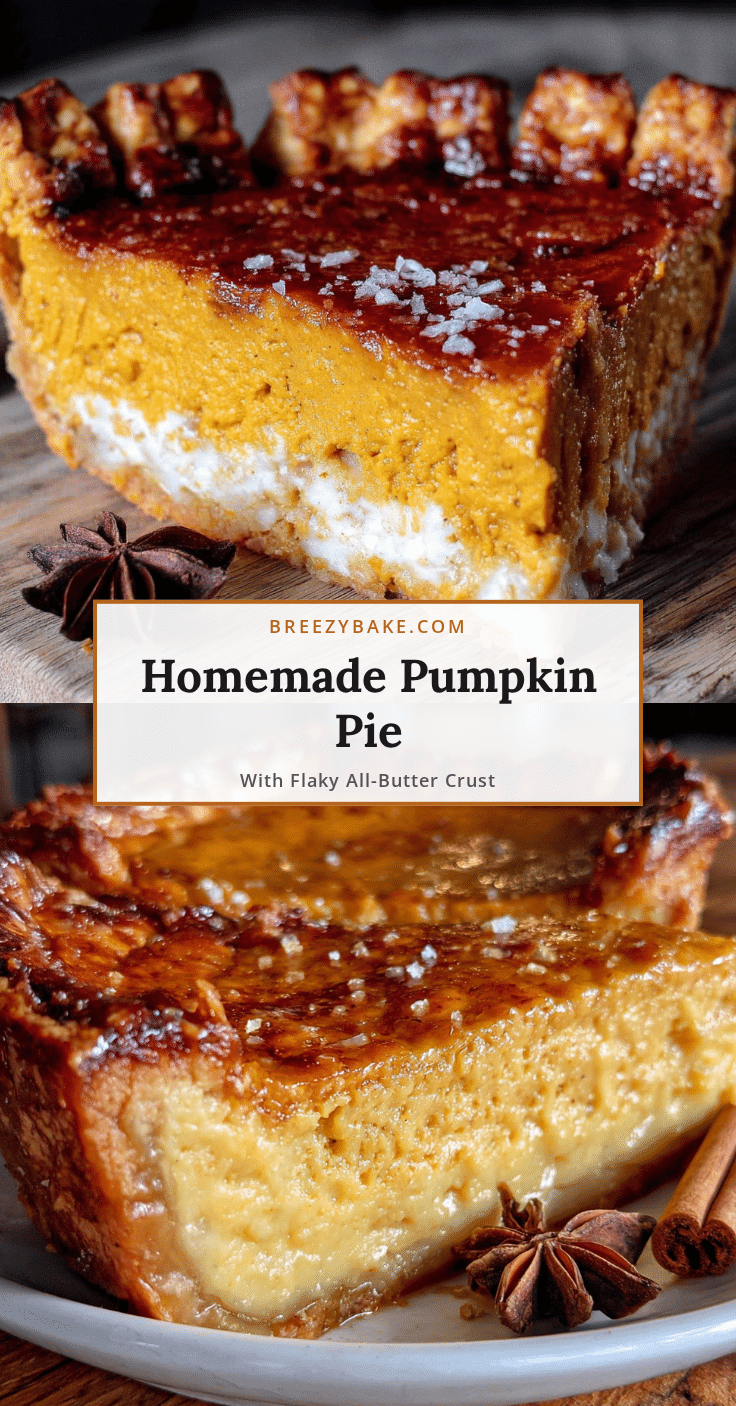
Easy Homemade Pumpkin Pie with Perfect Flaky Crust
This homemade pumpkin pie features an impossibly tender, cookie-like crust and a silky, spiced filling. A unique par-baking method ensures a crisp bottom every time, making it a foolproof holiday dessert that tastes like a hug from someone who really cares about dessert.
- Prep Time: 30 minutes
- Cook Time: 1 hour 10 minutes
- Total Time: 4 hours 40 minutes (includes chilling and cooling)
- Yield: 8 servings 1x
- Category: Dessert
- Cuisine: American
Ingredients
- 2 ½ cups all-purpose flour
- 1 teaspoon salt
- 1 tablespoon granulated sugar
- 1 cup (2 sticks) cold unsalted butter, cut into small cubes
- ¼ to ½ cup ice water
- 1 can (15 oz) pumpkin puree
- ¾ cup granulated sugar
- 1 teaspoon ground cinnamon
- ½ teaspoon ground ginger
- ¼ teaspoon ground cloves
- ½ teaspoon salt
- 2 large eggs
- 1 can (12 oz) evaporated milk
- Whipped cream or vanilla ice cream (optional, for topping)
- A pinch of flaky sea salt (optional, for topping)
Instructions
- Make the crust dough: In a large bowl, whisk together flour, salt, and sugar. Add cold butter cubes. Using a pastry cutter or fingertips, work butter into flour until mixture resembles coarse meal with some pea-sized butter pieces. Sprinkle ¼ cup ice water over mixture and stir with a fork until dough just comes together. Add more water if needed. Flatten into a disc, wrap in plastic, and refrigerate for at least 1 hour.
- Roll out the crust: On a lightly floured surface, roll chilled dough into a 12-inch circle, about ⅛-inch thick. Transfer to a 9-inch pie dish. Trim overhang to ½ inch, fold edges under, and crimp. Refrigerate for 15 minutes.
- Par-bake the crust: Preheat oven to 375°F (190°C). Line chilled crust with parchment paper and fill with pie weights or dried beans. Bake for 15 minutes. Remove parchment and weights. Prick bottom with a fork. Bake for another 8-10 minutes until lightly golden. Set aside to cool slightly.
- Make the filling: In a large bowl, whisk together pumpkin puree, sugar, cinnamon, ginger, cloves, and salt. Add eggs one at a time, whisking well after each. Slowly pour in evaporated milk while whisking continuously until smooth and glossy.
- Assemble and bake: Pour filling into warm par-baked crust. Bake at 375°F (190°C) for 45-55 minutes, until edges are set and center jiggles slightly. Let cool on a wire rack for at least 2 hours.
- Cool and serve: Refrigerate for another hour if desired. Serve at room temperature or slightly chilled, topped with whipped cream and a sprinkle of flaky salt.
Notes
Keep all ingredients cold for the flakiest crust. Don’t skip the par-bake—it prevents a soggy bottom. If the crust edges brown too fast, tent with foil. Let the pie cool completely before slicing to allow the filling to set. The flavors deepen after a day in the fridge, so making it ahead is recommended.
Nutrition
- Serving Size: 1 slice
- Calories: 380
- Sugar: 24
- Fat: 22
- Saturated Fat: 13
- Carbohydrates: 42
- Fiber: 3
- Protein: 6
Keywords: pumpkin pie, homemade pumpkin pie, flaky crust, all-butter crust, Thanksgiving dessert, fall dessert, easy pumpkin pie