Rummaging through the pantry when the realization hit: no more store-bought uncrustables for the lunchbox. It was one of those mornings where every second counted, and the kids were already bouncing off the walls, hungry and impatient. So, I grabbed the bread, peanut butter, and jelly, and started whipping up my own version of those perfect little pockets that save the day. Honestly, it’s a bit of a messy hustle, but there’s something so comforting about making homemade Easy Homemade Uncrustable PB&J Pockets for Freezer Meals. The smell of fresh bread pressed with peanut butter and jelly swirling inside — it’s a small chaos moment turned delicious win.
I’ve tried freezing store-bought ones before, but they never quite had the freshness or that just-right squishiness after thawing. Making these pockets at home means I can control exactly what goes inside, keep things allergen-friendly, and avoid those sneaky preservatives. Plus, I get to sneak in some fun with different jams or nut butters when I have time. This recipe stuck because it’s a lifesaver on busy mornings and perfect for when you need a quick snack on the go — no crust fights, no sticky fingers (well, less of them), just grab-and-go goodness. It’s my little secret for keeping lunches hassle-free with a homemade touch.
These pockets have become a staple in my freezer (right next to some of my other favorites like my healthy chicken veggie skillet wraps) and a simple comfort food that everyone in the family reaches for without complaint. And honestly, sometimes I even eat one straight from the freezer because who can resist a frozen snack with that familiar peanut butter and jelly combo? There’s a quiet joy in knowing I can pull these out whenever I want, no last-minute scrambling, and still feel like I’m serving up a little homemade love.
Why You’ll Love This Recipe
Making Easy Homemade Uncrustable PB&J Pockets for Freezer Meals has been a game changer in my kitchen. It’s one of those recipes that feels like a small victory on hectic days and even better, the taste delivers every time. Here’s why this recipe stands out:
- Quick & Easy: From start to finish, these pockets come together in about 20 minutes, including prep — perfect when you’re juggling a million things and need something fast.
- Simple Ingredients: No fancy or hard-to-find items needed. You probably already have peanut butter, jelly, and sandwich bread sitting in your kitchen.
- Perfect for Freezer Meals: These pockets freeze beautifully, making meal prep a breeze. Just pop one in a lunchbox or microwave when needed.
- Crowd-Pleaser: Whether it’s for picky kids or busy adults, these pockets get raves for their soft texture and classic flavor combo.
- Customizable: Swap jams, nut butters, or even add a sprinkle of cinnamon for a personal twist. This recipe is a blank canvas for your taste buds.
What makes this recipe different? It’s all about pressing the edges just right and using a little trick I picked up to keep the pockets from leaking during freezing and thawing. Also, I blend creamy peanut butter with a hint of honey to balance the flavors, which adds a subtle depth you won’t find in the store-bought versions. Plus, these pockets aren’t just about convenience — they hold the same nostalgic, cozy vibe as a classic PB&J, but fresher and homemade. No more soggy bottoms or crust battles; just soft, portable goodness.
What Ingredients You Will Need
This recipe uses simple, wholesome ingredients to deliver that perfect peanut butter and jelly combo wrapped up in soft bread. Most of these are pantry staples, and you can easily swap some out based on preferences or dietary needs.
- For the pockets:
- White sandwich bread, 8-10 slices (soft, fresh bread works best — I like using store-brand for consistency)
- Peanut butter, creamy (smooth texture helps seal the edges better; you can swap for almond or sunflower seed butter if needed)
- Grape jelly or strawberry jam (choose your favorite — homemade jam is lovely for a seasonal touch)
- Honey (optional, about 1 tablespoon mixed into the peanut butter for a slightly sweeter spread)
- For sealing:
- Water or milk (just a little to brush on the edges so the bread sticks together better)
If you’re looking to cater to specific diets, use gluten-free bread for a gluten-free option, or try natural peanut butter to avoid added sugars. For a dairy-free version, just use plant-based milk to brush the edges. The beauty of this recipe is its flexibility and simplicity.
Equipment Needed
- A butter knife or small spatula for spreading peanut butter and jelly smoothly onto the bread slices.
- A small bowl for mixing peanut butter with honey if you’re adding it. This keeps things neat and easy to spread.
- A drinking glass or round cookie cutter (about 3 inches diameter) to press and cut the pockets into neat circles — this helps seal the edges tightly.
- Baking sheet or tray lined with parchment paper to lay the pockets on while you freeze them initially.
- Plastic wrap or freezer bags for storing the pockets once frozen.
If you don’t have a round cutter, a sharp knife can do the job, but the press-and-cut method with a glass gives the pockets that classic uncrustable look and seals better. I’ve tried a few cookie cutters over time, but a sturdy glass usually works best and is budget-friendly. Also, using parchment paper on your tray saves cleanup and keeps the pockets from sticking.
Preparation Method
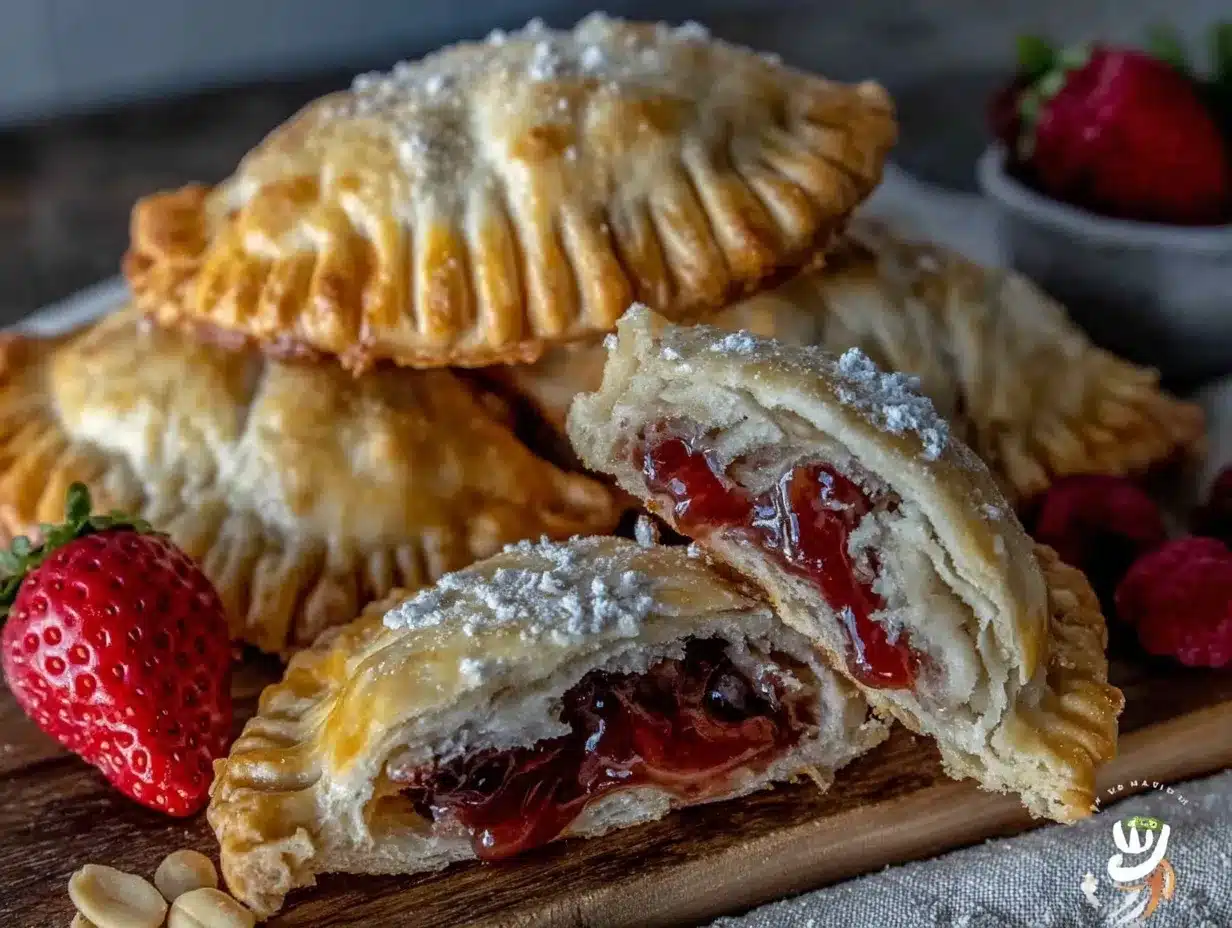
- Prepare your workspace. Lay out your bread slices on a clean cutting board. If your bread is very fresh, gently pressing it flat with your hand helps prevent tearing when sealing.
- Mix peanut butter and honey. In a small bowl, stir together about 1/2 cup creamy peanut butter with 1 tablespoon honey (this step is optional but adds a lovely sweetness). Spread about 1 tablespoon of this mixture evenly onto half of the bread slices, leaving about a 1/2-inch border around the edges.
- Spread jelly. On the remaining bread slices, spread about 1 tablespoon of your chosen jelly or jam, again leaving the edges clear.
- Assemble the pockets. Carefully place the jelly-covered slices on top of the peanut butter-covered slices, jelly side down, aligning the edges.
- Seal the edges. Dip your finger in water or milk and gently brush it around the edges of the sandwich. This acts like glue, helping the bread stick together.
- Cut and press. Using a round cookie cutter or glass about 3 inches in diameter, press down firmly along the edge of each sandwich to seal it and cut into neat circles. You may need to press twice to ensure a good seal.
- Freeze on a tray. Place the pockets on a parchment-lined baking sheet, making sure they don’t touch. Freeze them uncovered for about 1-2 hours until firm. This prevents sticking when stored.
- Store properly. Once frozen solid, transfer the pockets to a freezer-safe bag or airtight container. Label with the date and freeze for up to 2 months.
- To serve. Thaw the pockets in the fridge overnight or microwave for 20-30 seconds if you’re in a hurry. The bread should be soft but not soggy, and the peanut butter and jelly perfectly melded.
Pro tip: If you find the jelly is leaking during freezing, try using a thicker jam or reduce the amount slightly. Also, pressing the edges firmly is the key to keeping these pockets intact.
Cooking Tips & Techniques
Making homemade uncrustables might sound simple, but getting that perfect sealed pocket takes a little know-how. Here are some tips I’ve picked up along the way:
- Choose the right bread: Soft white sandwich bread works best because it seals easily without cracking. Avoid breads with thick crusts or artisanal styles that don’t press flat.
- Keep fillings moderate: Too much jelly or peanut butter makes sealing tricky and can cause leaks after freezing.
- Seal edges well: Brushing the edges with a little water or milk before pressing is essential. Don’t skip this step — it’s what keeps everything together.
- Press firmly: Use a sturdy glass or cookie cutter and press down firmly to crimp edges. A second press usually helps tighten the seal.
- Freeze uncovered initially: Letting the pockets freeze on a tray uncovered prevents them from sticking together and keeps their shape.
- Store properly: Use freezer bags with the air pressed out to avoid freezer burn and keep pockets tasting fresh.
- Microwave cautiously: When reheating, use short bursts (15-20 seconds) to avoid overheating the jelly, which can get runny.
One time I skipped freezing the pockets uncovered and ended up with a sticky mess stuck together — lesson learned! Also, experimenting with mixing a little honey into the peanut butter added a subtle sweetness that made the pockets stand apart. Cooking these pockets alongside prepping a quick dinner like my healthy chicken veggie skillet wraps can save you time and stress.
Variations & Adaptations
Not everyone loves the classic peanut butter and jelly combo, so here are some fun ways to mix things up or adapt:
- Different nut or seed butters: Swap peanut butter with almond, cashew, or sunflower seed butter for nut-free options.
- Jam and jelly swaps: Try raspberry, apricot, or blueberry jams for seasonal flair. In summer, fresh mashed berries work well too.
- Grain-free or gluten-free: Use gluten-free sandwich bread or make your own grain-free flatbread to keep it allergy-friendly.
- Sweet add-ins: Add a sprinkle of cinnamon or mini chocolate chips inside the pockets for a fun twist.
- Savory twist: For the adventurous, try swapping jelly for cream cheese and honey with sliced strawberries or apple slices.
Personally, I once made these pockets using sunflower seed butter and mixed berry jam for a friend with nut allergies — they disappeared faster than the classic ones! You can even freeze these pockets with a little less jelly if you worry about sogginess.
Serving & Storage Suggestions
These Easy Homemade Uncrustable PB&J Pockets are best served slightly thawed or at room temperature. If you’re packing them for school or work lunches, a quick thaw in the fridge overnight works perfectly. For a quick snack, microwave for 20-30 seconds — just enough to soften without melting the jelly.
Pair them with a glass of cold milk or fresh fruit for a balanced meal. They also make excellent picnic treats, especially alongside easy dishes like crispy chicken nacho crust pizza if you’re packing a crowd-pleasing spread.
Store the pockets in freezer bags or airtight containers for up to 2 months. To prevent freezer burn, press out as much air as possible. Over time, the bread texture may change slightly, but the flavor stays solid. If you notice slight dryness, a quick microwave thaw with a damp paper towel wrapped around the pocket can restore softness.
Nutritional Information & Benefits
Each homemade uncrustable pocket roughly contains:
| Nutrition | Per Pocket (approx.) |
|---|---|
| Calories | 250-280 kcal |
| Protein | 7-8 grams |
| Carbohydrates | 30-35 grams |
| Fat | 10-12 grams |
| Fiber | 2-3 grams |
| Sugar | 8-10 grams (depends on jelly choice) |
Key ingredients like peanut butter provide healthy fats and protein, which help keep you full longer. Choosing natural peanut butter with no added sugars and a fruit-based jelly with minimal preservatives can boost the nutritional value. For those with allergies, switching to seed butters or gluten-free bread makes this snack accessible. It’s not just a treat; it’s a decent source of energy that fuels busy days.
Conclusion
Making these Easy Homemade Uncrustable PB&J Pockets for Freezer Meals is a simple way to bring a little homemade magic to everyday lunches and snacks. They’re quick to make, freezer-friendly, and totally customizable to what your family loves. I keep coming back to this recipe because it solves the problem of rushed mornings, picky eaters, and the need for a reliable, tasty grab-and-go option.
Give yourself permission to tweak the fillings or try new spreads — it’s all about what makes your kitchen and your family happy. I’ve loved making these pockets a regular part of our meal prep, and I hope you find the same quiet joy in them as I do. If you try this recipe, I’d love to hear how you make it your own, so leave a comment below and share your favorite twists!
FAQs about Easy Homemade Uncrustable PB&J Pockets
How long can I store these PB&J pockets in the freezer?
They keep well for up to 2 months in an airtight container or freezer bag. Beyond that, the bread might get a bit dry, but they’re still safe to eat.
Can I use whole wheat bread instead of white bread?
Yes, but whole wheat bread is usually denser and less flexible, so sealing may be trickier. Press edges firmly and consider slightly toasting the bread first to help.
Will the jelly leak when freezing or thawing?
Using thicker jams or reducing the jelly amount helps prevent leaks. Also, sealing edges well and freezing uncovered initially reduces mess.
Can these pockets be reheated in an air fryer?
Yes! Air frying at 350°F (175°C) for 3-4 minutes crisps the bread nicely while warming the filling — just keep an eye to avoid burning.
Are these pockets safe for kids with peanut allergies?
If peanut allergies are a concern, substitute peanut butter with sunflower seed butter or another allergy-friendly spread to keep it safe and delicious.
Pin This Recipe!
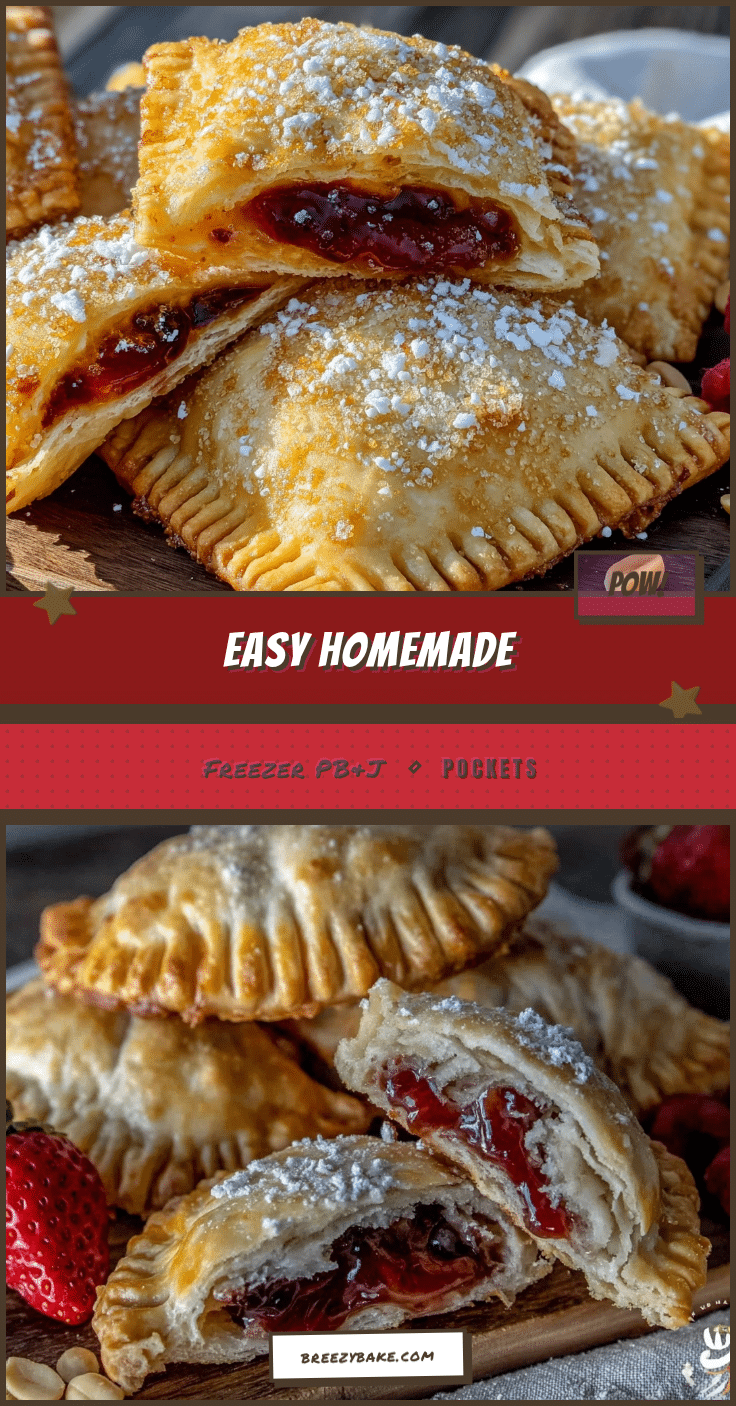
Easy Homemade Uncrustable PB&J Pockets Recipe for Perfect Freezer Meals
A quick and easy recipe to make homemade peanut butter and jelly pockets perfect for freezer meals, lunchboxes, and grab-and-go snacks. These pockets are customizable, freezer-friendly, and a comforting classic with a homemade touch.
- Prep Time: 10 minutes
- Cook Time: 0 minutes
- Total Time: 20 minutes
- Yield: 8-10 pockets 1x
- Category: Snack
- Cuisine: American
Ingredients
- 8–10 slices white sandwich bread (soft, fresh bread works best)
- 1/2 cup creamy peanut butter (can substitute almond or sunflower seed butter)
- 1 tablespoon honey (optional, mixed into peanut butter)
- 1 tablespoon grape jelly or strawberry jam (or your favorite jam)
- Water or milk (for brushing edges to seal)
Instructions
- Prepare your workspace by laying out bread slices on a clean cutting board. Gently press fresh bread flat to prevent tearing.
- Mix peanut butter and honey in a small bowl if using honey.
- Spread about 1 tablespoon of peanut butter mixture evenly onto half of the bread slices, leaving a 1/2-inch border around edges.
- Spread about 1 tablespoon of jelly or jam onto the remaining bread slices, leaving edges clear.
- Place jelly-covered slices on top of peanut butter-covered slices, jelly side down, aligning edges.
- Dip your finger in water or milk and brush around the edges of the sandwich to help bread stick together.
- Using a round cookie cutter or a drinking glass about 3 inches in diameter, press down firmly along the edges to seal and cut into circles. Press twice if needed.
- Place pockets on a parchment-lined baking sheet without touching and freeze uncovered for 1-2 hours until firm.
- Transfer frozen pockets to freezer-safe bags or airtight containers, label with date, and freeze up to 2 months.
- To serve, thaw in the fridge overnight or microwave for 20-30 seconds until soft but not soggy.
Notes
Use soft white sandwich bread for best sealing. Brush edges with water or milk to prevent leaking. Freeze pockets uncovered initially to avoid sticking. Use thicker jams or reduce jelly amount to prevent leaks. Microwave in short bursts to avoid overheating jelly. Air fryer reheating at 350°F for 3-4 minutes crisps bread nicely.
Nutrition
- Serving Size: 1 pocket
- Calories: 265
- Sugar: 9
- Sodium: 150
- Fat: 11
- Saturated Fat: 2
- Carbohydrates: 32
- Fiber: 2.5
- Protein: 7.5
Keywords: peanut butter, jelly, uncrustables, freezer meals, homemade, lunchbox, snack, easy recipe, kid-friendly


