My neighbor Marisol watched me scraping the stringy guts out of a pumpkin one October afternoon, and didn’t say anything at first. Then she reached over and grabbed a handful of the slippery seeds I’d just separated, held them up to the light, and said, “You’re going to rinse those and roast them, right?” I admitted I usually just tossed them—the truth is, I never knew what to do with pumpkin seeds that didn’t end up tasting like cardboard. She shook her head like I’d just confessed something mildly tragic and said, “Come over when you’re done. I’ll show you something quick.”
So there I was, twenty minutes later, standing in her tiny kitchen while she pulled out a baking sheet and a jar of honey. She wasn’t teaching me a formal recipe—she was just making a snack the way her grandmother had, passing along something that didn’t need measuring cups or fuss. The cinnamon came from a tin she had wedged between paprika and cumin, and she sprinkled it with the confidence of someone who’d done this a hundred times. Honestly, I was skeptical. Honey and pumpkin seeds? Wouldn’t that just make a sticky mess?
But the smell that filled her kitchen—warm, sweet, a little toasty—made me eat my words. The seeds came out glossy and caramelized, with that perfect balance of salty-sweet and a whisper of cinnamon warmth. I burned my tongue on the first batch because I couldn’t wait. Maybe you’ve been there, standing over a hot baking sheet, blowing on something you know is too hot but eating it anyway? That was me. Marisol just laughed and handed me a paper towel to take some home.
That’s the thing about this recipe. It’s not fancy or complicated, and it doesn’t pretend to be. It’s the kind of thing you make when you’re carving pumpkins with kids, or when you have fifteen minutes and a craving for something crunchy and sweet. It’s the recipe that made me stop throwing away seeds. And now, every time I make it, I think of Marisol’s cinnamon-stained fingers and her no-nonsense advice. You don’t need a special occasion for these honey roasted pumpkin seeds—just a pumpkin, a little honey, and maybe a neighbor who knows better than you do.
Why You’ll Love This Recipe
Let’s face it—most pumpkin seed recipes are either too bland or too complicated. These honey roasted pumpkin seeds with cinnamon hit that sweet spot (literally) between salty snack and dessert. They’re the kind of thing you make once and then find yourself craving all fall long.
- Quick & Easy: From pumpkin to snack in under 30 minutes. No complicated steps, no waiting around.
- Simple Ingredients: You probably have everything in your pantry right now—honey, cinnamon, salt, and oil. That’s it.
- Perfect for Weeknights: After a long day, sometimes you just want something crunchy and satisfying without a huge cleanup. This fits the bill.
- Crowd-Pleaser: I’ve brought these to potlucks and watched grown adults hover by the bowl. Kids love them too—they’re like a healthier version of those sugary snack mixes.
- Unbelievably Delicious: The honey caramelizes into a glossy coating that’s just sweet enough, while the cinnamon adds warmth and the salt keeps things balanced. You won’t stop at one handful.
What makes this recipe different from the rest? It’s the ratio. I tested this about five times before I got it right—too much honey and the seeds get soggy, too little and they’re dry. The trick is coating them just enough so they glisten without pooling. Plus, using cinnamon that’s fresh makes a bigger difference than you’d think. This isn’t just another pumpkin seed recipe; it’s the one that actually works for busy people who don’t have time for fussy techniques.
These honey roasted pumpkin seeds are the kind of snack that makes you close your eyes after the first bite. It’s comfort food in miniature—crunchy, warm, and just sweet enough to feel like a treat. Perfect for movie nights, lunchbox surprises, or just standing at the counter eating them straight off the baking sheet. No judgment here.
What Ingredients You Will Need
This recipe uses simple, wholesome ingredients to deliver bold flavor and satisfying crunch without the fuss. Most of these are pantry staples, which is exactly what you want on a busy weeknight when you’re craving something homemade.
- 1 cup fresh pumpkin seeds — These come straight from your pumpkin carving project. Rinse them well and pat them dry. The drier they are, the crunchier they’ll get. If you’re buying pre-packaged seeds, look for raw, unsalted ones.
- 2 tablespoons honey — Use a runny honey for easier coating. I prefer a mild honey like clover or orange blossom so the cinnamon flavor shines. Local honey works great too and adds a subtle floral note. (If your honey is crystallized, warm it gently for a few seconds in the microwave.)
- 1 tablespoon melted coconut oil or butter — Coconut oil gives a subtle sweetness that pairs beautifully with cinnamon. Butter adds a richer, toastier flavor. Use whichever you have on hand. For a dairy-free option, stick with coconut oil.
- 1 teaspoon ground cinnamon — Don’t skimp here. Fresh cinnamon makes a noticeable difference. I recommend Saigon cinnamon for its bold, slightly sweet warmth, but any cinnamon works. (Store your cinnamon in a cool, dark place and replace it every six months for best flavor.)
- 1/2 teaspoon salt — Flaky sea salt is ideal for that final sprinkle, but regular table salt works fine. The salt is crucial—it balances the sweetness and prevents the seeds from tasting one-dimensional.
- Optional: 1/4 teaspoon vanilla extract — This adds a lovely depth that makes the seeds taste almost like a cookie. I add it when I’m making these for a special treat.
- Optional: Pinch of nutmeg or cardamom — If you’re feeling adventurous, a tiny pinch of nutmeg or cardamom complements the cinnamon beautifully. Go easy—these are strong flavors.
That’s it. Seven ingredients max, and most of them are probably in your kitchen right now. The beauty of this recipe is that it doesn’t require a special trip to the store. You can make it the same night you carve your pumpkin, while the seeds are still fresh and the kitchen smells like fall.
Equipment Needed
You don’t need much for these honey roasted pumpkin seeds, which is exactly what you want on a busy weeknight. Here’s what you’ll need:
- Baking sheet — A standard half-sheet pan works perfectly. Line it with parchment paper for easier cleanup. Trust me, the honey can get sticky.
- Mixing bowl — Any medium bowl will do. You’re just tossing seeds with the honey mixture, so nothing fancy required.
- Colander — For rinsing the seeds. A fine-mesh sieve works even better.
- Kitchen towel or paper towels — For drying the seeds thoroughly. This step matters more than you think—wet seeds won’t get crispy.
- Spatula or wooden spoon — For stirring the seeds halfway through baking.
- Measuring spoons — For the honey, oil, cinnamon, and salt. Eyeballing works, but measuring ensures consistent results.
If you don’t have parchment paper, you can grease the baking sheet lightly with oil. Just be aware that the honey might stick a little more. A silicone baking mat also works beautifully and is reusable. Honestly, I’ve made these with just a bowl, a spoon, and a baking sheet—that’s the beauty of this recipe. It’s forgiving and doesn’t require specialized equipment.
Preparation Method
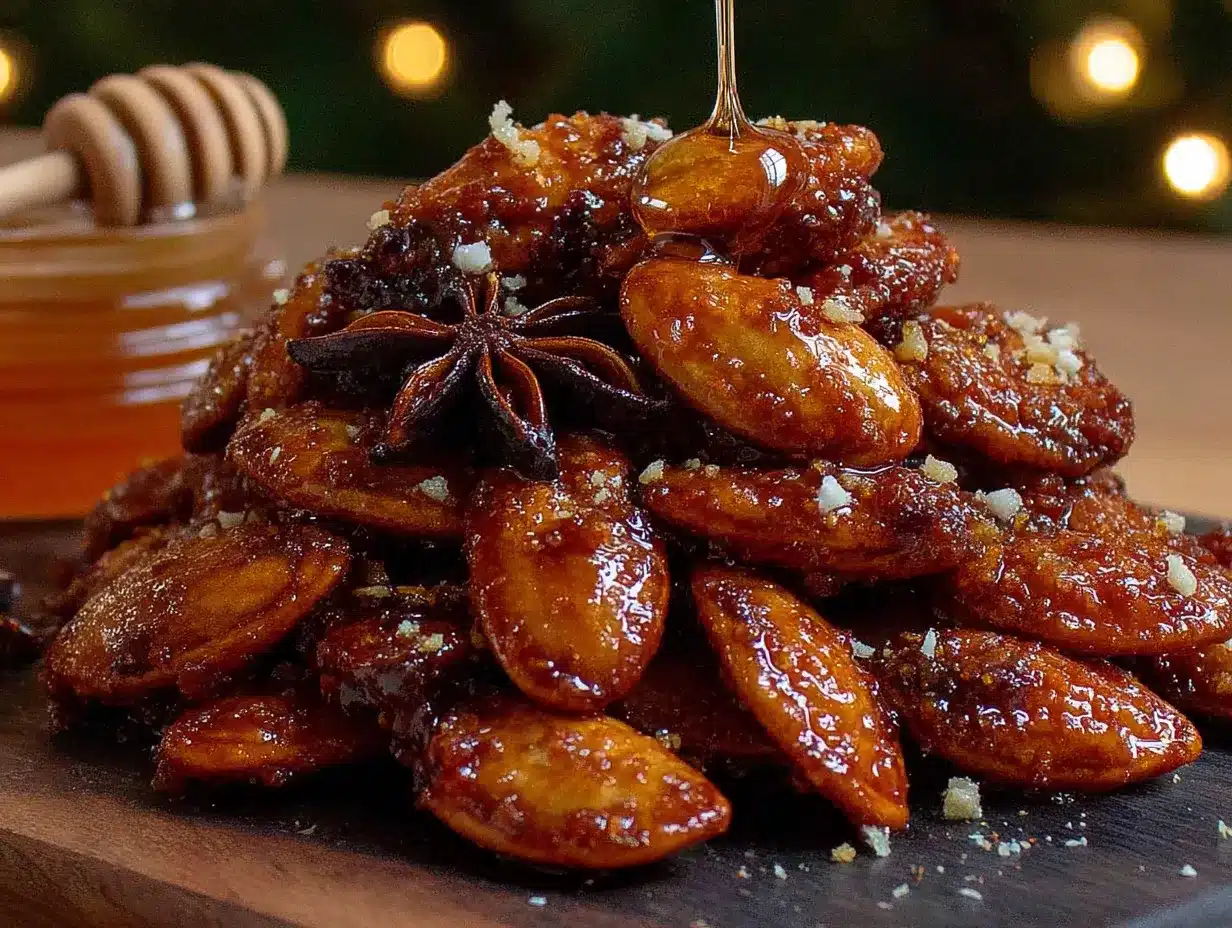
Follow these steps carefully, and you’ll have perfectly crunchy, sweet, and spicy honey roasted pumpkin seeds in under 30 minutes. I’ve added time estimates and sensory cues so you know exactly what to look for at each stage.
- Preheat your oven to 325°F (163°C). Line a baking sheet with parchment paper. While the oven heats, you’ll prep the seeds. This temperature is key—too hot and the honey burns, too cool and the seeds don’t crisp up.
- Clean the pumpkin seeds thoroughly. Place the seeds in a colander and rinse them under cool running water, using your fingers to separate any remaining pumpkin flesh. Pick out any stringy bits. This takes about 2-3 minutes. The seeds should feel clean and slightly slippery.
- Dry the seeds completely. Spread the rinsed seeds on a clean kitchen towel or layer of paper towels. Pat them dry, then let them sit for 5 minutes to air-dry. This is the most important step—wet seeds steam instead of roast, and you’ll end up with chewy, not crunchy, seeds. You’ll know they’re dry enough when they no longer stick to the towel.
- Mix the coating. In a medium bowl, combine 2 tablespoons honey, 1 tablespoon melted coconut oil (or butter), 1 teaspoon ground cinnamon, and 1/2 teaspoon salt. Whisk until smooth. If the honey is too thick to mix easily, warm the bowl slightly or microwave the honey for 10 seconds. The mixture should be glossy and fragrant.
- Coat the seeds. Add the dried pumpkin seeds to the bowl and toss well with a spatula until every seed is evenly coated. You want each seed to have a thin, even layer of the honey mixture—not clumps of coating stuck together. Scrape the sides of the bowl to get every bit of the mixture onto the seeds.
- Spread on the baking sheet. Pour the coated seeds onto the prepared baking sheet and spread them into a single, even layer. Don’t overcrowd—if seeds are stacked on top of each other, they’ll steam instead of roast. Use the spatula to separate any clumps.
- Bake for 12 minutes. Place the baking sheet on the middle rack. After 12 minutes, remove it from the oven and stir the seeds with a spatula, spreading them back into an even layer. This ensures even roasting. You’ll notice the kitchen starting to smell warm and toasty at this point.
- Bake for another 8-10 minutes. Return the sheet to the oven and bake until the seeds are golden brown and fragrant. Watch them closely in the last 2 minutes—honey can burn quickly. The seeds are done when they look glossy and slightly darker, and you can hear them sizzling gently. They will still feel slightly soft when hot but will crisp up as they cool.
- Cool completely. Remove the baking sheet from the oven and let the seeds cool on the sheet for at least 10 minutes without stirring. They’ll continue to crisp as they cool. Don’t skip this step—moving them too soon can make them soggy.
- Break apart and enjoy. Once cool, break apart any clusters with your fingers. The seeds should be crunchy, glossy, and perfectly coated. If they’re not crunchy enough, you can return them to a 300°F oven for 2-3 more minutes, but watch carefully.
Cooking Tips & Techniques
I’ve made this recipe more times than I can count, and I’ve learned a few things the hard way. Here are the tips that actually make a difference.
Dry the seeds like your crunch depends on it. Because it does. The first time I made these, I rushed the drying step and ended up with chewy, sad seeds. Pat them dry with a towel, then let them sit for a few extra minutes. If you’re in a hurry, spread them on a baking sheet and pop them in a 200°F oven for 5 minutes before coating.
Don’t skip the salt. I know it seems like a small detail, but salt is what makes the honey and cinnamon sing. Without it, the seeds taste flat and overly sweet. I like to add a tiny extra sprinkle of flaky sea salt right when they come out of the oven—it sticks to the warm honey and gives little bursts of salty goodness.
Watch the oven like a hawk in the last few minutes. Honey burns fast. I once walked away to answer a text and came back to seeds that tasted like bitter caramel. Set a timer, and check them at the 18-minute mark. They should be golden, not dark brown.
Let them cool completely. I know it’s tempting to dig in right away, but warm seeds are soft. As they cool, the honey hardens into that perfect crackly coating. Give them at least 10 minutes. Use that time to clean up the kitchen—the honey mess is easier to clean when it’s still warm.
Double the batch if you’re smart. These disappear fast. I’ve learned to make at least double what I think I need. They keep well in an airtight container for up to a week—if they last that long.
Variations & Adaptations
One of the best things about this recipe is how easy it is to change up. Here are some variations I’ve tried and loved:
Spicy Honey Roasted Seeds: Add 1/4 teaspoon cayenne pepper or chili powder to the honey mixture. The heat cuts through the sweetness beautifully. I made this version for a game day party and it was gone in minutes. Start with less cayenne than you think—you can always add more, but you can’t take it out.
Maple Cinnamon Seeds: Swap the honey for pure maple syrup. The flavor is earthier and less sweet, with a lovely woodsy note. Use Grade B maple syrup for a stronger flavor. This version pairs especially well with a pinch of smoked salt on top.
Pumpkin Pie Spice Seeds: Replace the cinnamon with 1 teaspoon pumpkin pie spice. This gives you all the warm flavors of fall in one bite. I make this version around Thanksgiving and package it in little jars as hostess gifts.
Savory Herb Seeds: Skip the honey and cinnamon entirely. Toss the seeds with olive oil, garlic powder, rosemary, and salt. Roast at 325°F for 20 minutes. These are fantastic on salads or just eaten by the handful.
Chocolate Drizzle Seeds: After the seeds cool, drizzle them with melted dark chocolate and let it set. This turns them into a dessert that feels fancy but takes almost no extra effort. I did this for a holiday cookie exchange and people lost their minds.
Dietary Adaptations: For a vegan version, use coconut oil instead of butter. For a lower-sugar option, reduce the honey to 1 tablespoon and add an extra sprinkle of cinnamon. The seeds won’t be as glossy, but they’ll still be delicious.
Serving & Storage Suggestions
These honey roasted pumpkin seeds are incredibly versatile. Here’s how to serve and store them for maximum enjoyment.
Serving Temperature: Serve them at room temperature. They’re best within a few hours of roasting, when the honey coating is perfectly crunchy. If you’re serving them at a party, set them out in a small bowl—they’re surprisingly filling, so a little goes a long way.
How to Serve: These are perfect as a snack on their own, but they also shine as a topping. Sprinkle them over yogurt parfaits, oatmeal, or even a simple green salad with apple slices and goat cheese. I’ve also crushed them slightly and used them as a crust for baked chicken—trust me on this one.
Pairing Suggestions: Serve alongside a warm mug of apple cider or a pumpkin spice latte for the ultimate fall treat. They also pair beautifully with cheese boards—the sweetness cuts through sharp cheddar or tangy goat cheese.
Storage Instructions: Store cooled seeds in an airtight container at room temperature for up to 1 week. Do not refrigerate—the moisture will make them soft. If they lose their crunch, spread them on a baking sheet and warm them in a 300°F oven for 3-4 minutes. Let them cool before eating.
Freezer Option: You can freeze these for up to 3 months. Place them in a freezer-safe bag, squeeze out as much air as possible, and seal. Thaw at room temperature for 15 minutes before serving. They might lose a tiny bit of crunch, but they’re still delicious.
Flavor Development: These seeds are actually best the day they’re made, when the honey coating is at its crunchiest. After a day or two, the coating softens slightly. They’re still good—just not as crackly. If you want that fresh-from-the-oven texture, make a small batch and eat it quickly. That’s never been a problem in my house.
Nutritional Information & Benefits
These honey roasted pumpkin seeds are more than just a tasty snack—they’re packed with nutrients that make them worth reaching for.
Estimated Nutritional Values (per 1/4 cup serving):
- Calories: 180
- Protein: 7g
- Fat: 12g (mostly healthy unsaturated fats)
- Carbohydrates: 12g
- Fiber: 2g
- Sugar: 7g
- Sodium: 150mg
Health Benefits: Pumpkin seeds are a great source of magnesium, zinc, and iron. Magnesium supports muscle function and sleep quality, while zinc is important for immune health. The healthy fats and protein make these seeds surprisingly satisfying—a small handful can curb hunger for hours.
Dietary Considerations: This recipe is naturally gluten-free and can be made dairy-free by using coconut oil instead of butter. For a lower-sugar option, reduce the honey to 1 tablespoon. The seeds are also vegetarian and can be made vegan with the oil swap.
Potential Allergens: Pumpkin seeds themselves are not common allergens, but if you have tree nut allergies, check that your seeds were processed in a nut-free facility. The recipe contains honey (which some infants under 1 year should avoid) and optional butter (dairy).
I love that this snack feels indulgent but actually has real nutritional value. It’s the kind of treat I feel good about giving my family—and myself—without any guilt.
Conclusion
These quick honey roasted pumpkin seeds with cinnamon are the kind of recipe that proves you don’t need complicated techniques or fancy ingredients to make something truly delicious. They come together in under 30 minutes, use stuff you probably already have, and turn something you might have thrown away into a snack worth savoring.
What I love most about this recipe is how adaptable it is. Make it spicy, make it sweet, make it savory—it works every time. It’s forgiving enough for a beginner and satisfying enough for someone who’s been cooking for years. And honestly, there’s something deeply satisfying about transforming a pile of slimy seeds into a bowl of golden, crunchy goodness. It feels like a small victory every time.
I hope you give these a try the next time you carve a pumpkin, or honestly, the next time you’re craving something crunchy and sweet. Play with the spices, adjust the sweetness to your taste, and make them your own. And if you come up with a variation I haven’t tried, I’d love to hear about it—drop a comment below and share your creation. Happy roasting!
Frequently Asked Questions
Can I use store-bought raw pumpkin seeds instead of fresh ones?
Absolutely. If you don’t have a pumpkin to carve, look for raw, unsalted pumpkin seeds (also called pepitas) in the bulk section or snack aisle. They work perfectly and save you the cleaning step.
Why did my seeds turn out chewy instead of crunchy?
This usually happens for one of two reasons: the seeds weren’t dried thoroughly before roasting, or they weren’t baked long enough. Make sure to pat them completely dry, and don’t be afraid to let them bake until they’re golden brown. They’ll also crisp up more as they cool.
Can I make these in an air fryer?
Yes! Preheat your air fryer to 300°F (150°C). Spread the coated seeds in a single layer in the basket and cook for 10-12 minutes, shaking halfway through. Watch them closely—air fryers run hot and honey can burn quickly.
How do I prevent the seeds from sticking to the baking sheet?
Parchment paper is your best friend here. It creates a non-stick surface that makes cleanup a breeze. If you don’t have parchment, grease the sheet generously with oil or use a silicone baking mat.
Can I use a different sweetener instead of honey?
Sure. Maple syrup is the best substitute—it has a similar consistency and caramelizes beautifully. Agave nectar also works, though it’s sweeter, so use slightly less. Avoid granulated sugar, as it won’t coat the seeds evenly.
Pin This Recipe!
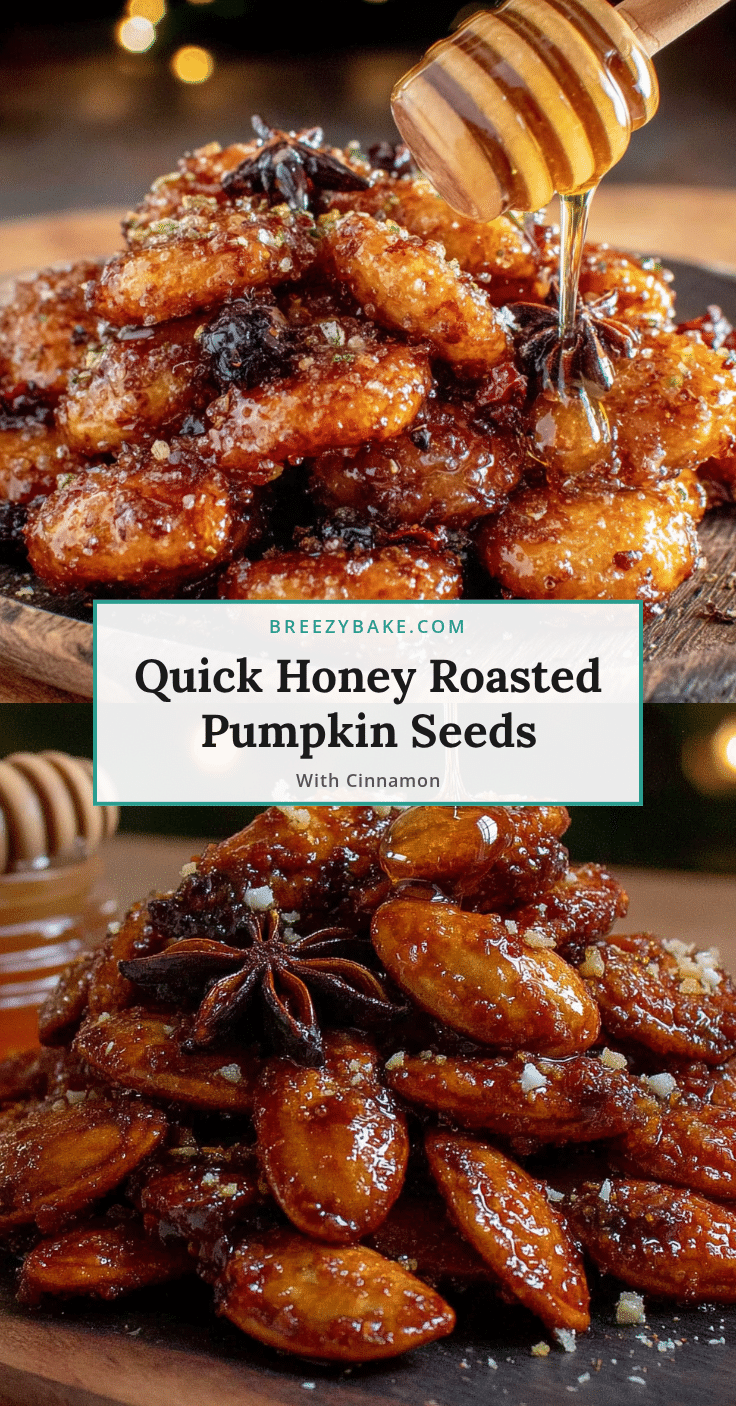
Easy Honey Roasted Pumpkin Seeds with Cinnamon

These honey roasted pumpkin seeds with cinnamon are a quick and easy snack that transforms fresh pumpkin seeds into a crunchy, sweet, and salty treat. Perfect for fall, they come together in under 30 minutes with simple pantry ingredients.
- Prep Time: 10 minutes
- Cook Time: 20 minutes
- Total Time: 30 minutes
- Yield: 4 servings 1x
- Category: Snack
- Cuisine: American
Ingredients
- 1 cup fresh pumpkin seeds
- 2 tablespoons honey
- 1 tablespoon melted coconut oil or butter
- 1 teaspoon ground cinnamon
- 1/2 teaspoon salt
- Optional: 1/4 teaspoon vanilla extract
- Optional: Pinch of nutmeg or cardamom
Instructions
- Preheat your oven to 325°F (163°C). Line a baking sheet with parchment paper.
- Clean the pumpkin seeds thoroughly. Place the seeds in a colander and rinse them under cool running water, using your fingers to separate any remaining pumpkin flesh. Pick out any stringy bits. This takes about 2-3 minutes.
- Dry the seeds completely. Spread the rinsed seeds on a clean kitchen towel or layer of paper towels. Pat them dry, then let them sit for 5 minutes to air-dry.
- Mix the coating. In a medium bowl, combine 2 tablespoons honey, 1 tablespoon melted coconut oil (or butter), 1 teaspoon ground cinnamon, and 1/2 teaspoon salt. Whisk until smooth.
- Coat the seeds. Add the dried pumpkin seeds to the bowl and toss well with a spatula until every seed is evenly coated.
- Spread on the baking sheet. Pour the coated seeds onto the prepared baking sheet and spread them into a single, even layer.
- Bake for 12 minutes. Place the baking sheet on the middle rack. After 12 minutes, remove it from the oven and stir the seeds with a spatula, spreading them back into an even layer.
- Bake for another 8-10 minutes. Return the sheet to the oven and bake until the seeds are golden brown and fragrant. Watch them closely in the last 2 minutes.
- Cool completely. Remove the baking sheet from the oven and let the seeds cool on the sheet for at least 10 minutes without stirring.
- Break apart and enjoy. Once cool, break apart any clusters with your fingers.
Notes
Dry the seeds thoroughly for maximum crunch. Watch the oven closely in the last few minutes to prevent burning. Let seeds cool completely before serving for the crispiest texture.
Nutrition
- Serving Size: 1/4 cup
- Calories: 180
- Sugar: 7
- Sodium: 150
- Fat: 12
- Saturated Fat: 3
- Carbohydrates: 12
- Fiber: 2
- Protein: 7
Keywords: honey roasted pumpkin seeds, cinnamon pumpkin seeds, easy pumpkin seed recipe, fall snack, roasted pumpkin seeds


