“Hey, you’ve got to try these bars!” my coworker said, sliding a slightly squished but utterly delicious square across the breakroom table. Honestly, at first, I was skeptical. No-bake? Peanut butter and chocolate? Oats thrown in? It sounded almost too simple—and I’m not really the “no-baker” type. But one bite, and I was hooked.
This recipe actually came about when I ran out of time one hectic afternoon—no oven, no patience, just a craving for something sweet and satisfying. I grabbed what I had on hand: creamy peanut butter, quick oats, and some chocolate chips. The result? These easy no-bake peanut butter chocolate oat bars that quickly became my go-to snack for busy days and last-minute guests.
What’s funny is how the texture caught me off guard. Not too sticky, not too crumbly, with a perfect balance of peanut butter richness and chocolate sweetness. It’s the kind of snack that reminds you why simple sometimes wins. Plus, they’re portable and filling enough to toss in a lunchbox or grab between errands—something I never thought I’d say about an oat bar.
After making these bars over and over (yes, multiple times in one week), I realized they’re more than just a quick fix. They’re a quiet little comfort—snacking without the guilt or fuss. And honestly, if you trust me on this, you’ll find they’re a solid recipe to keep in your back pocket.
Why You’ll Love This Recipe
After testing this recipe repeatedly, I can confidently say these bars tick all the boxes for an easy, crowd-pleasing snack that’s both satisfying and simple to make. Here’s why:
- Quick & Easy: Comes together in under 15 minutes—no baking, no waiting.
- Simple Ingredients: Uses pantry staples you probably already have, like peanut butter, oats, and chocolate chips.
- Perfect for Anytime Snacking: Great for lunchboxes, afternoon pick-me-ups, or post-workout fuel.
- Crowd-Pleaser: Kids and adults alike keep reaching for seconds, making it perfect for casual gatherings.
- Unbelievably Delicious: The chewy oats combined with creamy peanut butter and melty chocolate create a texture and flavor combo that’s hard to beat.
This isn’t just another oat bar recipe. The secret is in the mix of smooth peanut butter and just the right amount of honey to bind everything together without being overly sweet. Plus, melting the chocolate on top adds a glossy finish that feels indulgent but is so straightforward. I’ve tried swapping in almond butter and even peanut butter powder with good results, but honestly, the classic combo is where it’s at.
These bars aren’t just snacks—they’re little moments of comfort and energy wrapped in a chewy, chocolaty bite. If you’ve ever wished for a sweet treat that’s fuss-free and actually good for you, this recipe is going to stick with you.
What Ingredients You Will Need
This recipe uses simple, wholesome ingredients to deliver bold flavor and satisfying texture without the fuss. Most are pantry staples, and you can easily tweak a few to suit your taste or dietary needs.
- Old-Fashioned Rolled Oats (2 cups / 180g) – The chewy base that holds everything together; quick oats can work but may change texture slightly.
- Creamy Peanut Butter (1 cup / 250g) – I prefer natural peanut butter without added sugar or oil for the best flavor and texture.
- Honey (1/3 cup / 80ml) – Acts as a natural sweetener and binder (maple syrup works too if vegan).
- Vanilla Extract (1 teaspoon) – Adds subtle depth to the bars.
- Salt (1/4 teaspoon) – Balances the sweetness and enhances flavor.
- Chocolate Chips (1 cup / 175g) – Semi-sweet or dark chocolate works best; I like Ghirardelli for a richer taste.
- Optional Mix-ins: Chopped nuts, shredded coconut, or dried fruit for texture and flavor variations.
For a dairy-free version, choose vegan chocolate chips. Also, if you need a gluten-free option, ensure your oats are certified gluten-free. This recipe’s flexibility means you can swap ingredients like almond butter or sunflower seed butter if peanut allergies are a concern, though the flavor will shift slightly.
Equipment Needed
- Mixing Bowl: A medium to large bowl to combine your ingredients comfortably.
- Measuring Cups and Spoons: For accurate ingredient amounts (important for consistent texture).
- Spatula: A sturdy silicone spatula works best for mixing and spreading.
- 8×8-inch (20×20 cm) Baking Pan: For shaping the bars; you can line it with parchment paper for easy removal.
- Microwave-Safe Bowl or Double Boiler: To melt the chocolate chips smoothly.
If you don’t have a baking pan, a shallow dish or loaf pan can work, just adjust the thickness and cutting size accordingly. I’ve also tried using silicone molds for fun shapes, which kids loved! For melting chocolate, a double boiler keeps the texture silky without burning, but the microwave method is quick and just as effective if you stir frequently.
Preparation Method
- Prepare Your Pan: Line an 8×8-inch (20×20 cm) baking pan with parchment paper, leaving some overhang on the sides. This makes it easier to lift the bars out later. (5 minutes)
- Mix the Base: In a large bowl, combine 2 cups (180g) of old-fashioned rolled oats, 1 cup (250g) creamy peanut butter, 1/3 cup (80ml) honey, 1 teaspoon vanilla extract, and 1/4 teaspoon salt. Stir well with a spatula until the mixture is evenly combined and sticky. If it feels too dry, add a teaspoon or two more honey or peanut butter. (5 minutes)
- Press Into Pan: Transfer the mixture into your prepared pan. Use the back of the spatula or clean hands to press it down firmly and evenly, making sure there are no gaps or loose edges. This helps the bars hold together better. (3 minutes)
- Melt the Chocolate: In a microwave-safe bowl, melt 1 cup (175g) of chocolate chips in 20-second intervals, stirring between each, until smooth and glossy. Alternatively, melt using a double boiler over simmering water. (3-5 minutes)
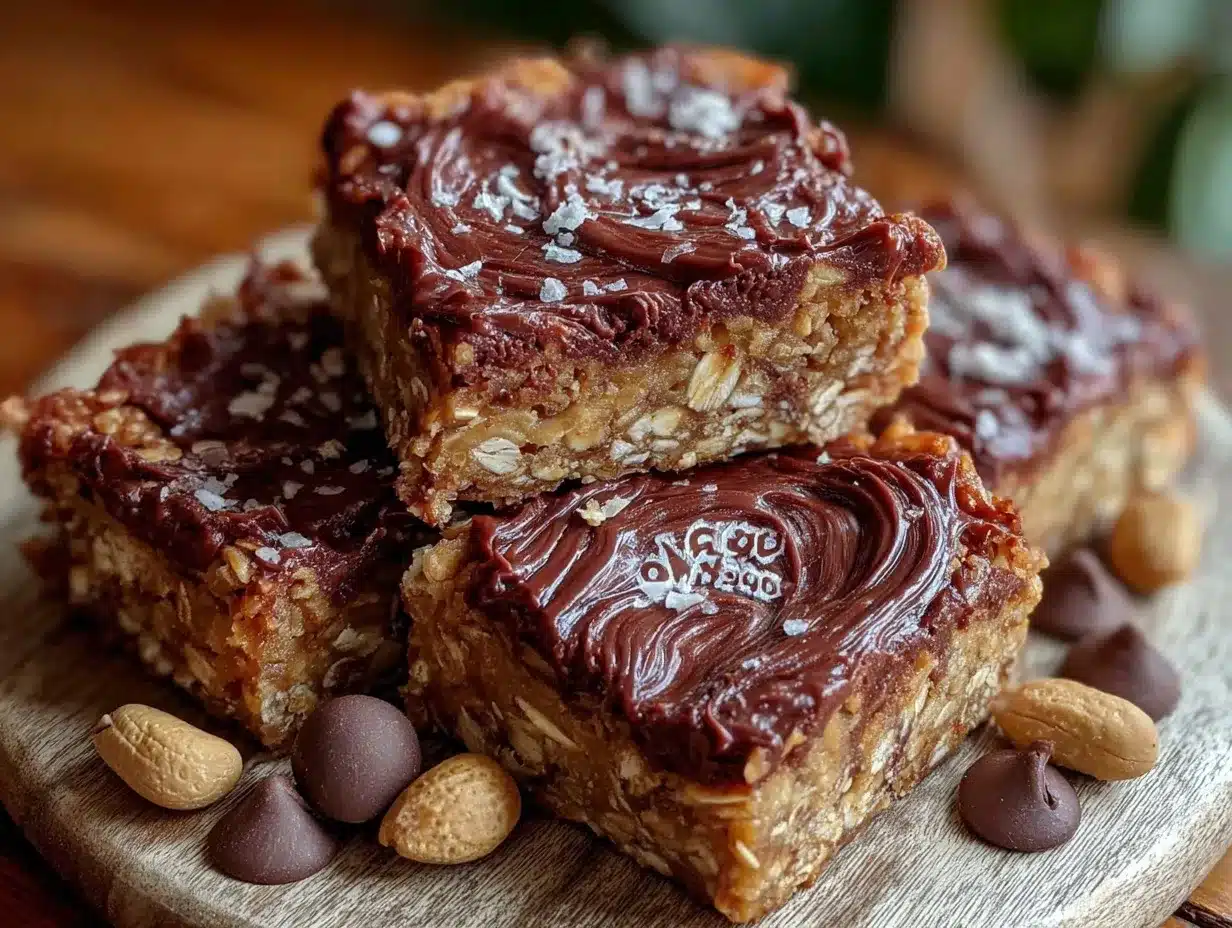
- Spread Chocolate Layer: Pour the melted chocolate over the pressed oat mixture, gently spreading to cover the surface evenly. The contrast between the creamy peanut butter oats and glossy chocolate is part of the charm here. (2 minutes)
- Chill: Place the pan in the refrigerator for at least 1 hour, or until the chocolate has set and bars are firm to the touch. This step is crucial to get clean cuts and keep the bars from falling apart. (1 hour)
- Slice and Serve: Use the parchment paper to lift the set bars from the pan. Cut into 12 squares or rectangles with a sharp knife. Store leftovers in an airtight container in the fridge. (5 minutes)
Pro Tip: If your peanut butter is on the thicker side, warm it slightly in the microwave for 15 seconds to make mixing easier. Also, don’t skip the chilling step; I’ve learned the hard way that bars cut too soon get crumbly and messy.
Cooking Tips & Techniques
Getting these bars just right takes a few little tricks I picked up along the way. First, the type of peanut butter matters—natural and creamy works best for that smooth texture and rich flavor. Avoid the dry or chunky versions unless you want a different bite.
When mixing, it’s okay if the oats seem a bit loose at first; the honey and peanut butter will bind everything as you press it into the pan. If your mixture feels crumbly, add a teaspoon of honey or peanut butter until it sticks better. You know, sometimes recipes look perfect online, but your pantry ingredients behave differently!
Melting chocolate can be tricky if you rush it. I always recommend short bursts in the microwave or a low heat double boiler to prevent seizing. Stirring often keeps the chocolate silky and easy to spread.
Timing matters too—giving the bars enough chilling time makes all the difference between neat, hold-together bars and a sticky mess. Multi-task by prepping other snacks or even trying a creamy strawberry cream puff bar while waiting!
Lastly, when cutting, use a sharp knife wiped clean between cuts. This helps with clean edges and prevents the chocolate from cracking.
Variations & Adaptations
- Nut-Free Version: Swap peanut butter with sunflower seed butter and use dairy-free chocolate chips to make these safe for nut allergies.
- Added Crunch: Toss in 1/4 cup of chopped roasted peanuts or almonds for extra texture.
- Seasonal Twist: Mix in dried cranberries or chopped dried cherries for a tart contrast, especially nice in the fall and winter months.
- Chocolate Swap: Use white chocolate or butterscotch chips melted on top for a sweeter finish.
- Boosted Nutrition: Stir in a tablespoon of chia seeds or ground flaxseeds for added fiber and omega-3s.
One personal favorite adaptation is adding a sprinkle of sea salt flakes over the melted chocolate just before chilling. It cuts through the sweetness and adds a little gourmet touch. Also, if you want a softer bar, reduce the oats slightly and add a little more peanut butter.
Serving & Storage Suggestions
These bars are best served chilled or at room temperature. I usually pull them out of the fridge about 10 minutes before serving to soften slightly—makes the chocolate less firm and the peanut butter creamier. They’re perfect on their own or paired with a cold glass of milk or a cup of coffee.
For a snack board idea, pair them alongside fresh fruit and nuts—kind of like how I arranged a pink velvet cookie crumble board once for a party. The bars’ rich flavors balance nicely with lighter elements.
Store leftovers airtight in the refrigerator for up to one week. You can also freeze them for up to three months—just thaw at room temperature or in the fridge before eating. I find that freezing slightly firms up the texture, which some folks prefer for a cool treat.
Flavors tend to deepen and meld over time, so if you make these ahead of a picnic or event, they’ll taste even better after a day or two in the fridge.
Nutritional Information & Benefits
Estimated per bar (assuming 12 bars):
| Calories | 190 |
|---|---|
| Protein | 5g |
| Fat | 11g |
| Carbohydrates | 18g |
| Fiber | 3g |
These bars offer a decent protein hit thanks to peanut butter and oats, which also provide fiber for sustained energy. The natural fats in peanut butter are heart-healthy when consumed in moderation. Using honey as a sweetener keeps added sugars moderate compared to processed snacks.
Keep in mind, the bars contain nuts and gluten unless you use certified gluten-free oats. For those watching sugar intake, the recipe is flexible enough to reduce honey slightly or swap for low-glycemic sweeteners.
Personally, I appreciate having a treat that feels indulgent but still delivers nutritional value—perfect for balancing my busy days without sacrificing taste or energy.
Conclusion
These easy no-bake peanut butter chocolate oat bars have become a staple in my kitchen for their ease, taste, and versatility. Whether you’re short on time, oven-less, or just craving a sweet snack that’s a little more wholesome, this recipe fits the bill.
Feel free to customize with your favorite nuts, seeds, or dried fruits to make the bars truly your own. That’s the beauty of this recipe—simple ingredients, flexible method, and guaranteed satisfaction.
Honestly, I love how these bars make me feel a little less frazzled on busy days, and I hope they bring that same quiet joy to your snacking moments.
If you give this recipe a try, I’d love to hear how you tweaked it or what your favorite additions are!
Frequently Asked Questions
Can I use crunchy peanut butter instead of creamy?
Yes, you can! Crunchy peanut butter will add some extra texture to the bars, but the overall result will still be delicious.
How long do these bars stay fresh?
Stored in an airtight container in the fridge, they keep well for up to one week. You can also freeze them for longer storage.
Can I substitute the oats with something else?
Rolled oats provide the best texture, but you can try quick oats or even quinoa flakes. Just note the texture may change slightly.
Is it possible to make these bars vegan?
Absolutely! Use maple syrup instead of honey and dairy-free chocolate chips to keep it vegan-friendly.
Why do my bars crumble when I cut them?
This usually means they haven’t chilled long enough or the mixture was too dry. Try adding a bit more peanut butter or honey next time, and make sure to chill for at least an hour.
Pin This Recipe!
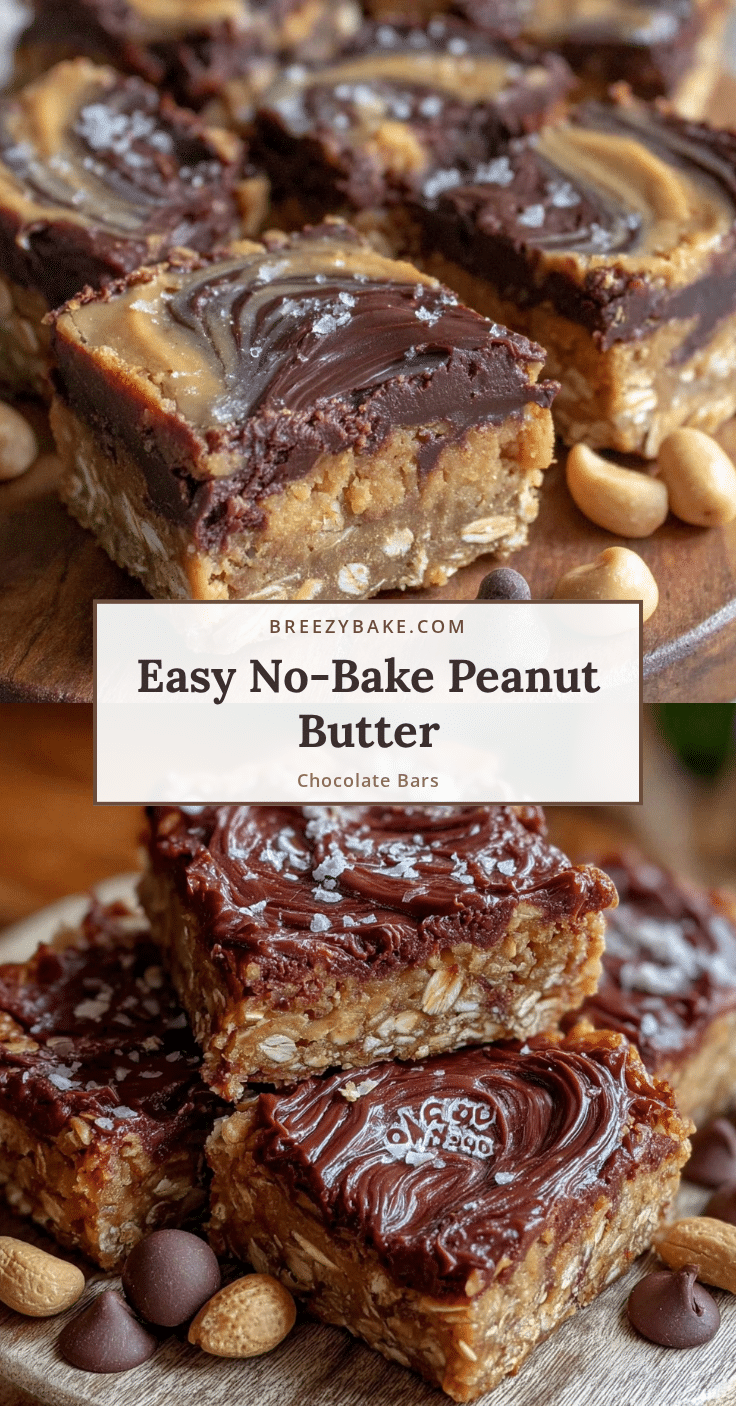
Easy No-Bake Peanut Butter Chocolate Oat Bars
These easy no-bake peanut butter chocolate oat bars are a quick, satisfying snack made with simple pantry staples. They combine creamy peanut butter, chewy oats, and melty chocolate for a perfect balance of flavor and texture.
- Prep Time: 15 minutes
- Cook Time: 0 minutes
- Total Time: 1 hour 15 minutes
- Yield: 12 bars 1x
- Category: Snack
- Cuisine: American
Ingredients
- 2 cups (180g) old-fashioned rolled oats
- 1 cup (250g) creamy peanut butter (natural, no added sugar or oil preferred)
- 1/3 cup (80ml) honey (maple syrup can be used for vegan option)
- 1 teaspoon vanilla extract
- 1/4 teaspoon salt
- 1 cup (175g) semi-sweet or dark chocolate chips (vegan chocolate chips for dairy-free)
- Optional mix-ins: chopped nuts, shredded coconut, dried fruit
Instructions
- Line an 8×8-inch (20×20 cm) baking pan with parchment paper, leaving some overhang on the sides.
- In a large bowl, combine oats, peanut butter, honey, vanilla extract, and salt. Stir well until evenly combined and sticky. Add more honey or peanut butter if mixture is too dry.
- Transfer mixture into the prepared pan and press down firmly and evenly with a spatula or clean hands.
- Melt chocolate chips in a microwave-safe bowl in 20-second intervals, stirring between each, until smooth and glossy, or melt using a double boiler.
- Pour melted chocolate over the pressed oat mixture and spread evenly.
- Refrigerate for at least 1 hour until chocolate is set and bars are firm.
- Lift bars out using parchment paper and cut into 12 squares or rectangles. Store leftovers in an airtight container in the fridge.
Notes
Warm peanut butter slightly if thick to ease mixing. Do not skip chilling step to avoid crumbly bars. Use a sharp knife wiped clean between cuts for neat edges. For vegan version, substitute honey with maple syrup and use dairy-free chocolate chips. Gluten-free option requires certified gluten-free oats.
Nutrition
- Serving Size: 1 bar (1 of 12)
- Calories: 190
- Fat: 11
- Carbohydrates: 18
- Fiber: 3
- Protein: 5
Keywords: no-bake, peanut butter, chocolate, oat bars, easy snack, healthy snack, no oven, quick recipe


