I was standing in the grocery store parking lot last October, fumbling for my keys, when the air shifted. That specific smell—damp leaves, a hint of woodsmoke from somewhere, and the sweet, earthy perfume of overripe bananas from the bag in my cart—hit me. And suddenly I was seven years old, standing on a step stool in my Aunt Carol’s tiny kitchen, watching her hands move like a magician’s as she mashed bananas for a quick bread while a can of pumpkin puree sat on the counter, waiting for its turn.
Aunt Carol wasn’t a fancy cook—she was a “what’s in the pantry” kind of baker. That day, she had a can of pumpkin leftover from a pie she’d made for a neighbor, and a bunch of bananas that had seen better days. She shrugged, tossed them both into one bowl, and said, “Well, let’s see what happens.” I remember the batter was a funny shade of orange-brown, and I was skeptical. But when that loaf came out of the oven, the whole house smelled like fall had moved in permanently. The first bite was soft, sweet, and impossibly moist. I’d never tasted anything like it.
She passed away a few years ago, and I’ve been chasing that exact loaf ever since. You know how it is—you try a dozen recipes, and they’re all good, but none of them are *that* one. So I set out to recreate it, but with a modern twist: no mixer, one bowl, and ingredients you probably already have. Honestly, it took me about eight tries to get the balance right. I forgot the baking soda once and ended up with a pumpkin-flavored brick. Another time, I used too much pumpkin and the bread was so dense it could’ve doubled as a doorstop.
But this version? This is the one. It’s the bread I bring to every fall potluck, the one my neighbors text me about, the one that makes people close their eyes after the first bite. It’s simple, forgiving, and tastes like that October afternoon in Aunt Carol’s kitchen. Let me show you how to make it.
Why You’ll Love This Recipe
This isn’t just another pumpkin bread recipe. After testing this dozens of times—for my family, for friends, for a local bake sale that sold out in an hour—I can tell you exactly why this one stands out. Let’s break it down.
- One Bowl, No Mixer: I mean it. You don’t need a stand mixer, a hand mixer, or even a whisk if you’re determined. A fork and a spatula will do the job. Less cleanup means more time to actually enjoy your bread.
- Simple Pantry Ingredients: You probably have everything already. Canned pumpkin, ripe bananas, flour, sugar, eggs, oil, and basic spices. No trips to a specialty store for weird flours or extracts.
- Perfect for Fall Gatherings: This bread is a showstopper at potlucks, Friendsgivings, and cozy brunches. It’s also the kind of thing you can whip up when guests are on their way—it comes together in under 15 minutes of active prep time.
- Crowd-Pleaser for All Ages: Kids love the sweetness. Adults love the warm spice. Even my picky uncle, who “doesn’t do pumpkin,” asked for the recipe. It’s that good.
- Unbelievably Moist: The combo of pumpkin and banana creates a texture that’s soft, tender, and stays fresh for days. No dry, crumbly slices here.
What makes this recipe different from the dozens of others out there? It’s the ratio. Most recipes lean too hard on pumpkin, which can make bread dense and heavy. By blending it with banana, you get the best of both worlds: the rich, earthy flavor of pumpkin and the natural sweetness and moisture of banana. Plus, the banana helps the bread rise without needing extra leavening, so it’s light and fluffy even though it’s packed with flavor.
This is the kind of bread that makes you close your eyes after the first bite. It’s comfort food reimagined—simpler, faster, but with the same soul-soothing satisfaction. Perfect for impressing guests without stress, or turning a quiet Sunday morning into something memorable.
What Ingredients You Will Need
This recipe uses simple, wholesome ingredients to deliver bold flavor and satisfying texture without the fuss. Most of these are pantry staples, and the ones that aren’t are easy to find at any grocery store. Here’s what you’ll need, along with a few tips I’ve picked up from making this bread more times than I can count.
Dry Ingredients
- All-purpose flour, 1 ¾ cups (220g): This gives the bread structure without making it tough. Spoon and level your flour—don’t scoop directly from the bag, or you’ll end up with too much and a dry loaf.
- Baking soda, 1 teaspoon: This is the main leavening agent. Make sure it’s fresh—test it by dropping a little into vinegar; if it fizzes, you’re good.
- Baking powder, ½ teaspoon: A little extra lift to keep the bread light.
- Salt, ½ teaspoon: Don’t skip this. It balances the sweetness and brings out the flavors of the pumpkin and spices.
- Ground cinnamon, 1 ½ teaspoons: The backbone of the spice blend. I use McCormick for consistency, but any brand works.
- Ground nutmeg, ½ teaspoon: Freshly grated if you have it—it makes a difference.
- Ground ginger, ¼ teaspoon: Adds a little warmth without being overpowering.
- Ground cloves, ⅛ teaspoon: Just a pinch. Cloves are potent, so a little goes a long way.
Wet Ingredients
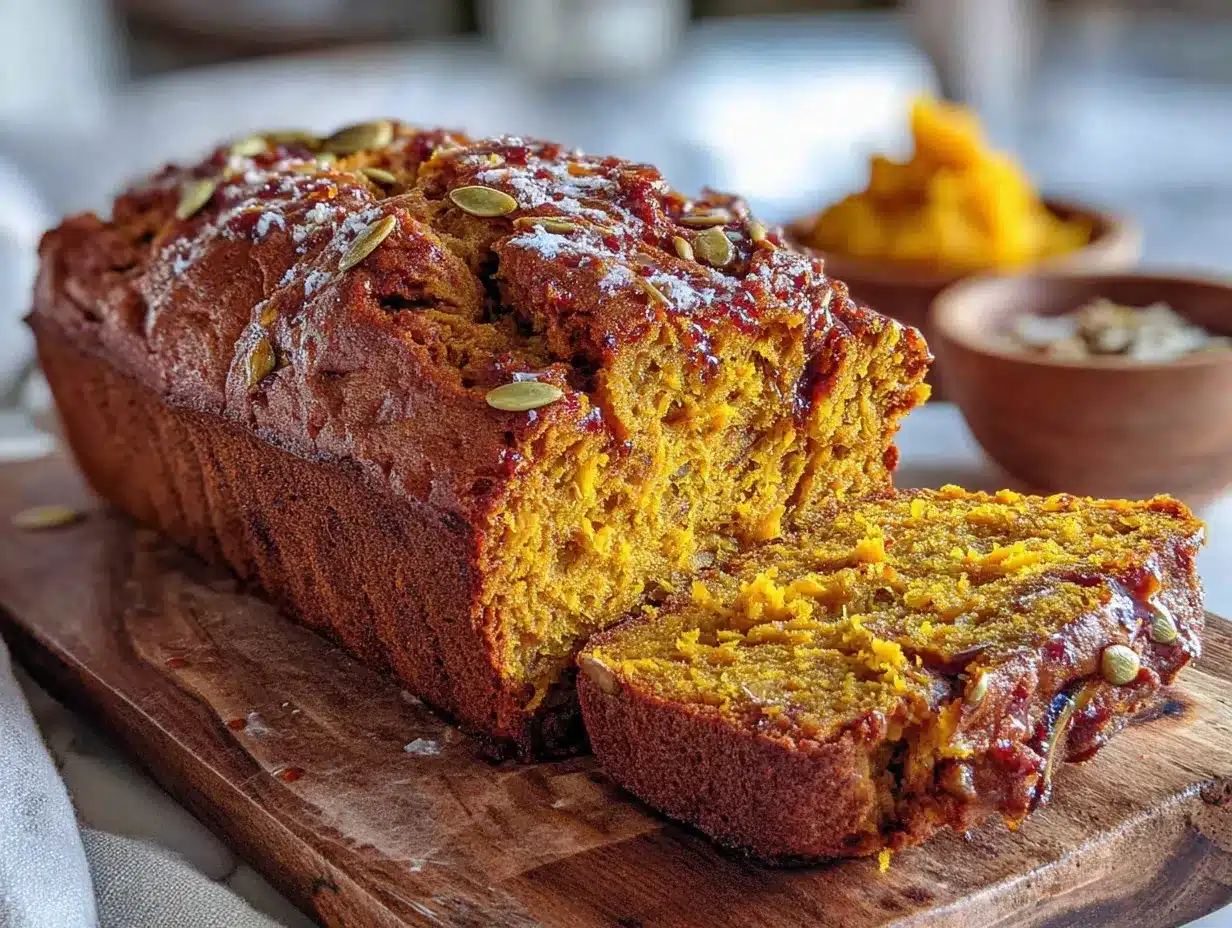
- Ripe bananas, 3 medium (about 1 cup mashed, 240g): The riper, the better. Look for bananas with lots of brown spots—they’re sweeter and easier to mash. If your bananas aren’t ripe enough, you can bake them at 300°F for 15 minutes to soften and sweeten them.
- Pumpkin puree, 1 cup (240g): Use canned pumpkin puree, not pumpkin pie filling. I prefer Libby’s for its consistent texture and flavor.
- Granulated sugar, ¾ cup (150g): Adds sweetness and helps with browning.
- Brown sugar, ½ cup (100g), packed: Light or dark both work. Dark brown sugar gives a deeper, more molasses-like flavor.
- Vegetable oil, ½ cup (120ml): Keeps the bread incredibly moist. You can use melted coconut oil or melted butter instead, but oil gives the best texture.
- Large eggs, 2: Room temperature is best—they incorporate more easily into the batter.
- Vanilla extract, 1 teaspoon: Pure vanilla is ideal, but imitation works in a pinch.
Optional Add-Ins
- Chopped walnuts or pecans, ½ cup (60g): Adds a nice crunch. Toast them first for extra flavor.
- Chocolate chips, ½ cup (90g): Semi-sweet or dark are my favorites—they balance the sweetness of the bread.
- Dried cranberries, ¼ cup (30g): A tart pop that works beautifully with the pumpkin and banana.
If you’re out of an ingredient, don’t panic. You can substitute the all-purpose flour with a 1:1 gluten-free baking flour blend. For a dairy-free version, this recipe is already dairy-free as written (no milk or butter). If you want to reduce the sugar, you can use 1 cup of granulated sugar total and skip the brown sugar, but the flavor won’t be as rich.
Equipment Needed
The beauty of this recipe is that you don’t need much. Here’s what I use every time:
- Large mixing bowl: Any big bowl works. I have a favorite ceramic one that my sister gave me—it’s slightly chipped, but I love it.
- Fork or potato masher: For mashing the bananas. A fork works fine, but a potato masher makes it quicker and gives you a smoother consistency.
- Spatula or wooden spoon: For mixing the batter. A rubber spatula is great for scraping the sides of the bowl.
- 9×5-inch loaf pan: This is the standard size. If you use an 8×4-inch pan, your bread will be taller and may need a few extra minutes in the oven.
- Parchment paper or non-stick spray: I line my pan with parchment paper for easy removal. If you don’t have parchment, grease the pan well with butter or oil.
- Cooling rack: A wire rack lets air circulate around the bread so it cools evenly and doesn’t get soggy on the bottom.
If you don’t have a loaf pan, you can bake this in an 8×8-inch square pan—just reduce the baking time to about 35-40 minutes. You can also make muffins (bake for 18-22 minutes at 350°F). I’ve done all three, and honestly, the muffins are dangerous because they’re so easy to grab and eat.
One tip: invest in a good cooling rack. I used to cool my bread on a cutting board, and the bottom would always get a little steamy. A $10 wire rack from the grocery store fixed that problem completely.
Preparation Method
Let’s get baking. This is straightforward, but I’ll walk you through every step with the little tricks I’ve learned along the way.
- Preheat your oven to 350°F (175°C). Position the rack in the center of the oven. While it’s heating, grease your 9×5-inch loaf pan with non-stick spray or line it with parchment paper, leaving some overhang on the long sides for easy lifting later.
- Mash the bananas. In your large mixing bowl, add the three ripe bananas. Mash them with a fork or potato masher until they’re mostly smooth with a few small lumps. You want some texture, not a complete puree. This should take about a minute. Set the bowl aside.
- Add the wet ingredients. To the mashed bananas, add the pumpkin puree, granulated sugar, brown sugar, vegetable oil, eggs, and vanilla extract. Stir with your spatula or wooden spoon until everything is combined. Don’t overmix—just stir until you don’t see any streaks of egg or oil. The mixture will look a little thin and that’s fine.
- Mix the dry ingredients separately (in your head). Here’s the one-bowl trick: Instead of using a second bowl, I sprinkle the dry ingredients right on top of the wet mixture, but I do it in layers. Start with the flour, then sprinkle the baking soda, baking powder, salt, cinnamon, nutmeg, ginger, and cloves over the top. This way, the leavening agents and spices get distributed more evenly without having to whisk them together in a separate bowl.
- Fold the dry ingredients into the wet. Use a gentle folding motion—cut through the center of the batter, scrape along the bottom, and bring the spatula up and over. Rotate the bowl as you go. Stop as soon as you no longer see streaks of flour. A few small lumps are okay; overmixing will make the bread tough. If you’re adding nuts or chocolate chips, fold them in at this point.
- Pour the batter into the prepared pan. Use your spatula to scrape every last bit out of the bowl. Smooth the top gently—it doesn’t need to be perfect. Give the pan a light tap on the counter to release any air bubbles.
- Bake for 50-60 minutes. Place the pan in the preheated oven. After 30 minutes, check the bread. If the top is browning too quickly, loosely tent it with aluminum foil. This happens more often with ovens that run hot. At the 50-minute mark, start testing for doneness. Insert a toothpick or a thin knife into the center of the bread. If it comes out clean or with just a few moist crumbs, it’s done. If there’s wet batter on it, give it another 5 minutes and test again.
- Cool in the pan for 10 minutes. Set the loaf pan on a wire rack. Let it sit for exactly 10 minutes—this allows the bread to set and makes it easier to remove. Don’t skip this step, or your bread might fall apart.
- Remove from the pan and cool completely. Use the parchment paper overhang to lift the bread out of the pan. Place it directly on the wire rack. Let it cool completely before slicing, which takes about 1-2 hours. I know it’s tempting to cut into it warm, but the bread is still setting up inside. Warm slices tend to be gummy and fall apart. Trust me—I’ve learned this the hard way.
Your kitchen should smell incredible at this point. The banana and pumpkin aromas mingling with cinnamon and nutmeg—it’s basically fall in a loaf.
Cooking Tips & Techniques
After making this bread more times than I can count, I’ve picked up a few things that make a real difference.
Don’t overmix the batter. This is the number one mistake I see. When you overmix, you develop the gluten in the flour, which makes the bread tough and dense. You want to mix just until the flour disappears. A few streaks are fine—they’ll work themselves out as the bread bakes.
Check your oven temperature. Ovens are liars. I once had an oven that ran 25 degrees hot, and I couldn’t figure out why my bread was burning on the outside but raw in the middle. An inexpensive oven thermometer saved my baking life. Place it in the center of the oven and adjust your temperature accordingly.
Use room temperature eggs. Cold eggs can seize up the batter, making it harder to mix and potentially affecting the texture. If you forgot to take them out of the fridge, place them in a bowl of warm water for 5 minutes before using.
Let the bread rest overnight. This is my secret weapon. The flavors of pumpkin, banana, and spices meld together beautifully after the bread sits for a day. I actually prefer this bread on day two. The texture becomes even more moist and the spices settle into something deeper. Wrap it tightly in plastic wrap and leave it on the counter overnight. Slice it the next morning—you’ll thank me.
If your bread cracks on top, don’t worry. That’s actually a good sign—it means the bread rose properly and the crust set at the right time. A crack down the center is perfectly normal and gives the bread a rustic, homemade look.
Test for doneness with a toothpick, not your eyes. The top might look golden and set, but the center could still be raw. Always use a toothpick or a thin knife to check. If it comes out clean, you’re good. If not, give it more time.
Variations & Adaptations
This recipe is incredibly flexible. Here are some of my favorite ways to change it up.
Gluten-Free Version: Substitute the all-purpose flour with a 1:1 gluten-free baking flour blend that contains xanthan gum. I’ve used King Arthur Flour Measure for Measure with great results. The texture is slightly more delicate, but still delicious. Add an extra tablespoon of oil to help with moisture.
Vegan Adaptation: Replace the two eggs with flax eggs (2 tablespoons ground flaxseed mixed with 6 tablespoons water, let sit for 5 minutes). Use a plant-based oil like coconut or avocado oil. The bread will be a little denser but still incredibly moist. I’ve made this for a vegan friend’s brunch, and no one could tell the difference.
Chocolate Chip Pumpkin Banana Bread: Fold in ¾ cup of semi-sweet chocolate chips along with the dry ingredients. The chocolate melts into little pockets of richness throughout the bread. This is my husband’s favorite version—he claims it’s basically dessert.
Streusel Topping: Mix together ¼ cup all-purpose flour, ¼ cup brown sugar, 2 tablespoons cold butter (cut into small pieces), and ½ teaspoon cinnamon. Use your fingers to work the butter into the flour mixture until it resembles coarse crumbs. Sprinkle this over the batter before baking. It adds a lovely crunchy top that makes the bread feel extra special for guests.
Spice Variations: Not a fan of cloves? Leave them out and add an extra ¼ teaspoon of cinnamon. Want more warmth? Add ¼ teaspoon of cardamom or allspice. I once made this with a pinch of black pepper (trust me on this), and it added a subtle heat that complemented the pumpkin beautifully.
Mini Loaves or Muffins: Divide the batter among 3 mini loaf pans (bake for 30-35 minutes) or a 12-cup muffin tin (bake for 18-22 minutes). Muffins are great for freezing—just pop one in the microwave for 15 seconds when you need a quick breakfast.
Serving & Storage Suggestions
This bread is versatile enough for breakfast, brunch, dessert, or a snack. Here’s how I serve it and keep it fresh.
Serving: I love this bread slightly warm, with a pat of salted butter melting into the slice. For a breakfast treat, toast a slice and drizzle it with honey or maple syrup. For dessert, serve it with a scoop of vanilla ice cream or a dollop of whipped cream and a sprinkle of cinnamon. It’s also fantastic with a smear of cream cheese frosting for a more indulgent option.
What to Serve Alongside: This bread pairs beautifully with a cup of hot coffee, chai tea, or spiced apple cider. For a fall brunch spread, serve it alongside a savory sausage and sage stuffing for a sweet-savory balance. It also goes well with a simple green salad dressed with a tangy vinaigrette to cut through the sweetness.
Storage: Wrap the cooled bread tightly in plastic wrap or aluminum foil. Store it at room temperature for up to 4 days. I find it actually tastes better on days 2 and 3 as the flavors meld. Do not refrigerate—the cold air dries out the bread and makes it stale faster.
Freezing: This bread freezes beautifully. Wrap the whole loaf or individual slices tightly in plastic wrap, then place them in a freezer-safe zip-top bag. Freeze for up to 3 months. To thaw, leave the wrapped bread on the counter for a few hours or overnight. For individual slices, pop them in the toaster or microwave for a quick treat.
Reheating: To recapture that fresh-from-the-oven warmth, microwave a slice for 10-15 seconds, or toast it in a toaster oven at 350°F for 5 minutes. The toaster oven method gives you a slightly crisp edge—my preferred way to eat leftovers.
One note: if you’re making this for a gathering, bake it a day ahead. The flavors deepen overnight, and you’ll have one less thing to worry about on the day of your party. Just wrap it well and keep it on the counter.
Nutritional Information & Benefits
Here’s the estimated nutritional breakdown for one slice (based on 12 slices per loaf):
- Calories: 285
- Fat: 12g
- Carbohydrates: 41g
- Fiber: 2g
- Sugar: 22g
- Protein: 4g
This bread offers some surprising nutritional perks. Pumpkin is packed with vitamin A (from beta-carotene), which supports eye health and immune function. Bananas provide potassium, which helps regulate blood pressure and muscle function. The fiber from the pumpkin and bananas also aids digestion and keeps you feeling full longer.
If you’re watching your sugar intake, you can reduce the granulated sugar to ½ cup and the brown sugar to ¼ cup. The bananas and pumpkin add natural sweetness, so the bread will still be plenty sweet. For a lower-fat option, substitute the oil with unsweetened applesauce (use the same amount). The texture will be slightly more cake-like, but still delicious.
This recipe is naturally dairy-free and can be made gluten-free and vegan with the substitutions mentioned earlier. Always check your ingredient labels if you’re cooking for someone with allergies—some brands of baking powder contain cornstarch, and some chocolate chips may contain milk solids.
I personally love that this bread feels indulgent but has some actual nutritional value. It’s the kind of treat I feel good about eating for breakfast or packing in a lunchbox.
Conclusion
This one-bowl pumpkin banana bread is everything I love about fall baking—simple, forgiving, and packed with flavor. It’s the recipe I turn to when I want to impress without stress, when I need a last-minute contribution to a potluck, or when I just want my kitchen to smell like October.
What I love most is how adaptable it is. You can dress it up with a streusel topping or keep it simple with just a smear of butter. You can make it gluten-free, vegan, or loaded with chocolate chips. It’s a recipe that works with you, not against you.
I’d love to hear how yours turns out. Did you add any special mix-ins? Did you serve it at a gathering? Drop a comment below and let me know—I read every single one. And if you loved this recipe, share it with a friend who needs a little fall comfort in their life.
Happy baking, and remember: the best loaves are the ones made with a little patience and a lot of love.
Frequently Asked Questions
Can I use fresh pumpkin instead of canned?
Yes, you can! If you’re using fresh pumpkin, make sure to roast or steam it until tender, then puree it until smooth. You’ll need to drain off any excess liquid—fresh pumpkin tends to be more watery than canned. Spread the puree on a paper towel-lined plate for a few minutes to absorb some moisture before using.
Why did my bread sink in the middle?
A sunken middle usually means the bread was underbaked. Make sure you’re testing with a toothpick inserted into the center—it should come out clean or with just a few moist crumbs. Another cause could be opening the oven door too early. Try to avoid opening the oven for the first 30 minutes of baking.
Can I make this without eggs?
Absolutely. You can use flax eggs (1 tablespoon ground flaxseed mixed with 3 tablespoons water per egg) or a commercial egg replacer. The texture will be slightly denser, but still delicious. I’ve also used ¼ cup of unsweetened applesauce per egg with good results.
How ripe should the bananas be?
The riper, the better. Look for bananas with lots of brown spots or even completely black skins. They should be soft to the touch and smell sweet. If your bananas aren’t ripe enough, you can speed up the process by baking them at 300°F for 15-20 minutes until the skins turn black.
Can I double this recipe?
Yes, this recipe doubles beautifully. Just use a larger bowl and make sure your loaf pans aren’t overcrowded. You can bake two loaves at the same time if they fit on the same oven rack with at least 2 inches of space between them. You may need to add 5-10 minutes to the baking time.
Pin This Recipe!
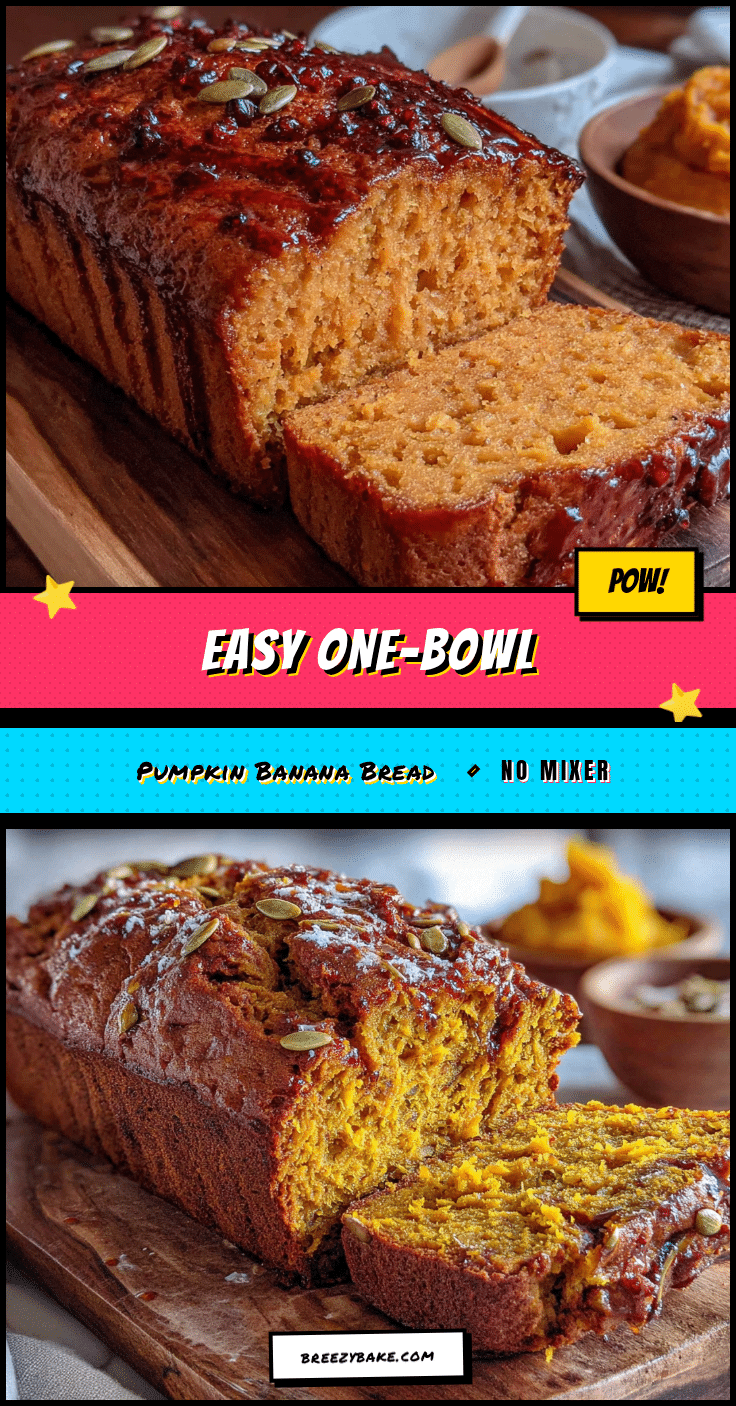
Easy One-Bowl Pumpkin Banana Bread: Best Homemade Recipe
This one-bowl pumpkin banana bread is simple, forgiving, and packed with flavor. It combines the rich, earthy taste of pumpkin with the natural sweetness and moisture of banana for an unbelievably moist loaf that tastes like fall.
- Prep Time: 15 minutes
- Cook Time: 55 minutes
- Total Time: 1 hour 10 minutes
- Yield: 12 servings 1x
- Category: Dessert
- Cuisine: American
Ingredients
- 1 ¾ cups (220g) all-purpose flour
- 1 teaspoon baking soda
- ½ teaspoon baking powder
- ½ teaspoon salt
- 1 ½ teaspoons ground cinnamon
- ½ teaspoon ground nutmeg
- ¼ teaspoon ground ginger
- ⅛ teaspoon ground cloves
- 3 medium ripe bananas (about 1 cup mashed, 240g)
- 1 cup (240g) pumpkin puree (canned, not pumpkin pie filling)
- ¾ cup (150g) granulated sugar
- ½ cup (100g) packed brown sugar (light or dark)
- ½ cup (120ml) vegetable oil (or melted coconut oil or butter)
- 2 large eggs, room temperature
- 1 teaspoon vanilla extract
- ½ cup (60g) chopped walnuts or pecans (optional)
- ½ cup (90g) chocolate chips (optional)
- ¼ cup (30g) dried cranberries (optional)
Instructions
- Preheat your oven to 350°F (175°C). Position the rack in the center of the oven. Grease a 9×5-inch loaf pan with non-stick spray or line it with parchment paper, leaving some overhang on the long sides for easy lifting.
- In a large mixing bowl, mash the three ripe bananas with a fork or potato masher until mostly smooth with a few small lumps.
- Add the pumpkin puree, granulated sugar, brown sugar, vegetable oil, eggs, and vanilla extract to the mashed bananas. Stir with a spatula or wooden spoon until combined. Do not overmix.
- Sprinkle the dry ingredients (flour, baking soda, baking powder, salt, cinnamon, nutmeg, ginger, and cloves) over the wet mixture in layers. Fold gently using a folding motion until no streaks of flour remain. A few small lumps are okay. If using optional add-ins, fold them in now.
- Pour the batter into the prepared loaf pan. Smooth the top gently and tap the pan lightly on the counter to release air bubbles.
- Bake for 50-60 minutes. After 30 minutes, if the top is browning too quickly, loosely tent with aluminum foil. Test for doneness at 50 minutes by inserting a toothpick into the center; it should come out clean or with a few moist crumbs.
- Cool the bread in the pan on a wire rack for exactly 10 minutes.
- Remove the bread from the pan using the parchment overhang and place it directly on the wire rack. Cool completely before slicing (about 1-2 hours).
Notes
For best flavor, let the bread rest overnight wrapped tightly in plastic wrap. The flavors meld and the texture becomes even more moist. Do not refrigerate; store at room temperature for up to 4 days. Freezes well for up to 3 months.
Nutrition
- Serving Size: 1 slice
- Calories: 285
- Sugar: 22
- Sodium: 280
- Fat: 12
- Saturated Fat: 2
- Carbohydrates: 41
- Fiber: 2
- Protein: 4
Keywords: pumpkin banana bread, one bowl, easy, fall baking, moist bread, homemade


