My sister called me last December, frantic. She needed three dozen dessert gifts for her son’s teachers, the PTA bake sale, and her book club—and she had exactly one evening to pull it off. “Don’t send me a recipe with a candy thermometer,” she warned. “I will cry.”
Now, I’ve made traditional fudge. The kind where you stand over a pot, stirring butter and sugar, watching a thermometer like it’s a ticking bomb. One degree off and you get grainy disaster. So when I started testing a no-bake peppermint bark fudge that uses melted chocolate chips and sweetened condensed milk, I’ll be honest—I didn’t trust it at first. It sounded too simple. Where was the fuss? The precision? The potential for failure?
But here’s the thing about holiday baking when you’re actually busy living life: simple doesn’t mean lesser. I made my first batch of this Easy Peppermint Bark Fudge on a Tuesday night after dinner, and by the time I finished washing the dishes, it was already setting in the fridge. The next morning, I cut into a pan of perfectly creamy, minty, chocolatey fudge topped with crushed candy canes—and I had to sit down.
It worked. It actually worked.
That first bite had that familiar snap of chocolate bark, but the fudge underneath was so soft it practically melted on my tongue. The peppermint was cool without being medicinal, and the crunch from the candy cane pieces gave it that festive feel without any actual baking. My sister made four batches that week. She said it was the first time she actually enjoyed holiday gifting instead of dreading it.
So here’s a recipe that doesn’t need any special equipment, any fancy techniques, or any patience you don’t have. Just four ingredients and a fridge. Sometimes the best things really are that straightforward.
Why You’ll Love This Recipe
Let me tell you why this Easy Peppermint Bark Fudge has become my go-to holiday recipe—and why it will be yours too.
- No-Bake & Foolproof : You don’t need a candy thermometer, a double boiler, or any special skills. If you can melt chocolate and stir, you can make this fudge. It comes together in about 10 minutes of active time.
- Just 4 Simple Ingredients : Chocolate chips, sweetened condensed milk, peppermint extract, and crushed candy canes. That’s it. No heavy cream, no corn syrup, no complicated shopping list.
- Perfect for Holiday Gifting : This fudge slices cleanly, stacks beautifully in tins, and stays fresh for weeks. It’s the ideal homemade gift for teachers, neighbors, coworkers, and holiday parties.
- Crowd-Pleaser : I’ve brought this to cookie swaps, office parties, and family gatherings. It disappears faster than anything else on the table. Kids love the crunch, adults love the creamy texture, and everyone loves that it doesn’t taste like a box mix.
- Endlessly Customizable : Swap dark chocolate for milk or white chocolate. Add crushed Oreos. Drizzle with caramel. The base recipe is a blank canvas for your holiday creativity.
What makes this recipe different from other peppermint bark fudge recipes online? I’ve tested this version at least eight times to get the perfect ratio of chocolate to condensed milk. Too much condensed milk and the fudge won’t set properly. Too little and it’s crumbly. This balance gives you that perfect fudge texture—firm enough to slice, soft enough to melt in your mouth. Plus, I’ll share my trick for getting those candy cane pieces to stay put instead of falling off when you cut the fudge.
This isn’t just another holiday dessert. It’s the kind of recipe that makes you feel like a hero when you show up with a plate of perfect fudge—and nobody has to know it took you less time than watching a Christmas movie.
What Ingredients You Will Need
This recipe uses simple, pantry-friendly ingredients to create something that tastes like it came from a fancy chocolate shop. Here’s what you need and why each ingredient matters.
For the Fudge Base
- Semi-sweet chocolate chips (3 cups or 18 oz) – I prefer Ghirardelli or Guittard for the smoothest melt, but any good-quality brand works. The semi-sweet balance keeps the fudge from being too sweet since we’re adding sweetened condensed milk.
- Sweetened condensed milk (1 can, 14 oz) – This is the secret to the no-bake fudge texture. Don’t substitute evaporated milk or regular milk—condensed milk has the right sugar content and thickness to help the fudge set without cooking.
- Peppermint extract (1 teaspoon) – Use pure peppermint extract, not mint extract (which can taste more like spearmint). I like Nielsen-Massey for a clean, natural peppermint flavor. Start with 1 teaspoon—you can always add more, but too much makes it taste like toothpaste.
- Crushed candy canes (½ cup, plus more for topping) – About 6-8 regular-sized candy canes, crushed. You can buy pre-crushed candy cane pieces, but I find they’re often too fine. Crushing your own gives you a nice mix of textures.
For the Topping
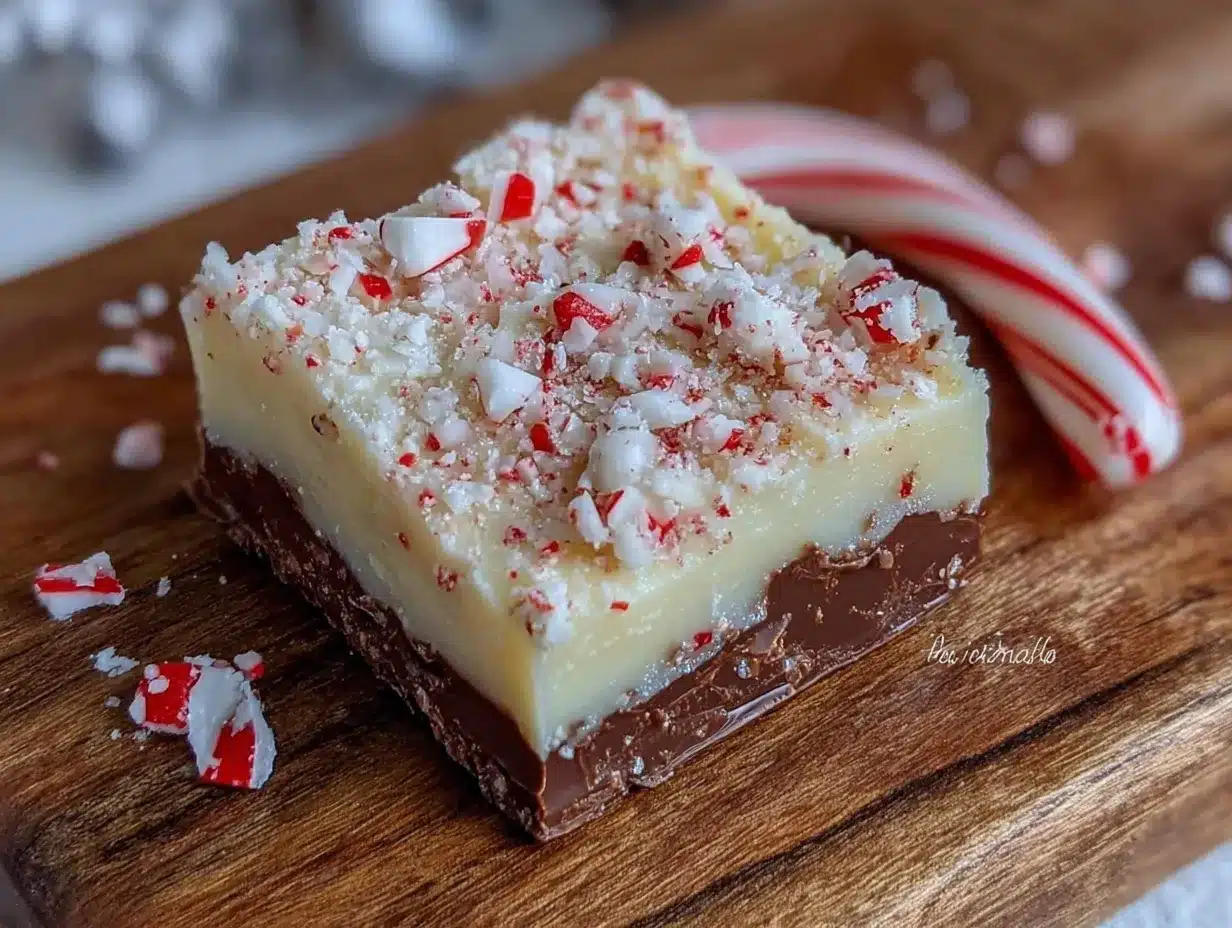
- White chocolate chips (½ cup or 3 oz) – Optional, but highly recommended for that classic bark look. Melting white chocolate can be tricky—I’ll share my method below.
- Additional crushed candy canes (2-3 tablespoons) – For sprinkling on top while the white chocolate is still wet.
Ingredient Tips & Substitutions
If you’re dairy-free, use dairy-free chocolate chips and a can of coconut sweetened condensed milk. The texture will be slightly different—a bit softer—but still delicious. For a darker fudge, use dark chocolate chips (60-70% cacao) and reduce the peppermint extract to ¾ teaspoon so it doesn’t overpower the chocolate. If you’re not a fan of white chocolate, simply skip the topping and sprinkle crushed candy canes directly onto the fudge base before it sets.
For the candy canes, I recommend classic peppermint flavor. Stay away from the weird flavors like blueberry or sour apple—trust me, I tried it one year and it was a mistake. Stick with the classic.
Equipment Needed
This is one of those rare recipes where you probably already own everything you need. Here’s the list:
- 8×8-inch baking pan – Glass or metal both work fine. If you use metal, line it well with parchment so the fudge doesn’t stick.
- Parchment paper – Non-negotiable. You want overhang on two sides so you can lift the whole block of fudge out cleanly.
- Medium saucepan – For melting the chocolate and condensed milk together. A heavy-bottomed pan works best to prevent scorching.
- Silicone spatula – For stirring. A wooden spoon works too, but silicone gets every last bit of fudge out of the pan.
- Small microwave-safe bowl – If you’re melting white chocolate for the topping.
- Ziploc bag and rolling pin – For crushing candy canes. Place candy canes in the bag, seal it, and gently smash them. Or use a food processor if you want finer pieces.
- Sharp knife – For cutting the fudge cleanly. A chef’s knife works great.
No mixer, no double boiler, no candy thermometer. Just basic kitchen tools you probably use every day. If you don’t have an 8×8 pan, a 9×9 works too—your fudge will just be slightly thinner. A loaf pan also works if you want thicker squares.
Preparation Method
Here’s the step-by-step process for making the best Easy Peppermint Bark Fudge of your life. Read through the whole thing once before you start—it’s simple, but timing matters a little.
Step 1: Prep Your Pan
Line your 8×8-inch baking pan with parchment paper. Leave about 2 inches of overhang on two opposite sides—this creates handles for lifting the fudge later. Don’t skip this step. I learned the hard way that unlined pans lead to fudge that requires archaeological excavation to remove.
Step 2: Crush the Candy Canes
Place 6-8 candy canes in a sturdy Ziploc bag. Seal it, squeeze out the air, and use a rolling pin to gently crush them. You want a mix of fine powder and small chunks—not dust, not boulders. Aim for pieces about the size of small peas. Set aside ½ cup for the fudge and reserve 2-3 tablespoons for topping. Pro tip: crush them over a cutting board in case the bag breaks. Ask me how I know.
Step 3: Melt the Chocolate Base
In a medium saucepan over low heat, combine the semi-sweet chocolate chips and the entire can of sweetened condensed milk. Stir constantly with your silicone spatula. This is important—don’t walk away. Chocolate can burn in seconds. Stir until the chocolate is completely melted and the mixture is smooth, glossy, and thick. This takes about 4-5 minutes. The mixture should coat the back of a spoon. Remove from heat immediately.
Step 4: Add Peppermint and Candy Canes
Stir in 1 teaspoon of peppermint extract. Taste the mixture (careful, it’s hot) and add another ¼ teaspoon if you want a stronger mint kick. Then fold in the ½ cup of crushed candy canes. Stir just until distributed—don’t overmix or the candy cane pieces will start to dissolve and turn the fudge pink. A few streaks are totally fine, honestly.
Step 5: Spread the Fudge
Pour the fudge mixture into your prepared pan. Use the spatula to spread it evenly into all corners. Tap the pan gently on the counter a few times to release any air bubbles. The surface should be relatively smooth, but don’t obsess over it—the topping will cover any imperfections.
Step 6: Make the White Chocolate Topping (Optional)
In a small microwave-safe bowl, heat the white chocolate chips in 20-second intervals, stirring after each. White chocolate burns easily, so go slow. It should be fully melted and smooth after about 60-90 seconds total. If it seizes up (gets clumpy and grainy), stir in ½ teaspoon of coconut oil or vegetable oil to bring it back.
Pour the melted white chocolate over the fudge and spread it in a thin, even layer. Work quickly—the fudge underneath is starting to set. Immediately sprinkle the reserved crushed candy canes over the white chocolate before it hardens.
Step 7: Chill and Set
Place the pan in the refrigerator, uncovered, for at least 2 hours. I’ve found that 3 hours is even better for clean slicing. Don’t rush this—if the fudge isn’t fully set, it’ll be a sticky mess when you try to cut it. You’ll know it’s ready when the surface feels firm to the touch and the fudge pulls away slightly from the edges of the pan.
Step 8: Slice and Serve
Lift the fudge out of the pan using the parchment handles. Place it on a cutting board. Use a sharp knife to cut into 1-inch squares. For clean cuts, wipe the knife clean between each slice. I usually get about 36-40 pieces from one batch. If the fudge starts to soften as you work, pop it back in the fridge for 10 minutes.
Cooking Tips & Techniques
After making this Easy Peppermint Bark Fudge more times than I can count (and messing it up a few times), here are the things I wish someone had told me from the start.
Low heat is your friend. I know it’s tempting to crank up the heat to melt the chocolate faster. Don’t. Medium-low or low heat, constant stirring. The first time I made this, I got distracted and let the heat get too high. The chocolate seized up into a grainy, greasy mess. Start over? No thanks. Just be patient.
Room temperature ingredients matter. Make sure your sweetened condensed milk is at room temperature before you start. Cold condensed milk can cause the chocolate to seize when you combine them. Leave the can on the counter for 30 minutes before you begin.
The candy cane trick. If you want the crushed candy canes to stay suspended in the fudge instead of sinking to the bottom, fold them in gently and pour the fudge immediately. The less you stir after adding them, the more they’ll stay distributed throughout.
White chocolate is diva-ish. It’s more finicky than regular chocolate. If your white chocolate seizes, don’t panic. Add a teaspoon of coconut oil or vegetable shortening and stir vigorously. It should smooth right out. Also, don’t let any water get into the white chocolate—even a drop can cause it to seize.
Cutting cleanly. For the prettiest squares, let the fudge sit at room temperature for about 5 minutes after taking it out of the fridge. Too cold and the chocolate can crack. Too warm and it gets sticky. Use a long, sharp knife and wipe it clean between cuts. I run my knife under hot water, dry it, then slice—the warmth helps the knife glide through.
Don’t skip the parchment. I know it seems like an extra step, but I promise you will regret not using it. Fudge that sticks to the pan is fudge that gets eaten with a spoon in frustration. Use the parchment.
Make ahead tip. This fudge actually tastes better after a day in the fridge. The flavors meld together, and the texture becomes even creamier. So feel free to make it a day or two before you need it.
Variations & Adaptations
One of the best things about this Easy Peppermint Bark Fudge is how easy it is to change up. Here are some of my favorite variations.
Dark Chocolate Peppermint Fudge
Use dark chocolate chips (60% cacao or higher) instead of semi-sweet. The bitterness of the dark chocolate balances beautifully with the sweet condensed milk and mint. Reduce the peppermint extract to ¾ teaspoon so it doesn’t overpower the dark chocolate notes.
Milk Chocolate Peppermint Fudge
For a sweeter, creamier fudge, use milk chocolate chips. This version is especially popular with kids. You might want to reduce the crushed candy canes slightly—the milk chocolate is already quite sweet, and too many candy canes can push it over the top.
Cookies & Cream Peppermint Fudge
Fold in ½ cup of crushed Oreo cookies (about 6-8 cookies) along with the candy canes. The chocolate cookies add a nice texture contrast. This variation is always a hit at parties. I actually made a version of this for a St. Patrick’s Day treat last year and it disappeared in minutes.
White Chocolate Peppermint Fudge
Replace the semi-sweet chocolate chips with white chocolate chips for an entirely white fudge. Add a few drops of red food coloring and swirl it through for a festive look. This version is sweeter, so go easy on the candy canes.
Vegan & Dairy-Free Version
Use dairy-free chocolate chips and a can of coconut sweetened condensed milk. The texture will be slightly softer and the fudge might need an extra hour in the fridge to set properly. It’s still absolutely delicious—I’ve served it to non-vegans who couldn’t tell the difference.
Extra Minty Version
If you’re a peppermint fanatic like my friend Jen, add ½ teaspoon of peppermint extract to the white chocolate topping as well. You can also mix a few drops of peppermint oil into the crushed candy canes for an intense mint experience. Just be careful—peppermint oil is much stronger than extract.
If you love mint and chocolate combinations, you should also try my Mint Chocolate Cake Jar Parfaits for another no-bake minty dessert option.
Serving & Storage Suggestions
This fudge is versatile enough for any holiday occasion. Here’s how to serve and store it like a pro.
Serving
Serve the fudge cold or at room temperature. I prefer it straight from the fridge—the texture is firmer and the peppermint flavor is more pronounced. If you’re serving it at a party, arrange the squares on a festive platter or in a decorative tin. For a dessert board, pair it with Chocolate-Dipped Strawberry Coconut Bars for a stunning holiday spread.
This fudge pairs beautifully with hot drinks. Serve it alongside peppermint hot chocolate, coffee, or even a glass of cold milk. It also works as a garnish for ice cream sundaes or as a topping for brownies.
Storage
Store the fudge in an airtight container in the refrigerator for up to 2 weeks. Layer the pieces between sheets of parchment paper to prevent sticking. I don’t recommend storing it at room temperature—the fudge can become too soft and the candy cane pieces can get sticky.
Freezing
This fudge freezes beautifully. Place the cut squares on a baking sheet lined with parchment and freeze for 1 hour, until firm. Then transfer to a freezer-safe container or Ziploc bag, layering with parchment. Frozen fudge keeps for up to 3 months. Thaw in the refrigerator overnight before serving. The texture remains perfectly creamy—no graininess or separation.
Gifting
This is my favorite fudge for holiday gifting. Pack the squares in a decorative tin or a cellophane bag tied with a ribbon. Add a tag with the recipe name and ingredients (in case of allergies). It’s a thoughtful, homemade gift that costs a fraction of store-bought chocolates.
Pro tip: If you’re shipping this fudge to someone, freeze it first and pack it in a sturdy container with plenty of padding. It travels surprisingly well.
Nutritional Information & Benefits
Let’s be real—this is a treat, not a health food. But here’s the nutritional breakdown so you can plan accordingly.
Per square (based on 36 pieces):
| Nutrient | Amount |
|---|---|
| Calories | ~145 |
| Total Fat | 7g |
| Saturated Fat | 4g |
| Cholesterol | 8mg |
| Sodium | 25mg |
| Total Carbohydrates | 21g |
| Dietary Fiber | 1g |
| Sugars | 18g |
| Protein | 2g |
Health Considerations
Dark chocolate contains antioxidants called flavonoids, which can support heart health. Peppermint has been shown to aid digestion and can help soothe an upset stomach. Of course, the sugar and fat content means this is best enjoyed in moderation—but hey, it’s the holidays.
Dietary Notes:
- Contains dairy and soy (from chocolate chips)
- Can be made dairy-free with substitutions
- Not suitable for vegan diets unless using vegan chocolate and condensed milk
- Contains gluten only if the candy canes contain gluten (most are gluten-free, but check labels)
- Nut-free if you use certified nut-free chocolate chips
My philosophy? One or two squares with a cup of coffee is a perfect holiday moment. No guilt, just enjoyment.
Conclusion
This Easy Peppermint Bark Fudge has become my holiday secret weapon. It’s the recipe I turn to when I need something impressive but don’t have time for complicated techniques or long ingredient lists. It’s the gift I bring to parties that makes people ask for the recipe. And honestly? It’s the treat I make just for myself on quiet December evenings when I want something sweet without the fuss.
What I love most about this fudge is how it brings people together. There’s something about a plate of homemade fudge that makes conversations longer and smiles wider. It’s nostalgia in a square—the taste of candy canes and chocolate, the crunch of holiday memories.
I’d love to hear how your fudge turns out. Did you add any fun mix-ins? Did you try a different chocolate? Drop a comment below and share your version. And if you make this for a holiday party or gift exchange, tag me in your photos—I love seeing these recipes come to life in your kitchens.
Now go make some fudge. Your holiday self will thank you.
Frequently Asked Questions
Can I use white chocolate chips instead of semi-sweet?
Absolutely! White chocolate makes a sweeter, creamier fudge. Just keep in mind that white chocolate is more delicate and can seize more easily. Follow the same melting instructions but watch it carefully. You can also do a layered version with both—semi-sweet on the bottom and white chocolate on top, just like classic peppermint bark.
Why did my fudge turn out soft and not set?
This usually happens for one of two reasons: either the fudge wasn’t chilled long enough, or the ratio of chocolate to condensed milk was off. Make sure you’re using exactly 3 cups of chocolate chips and one full 14-ounce can of condensed milk. If it’s still soft after 3 hours in the fridge, pop it in the freezer for 30 minutes. It should firm up nicely.
Can I use peppermint oil instead of peppermint extract?
You can, but be very careful. Peppermint oil is much more concentrated than extract. Start with just 2-3 drops and taste as you go. Too much peppermint oil can make the fudge taste bitter and medicinal. I recommend sticking with extract for the most reliable results.
How do I get clean, neat slices without the fudge cracking?
Let the fudge sit at room temperature for 5 minutes after taking it out of the fridge. Use a sharp chef’s knife and wipe it clean between each cut. For the absolute cleanest slices, run your knife under hot water, dry it, then slice—the heat helps the blade glide through the fudge without cracking.
Can I double this recipe?
Yes, but use a 9×13-inch pan instead of an 8×8. Double all ingredients and follow the same instructions. The fudge will be slightly thinner, so it might set a little faster. Check it after 2 hours in the fridge. You’ll get about 60-72 pieces from a double batch—perfect for large holiday gatherings.
Pin This Recipe!
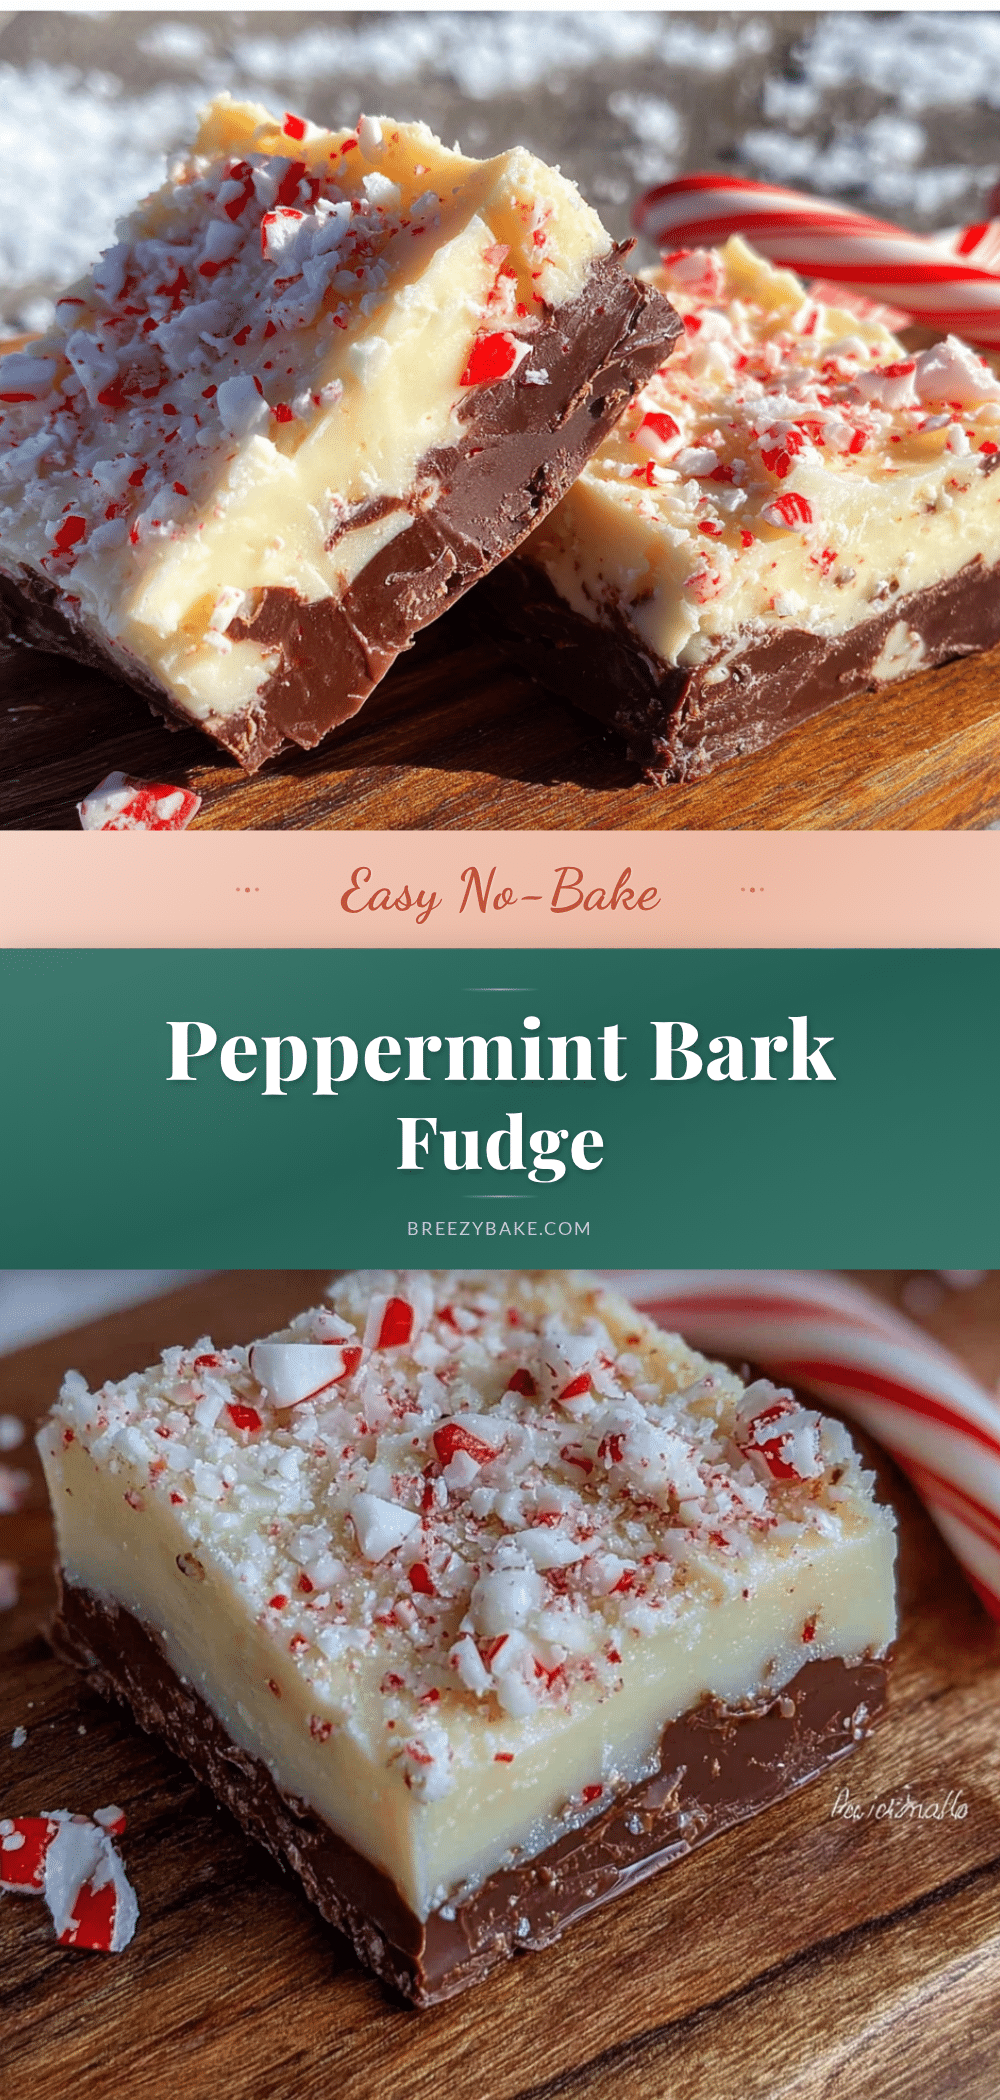
Easy Peppermint Bark Fudge (No-Bake) – Best 4-Ingredient Recipe

This no-bake peppermint bark fudge uses just 4 ingredients and comes together in 10 minutes. Creamy, minty, and topped with crushed candy canes, it’s the perfect foolproof holiday treat for gifting or parties.
- Prep Time: 10 minutes
- Cook Time: 5 minutes
- Total Time: 2 hours 15 minutes (includes chilling)
- Yield: 36-40 pieces 1x
- Category: Dessert
- Cuisine: American
Ingredients
- 3 cups (18 oz) semi-sweet chocolate chips
- 1 can (14 oz) sweetened condensed milk
- 1 teaspoon peppermint extract
- ½ cup crushed candy canes (about 6–8 candy canes), plus 2-3 tablespoons for topping
- ½ cup (3 oz) white chocolate chips (optional, for topping)
Instructions
- Line an 8×8-inch baking pan with parchment paper, leaving 2 inches of overhang on two opposite sides.
- Place 6-8 candy canes in a sturdy Ziploc bag and crush with a rolling pin into a mix of fine powder and small chunks (about pea-sized). Set aside ½ cup for the fudge and reserve 2-3 tablespoons for topping.
- In a medium saucepan over low heat, combine the semi-sweet chocolate chips and sweetened condensed milk. Stir constantly with a silicone spatula until the chocolate is completely melted and the mixture is smooth, glossy, and thick (about 4-5 minutes). Remove from heat immediately.
- Stir in 1 teaspoon of peppermint extract. Taste and add another ¼ teaspoon if desired. Fold in the ½ cup of crushed candy canes, stirring just until distributed.
- Pour the fudge mixture into the prepared pan and spread evenly. Tap the pan gently on the counter to release air bubbles.
- If using white chocolate topping: In a small microwave-safe bowl, heat the white chocolate chips in 20-second intervals, stirring after each, until melted and smooth (about 60-90 seconds total). Pour over the fudge and spread in a thin, even layer. Immediately sprinkle the reserved crushed candy canes on top.
- Refrigerate the pan, uncovered, for at least 2-3 hours, until the fudge is firm to the touch and pulls away from the edges.
- Lift the fudge out using the parchment handles. Place on a cutting board and cut into 1-inch squares with a sharp knife, wiping the blade clean between cuts. Serve cold or at room temperature.
Notes
For clean slices, let fudge sit at room temperature for 5 minutes after chilling. Use a sharp knife wiped clean between cuts. For dairy-free version, use dairy-free chocolate chips and coconut sweetened condensed milk. Fudge can be stored in an airtight container in the refrigerator for up to 2 weeks or frozen for up to 3 months.
Nutrition
- Serving Size: 1 square
- Calories: 145
- Sugar: 18
- Sodium: 25
- Fat: 7
- Saturated Fat: 4
- Carbohydrates: 21
- Fiber: 1
- Protein: 2
Keywords: peppermint bark fudge, no-bake fudge, 4-ingredient fudge, holiday fudge, easy fudge recipe, peppermint fudge, chocolate fudge, candy cane fudge


